Knowing where to access resources is one thing. Being able to access resources quickly is an entirely different animal.
When I teach the
IDz Distance Learning course, I get at least a handful of questions regarding how to get to different types of mainframe resources efficiently. If you’re not using an
open and modern solution for development on the mainframe, you’re probably used to doing 3.4 searches, splitting screens, having to reuse the splits, going back to 3.4, searching again, rinse and repeat. While this works, I would never argue that it doesn’t, there’s another way to shave time and get more done in your day.
In this blog, I want to take you through the following example: a student of mine explained that they had COBOL copy libraries that were SCM managed but accessible through an ISPF 3.4 search. The student asked me, “how do I access these libraries through IDz? Can I?”
In short, yes. I will be walking you through step by step in the following blog, so fire up your IDz instance and let’s get to work.
To create a custom filter for your SCM managed resources, start by navigating over to the
Remote Systems Explorer view. If you’re using the default, out-of-the-box workspace or the education workspace that was created for the IBM IDz Distance Learning program, the Remote Systems Explorer view will be located in the upper right-hand corner of the z/OS Projects perspective. *Note: if you have customized the workspace and moved the Remote Systems Explorer view or are not using the aforementioned workspaces, your mileage may vary:
[caption id="attachment_19524" align="alignnone" width="640"]

Remote Systems View[/caption]
Log in to the host system you want to create the filter in by
right-clicking on your host system within the Remote Systems Explorer view and choosing connect. This will launch a pop-up window that prompts you for your TSO ID and password. Input them in the pop-up box and click OK. In my case, I am going to create a filter in my education LPAR, ZSERVEROS:
[caption id="attachment_19527" align="alignnone" width="516"]

Connect to remote system[/caption]
Once connected, we can begin actually creating the filter. Find the
My Datasets filter and right-click on it to access IDz’s
context menu. The context menu is a context-sensitive, feature rich menu that provides quick access to powerful functionality within the workbench. From the context menu, choose
New >
Filter… This will cause another pop-up window to launch:
[caption id="attachment_19526" align="alignnone" width="669"]

Create New Filter[/caption]
From the
New Filter pop-up window, you will land on a page with a drop-down box and an input box. This first page is where you enter in your filter string, which you could think of as an ISPF 3.4 search pattern. The dropdown box can be typed over or filled out, or if you have created filters before, you will see choices within the drop-down box itself. This drop-down box is where you input a high-level qualifier for the datasets you want to include in your filter. Note that you will only in put a high-level qualifier, no other qualifiers. In the input box next to the drop-down box, fill in the rest of your filter string. You can use the wildcard * like you would in a 3.4 search. In my example, I am going to use the filter string RTPOT.TEST.*. Once you’ve filled out the filter string information on the first page of the pop-up window, click
Next to go to the next page:
[caption id="attachment_19528" align="alignnone" width="640"]
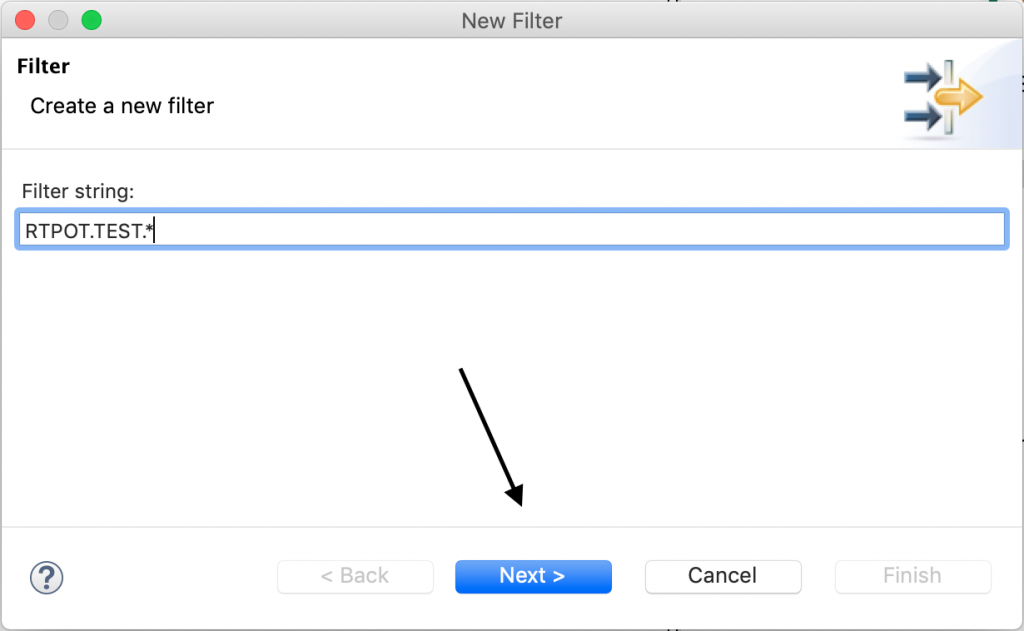
Filter String[/caption]
On the next page, you can enter a name for your filter. What you choose to name the filter is up to you, but we have found that most IDz users choose to use the filter string itself as the name. This makes the filter easy to identify among your other filters. Go ahead and name the filter in the input box, and click
Finish:
[caption id="attachment_19529" align="alignnone" width="640"]
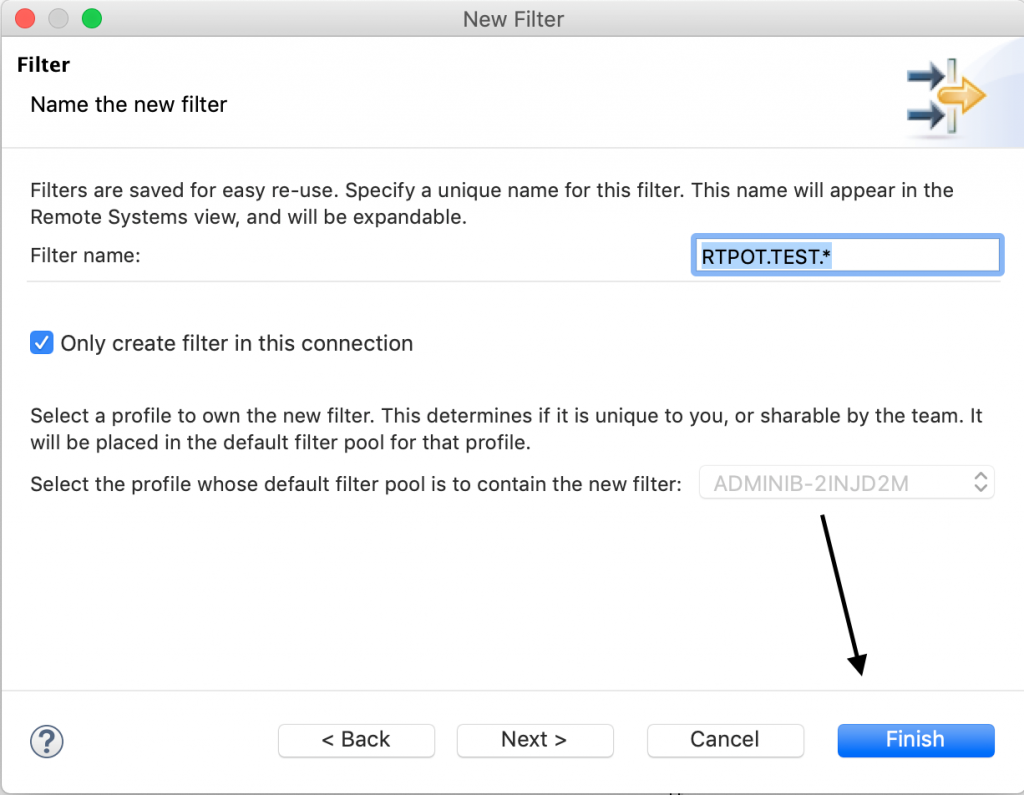
Filter Name[/caption]
And that’s it! You have created a filter within the Remote Systems Explorer view that you can use to quickly access SCM managed resources. While it didn’t take a lot of effort and was a fairly simple process (the more you do it, the easier it gets!), it pays dividends in time-savings and a simplified process. And who doesn’t want a little more time!
Let us know in the comments if this has been helpful, I would love to hear your experiences using the above technique. Make sure that you sign up for the Distance Learning class if you can, and also check out the
self-paced online IDz course!