Streams Console provides an intuitive and easy-to-use graphical interface that allows you to configure and submit a Streams application for execution.
In this article, I will present a basic workflow using a few of the common configuration parameters. See the references section for full details on available parameters.
Typical user scenario
Imagine you want to have a compiled Streams application(.sab) file. However, the compiled the sample application doesn’t match up perfectly with the constraints of yourStreams instance. So, you want to adjust the job's configuration at runtime without changing the application source code. You can do this using the Streams console.
By the end of this tutorial, you will be able to:
- Customize a job’s configuration parameters
- Preview a job submission and view any fusion/placement error messages
- Reuse a configuration by importing a job configuration overlay file
- Share a configuration by exporting a job configuration overlay file and/or preview results
In this tutorial, I will show you how to use the new job configuration capabilities available in Streams Console v4.2+.
Although Streamtool can also be used via the command line, Console provides an intuitive and easy-to-use graphical interface. In this article, I will present a basic workflow using a few of the common configuration parameters. For more information about the complete set of capabilities that are supported, refer to the IBM Knowledge Center links in the References section at the bottom of this article.
By the end of this tutorial, you will be able to:
- Customize a job’s configuration parameters
- Preview a job submission and view any fusion/placement error messages
- Reuse a configuration by importing a job configuration overlay file
- Share a configuration by exporting a job configuration overlay file and/or preview results
Requirements
Before we start configuring any parameters, let’s discuss the requirements we need to meet. I am using the LogWatchUDP sample application, which watches the system messages file (usually found at /var/log/messages), flagging security breaches.
- To make it easier to specify the job parameters for each subsequent submission, we want to add the following job configuration parameters: Job name, Data directory, and Submission-time parameters.
- There are two parallel regions defined in this application,
ParsedLines[*] and Failures[*]. We want all the operators in a channel of these parallel regions to be fused only with other operators in that same channel. We can do this by setting the Parallel region fusion parameter.
- The operators that are related to parsing the lines, which have the
ParsedLines prefix in their names, are heavy resource users. If the instance has a host that is large enough to support them, it works best if:
- We place the operators with names starting with
ParsedLines onto a large host by creating a Host pool. In my instance, the large host (streamshost6.canlab.ibm.com) has been tagged with BigHosts.
- We fuse the
ParsedLines[*] operators into same PE by creating a Partition co-location group.
- This application is configured to use an advanced host pool indexing technique to have fine grain control over where the PEs get placed, which we do not want to use. We can achieve this by setting the Ignore host placement constraints from the bundle parameter.
- After making the previous change, all operators will be automatically placed in the default host pool. We want to place all operators in that host pool on hosts tagged with the tags rack1 and rack2. We can accomplish this by using the Convert host pool tags parameter.
Introduction
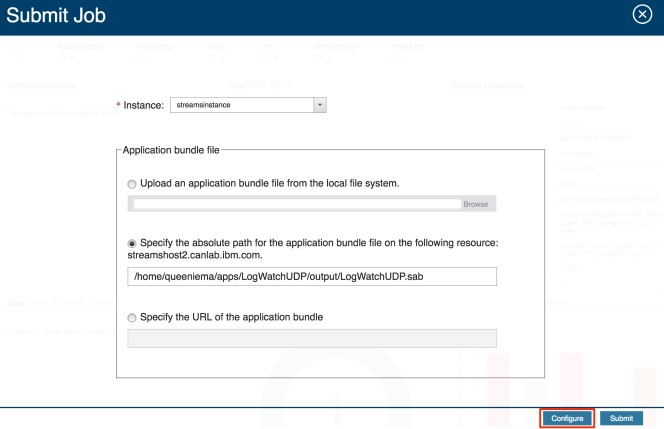
Let’s start by navigating to the job submission page. We see that the same 3 application selection options are available. I’ll pick the second option and specify a path to the LogWatchUDP application bundle on my machine. Notice that there is a new Configure button at the bottom right of the window. I’ll click on it to start configuring my job submission.
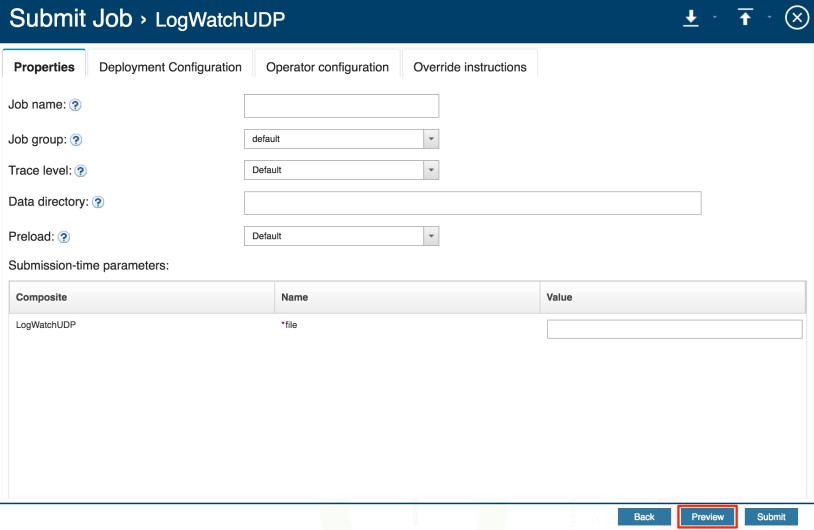
You’ll see the job configuration page, and I’ll explain each section in more detail later in this article. For now, I would like to start by previewing the job submission to see the number of operators, how operators will be fused together and placed on PEs, and any requirements that need to be met before submitting the job. Click on the Preview button in the bottom right corner.
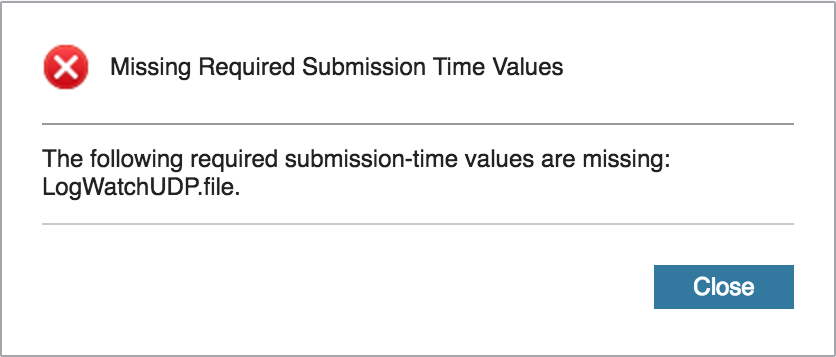
An error message is displayed which notifies us that we are missing a required submission-time value called file.
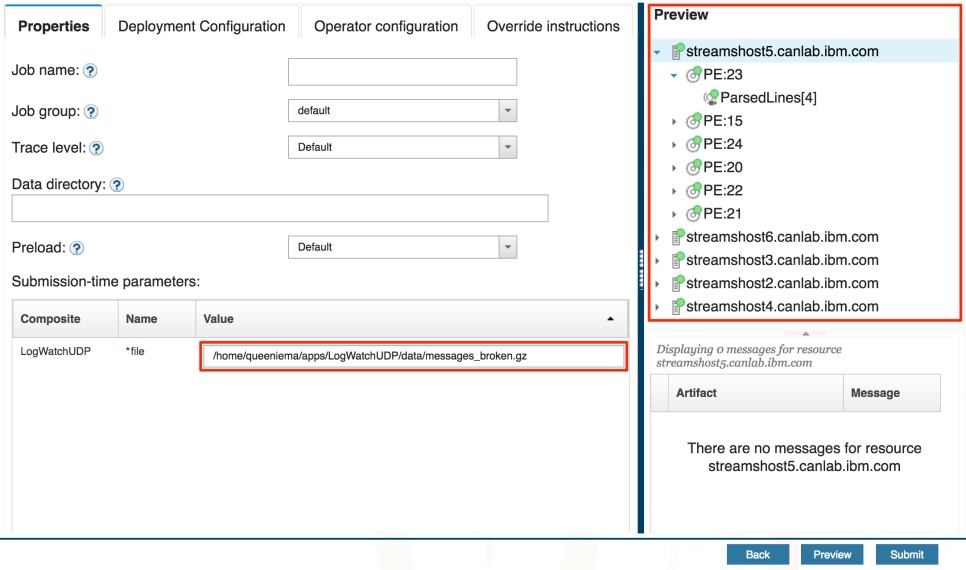
This value should be a path to a log file, and to bypass this error, we can specify the path to the messages_broken.gz file that is included when you download the application from GitHub. In my case, the log path is: /home/queeniema/apps/LogWatchUDP/data/messages_broken.gz. With that, let’s preview the job once more. Now, we see that there are no errors. If we were to submit the job as is, the preview results show that there would be 27 operators grouped into 14 PEs and placed on 5 hosts.
Configuration
Let’s begin the configuration process, keeping in mind the requirements that we jotted down earlier. At the top of the configuration page, there are 4 tabs which correspond to the job parameter categories. Let’s start with the first tab, which displays basic job properties such as a job name or data directory to use for the application. This is where we can fulfill the first requirement. I will specify a Job name of MyJob and a Data directory path of /home/queeniema/apps/LogWatchUDP/data. Now that we are using a data directory, I will also update the file Submission-time parameter to simply messages_broken.gz. Note that any edits you make after previewing a job submission will display a message notifying you that the preview results are out-of-date. You can update the preview results at any time during the configuration process. I’ll minimize the the preview pane for now by clicking on the vertical column of white dots on the blue divider.

Let’s now configure the deployment configuration properties. Streams uses default deployment settings that should work for most applications, but you may customize them as you like. Here, you can modify the fusion scheme, placement scheme, and threading model. Choosing certain values will display additional options. For example, choosing Manual for Fusion Scheme will allow you to specify the target number of PEs. Note that the application may have constraints that will not allow the job to have the specified number of PEs.
Notice that we can customize fusion in parallel regions by specifying the Parallel region fusion parameter in the Operator fusion section. Set this to Fuse operators in the same channel to fulfill the second requirement.
Also, note that if legacy mode is in effect, either by selecting Legacy in the Fusion Scheme dropdown or by using an application bundle that was compiled with a previous version of Streams, the configuration parameters related to fusion will be ignored.

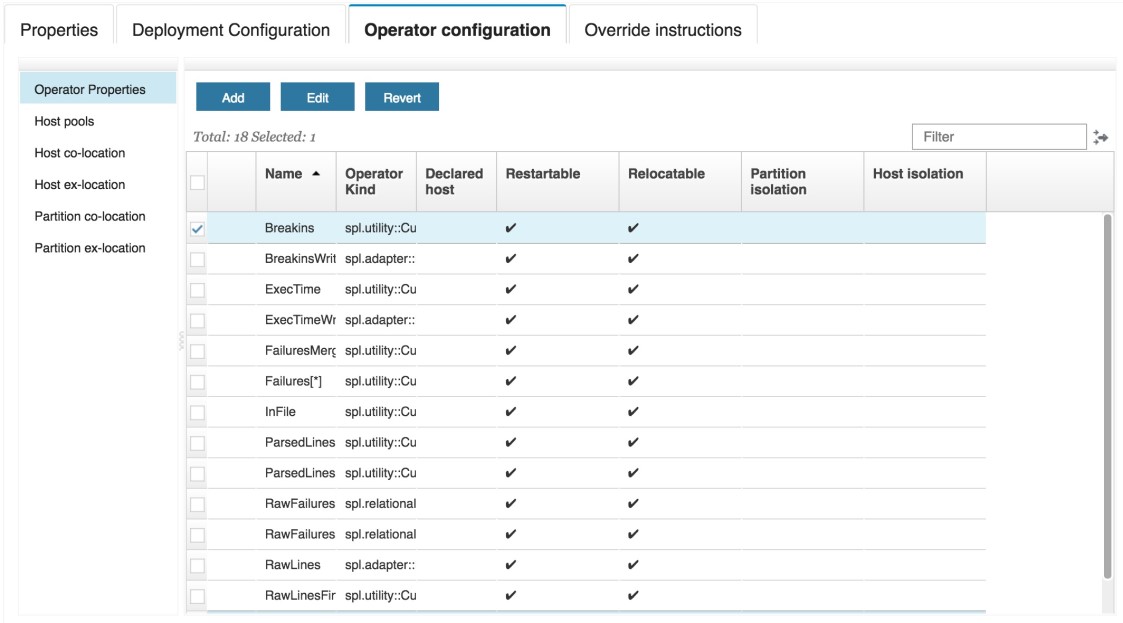
Next up are the operator configuration properties, which allow you to specify operator properties and host pools, and adjust how operators are grouped together. The Operator Properties panel displays the operators defined in the application, and from here, you can modify the properties of each one (e.g., restartable, relocatable, isolated, and declared host) by selecting the Edit button. You can also revert any changes made using the Revert button.
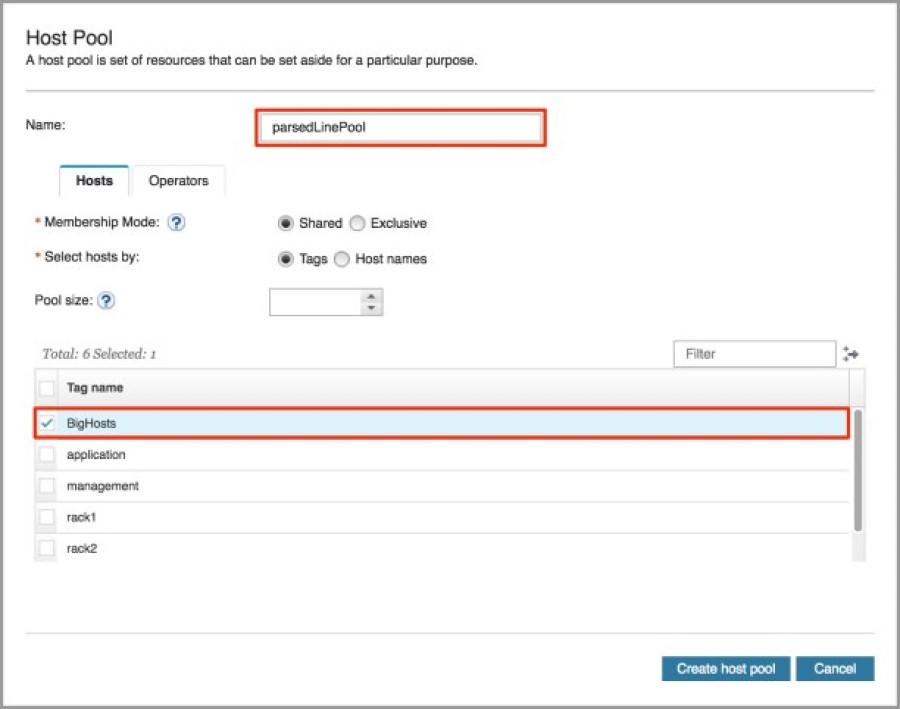
The Host Pools panel allows you to create and modify host pools. There is one host pool defined in the application bundle called nodes. Let’s see how we can fulfill the third requirement, part a. We need to create a host pool, so let’s click on the Add button.

In the dialog, there is an option to specify the host pool name. Let’s input parsedLinePool. Now, we need to do two things. The first is to assign the BigHosts tag to the host pool, so check the box next to the corresponding tag.
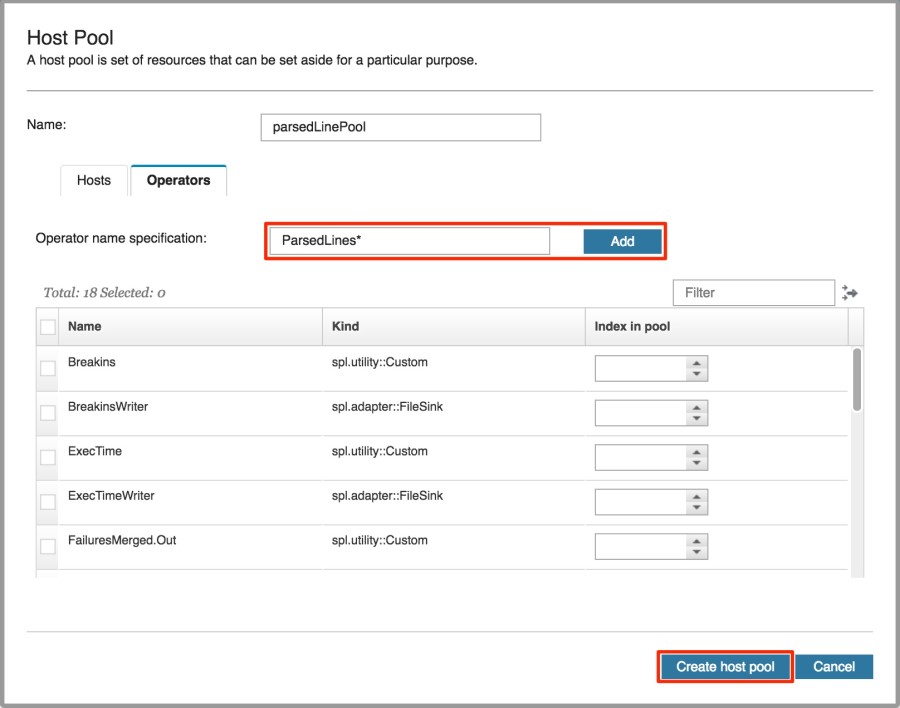
We also need to assign operators, in this case, all operators which have names starting with ParsedLines (i.e., the operators in the ParsedLines parallel region and the ParsedLinesMerged.out operator). Click on the Operators tab. I could manually select the operators, but there is a more efficient method. These operators all have the same ParsedLines prefix. We can use a feature called operator wildcarding, which will allow us to use the asterik symbol (*) to select multiple operators at a time. Wildcarding can be used in any of the panels in the Deployment Configuration tab. In this case, I will input ParsedLines*, and then click on the Add button. Complete the process by clicking on the Create host pool button.
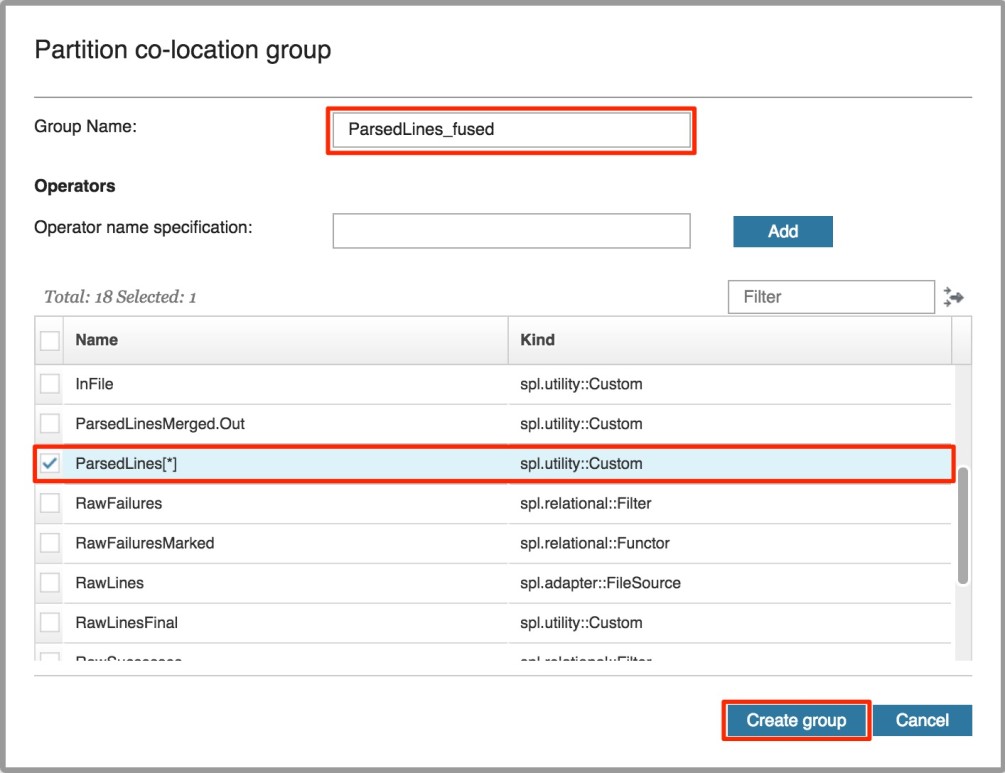
Now, let’s look at the next set of panels which allow you to co-locate and ex-locate hosts and operators. We see that there are 5 partition co-location groups defined in the application bundle. To satisfy the third requirement, part b, start by creating a partition co-location group.

First, specify a group name of ParsedLines_fused. Next, we want to fuse the ParsedLines operators into same PE, so all we need to do is assign them to this group. We can use operator wildcarding as we did when creating the host pool. This time, let’s specify ParsedLines[*] so that we only include the operators in the parallel region and not the ParsedLinesMerged.out operator. When we type that specification into the input field, an error message is generated saying that the specification already exists. Find it in the list, and check the box next to it. Then, click on the Create group button.
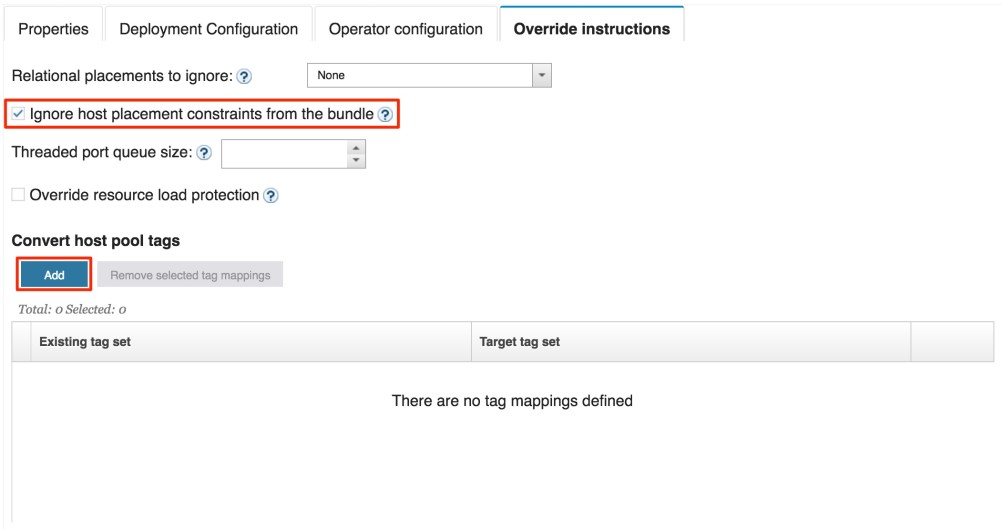
Finally, you can specify override instructions that allow you to override configuration settings for the application. This may be helpful when you want to ignore all of the constraints that are specified in the application bundle. In this case, I want to check the box next to Ignore host placement constraints from the bundle in order to satisy the fourth requirement. Note that this places all operators in the default host pool.
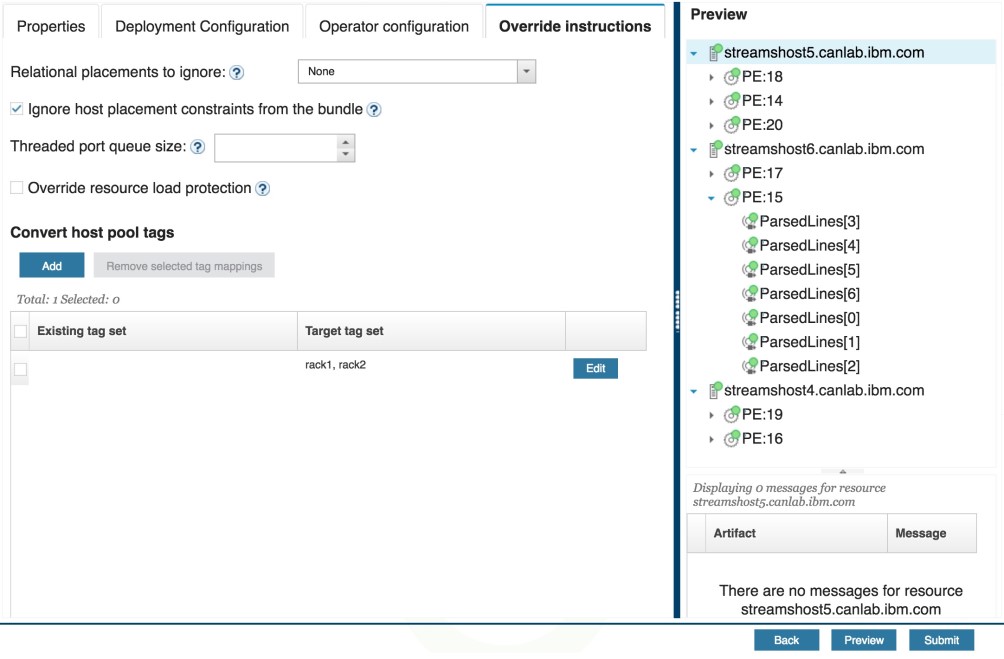
Now, let’s focus on the bottom portion of the screen. We can use the Convert host pool tags parameter to assign the rack1 and rack2 tags to the default host pool, thereby fulfilling the fifth requirement. Click on the Add button to create a tag mapping.
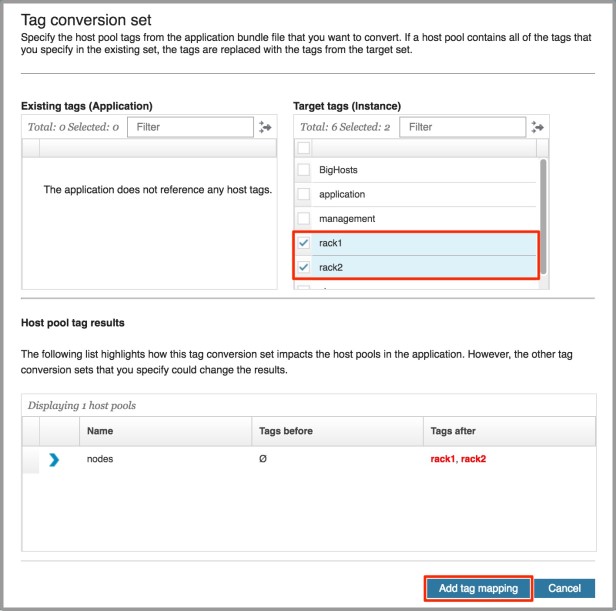
On the left, we see the tags defined in the bundle (there are none for this particular application), and on the right, we see the tags in the instance. To create a tag mapping, select zero or more tags from the left (corresponding to the originalTagSet in a job configuration overlay file), and one or more tags on the right (corrseponding to the targetTagSet). If no tags are selected from the left side, then it indicates that the default host pool (which has no tags) is the target of the conversion. In this case, that’s exactly what we want. Since there are no tags to select from the left (and we do not want to select any), I will leave it as is and only select rack1 and rack2 from the right side. In the bottom portion of the dialog, the new mapping is shown. Let’s complete the process by clicking on the Add tag mapping button.
Previewing a job submission
Now that we’ve adjusted the configuration parameters, we can preview the job submission to get a sense of what the job will look like once we submit it. Once again, it is successful and the results show that there will be 27 operators grouped into 7 PEs and placed on 3 hosts.
Let’s check to make sure that the requirements have been met. The full preview results are shown below. Note that the job properties in the first requirement are omitted in the preview panel.
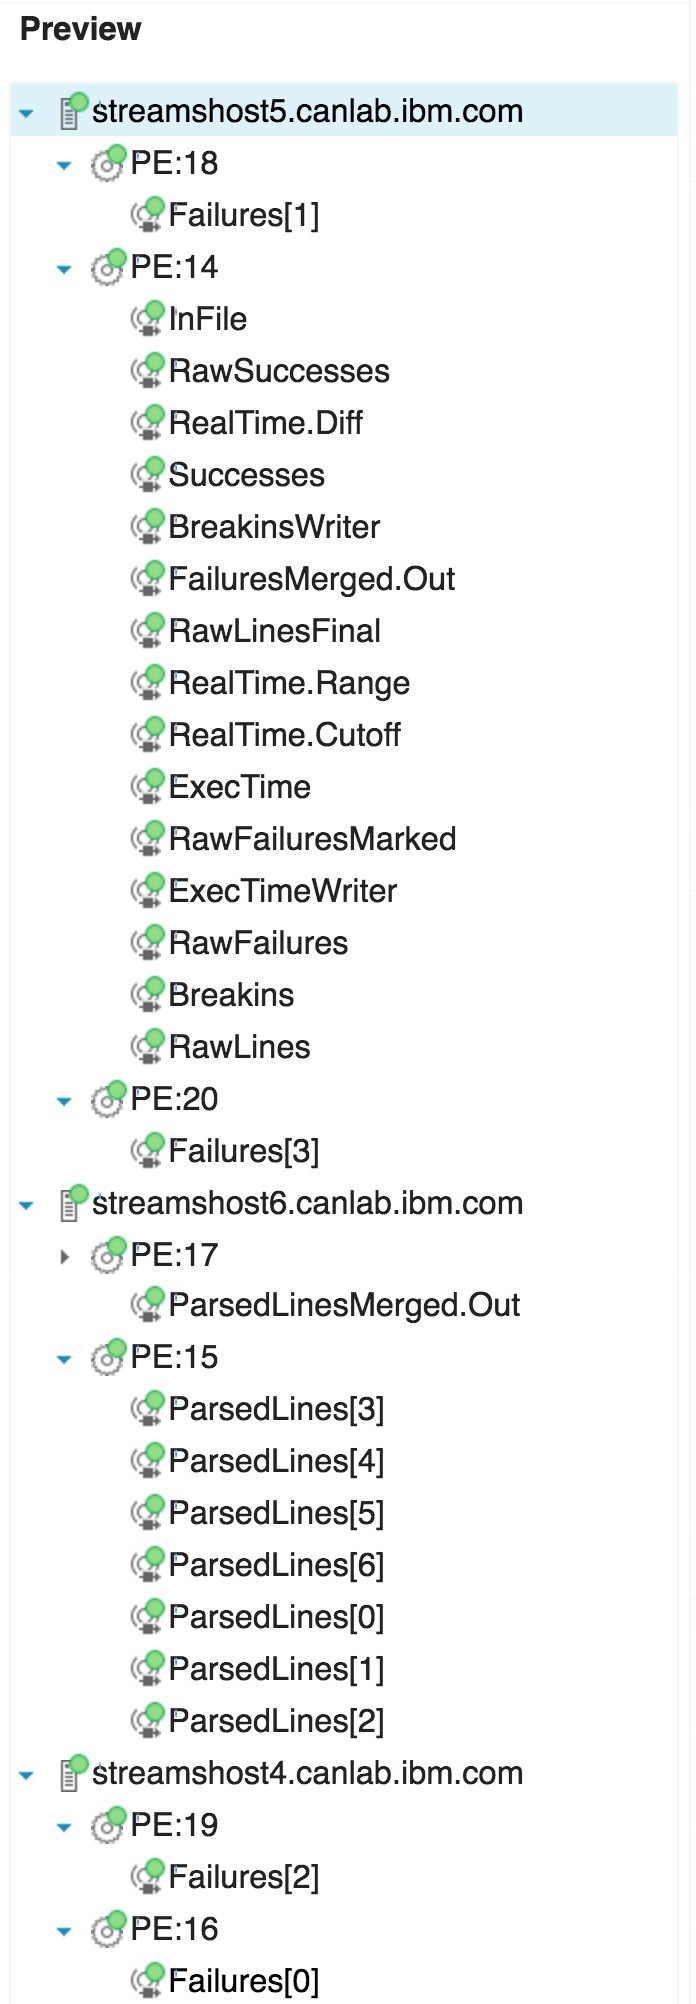
- Requirement 2: For the
Failures[*] parallel region (width = 4), operators in different channels are not fused together. The 4 operators are all on different PEs, namely: 16, 18, 19, and 20. The ParsedLines[*] parallel region (width = 7) does not obey this setting because the partition co-location group defined for the operators overrides this parameter.
- Requirement 3: The
ParsedLines[*] operators and the ParsedLinesMerged.Out operator were all placed on the BigHosts resource: streamshost6.canlab.ibm.com (see PEs 15 and 17). In addition, all of the operators in the ParsedLines[*] parallel region were fused together into a single PE: 15.
- Requirement 4: The host pool indexing has been removed. This can be demonstrated by looking at two of the operators in the application bundle:
InFile and RawSuccesses. The InFile operator was defined with "inPoolIndex": 4, while the RawSuccesses operator was defined with "inPoolIndex": 2. This means they were originally supposed to be placed on different hosts, but those settings were ignored. They are both in PE 14 on the streamshost5.canlab.ibm.com host.
- Requirement 5: The
streamshost4.canlab.ibm.com and streamshost5.canlab.ibm.com resources were both tagged with the rack1 and rack2 tags. All PEs in the default host pool (i.e., the operators that do not have the ParsedLines prefix) have been placed on one of these two resources.
With that, we can choose to export the job configuration file or preview result by clicking on the export icon in the top right corner.
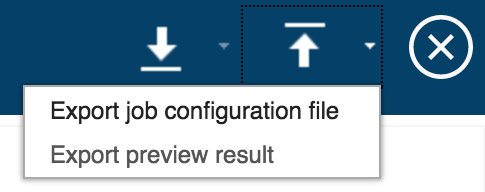
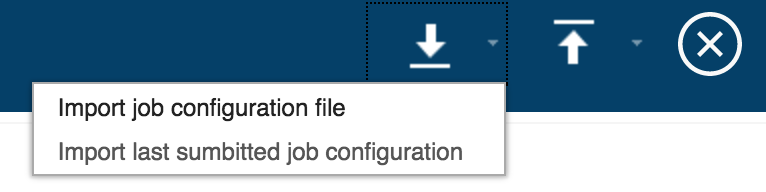
Both of these generated files will be in JSON format. The difference between the two files is the job configuration file contains only the configuration parameters we specified in the Console, not the parameters defined in the bundle. The preview result file shows all configuration parameters, both new and existing, as well as any fusion and/or placement errors reported when previewing the job. Either of these files can be used the next time you submit this job by importing the file using the import icon.
There is also an option to import the last submitted job configuration for faster loading of configuration parameters.
Let’s take a quick look at the job configuration file which is generated after clicking on Export job configuration file.
{
  "jobConfigOverlays": [
    {
      "jobConfig": {
        "dataDirectory": "/home/queeniema/apps/LogWatchUDP/data",
        "jobName": "MyJob",
        "submissionParameters": [
          {
            "name": "LogWatchUDP.file",
            "value": "messages_broken.gz"
          }
        ]
      },
      "deploymentConfig": {
        "parallelRegionConfig": {
          "fusionType": "channelIsolation"
        }
      },
      "operatorConfigs": {
        "poolPlacementGroups": [
          {
            "name": "parsedLinePool",
            "membershipMode": "SHARED",
            "tags": [
              "BigHosts"
            ],
            "operatorsInPool": [
              {
                "nameSpec": "ParsedLines*"
              }
            ]
          }
        ],
        "partitionColocationGroups": [
          {
            "groupName": "ParsedLines_fused",
            "members": [
              "ParsedLines[*]"
            ]
          }
        ]
      },
      "configInstructions": {
        "ignoreBundleHostPlacements": true,
        "convertTagSet": [
          {
            "originalTagSet": [],
            "targetTagSet": [
              "rack1",
              "rack2"
            ]
          }
        ]
      }
    }
  ]
}
Everything looks great! All the configuration parameters that we specified are being picked up.
With that, we can submit the job!
Job configuration overlay files, such as this one, allow us to be more flexible as we can share it with others or even modify them if the requirements change in the future. Neat!
References
#CloudPakforDataGroup