Tutorial
Deploying a sample MongoDB geospatial application on Red Hat OpenShift Container Platform
How-to guide for deploying applicationsIntroduction
This tutorial shows how easily we can deploy a cloud-native application on Red Hat® OpenShift® Container Platform hosted on IBM® Power Systems™ Virtual Server. In terms of performance, throughput, and IT dependability, IBM Power Systems delivers elite-level quality for business-critical workloads. Clients can make use of the unique capabilities of IBM Power Systems to incrementally modernize their IT infrastructure and streamline their deployment of cloud native applications with continuous integration and deployment.
In this tutorial, we have used open source packages (such as MongoDB and Node.js) and deployed a sample MongoDB geospatial application on OpenShift Container Platform hosted on IBM Power Systems Virtual Server.
Prerequisites
Ensure that the following prerequisite is fulfilled before deploying the sample cloud-native application:
A running OpenShift Container Platform 4.x cluster must be set up on an IBM Power Systems server.
Estimated time to install
To deploy this cloud-native application, it would take nearly 15 mins.
Deploying the cloud-native application
Perform the following steps to deploy the cloud-native application on OpenShift on IBM Power Systems:
Clone the repository: https://github.com/ocp-power-demos/cloud_interop
This repository contains the service and deployment configuration files that can be used as-is on the OpenShift or any Kubernetes platform.
git clone https://github.com/ocp-power-demos/cloud_interopFigure 1. Cloning the repository

Create a new project in your OpenShift cluster.
oc new-project ibm --description=”IBM ISDL” --display-name=”IBM”Figure 2. Creating a new project

To deploy the geospatial workload, run the following commands:
  oc create -f mong-service.yaml
  oc create -f node-service.yaml
  oc create -f mong-deployment.yaml
  oc create -f node-deployment.yaml
Figure 3. Deploying the application

Verify that the status shows Running, indicating that the application is successfully deployed.
oc get allFigure 4. Checking the application status

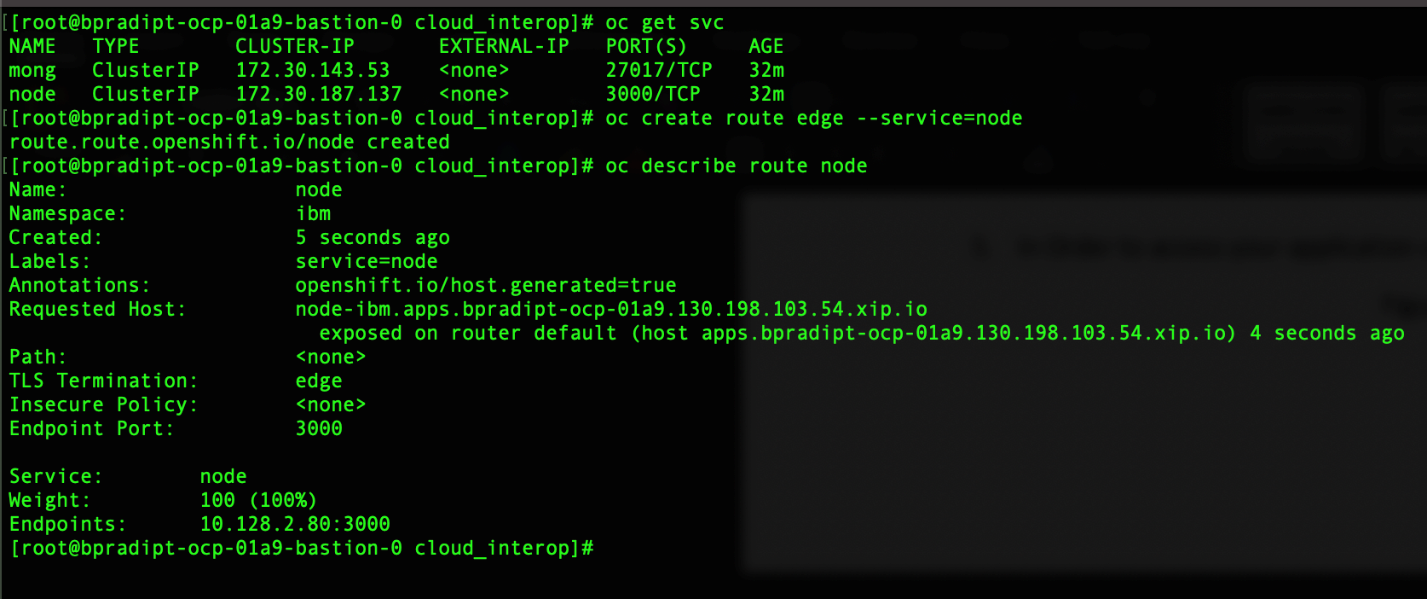
To access your application outside the cluster, create a secure route.
  oc get svc
  oc create route edge --service=node
  oc describe route node
Figure 5. Creating a route
To access your newly deployed application, open the URL provided in the previous step.
In this example, the URL is
https://node-ibm.apps.bpradipt-ocp-01a9.130.198.103.54.xip.ioFigure 6. Initial welcome screen

Perform a query to fetch data in an area within specific pin codes. Add
/api/getInspectionsByZipCodeIteration/10100/10150/1at the end of the route to fetch the results.In this example, to perform the query, the URL is:
https://node-ibm.apps.bpradipt-ocp-01a9.130.198.103.54.xip.io/api/getInspectionsByZipCodeIteration/10100/10150/1Figure 7. Accessing inspection data between pin codes

what you see here is output returned from MongoDB, where we queried for inspection results performed within specific areas using pin codes.
Conclusion
This tutorial provides insights on how to deploy a cloud-native application on OpenShift on Power Systems using command-line. In case you need to deploy this application using OpenShift web console, follow the steps outlined at: https://github.com/ocp-power-demos/cloud_interop#deploying-this-two-tier-application-via-ocp4x-webconsole