Tutorial
Turn your smartphone into an IoT device
Create a Node-RED app to process, visualize, and store sensor data that is sent to and from your smartphoneThe number of connected devices continues to increase day-by-day. With the availability of low-cost hardware like sensors, microcontrollers, and single board computers, we’ve seen a large increase in the smart devices being deployed around us. Whether it is a dishwasher or a car, we can find sensors everywhere, and these IoT devices are getting smarter because of cloud service providers like IBM.
This tutorial is a step-by-step guide that helps you create a simple IoT system that can make use of readily available components like cloud services and a smartphone. We will be using an Android smartphone and its accelerometer sensor which will be acting as a sensor node. We will get and send that sensor data over the MQTT communication protocol to a Node-RED dashboard for analysis and visualization.
What you'll need to build your apps
To make a working prototype, you will need:
An account at one of these cloud service providers:
- IBM Cloud. Learn more about IBM Cloud by reviewing the Getting Started documentation. Although you need a pay-as-you-go account, all of the services we use are either part of a Lite or free tier or you will not meet the free tier threshold for the service.
- AWS
An Android smartphone
- Android Studio installed on your laptop (optional)
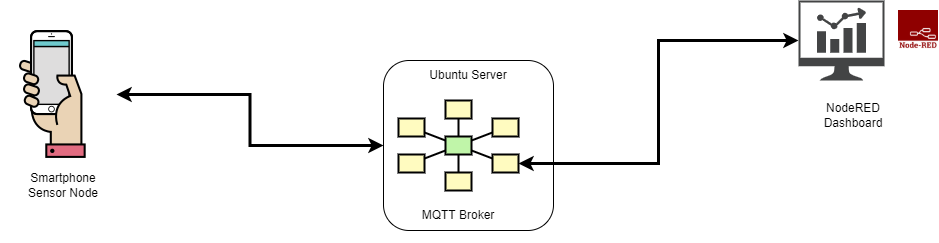
Architecture of our IoT system
The following figure shows an architectural overview of the IoT system where all the devices can communicate with each other by passing through the MQTT Broker. The job of MQTT broker is to ensure that the messages are delivered to the correct clients, while clients can send messages in a one-to-many fashion as well. We use Node-RED, an open-source visual programming tool, to build a dashboard to visualize the real-time accelerometer data sent from the smartphone.
Steps
In this tutorial, we set up an Ubuntu server on a cloud service, and install Mosquitto (an open source MQTT broker) and Node-RED (an open source low-programming tool) on it. Then, an Android smartphone acts as a sensor node (an IoT device) sending its sensor data to a Node-RED dashboard via MQTT.
- Step 1 explains how to set up an Ubuntu server in IBM Cloud or AWS EC2 and then explains how to install Mosquitto.
- Step 2 describes how to install and configure Node-RED on IBM Cloud or AWS EC2.
- Step 3 explains how to create a Node-RED dashboard by importing a flow.
- Step 4 shows how to create an Android app that turns the Android smartphone into a sensor node for sending smartphone accelerometer data to the Node-RED dashboard via the MQTT Broker.
Step 1. Installing an MQTT broker on a virtual server
In this tutorial, we will install the mosquitto MQTT broker on a virtual server, either in IBM Cloud or AWS EC2.
Setting up a baremetal server in IBM Cloud
We can get an Ubuntu server with IBM Cloud.
Log in to your IBM Cloud account.
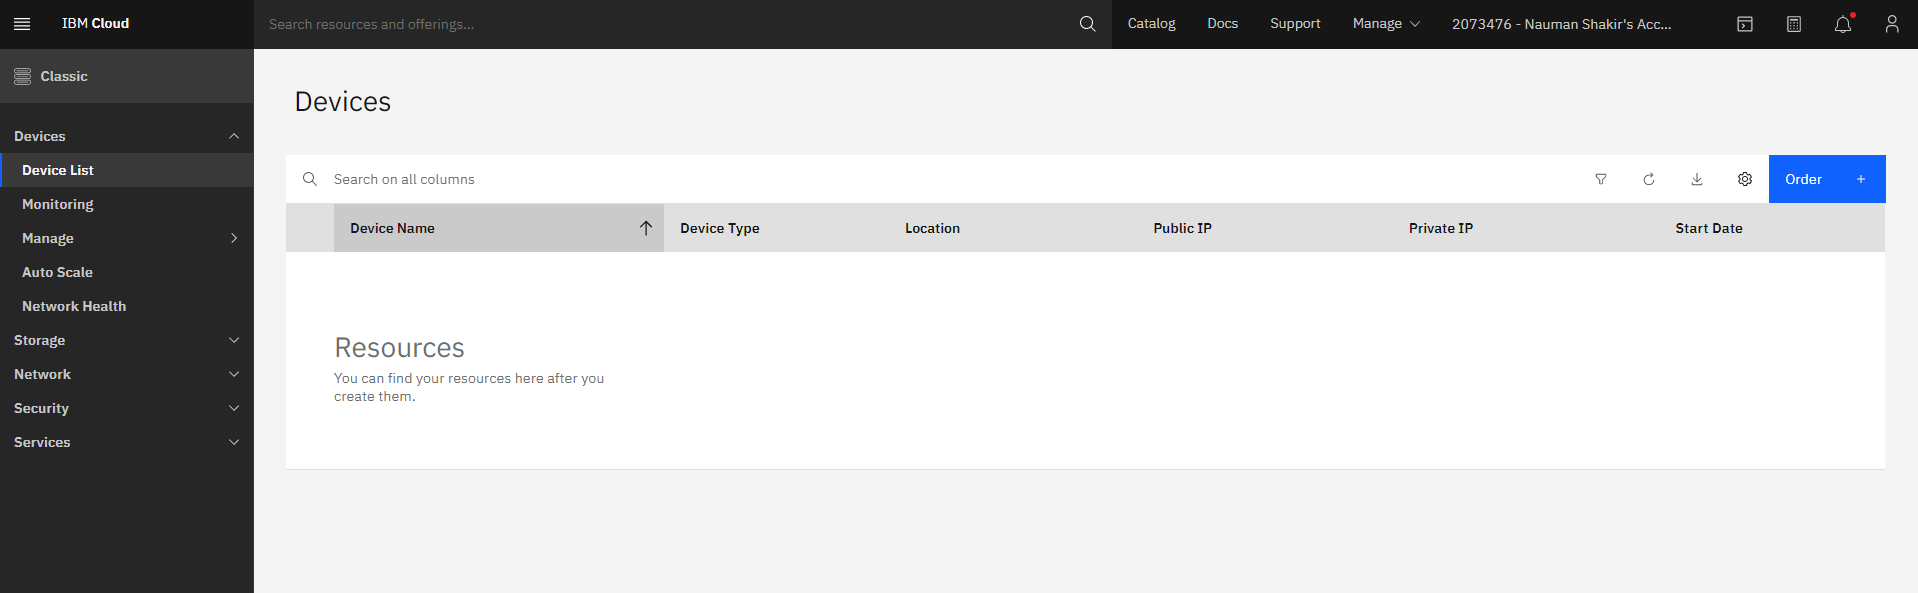
Navigate to Classic > Device List from the sidebar. We are going to use IBM Classic Infrastructure for this tutorial.
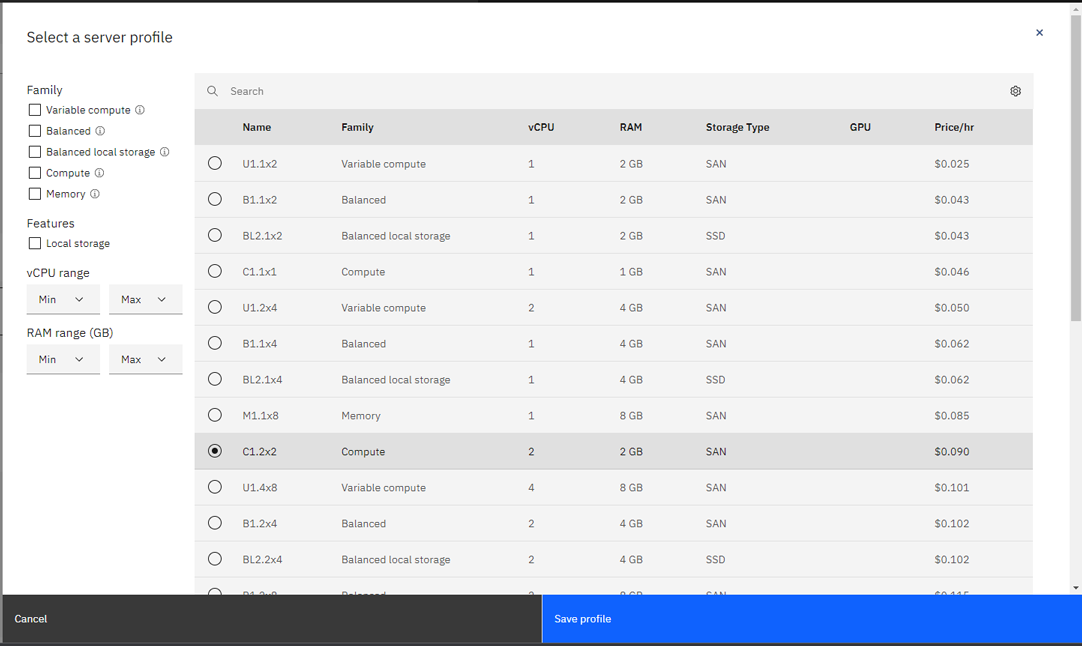
Click the Order button, open Virtual Server for Classic, and then click View all profiles in the Profile section. Select C1.2x2, and click Save profile.
Scroll down to select the operating system. Select Ubuntu, and click the Create button on the right sidebar.
Go to the classic infrastructure, and then go to Security > Network Security > Security Groups. Click Create Group, and name the new group MQTT.
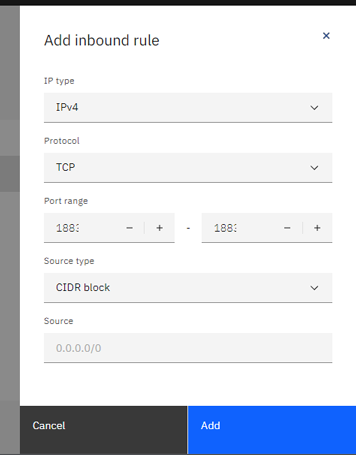
Add a new inbound rule, with type IPv4, protocol TCP, port 1883, and source type CIDR block.
Go back to the dashboard and open the Devices list. You will see your newly created VPS.
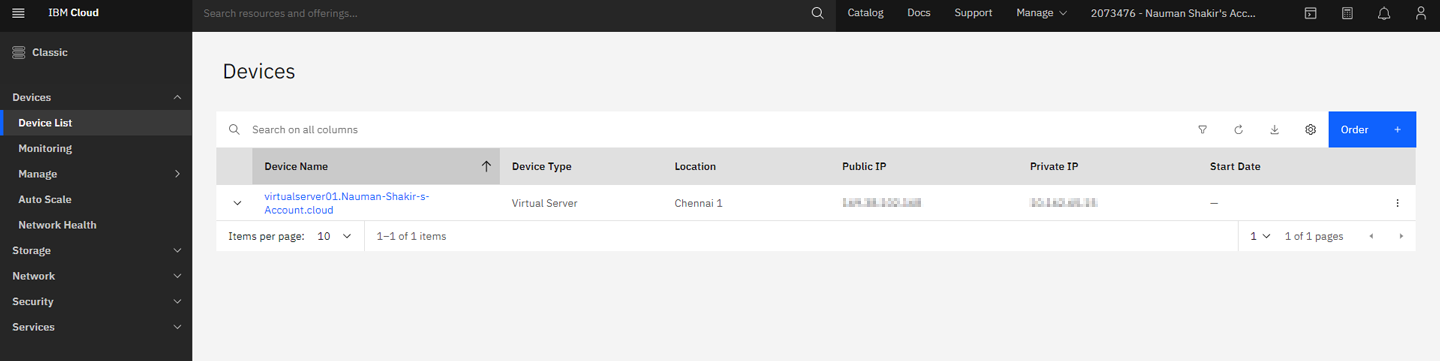
Click the Device Name to open it. Note the public IP address from the Network details section.
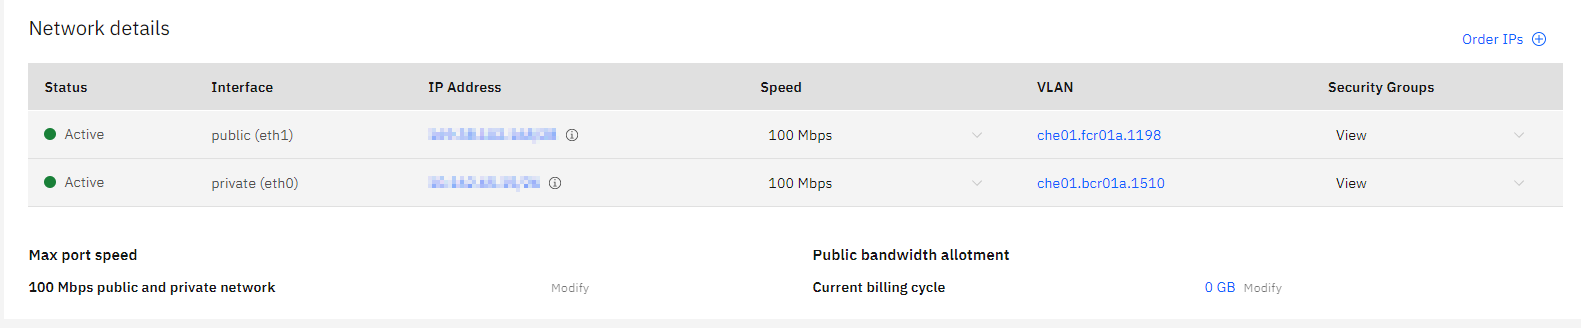
In Security Groups, click View and then Allow All for both the public and private IP addresses. From the actions, the menu selects KVM Console or SSH to the server.
Setting up an Ubuntu server in AWS
We can also get the Ubuntu server with AWS. The VPS are called EC2 instances in AWS.
Log in to your AWS account, and go to
https://aws.amazon.com/ec2/to create a VPS.Click Launch instance, on the next screen search for Ubuntu, Select
Ubuntu Server 20.04 (Free tier eligible), and with the default settings launch it.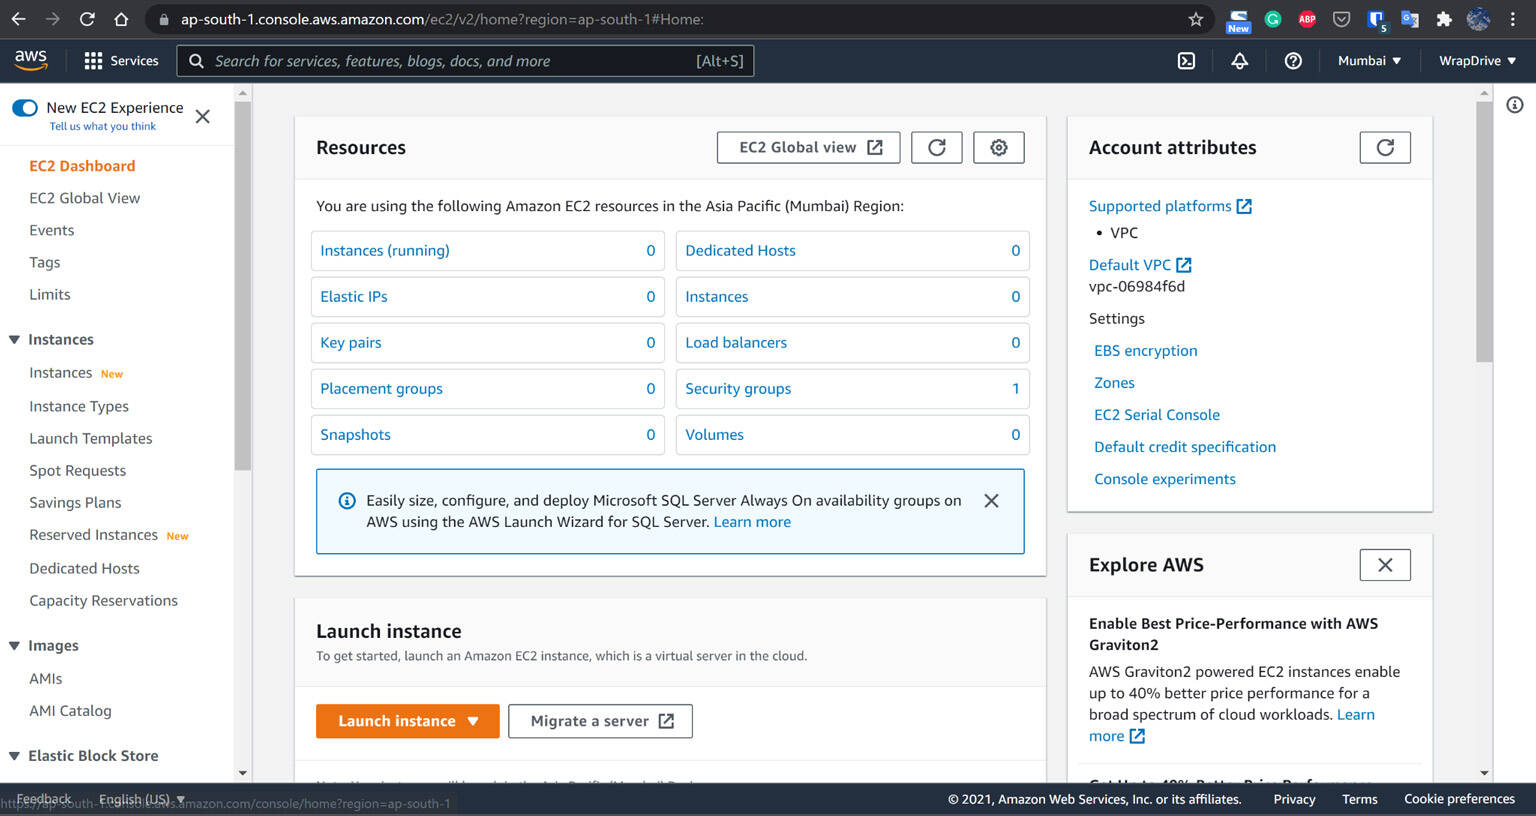
From the sidebar on the left, open Network & Security and select Security Groups.
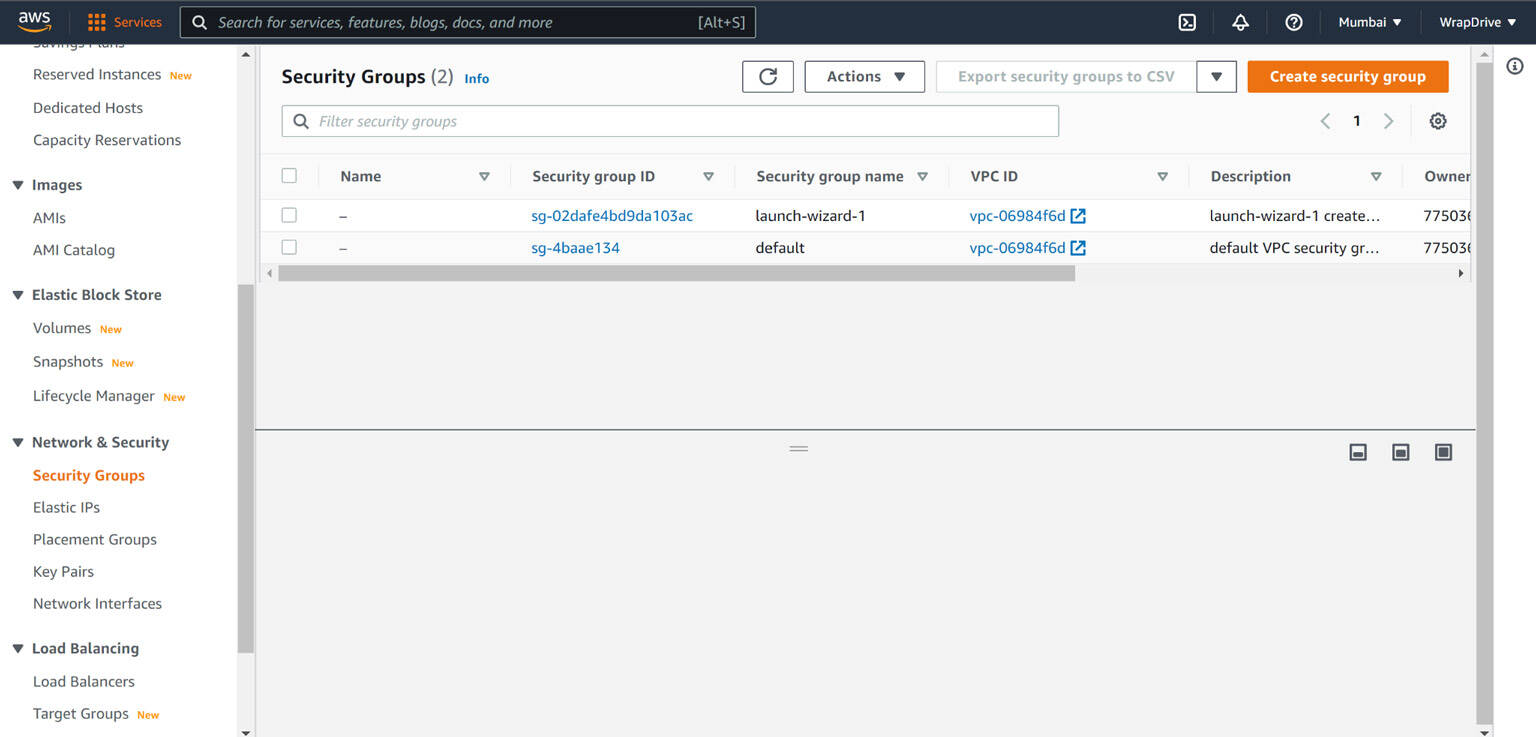
Click the
launch-wizard-1security group, and on the Inbound Rules tab, click the Edit inbound rules button. Add a new inbound rule, with type Custom TCP, protocol TCP, port 1883, source Anywhere IPv4, and MQTT as the description. Save the rule.
Go back to the Instances tab, open your newly created VPS, note down its public IP address, and click on the Connect button to open the terminal.
Installing mosquitto on our Ubuntu server
On either Ubuntu-based VPS, open the terminal, and execute the following commands to install the mosquitto MQTT broker.
sudo apt update
sudo apt upgrade
sudo apt install mosquitto -y
sudo apt-get install mosquitto-clients
sudo apt clean
sudo service mosquitto stop
sudo nano /etc/mosquitto/mosquitto.conf
sudo apt install ufw
sudo ufw allow 1883
sudo ufw allow 22
sudo ufw enable
These commands will open up the file mosquitto.conf in a terminal-based text editor. Put the following two lines at the end of the mosquitto.conf file.
listener 1883
allow_anonymous true
Then, press CTRL+O and CTRL+X to save and exit the file.
Next, start our mosquitto MQTT broker.
sudo service mosquitto start
mosquitto -v
Now you have an MQTT broker running on the port 1883 with the address, which is the public IP address of your Ubuntu server.
Step 2. Installing and configuring Node-RED
Install Node-RED locally, following the instructions in the Node-RED Getting Started docs. To install Node-RED locally, you need a supported version of Node.js.
Next, we need to add some nodes to the Node-RED palette. Open Node-RED with this URL: http://localhost:1880/. Then, open Menu > Manage Palette > Install. Then, search for node-red-dashboard, and click Install to install it.

Step 3. Create the Node-RED dashboard
I created the Node-RED dashboard and saved the Node-RED flow to a JSON file that I stored in my GitHub repo for this tutorial.
You can import this flow into your Node-RED app to create the Node-RED dashboard.
- Copy the JSON file from my GitHub repo.
- Open your Node-RED app, and from the Node-RED menu, select Import.
- Paste the JSON file into the Clipboard tab.
- Click Import.
The overall Node-RED flow will look something like this:
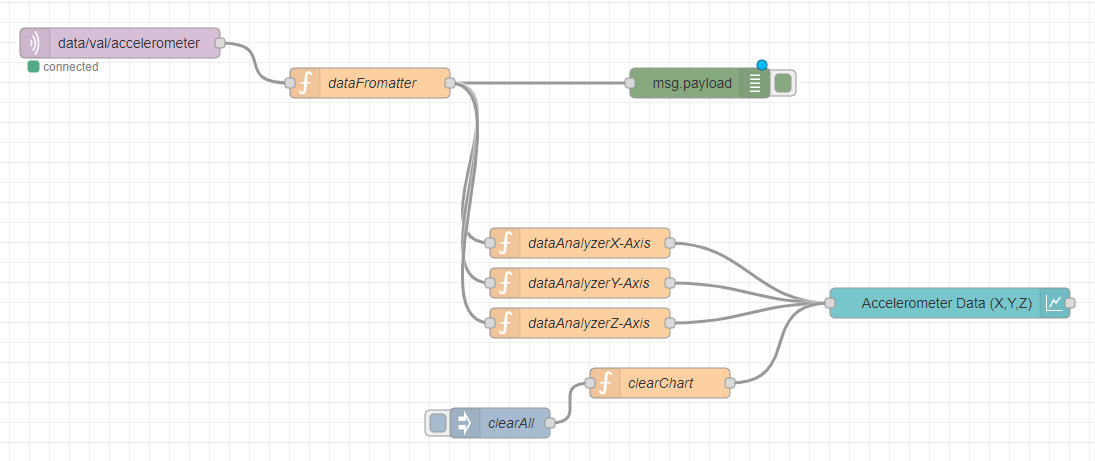
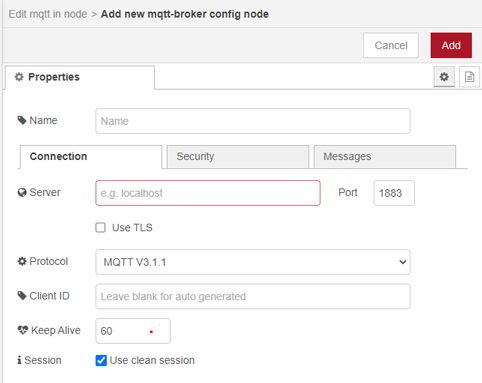
Now, you need to configure the MQTT node to use your mosquitto broker. Double-click the purple-colored MQTT node (named data/val/accelerometer in my flow), and specify the public IP address of your Ubuntu server (that you created in Step 1) in the Server field while keeping all other settings as default.
Now, deploy your Node-RED app (your Node-RED dashboard) by clicking Deploy.
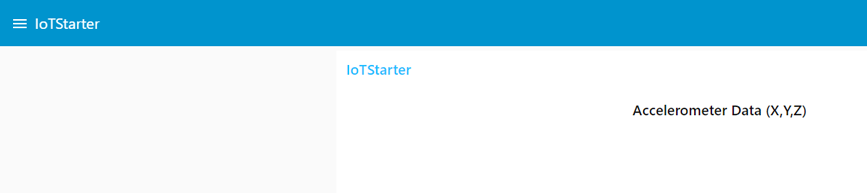
Once it is deployed, open the Node-RED dashboard by going to this URL: http://localhost:1880/ui.
After configuring Node-RED, if you open the Dashboard you will see an empty chart. The chart is empty because we haven’t yet configured our smartphone-based sensor node and the sensor node hasn’t started sending any data yet.
Step 4. Install and configure the Android app
This project uses an Android smartphone to send sensor data to the Node-RED dashboard for visualization.
- Clone or download my GitHub repository to your laptop.
Now, you have two options:
a. Send the
Accelerometer.apkfile from the downloaded repository to your smartphone. b. Compile the whole project using Android Studio and send the compiled app to your smartphone.Install the app on your Android smartphone.
Open the app on your Android smartphone. The app looks like this:

Open the settings screen of the app, and enter these details:
- Put the public IP address of your Ubuntu server where you installed the mosquitto MQTT broker.
In the topic field, put
data/val/accelerometer. You can put anything in the topic field and the app will still work, as long as the topic of the app and the topic of the Node-RED MQTT node matches exactly.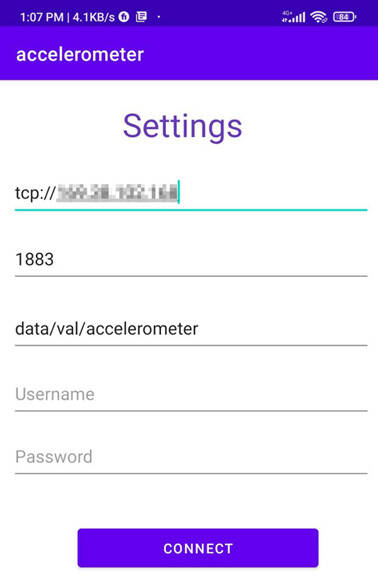
Click the Connect button and go back to the home screen.
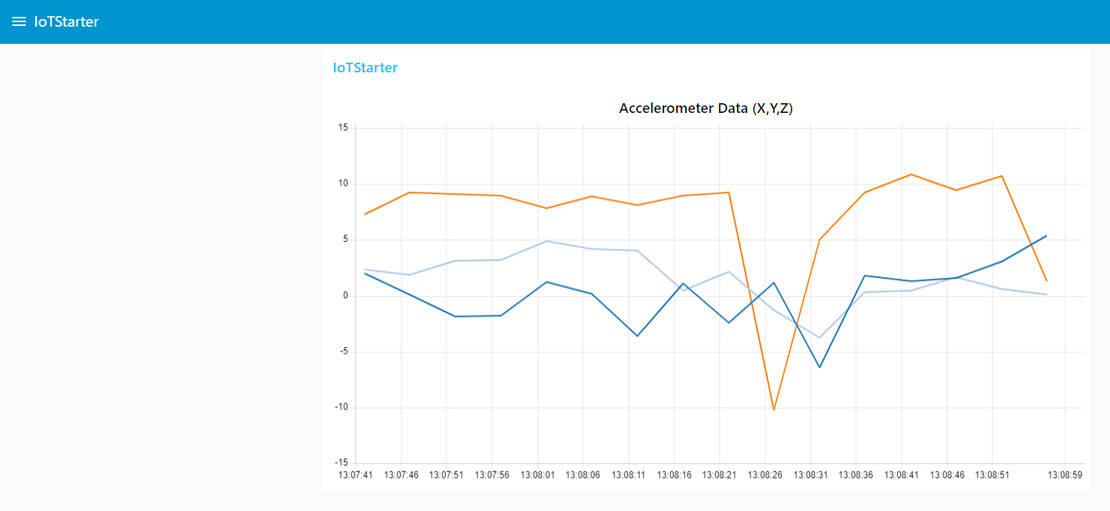
Open your Node-RED Dashboard. Now, move your smartphone. You can now visualize the real-time accelerometer data being sent from your smartphone to the Node-RED dashboard.
Conclusion
In this tutorial, you learned how easy it is to set up an IoT system using just a smartphone. You also learned how to process and visualize IoT sensor data in a dashboard.
Learn more about getting started with IoT development in this learning path.
Acknowledgements
This sample and tutorial were originally developed and written by Daniel Beguelin.