Tutorial
Prepare for LPIC-1 exam 1 - topic 103.5: Create, monitor, and kill processes
Keeping your eye on what's going onOverview
This tutorial grounds you in the basic Linux techniques for process management. Learn to:
- Manage foreground and background jobs
- Start processes that will run after you log out
- Monitor processes
- Select and sort processes for display
- Send signals to processes
- Multitask in a terminal window
Do more at the same time
If you stop and reflect for a moment, it's pretty obvious that lots of things are running on your computer besides the terminal programs we've been discussing in earlier tutorials in this series. Indeed, if you are using a graphical desktop, you might have opened more than one terminal window at a time, or perhaps opened a file browser, Internet browser, game, spreadsheet, or other application. Previously, our examples have shown commands entered at a terminal window. The command runs and you wait for it to complete before you do anything else. In this tutorial, you learn how to do more than one thing at a time using your terminal window.
This tutorial helps you prepare for Objective 103.5 in Topic 103 of the Linux Server Professional (LPIC-1) exam 101. The objective has a weight of 4.
Prerequisites
To get the most from the tutorials in this series, you should have a basic knowledge of Linux and a working Linux system on which you can practice the commands covered in this tutorial. Sometimes different versions of a program format output differently, so your results might not always look exactly like the listings and figures shown here.
Unless otherwise noted, the examples in this tutorial use Fedora 22, with a 4.0.4 kernel. Your results on other systems might differ.
Manage foreground and background jobs
When you run a command in your terminal window, you are running it in the foreground. Most such commands run quickly, but suppose you are running a graphical desktop and would like a digital clock displayed on the desktop. For now, let's ignore the fact that most graphical desktops already have one; we're just using this as an example.
If you have the X Window System installed, you probably also have a graphical desktop and lots of cool graphical tools. The X Window system has several utilities such as xclock and xeyes, but they don't always play well with modern desktops, so I illustrate using the cairo-clock application, which you can install using yum, dnf, or apt-get.
Start by opening a terminal window and running the command
'cairo-clock --seconds'
The --seconds option requests that a second hand be displayed, which makes our example easier to follow. We also redirect some GTK+ error messages that might otherwise appear to /dev/null (also known as the bit bucket). You should see a clock like Figure 1, and your terminal window should look like Listing 1. If you don't have cairo-clock or the X Window System, you'll see shortly how to create a poor man's digital clock with your terminal, so you might want to follow along for now and then retry these exercises with that clock.
Figure 1. A graphical clock with cairo-clock

Listing 1. Listing 1. Starting cairo-clock
[ian@atticf20 ~]$ cairo‑clock ‑‑seconds 2>/dev/null
Unfortunately, your terminal window no longer has a prompt, so you really need to get control back. Fortunately, the Bash shell has a suspend key: Ctrl-z. Pressing this key combination gets you a terminal prompt again as shown in Listing 2.
Listing 2. Listing 2. Suspending cairo-clock with Ctrl-z
[ian@atticf20 ~]$ cairo‑clock ‑‑seconds  2>/dev/null
^Z
[1]+  Stopped                 cairo‑clock ‑‑seconds 2> /dev/null
The clock is still on your desktop, but it has stopped running. Suspending it did exactly that. In fact, if you drag another window over part of it, that part of the clock might not even redraw. Notice the terminal output message indicating [1]+ fg %1. You could also use the command name or part of it by typing fg fg %cairo-clock or fg fg %?clo. Finally, if you just type fg with no parameters, you can restart the most recently stopped job, job 1 in this case. Restarting it with fg also brings the job right back to the foreground, and you no longer have a shell prompt. What you need to do is place the job in the background; a bg command takes the same type of job specification as the fg command and does exactly that.
Listing 3 shows how to bring the cairo-clock job back to the foreground and suspend it using two forms of the fg command. You can suspend it again and place it in the background; the clock continues to run while you do other work at your terminal.
Listing 3. Listing 3. Placing cairo-clock in the foreground or background
[ian@atticf20 ~]$ fg %1
cairo‑clock ‑‑seconds 2> /dev/null
^Z
[1]+  Stopped                 cairo‑clock ‑‑seconds 2> /dev/null
[ian@atticf20 ~]$ fg %?clo
cairo‑clock ‑‑seconds 2> /dev/null
^Z
[1]+  Stopped                 cairo‑clock ‑‑seconds 2> /dev/null
[ian@atticf20 ~]$ bg
[1]+ cairo‑clock ‑‑seconds 2> /dev/null &
Using "&"
You might have noticed that when you placed the cairo-clock job in the background, the message no longer said "Stopped" and that it was terminated with an ampersand (&). In fact, you don't need to suspend the process to place it in the background at all; just append an ampersand to the command and the shell starts the command (or command list) in the background. Let's start cairo-clock with an antique theme using this method. You should see a clock like that in Figure 2 and terminal output like Listing 4.
Figure 2. An antique clock with cairo-clock

Listing 4. Listing 4. Starting antique cairo-clock in background with &
[ian@atticf20 ~]$ cairo‑clock ‑‑seconds ‑‑theme antique 2>/dev/null &
[2] 6268
Notice that the message is slightly different this time. It represents a job number and a process id (PID). I cover PIDs and more about status in a moment. For now, let's use the jobs command to find out what jobs are running. Add the -l option to list PIDs, and you see that job 2 indeed has PID 4320 as shown in Listing 5. Note also that job 2 has a plus sign (+) beside the job number, indicating that it is the current job. This job comes to the foreground if no job specification is given with the fg command.
Listing 5. Listing 5. Displaying job and process information
[ian@atticf20 ~]$ jobs ‑l
[1]‑  6250 Running                 cairo‑clock ‑‑seconds 2> /dev/null &
[2]+  6268 Running                 cairo‑clock ‑‑seconds ‑‑theme antique 2> /dev/null &
Before I address some other issues related to background jobs, let's create a poor man's digital clock. We use the sleep command to cause a delay for two seconds, and use the date command to print the current date and time. We wrap these commands in a while loop with a do/done block to create an infinite loop. Finally, we put the whole lot in parentheses to make a command list and put the entire list in the background using an ampersand. You learn more about how to build more complex commands using loops and scripting in later tutorials of this series. See our series roadmap for a description of and link to each tutorial in the series.
Listing 6. Listing 6. Poor man's digital clock
[ian@atticf20 ~]$ (while sleep 2; do date;done)&
[3] 6717
[ian@atticf20 ~]$ Mon Jun 15 16:35:40 EDT 2015
Mon Jun 15 16:35:42 EDT 2015
Mon Jun 15 16:35:44 EDT 2015
Mon Jun 15 16:35:46 EDT 2015
Mon Jun 15 16:35:48 EDT 2015
fMon Jun 15 16:35:50 EDT 2015
Mon Jun 15 16:35:52 EDT 2015
gMon Jun 15 16:35:54 EDT 2015

( while sleep 2; do
    date;
done )
Mon Jun 15 16:35:56 EDT 2015
Mon Jun 15 16:35:58 EDT 2015
Mon Jun 15 16:36:00 EDT 2015
^C
Our list is running as job 3 with PID 6717. Every two seconds, the date command runs, and a date and time are printed on the terminal. The input that you type is highlighted. A slow typist has characters interspersed with several lines of output before a full command can be typed. In fact, notice how the 'f' 'g' that you type in to bring the command list to the foreground are a couple of lines apart. When you finally get the fg command entered, bash displays the command that is now running in your shell, namely, the command list, which is still happily printing the time every two seconds.
Once you succeed in getting the job into the foreground, you can either terminate (or kill) it, or take some other action, In this case, let's use Ctrl-c to terminate our 'clock.'
Standard IO and background processes
The output from the date command in our previous example is interspersed with echoed characters for the fg command that we are trying to type. This raises an interesting issue. What happens to a background process if it needs input from stdin?
The terminal process under which we start a background application is called the controlling terminal. Unless redirected elsewhere, the stdout and stderr streams from the background process are directed to the controlling terminal. Similarly, the background task expects input from the controlling terminal, but the controlling terminal has no way of directing any characters you type to the stdin of a background process. In such a case, the Bash shell suspends the process, so that it is no longer executing. You can bring it to the foreground and supply the necessary input. Listing 7 illustrates a simple case where you can put a command list in the background. After a moment, press Enter and see the message that the process has stopped. Bring it to the foreground and provide a line of input followed by Ctrl-d to signal end of input file. The command list completes and you display the file we created.
Listing 7. Listing 7. Waiting for stdin
[ian@atticf20 ~]$ (date; cat ‑ > bginput.txt;date)&
[3] 6877
Mon Jun 15 16:45:35 EDT 2015

[3]+  Stopped                 ( date; cat ‑ > bginput.txt; date )
[ian@atticf20 ~]$ fg
( date; cat ‑ > bginput.txt; date )
some textmore text
Mon Jun 15 16:45:47 EDT 2015
[ian@atticf20 ~]$ cat bginput.txt
some text
more text
You might wonder why this job is job 3. With the poor mans clock terminated, there were only two cairo-clock jobs running, which were jobs number 1 and 2. So the next available job number was assigned, and our background input job became job 3.
Run a process after log out
In practice, you probably want to have standard IO streams for background processes redirected to or from a file. There is another related question: what happens to the process if the controlling terminal closes or the user logs off? The answer depends on the shell in use. If the shell sends a SIGHUP (or hangup) signal, then the application is likely to close. I cover signals shortly, but for now, we'll consider another way around this problem.
nohup
The nohup command is used to start a command that ignores hangup signals and appends stdout and stderr to a file. The default file is either nohup.out or $HOME/nohup.out. If the file cannot be written, then the command does not run. If you want output to go somewhere else, redirect stdout, or stderr as discussed in the tutorial "Learn Linux 101: Streams, pipes and redirects."
The nohup command will not execute a pipeline or a command list. You can save a pipeline or list in a file and then run it using the sh (default shell) or the bash command. Another tutorial in this series shows you how to make the script file executable, but for now we'll stick to running scripts by using the sh or the bash command. Listing 8 shows how we might do this for our poor man's digital clock. Needless to say, having the time written to a file isn't particularly useful, and the file will keep growing, so we'll set the clock to update every 30 seconds instead of every second.
Listing 8. Listing 8. Using nohup with a command list in a script
[ian@atticf20 ~]$ echo "while sleep 30; do date;done">pmc.sh
[ian@atticf20 ~]$ nohup sh pmc.sh&
[3] 6955
[ian@atticf20 ~]$ nohup: ignoring input and appending output to ‘nohup.out’

[ian@atticf20 ~]$ nohup bash pmc.sh&
[4] 6970
nohup: ignoring input and appending output to ‘nohup.out’
If we display the contents of nohup.out, we see output lines from the two nohup commands we are running interspersed, with each line approximately 30 seconds after the one that is two lines above it, as shown in Listing 9.
Listing 9. Listing 9. Output from nohup processes
[ian@atticf20 ~]$ cat nohup.out
Mon Jun 15 17:02:24 EDT 2015
Mon Jun 15 17:02:43 EDT 2015
Mon Jun 15 17:02:54 EDT 2015
Mon Jun 15 17:03:13 EDT 2015
Mon Jun 15 17:03:24 EDT 2015
Mon Jun 15 17:03:43 EDT 2015
Older versions of nohup did not write a status message to the controlling terminal, so if you made a mistake, you might not immediately know. Suppose you redirect both stdout and stderr to a file of your own choosing, and suppose you decide that it would be easier to source the command using . rather than typing sh or bash. Listing 10 shows what happens if you use nohup as we did before, but redirect both stdout and stderr. After you enter the command, you see the message indicating that job 4 has started with PID 5853. If you don't immediately see the message saying that the job has terminated with exit code 126, press Enter again, and you should see it.
Listing 10. Listing 10. Making mistakes with nohup
[ian@atticf20 ~]$ nohup . pmc.sh >mynohup.out 2>&1 &
[5] 7042
[5]+  Exit 126                nohup . pmc.sh > mynohup.out 2>&1
Listing 11 shows the contents of mynohup.out. Not surprising, really. You use nohup to run a command in the background, and you use source (.) to run read commands from a file and run them in the current shell. The important thing to remember about this is that you might have to press Enter to allow the shell to display the background job exit status, and you might have to look at nohup's output file to see what really went wrong.
Listing 11. Listing 11. Hidden message from nohup
[ian@atticf20 ~]$ cat mynohup.out
nohup: ignoring input
nohup: failed to run command ‘.’: Permission denied
Now let's turn our attention to the status of our processes. If you are following along and planning to take a break at this point, please stay around as you now have two jobs that are creating ever larger files in your file system. You can use the fg command to bring each, in turn, to foreground, and then use Ctrl-c to terminate it, but if you let them run for a little longer, you'll see other ways to monitor and interact with them.
Monitor processes
Earlier, I gave a brief introduction to the jobs command and you saw how to use it to list the Process IDs (or PIDs) of our jobs.
ps
There is another command, the ps command, which we use to display various pieces of process status information. Remember "ps" as an acronym for "process status." The ps command accepts zero or more PIDs as arguments and displays the associated process status. If we use the jobs command with the -p option, the output is simply the PID of the process group leader for each job. We'll use this output as arguments to the ps command as shown in Listing 12.
Listing 12. Listing 12. Status of background processes
[ian@atticf20 ~]$ jobs ‑p
6250
6268
6955
6970
[ian@atticf20 ~]$ ps $(jobs ‑p)
  PID TTY      STAT   TIME COMMAND
 6250 pts/1    Sl     2:34 cairo‑clock ‑‑seconds
 6268 pts/1    Sl     3:42 cairo‑clock ‑‑seconds ‑‑theme antique
 6955 pts/1    S      0:00 sh pmc.sh
 6970 pts/1    S      0:00 bash pmc.sh
If you use ps with no options, you see a list of processes that have your terminal as their controlling terminal as shown in Listing 13. Notice that the pmc.sh commands do not show up in this list. You'll see why in a moment.
Listing 13. Listing 13. Displaying status with ps
[ian@atticf20 ~]$ ps
  PID TTY          TIME CMD
 4111 pts/1    00:00:00 bash
 6250 pts/1    00:02:36 cairo‑clock
 6268 pts/1    00:03:46 cairo‑clock
 6955 pts/1    00:00:00 sh
 6970 pts/1    00:00:00 bash
 7218 pts/1    00:00:00 sleep
 7221 pts/1    00:00:00 sleep
 7222 pts/1    00:00:00 ps
Several options, including -f (full), -j (jobs), and -l (long) give control of how much information is displayed. If you do not specify any PIDs, then another useful option is the --forest option, which displays the commands in a tree hierarchy, showing which process has which other process as a parent. In particular, you see that the sleep commands of the previous listing are children of the scripts you have running in background. If you happened to run the command at a different instant, you might see the date command listed in the process status instead, but the odds are very small with this script. I illustrate some of these options in Listing 14.
Listing 14. Listing 14. More status information
[ian@atticf20 ~]$ ps ‑f
UID        PID  PPID  C STIME TTY          TIME CMD
ian       4111  2176  0 13:38 pts/1    00:00:00 bash
ian       6250  4111  4 16:20 pts/1    00:02:41 cairo‑clock ‑‑seconds
ian       6268  4111  6 16:21 pts/1    00:03:53 cairo‑clock ‑‑seconds ‑‑theme an
ian       6955  4111  0 17:01 pts/1    00:00:00 sh pmc.sh
ian       6970  4111  0 17:02 pts/1    00:00:00 bash pmc.sh
ian       7240  6970  0 17:19 pts/1    00:00:00 sleep 30
ian       7243  6955  0 17:19 pts/1    00:00:00 sleep 30
ian       7256  4111  0 17:19 pts/1    00:00:00 ps ‑f
[ian@atticf20 ~]$ ps ‑j ‑‑forest
  PID  PGID   SID TTY          TIME CMD
 4111  4111  4111 pts/1    00:00:00 bash
 6250  6250  4111 pts/1    00:02:41  \_ cairo‑clock
 6268  6268  4111 pts/1    00:03:53  \_ cairo‑clock
 6955  6955  4111 pts/1    00:00:00  \_ sh
 7243  6955  4111 pts/1    00:00:00  |   \_ sleep
 6970  6970  4111 pts/1    00:00:00  \_ bash
 7264  6970  4111 pts/1    00:00:00  |   \_ sleep
 7265  7265  4111 pts/1    00:00:00  \_ ps
Now that you have some basic tools for monitoring your processes using the jobs and ps commands, let's take a brief look at two other monitoring commands before moving on to other ways to select and sort processes for display.
free
The free command displays the amount of free and used memory in your system. By default the display is in kilobytes, but you can override this using -b for bytes, -k for kilobytes, -m for megabytes, or -g for gigabytes. The -t option displays a total line, and the -s option along with a value refreshes the info with the frequency specified. The number is in seconds but might be a floating point value. Listing 15 shows two examples.
Listing 15. Listing 15. Using the free command
[ian@atticf20 ~]$ free
              total        used        free      shared  buff/cache   available
Mem:        4046816     1845624      334164       21212     1867028     1926056
Swap:             0           0           0
[ian@atticf20 ~]$ free ‑mt
              total        used        free      shared  buff/cache   available
Mem:           3951        1801         327          20        1823        1882
Swap:             0           0           0
Total:         3951        1801         327
uptime
The uptime command shows you a one-line display that includes the current time, how long the system has been running, how many users are currently logged on, and the system load averages for the past 1, 5, and 15 minutes. Listing 16 shows an example.
Listing 16. Listing 16. Showing uptime information
[ian@atticf20 ~]$ uptime
 17:22:39 up  8:53,  4 users,  load average: 0.41, 0.62, 0.66
Select and sort processes for display
Using ps
The ps commands discussed so far only list processes that were started from your terminal session (note the SID, or session id, column in the second example of Listing 14). To see all the processes with controlling terminals, use the -a option. The -x option displays processes without a controlling terminal, and the -e option displays information for every process. You'll find if you run this on a system where you or anyone else is logged in on a graphical desktop that you will have a lot of output. Listing 17 shows the full (-f) format for all the processes with a controlling terminal on two different systems (Ubuntu 15 and Fedora 22). For the second system, we've truncated the output but then showed how many lines of output there really were. I suspect there is a bug in Fedora 22 in that a daemon process should normally detach from its controlling terminal, so we should not be seeing daemon processes in this output.
Listing 17. Listing 17. Displaying other processes
jenni@yoga‑u15:~$ ps ‑af #Ubuntu 15.04
jenni@yoga‑u15:~$ ps ‑af
UID        PID  PPID  C STIME TTY          TIME CMD
root      3168  1934  0 12:23 pts/1    00:00:00 sudo ‑s
root      3169  3168  0 12:23 pts/1    00:00:00 /bin/bash
root      4938  4769  0 22:03 pts/5    00:00:00 su ‑ jenni
jenni     4939  4938  0 22:03 pts/5    00:00:00 ‑su
jenni     5013  4994  0 22:06 pts/19   00:00:00 ps ‑af

[ian@atticf20 ~]$ ps ‑af #Fedora 22
UID        PID  PPID  C STIME TTY          TIME CMD
gdm       1050  1045  0 08:29 tty1     00:00:00 dbus‑daemon ‑‑print‑address 3 ‑‑
gdm       1089  1045  0 08:29 tty1     00:00:00 /usr/bin/gnome‑session ‑‑autosta
...
ian       4788     1  0 14:09 tty2     00:00:00 /usr/libexec/gvfsd‑http ‑‑spawne
ian       6250  4111  4 16:20 pts/1    00:14:24 cairo‑clock ‑‑seconds
ian       6268  4111  6 16:21 pts/1    00:21:55 cairo‑clock ‑‑seconds ‑‑theme an
ian       6955  4111  0 17:01 pts/1    00:00:00 sh pmc.sh
ian       6970  4111  0 17:02 pts/1    00:00:00 bash pmc.sh
ian      10758 10715  0 21:24 pts/3    00:00:00 ssh ian@192.168.1.42
ian      10962  6955  0 21:36 pts/1    00:00:00 sleep 30
ian      10963 10922  0 21:36 pts/4    00:00:00 ssh ian@192.168.1.24
ian      11138  6970  0 21:36 pts/1    00:00:00 sleep 30
ian      11139 10974  0 21:36 pts/5    00:00:00 ps ‑af
[ian@atticf20 ~]$ ps ‑af | wc ‑l
83
Note the controlling terminal listed in the TTY column. For the Fedora 22 part of this listing, I switched to an ssh login (pts/5), so the ps ps -af command is running under pts/5, while most of the commands created for this tutorial are running under pts/1.
There are many more options for ps, including a number that provide significant control over what fields are displayed and how they are displayed. Others provide control over the selection of processes for display, for example, by selecting those processes for a particular user (-u) or a particular command (-C). In Listing 18, user jenni finds all processes running the bash command; we use the -o option to specify the columns that are displayed. We've added the user option to the normal list that you get with just plain ps, so you can see which user runs bash.
Listing 18. Listing 18. Who is running the bash command?
[jenni@atticf20 ~]$ ps ‑C bash ‑o user,pid,tty,time,comm
jenni@yoga‑u15:~$ ps ‑af #Ubuntu 15.04
UID        PID  PPID  C STIME TTY          TIME CMD
root      3168  1934  0 12:23 pts/1    00:00:00 sudo ‑s
root      3169  3168  0 12:23 pts/1    00:00:00 /bin/bash
root      4938  4769  0 22:03 pts/5    00:00:00 su ‑ jenni
jenni     4939  4938  0 22:03 pts/5    00:00:00 ‑su
jenni     5014  4994  0 22:08 pts/19   00:00:00 ps ‑af
Sometimes you might want to sort the output by particular fields, and you can do that too using the --sort option to specify the sort fields. The default is to sort in ascending order (+), but you can also specify descending order (-). Listing 19 shows the final ps example where all processes are listed using the jobs format, and the output is sorted by session id and command name. For the first, we use the default sort order, and for the second, we specify both sort orders explicitly.
Listing 19. Listing 19. Sorting the output from ps
jenni@yoga‑u15:~$ ps ‑aj ‑‑sort ‑sid,+comm #Ubuntu 15.04
  PID  PGID   SID TTY          TIME CMD
 5083  5083  4994 pts/19   00:00:00 ps
 4939  4939  4769 pts/5    00:00:00 bash
 4938  4938  4769 pts/5    00:00:00 su
 3169  3169  1934 pts/1    00:00:00 bash
 3168  3168  1934 pts/1    00:00:00 sudo
jenni@yoga‑u15:~$ ps ‑aj ‑‑sort sid,comm #Ubuntu 15.04
  PID  PGID   SID TTY          TIME CMD
 3169  3169  1934 pts/1    00:00:00 bash
 3168  3168  1934 pts/1    00:00:00 sudo
 4939  4939  4769 pts/5    00:00:00 bash
 4938  4938  4769 pts/5    00:00:00 su
 5085  5085  4994 pts/19   00:00:00 ps
pgrep
Another useful command, albeit with fewer options, is the pgrep command, which allows you to use a regular expression to search for processes by name. The -a option also prints the command line and the -f option matches against the full command line. An example is shown in Listing 20 searching for our clock processes.
Listing 20. Listing 20. Using pgrep to find clock processes
[ian@atticf20 ~]$ pgrep iro #Fedora 22
6250
6268
[ian@atticf20 ~]$ pgrep ‑af "i.*seconds"
6250 cairo‑clock ‑‑seconds
6268 cairo‑clock ‑‑seconds ‑‑theme antique
As usual, see the man pages for ps and pgrepfor full details on the many options and fields you can specify.
Using top
If you run ps several times in a row to see what is changing, you probably need the top command instead. It displays a continuously updated process list, along with useful summary information. Listing 21 shows the first few lines of a top display. Use the q subcommand to quit top.
Listing 21. Listing 21. Displaying processes using top
jenni@yoga‑u15:~$ top #Ubuntu 15.04
top ‑ 22:20:01 up 10:11,  5 users,  load average: 0.00, 0.01, 0.05
Tasks: 206 total,   1 running, 205 sleeping,   0 stopped,   0 zombie
%Cpu(s):  0.4 us,  0.1 sy,  0.0 ni, 99.5 id,  0.0 wa,  0.0 hi,  0.0 si,  0.0 st
KiB Mem:   8090136 total,  2355204 used,  5734932 free,    50760 buffers
KiB Swap:  4095996 total,        0 used,  4095996 free.  1713188 cached Mem

  PID USER      PR  NI    VIRT    RES    SHR S  %CPU %MEM     TIME+ COMMAND
 1257 ian       20   0 1225160 176140  85496 S   1listing.7  2.2   3:31.96 compiz
 1252 ian       20   0  628292  37536  25508 S   0.3  0.5   0:05.15 unity‑pane+
 4026 root      20   0       0      0      0 S   0.3  0.0   0:00.54 kworker/2:0
 5086 jenni     20   0   29184   3084   2560 R   0.3  0.0   0:00.05 top
    1 root      20   0  182724   5400   3676 S   0.0  0.1   0:02.08 systemd
    2 root      20   0       0      0      0 S   0.0  0.0   0:00.00 kthreadd
The top command has a number of subcommands, of which the most useful to start with are:
- h: Gets you help
- q: Quits the
topcommand - f: Lets you add or remove fields from the display
- F: Selects fields to sort on
See the man pages for top for full details on options, including how to sort by memory usage or other criteria. Listing 22 shows an example of the output sorted by virtual memory usage in descending order.
Listing 22. Listing 22. Sorting the output of top
top ‑ 22:42:27 up 10:34,  5 users,  load average: 0.00, 0.01, 0.05
Tasks: 205 total,   1 running, 204 sleeping,   0 stopped,   0 zombie
%Cpu(s):  0.3 us,  0.0 sy,  0.0 ni, 99.7 id,  0.0 wa,  0.0 hi,  0.0 si,  0.0 st
KiB Mem:   8090136 total,  2356524 used,  5733612 free,    50836 buffers
KiB Swap:  4095996 total,        0 used,  4095996 free.  1713456 cached Mem

  PID USER      PR  NI    VIRT    RES    SHR S  %CPU %MEM     TIME+ COMMAND
 1257 ian       20   0 1225160 176240  85596 S   0.9  2.2   3:44.41 compiz
  802 root      20   0  695780 152280 132704 S   0.1  1.9   0:48.44 Xorg
 1408 ian       20   0 1220376  66628  56444 S   0.0  0.8   0:01.02 nautilus
 1461 ian       20   0 1003252  59780  20904 S   0.0  0.7   0:00.18 evolution‑+
 1244 ian       20   0  939208  38948  29604 S   0.0  0.5   0:01.11 unity‑sett+
 1252 ian       20   0  628292  37536  25508 S   0.0  0.5   0:05.27 unity‑pane+
Send signals to processes
Let's now look at Linux signals, which are an asynchronous way to communicate with processes. We have already mentioned the SIGHUP signal, and we have used both Ctrl-c and Ctrl-z, which are other ways of sending a signal to processes. The general way to send a signal is with the kill command. You can also use the pkill or killall commands to signal multiple processes with one command.
Sending signals using kill
The kill command sends a signal to a specified job or process. Listing 23 shows the use of the SIGTSTP and SIGCONT signals to stop and resume a background job. Using the SIGTSTP signal is equivalent to using the fg command to bring the job to the foreground and then Ctrl-z to suspend it. Using SIGCONT is like using the bg command.
Listing 23. Listing 23. Stopping and restarting background jobs
[ian@atticf20 ~]$ kill ‑s SIGTSTP %1

[1]+  Stopped                 cairo‑clock ‑‑seconds 2> /dev/null
[ian@atticf20 ~]$ jobs ‑l
[1]+  6250 Stopped                 cairo‑clock ‑‑seconds 2> /dev/null
[2]   6268 Running                 cairo‑clock ‑‑seconds ‑‑theme antique 2> /dev/null &
[3]   6955 Running                 nohup sh pmc.sh &
[4]‑  6970 Running                 nohup bash pmc.sh &
[ian@atticf20 ~]$ kill ‑s SIGCONT 6250
[ian@atticf20 ~]$ jobs ‑l
[1]   6250 Running                 cairo‑clock ‑‑seconds 2> /dev/null &
[2]   6268 Running                 cairo‑clock ‑‑seconds ‑‑theme antique 2> /dev/null &
[3]‑  6955 Running                 nohup sh pmc.sh &
[4]+  6970 Running                 nohup bash pmc.sh &
We used the job specification (%1) to stop the cairo-clock process in this example, and then the process id (PID) to restart (continue) it. If you stopped job %2 and then used tail with the -f option to follow the nohup output file nohup.out, you would see that only one process is updating the file.
There are a number of other possible signals that you can display on your system using kill kill -l. Some are used to report errors such as illegal operation codes, floating point exceptions, or attempts to access memory that a process does not have access to. Notice that signals have both a number, such as 20, and a name, such as SIGTSTP. You can use either the number prefixed by a - sign, or the -s option and the signal name. On my system, I could have used kill kill -20 instead of kill kill -s SIGTSTP. You should always check the signal numbers on your system before assuming which number belongs to which signal.
Signal handlers and process termination
You have seen that Ctrl-c terminates a process. In fact, it sends a SIGINT (or interrupt) signal to the process. If you use kill without any signal name, it sends a SIGTERM signal. For most purposes, these two signals are equivalent.
You also saw that the nohup command makes a process immune to the SIGHUP signal. In general, a process can implement a signal handler to catch signals. So a process could implement a signal handler to catch either SIGINT or SIGTERM. Because the signal handler knows what signal was sent, it might choose to ignore SIGINT and only terminate when it receives SIGTERM, for example. Listing 24 shows how to send the SIGTERM signal to job %1 using the kill and the send the SIGTERM (default) signal to the other cairo-clock process using part of the command name as a pattern. Notice that the process status shows as "Terminated" right after we send the signal. This would show as "Interrupt" if we used SIGINT instead. After a few moments, the process cleanup has occurred and the job no longer shows in the job list. Finally, we send the SIGHUP signal to all of our processes that are running the sleep command. Because this is what pmc.sh does most of the time, this is what we find if we use pgrep to look for processes running sleep. Not surprisingly, the processes keep right on running, because we started them with the intention that they would ignore the SIGHUP signal.
Listing 24. Listing 24. Terminating a process with SIGTERM
[ian@atticf20 ~]$ kill ‑s SIGTERM %1
[1]   Terminated              cairo‑clock ‑‑seconds 2> /dev/null
[ian@atticf20 ~]$ pkill cairo
[2]   Terminated              cairo‑clock ‑‑seconds ‑‑theme antique 2> /dev/null
[ian@atticf20 ~]$ pgrep ‑a sleep; pkill ‑‑signal SIGHUP sleep;jobs ‑l
13628 sleep 30
13631 sleep 30
[3]‑  6955 Running                 nohup sh pmc.sh &
[4]+  6970 Running                 nohup bash pmc.sh &
Signal handlers give a process great flexibility. A process can do its normal work and be interrupted by a signal for some special purpose. Besides allowing a process to catch termination requests and take possible action such as closing files or checkpointing transactions in progress, signals are often used to tell a daemon process to reread its configuration file and possibly restart operation. You might do this for the inetd process when you change network parameters, or the line printer daemon (lpd) when you add a new printer.
Terminating processes unconditionally
Some signals cannot be caught, such as some hardware exceptions. SIGKILL, the most likely one you will use, cannot be caught by a signal handler and unconditionally terminates a process. In general, you should need this only if all other means of terminating the process have failed.
Logout and nohup
Remember you saw that using nohup would allow your processes to keep running after you log out. Well, let's do that and then log back in again. After you log back in, check your remaining poor man's clock process using jobs as we have done above. The output is shown in Listing 25.
Listing 25. Listing 25. Logging back in
[ian@atticf20 ~]$ jobs ‑lThere is no sign of our jobs! Not perhaps what we were expecting. However, all is not lost. Suppose you can't remember whether you terminated the nohup job that you started with bash or the one you started with sh. You saw previously how to find the processes that were running the bash command, so you can use the same trick to display just the SID, PID, PPID, and command string. Then you can use the -js option to display all the processes in the session using the SID (Session ID) value. Listing 26 shows the result. Think about other ways you might have found these processes, such as searching by username and then filtering using grep.
Listing 26. Listing 26. Finding our lost commands
[ian@atticf20 ~]$ ps ‑C bash ‑C sh ‑o pid,sid,tname,cmd
  PID   SID TTY      CMD
 2180  2180 pts/0    bash
 3779  1474 tty2     /bin/sh /home/ian/Oxygen XML Author 17/oxygenAuthor17.0
 4158  4158 pts/2    bash
 6955  4111 ?        sh pmc.sh
 6970  4111 ?        bash pmc.sh
10715 10715 pts/3    bash
10922 10922 pts/4    bash
10974 10974 pts/5    ‑bash
11262 11262 pts/6    bash
13702 13702 pts/1    bash
[ian@atticf20 ~]$ ps ‑js 4111
  PID  PGID   SID TTY          TIME CMD
 6955  6955  4111 ?        00:00:00 sh
 6970  6970  4111 ?        00:00:00 bash
14394  6955  4111 ?        00:00:00 sleep
14402  6970  4111 ?        00:00:00 sleep
Note that the pmc.sh is still running but now it has a question mark (?) for the controlling TTY.
Given what you have now learned about killing processes, you should be able to kill the remaining poor man's clock processes using their PIDs and the kill command. There is one more command we'll introduce for killing processes, the killall command, which has many parameters in common with pgrep and pkill. Unfortunately it does not identify our processes by the pmc.sh name, so we'll just use it to kill all the sleep commands. This is used here solely for illustration; selecting one command from a running shell script is NOT generally a good way to find a particular set of processes. You might accidentally kill something totally unrelated. Using killall would have been more appropriate for killing the cairo-clock processes, but we already killed those.
Listing 27. Listing 27. Using the killall command
[ian@atticf20 ~]$ killall sleep
[ian@atticf20 ~]$ ps ‑js 4111
  PID  PGID   SID TTY          TIME CMD
Multiplexing with the screen command
When you have to administer several systems, you often log in to one using an SSH terminal session. While there, you can start a long running job and forget about nohup. When you log out, your work goes away. At other times, you might be doing something and wish you had another window to look at a related or unrelated issue. You could start another SSH session, or you could use the screen command, which is a full-screen window manager that multiplexes a physical terminal between several processes. You can disconnect from a remote system and then reconnect later, leaving your processes running while you are away.
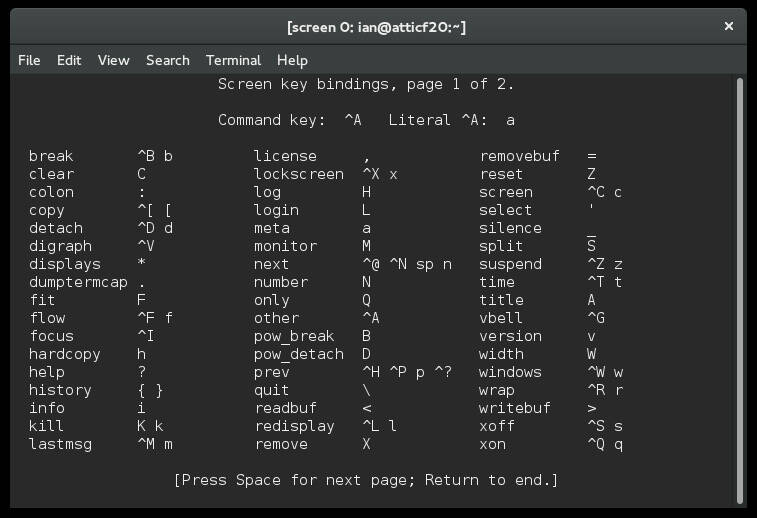
Type screen to start the screen program. Your terminal window clears and you are now running in the screen environment. You won't see much difference from a regular terminal, except that you now use Ctrl-a (hold Ctrl key while pressing lowercase 'a' key). to interact with screen itself rather than the shell. You can then enter commands that screen understands, for example ? to get help. We've illustrated how the screen appears in Figure 3 and shown the second page of help in Listing 28. From now on, we'll just use the more accessible code listings to illustrate.
Note: If the screen command is not on your system, you might need to install the screen package. See the developerWorks roadmap for LPIC-1 for topics on package installation.
Figure 3. Help for the screen command - page 1
Listing 28. Listing 28. Help for the screen command - page 2
                        Screen key bindings, page 2 of 2.

^]   paste .
"    windowlist ‑b
‑    select ‑
0    select 0
1    select 1
2    select 2
3    select 3
4    select 4
5    select 5
6    select 6
7    select 7
8    select 8
9    select 9
I    login on
O    login off
]    paste .
|    split ‑v
:kB: focus prev


                        [Press Space or Return to end.]
We'll now restart our poor man's clock script and let it run for a few moments, then disconnect from the screen using Ctrl-a and then d as shown in Listing 29. We'll use ^a for Ctrl-a in listings for the remainder of this section.
Listing 29. Disconnecting from a running screen session
[ian@atticf20 ~]$ bash pmc.sh
Tue Jun 16 12:11:16 EDT 2015
Tue Jun 16 12:11:46 EDT 2015
Tue Jun 16 12:12:16 EDT 2015
Tue Jun 16 12:12:46 EDT 2015
^ad
[detached from 21657.pts‑8.atticf20]
Now we'll move over to my Ubuntu 15.04 system in another office (or at home as the case might be) and ssh back into atticf20 to see how the command is progressing. We reconnect to the disconnected screen session using the -r option as shown in Listing 30. You can see that is has continued to run, even while we were disconnected from the screen command. In this case, we'll also terminate the command using Ctrl-c. Note that we are still under the control of screen; the only thing that was terminated was the running pmc.sh command.
Listing 30. Reconnecting to a disconnected screen
ian@yoga‑u15:~$ ssh ian@atticf20
ian@atticf20's password:
 Last login: Tue Jun 16 12:11:09 2015 from 192.168.1.42
[ian@atticf20 ~]$ screen ‑r
[ian@atticf20 ~]$ bash pmc.sh
Tue Jun 16 12:11:16 EDT 2015
Tue Jun 16 12:11:46 EDT 2015
Tue Jun 16 12:12:16 EDT 2015
Tue Jun 16 12:12:46 EDT 2015
Tue Jun 16 12:13:16 EDT 2015
Tue Jun 16 12:13:47 EDT 2015
Tue Jun 16 12:14:17 EDT 2015
Tue Jun 16 12:14:47 EDT 2015
Tue Jun 16 12:15:17 EDT 2015
Tue Jun 16 12:15:47 EDT 2015
Tue Jun 16 12:16:17 EDT 2015
^C
If you need multiple virtual terminals in your screen session, you can use the following basic commands to get started. See the man pages for screen for more things you can do. We've separated the subcommand letter from the Ctrl-a part for clarity, so Ctrl-a w really means ^aw.
- Ctrl-a w: Start another virtual screen
- Ctrl-a n: Show the next window in this ring
- Ctrl-a p: Show the previous window in this ring
- Ctrl-a k: Terminate (or kill) the current virtual screen
- Ctrl-a \: Kill all windows and terminate screen
So far, we've seen only one running screen command. We've seen how to open multiple virtual screens and cycle between them. And we saw how to reconnect using the -r option of screen. But how do you reconnect if you have multiple copies of screen running?
The first thing to note is that the disconnect command. (Ctrl-a d shown in Listing 29 said we were disconnecting from "21657.pts-8.atticf20".) The 21657 part is actually the PID of the screen command's process. and you can reconnect using -r and also the value 21657. Because PIDs aren't very user friendly, you can also start screen with the -S option and a more friendly name. The -ls option gives you a list of running screen copies that you can reconnect to. You cannot reconnect to a screen that is already in Attached state, only to one that is in Detached state. I show some examples in Listing 31.
Listing 31. More on disconnecting and reconnecting
[ian@atticf20 ~]$ screen ‑S lpi‑example^ad
[detached from 22399.lpi‑example]
[ian@atticf20 ~]$ screen ‑ls
There are screens on:
    22399.lpi‑example    (Detached)
    21657.pts‑8.atticf20    (Attached)
2 Sockets in /var/run/screen/S‑ian.


[ian@atticf20 ~]$ screen ‑r 21657.pts‑8.atticf20
There is a screen on:
    21657.pts‑8.atticf20    (Attached)
There is no screen to be resumed matching 21657.pts‑8.atticf20.
[ian@atticf20 ~]$ screen ‑r 21657
There is a screen on:
    21657.pts‑8.atticf20    (Attached)
There is no screen to be resumed matching 21657.
[ian@atticf20 ~]$ screen ‑r lpi‑example^ad
[detached from 22399.lpi‑example]
You can explore the many other possibilities of the screen command using the man pages.
It is also possible to share your screen with other users, for example in a class setting or for help purposes, This requires setting the suid bit on the screen command's binary file and is beyond the scope of this tutorial. You can probably find helpful tips on the Internet if you want to do this as the man pages do not fully explain it.
This completes your introduction to creating, monitoring, and killing processes.