Tutorial
Prepare for LPIC-1 exam 2 - topic 108.1: Maintain system time
Learn to configure the various time-related aspects of your Linux systemOverview
In this tutorial, learn to:
- Set the system date and time
- Set the hardware clock to the correct time in UTC
- Configure the correct time zone
- Perform basic NTP configuration
- Use the pool.ntp.org service
- Understand the
ntpqcommand
Inside your system clock
When you install a Linux® system graphically, you set the clock and choose a time zone suitable for your needs. You can also choose to use the Network Time Protocol (NTP) to set your clock automatically, and you can choose to have the system clock use Coordinated Universal Time (UTC) rather than local time. This tutorial shows you how to go below the graphical interfaces and configure the various time-related aspects of your Linux system.
This tutorial helps you prepare for Objective 108.1 in Topic 108 of the Linux Server Professional (LPIC-1) exam 102. The objective has a weight of 3.
Prerequisites
To get the most from the tutorials in this series, you need a basic knowledge of Linux and a working Linux system on which you can practice the commands covered in this tutorial. You should be familiar with GNU and UNIX® commands. Sometimes different versions of a program format output differently, so your results might not always look exactly like the listings shown here.
Unless otherwise noted, I use Fedora 26 running Wayland and Ubuntu 16.04 LTS or CentOS 6 running X11 for the examples in this tutorial.
Dates and times
Calendars have existed for thousands of years, mostly based on the regular courses of the sun and the moon. Sundials have been used since ancient times to mark the passage of time during a day. Time was sometimes disseminated by ringing bells to announce hours or times of prayer. Mechanical clocks have been powered by water, springs, and pendulums among other things. A great improvement in accuracy came with the use of the quartz crystal oscillator. Atomic clocks (now based on ytterbium) are now the most accurate clocks. Reference sources are maintained by national standards organizations. Time is now disseminated to computers from these primary sources using NTP.
Display and set the system date and time
System time on a Linux system is very important. The cron and anacron facilities perform tasks based on time, so they need an accurate clock to base decisions on. Most backup and restore tools, along with development tools such as make, also depend on reliable time measurements. Computers built since around 1980 usually include some kind of clock mechanism, and most built since 1984 or so have a persistent clock mechanism that keeps time even if the computer is turned off.
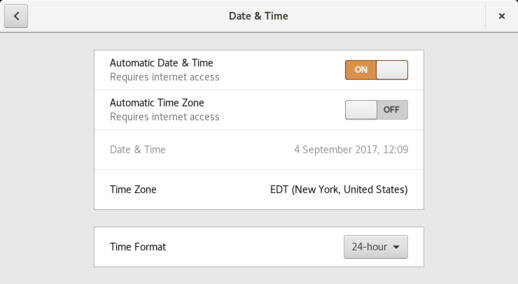
You can use graphical tools to display or set the clock if your system has a graphical interface such as Wayland or the X Window System. Figure 1 shows an example from a GNU Network Object Model Environment (GNOME) desktop.
Figure 1. Updating the date and time graphically
In the remainder of this tutorial, I show you how to get under the hood and use command-line tools to manage your time and time zone settings as well as your hardware clock.
Displaying date and time
No matter whether you live in New York, Budapest, Nakhodka, Ulaanbaatar (formerly anglicised as Ulan Bator), Bangkok, or Canberra, most of your Linux time computations are related to Coordinated Universal Time or UTC. Listing 1 shows you how to use the date command to display the current date and time. The default display is always in local time, even if your hardware clock keeps UTC. Use the -u option to display UTC. Besides UTC, the date command supports a wide variety of possible output formats. See the man page for date if you'd like to learn more about the various date formats.
Listing 1. Displaying the current date and time
[ian@atticf26 ~]$ date
Wed Sep  6 23:04:40 EDT 2017
[ian@atticf26 ~]$ date ‑u
Thu Sep  7 03:04:43 UTC 2017
Use the -d (or --date) option to display the date for some particular time, such as next Tuesday, or for a particular time zone. The input format is quite flexible, although it is currently restricted to locale-independent formats. Use LC_TIME=C if necessary. Listing 2 shows several examples.
Listing 2. Displaying other dates and times
[ian@atticf26 ~]$ #Date tomorrow
[ian@atticf26 ~]$ date ‑d tomorrow
Fri Sep 15 13:33:10 EDT 2017
[ian@atticf26 ~]$ #Date 8 months ago ‑ note timezone
[ian@atticf26 ~]$ date ‑‑date "8 months ago"
Sat Jan 14 12:34:20 EST 2017
[ian@atticf26 ~]$ #Display it in French
[ian@atticf26 ~]$ LC_TIME=fr_FR date ‑‑date '8 months ago'
sam. janv. 14 12:35:44 EST 2017
[ian@atticf26 ~]$ #French string doesn't work as input
[ian@atticf26 ~]$ date "$(LC_TIME=fr_FR date ‑‑date '8 months ago')"
date: invalid date ‘sam. janv. 14 12:36:47 EST 2017’
ian@atticf26 ~]$ #Use LC_TIME=C
[ian@atticf26 ~]$ LC_TIME=fr_FR date ‑d "$(LC_TIME=C date ‑‑date '8 months ago')"
sam. janv. 14 12:38:25 EST 2017
Use the output formatting options of the date command to control how you want the output displayed. Listing 3 shows some examples. The info pages for the date command contain several other examples of using the date command and a lot more information.
Listing 3. Date output formats
[ian@atticf26 ~]$ #Date in ISO 8601 format
[ian@atticf26 ~]$ date "+%F"
2017‑09‑14
[ian@atticf26 ~]$ #Day of year (‘001’...‘366’)
[ian@atticf26 ~]$ date "+%j"
257
[ian@atticf26 ~]$ date ‑d "jan 1" "+%j"
001
[ian@atticf26 ~]$ #Next month's date, day of week and month name in German
[ian@atticf26 ~]$ LC_TIME=de_DE date ‑d "+1  month" "+%F %A %B"
2017‑10‑14 Samstag Oktober
Setting date and time
If you need to set the date, you provide a date and time string as an argument. The required format is historical and is somewhat odd even to Americans and truly odd to the rest of the world. You must specify at least month, day, hour, and minute in MMDDhhmm format, and you can also append a two- or four-digit year (CCYY or YY) and optionally a period (.) followed by a two-digit number of seconds. Listing 4 shows an example that alters the system date by 5 minutes. Note that you need to have root authority to change the date or time.
Listing 4. Setting the system date and time
[root@atticf26 ~]##Show date in date input format
[root@atticf26 ~]#date +%m%d%H%M%Y.%S
091416592017.45
[root@atticf26 ~]##Add 5 minutes
[root@atticf26 ~]#date ‑d "+5 min" +%m%d%H%M%Y.%S
091417052017.08
[root@atticf26 ~]##Set time ahead by 5 minutes
[root@atticf26 ~]#date;date "$(date ‑d "+5 min" +%m%d%H%M%Y.%S)";date
Thu Sep 14 17:01:09 EDT 2017
Thu Sep 14 17:06:09 EDT 2017
Thu Sep 14 17:06:09 EDT 2017
On GNU systems you can also set the system clock using date strings that are acceptable to the -d option of the date command. Use the -s (or --set) option. For example, you can set the clock ahead by 5 minutes using the command, date --set='+5 minutes'
Note: Neither -s nor -d options accept the MMDDhhmm format described above.
Set the hardware clock to UTC
Most Linux systems, along with other current operating systems, actually have two clocks. The first is the internal software clock, which is driven by counting system interrupts. It is subject to variations caused by high system load and interrupt latency. The second is the hardware clock, sometimes called the Real Time Clock (RTC) or hardware clock, which is usually tied to an oscillating quartz crystal that is accurate to within a few seconds per day. It is subject to variations such as ambient temperature. Your system typically reads the hardware clock at start up and from then on uses the software clock. The date command that you just learned about sets the software clock, not the hardware clock.
Note: A hardware clock needs battery power to maintain status when the system is turned off. The battery is typically a common coin-sized battery. There are some systems, for example Raspberry Pi, that do not have a hardware clock but can run Linux. These are usually connected to the Internet to update time. I will show you more about Internet time protocols later in this tutorial.
If you run a dedicated Linux system, it is customary to keep the hardware clock set to UTC, but if you also boot another operating system such as Microsoft® Windows®, you might need to set the hardware clock to local time. Mostly it doesn't matter as far as Linux is concerned, except that the hardware clock doesn't know about Daylight Saving Time (DST). So, if your Linux system isn't running when a DST change occurs, then your time will probably be off when it next starts unless you have automatic time zone setting enabled.
If you use NTP, you may possibly set the hardware clock when you first install the system and never worry about it again. If not, this part of the tutorial will show you how to display and set the hardware clock if you have one.
The hwclock command (without any options) shows the current value of the hardware clock. Listing 5 shows the current value of both the system and hardware clocks.
Listing 5. System and hardware clock values
[root@atticf26 ~]#date;hwclock
Fri Sep 15 11:52:21 EDT 2017
2017‑09‑15 11:47:22.224275‑0400
Notice that the two values differ by 5 minutes. When you use the date command to update the system time, the hardware clock is not affected. Thus the 5 minute difference.
You can synchronize the hardware clock from the system clock using the -w or --systohc option of hwclock, and you can synchronize the system clock from the hardware clock using the --set or --hctosys option, as shown in Listing 6.
Listing 6. Setting the system clock from the hardware clock
[root@atticf26 ~]#date;hwclock;hwclock ‑s;date
Fri Sep 15 11:54:28 EDT 2017
2017‑09‑15 11:49:29.557339‑0400
Fri Sep 15 11:49:31 EDT 2017
You can use the --set option together with the --date option and a date string to specify an absolute or relative date for the hardware clock.
When setting the hardware clock, specify the --utc option to have the hardware clock kept in UTC or the --localtime option to have it kept in local time. If neither is specified, the value is taken from the third line of /etc/adjtime, if that file exists.
The Linux kernel has a mode that copies the system time to the hardware clock every 11 minutes. This is off by default, but is turned on by NTP. Running anything that sets the time the old-fashioned way, such as hwclock --hctosyshwclock--hctosys, turns it off, so it is a good idea to just let NTP do its work if you are using NTP. See the man page for adjtimex to find out how to check whether the clock is being updated every 11 minutes or not. You may need to install the adjtimex package as it is not always installed by default.
The hwclock command keeps track of changes made to the hardware clock in order to compensate for inaccuracies in the clock frequency. The necessary data points are kept in /etc/adjtime, which is an ASCII file. If you are not using NTP, you can use the adjtimex command to compensate for clock drift. Otherwise, the hardware clock will be adjusted approximately every 11 minutes by NTP. Besides showing whether your hardware clock is in local time or UTC, the first value in /etc/adjtime shows the amount of hardware clock drift per day (in seconds). Listing 7 shows an example.
Listing 7. /etc/adjtime showing clock drift and local time or UTC
[[ian@atticf26 ~]$ cat /etc/adjtime
0.000000 1504469764 0.000000
1504469764
UTC
Note that this system keeps the hardware clock in UTC.
Configure your time zone
Your time zone is a measure of how far your local time differs from UTC. Information on available time zones that can be configured is kept in /usr/share/zoneinfo. Traditionally, /etc/localtime is a link to one of the time zone files in this directory tree, for example, /usr/share/zoneinfo/Eire or /usr/share/zoneinfo/Australia/Hobart. Some systems, such as Ubuntu, use a copy of the file rather than a link.
Many countries or regions also use daylight savings. Dates for daylight savings changes can vary from year to year and from place to place. So, keeping your clock correctly set relative to UTC has become quite complex.
Another file, /etc/timezone, was traditionally a link to /etc/default/init and was used to set the time zone environment variable, TZ, and several locale-related environment variables. The file may or may not exist on your system. If it does, it may just contain the name of the current time zone. Finally, some systems also have time zone information in /etc/sysconfig/clock.
Listing 8 shows /etc/timezone and /etc/localtime links on a Ubuntu 16.04 system.
Note: Fedora systems do not have /etc/timezone.
Listing 8. Time zone information in /etc
ian@attic‑u16:~$ #Ubuntu 16.04 LTS
ian@attic‑u16:~$ cat /etc/timezone
America/New_York
ian@attic‑u16:~$ ls ‑l /etc/localtime
lrwxrwxrwx 1 root root 36 Dec 23  2016 /etc/localtime ‑> /usr/share/zoneinfo/America/New_York
To set the time zone correctly, you need to know the appropriate zone name. Use the txselect command to determine this interactively as shown in Listing 9.
Listing 9. Using tzselect interactively
ian@attic‑u16:~$ tzselect
Please identify a location so that time zone rules can be set correctly.
Please select a continent, ocean, "coord", or "TZ".
 1) Africa
 2) Americas
 3) Antarctica
 4) Asia
 5) Atlantic Ocean
 6) Australia
 7) Europe
 8) Indian Ocean
 9) Pacific Ocean
10) coord ‑ I want to use geographical coordinates.
11) TZ ‑ I want to specify the time zone using the Posix TZ format.
#? 4
Please select a country whose clocks agree with yours.
 1) Afghanistan    18) Israel      35) Palestine
 2) Armenia          19) Japan            36) Philippines
 3) Azerbaijan          20) Jordan            37) Qatar
 4) Bahrain          21) Kazakhstan        38) Russia
 5) Bangladesh          22) Korea (North)        39) Saudi Arabia
 6) Bhutan          23) Korea (South)        40) Singapore
 7) Brunei          24) Kuwait            41) Sri Lanka
 8) Cambodia          25) Kyrgyzstan        42) Syria
 9) China          26) Laos            43) Taiwan
10) Cyprus          27) Lebanon            44) Tajikistan
11) East Timor          28) Macau            45) Thailand
12) Georgia          29) Malaysia            46) Turkmenistan
13) Hong Kong          30) Mongolia            47) United Arab Emirates
14) India          31) Myanmar (Burma)        48) Uzbekistan
15) Indonesia          32) Nepal            49) Vietnam
16) Iran          33) Oman            50) Yemen
17) Iraq          34) Pakistan
#? 30
Please select one of the following time zone regions.
1) Mongolia (most areas)
2) Bayan‑Ölgii, Govi‑Altai, Hovd, Uvs, Zavkhan
3) Dornod, Sükhbaatar
#? 1

The following information has been given:

    Mongolia
    Mongolia (most areas)

Therefore TZ='Asia/Ulaanbaatar' will be used.
Local time is now:    Sat Sep 16 11:16:34 ULAST 2017.
Universal Time is now:    Sat Sep 16 02:16:34 UTC 2017.
Is the above information OK?
1) Yes
2) No
#? 1

You can make this change permanent for yourself by appending the line
    TZ='Asia/Ulaanbaatar'; export TZ
to the file '.profile' in your home directory; then log out and log in again.

Here is that TZ value again, this time on standard output so that you
can use the /usr/bin/tzselect command in shell scripts:
Asia/Ulaanbaatar
Now that you know your time zone, you can change it for a single user as described at the end of the output shown in Listing 9. If you want to change the system time zone there are different ways on different types of system as I explain below.
For Debian-based systems such as Ubuntu, the recommended method is to use dpkg-reconfigure tzdatadpkg-reconfiguretzdata, which uses an interactive dialog that first asks for the continent and then the city that you want to set the time zone for. Listing 10 shows the console output if I reset my Ubuntu system's time zone to Asia/Ulaanbaatar and also the values for /etc/timezone and /etc/localtime. Figure 2 shows part of the dialog.
Listing 10. Using dpkg-reconfiguretzdata
ian@attic‑u16:~$ sudo dpkg‑reconfigure tzdata

Current default time zone: 'Asia/Ulaanbaatar'
Local time is now:      Sat Sep 16 12:04:45 ULAST 2017.
Universal Time is now:  Sat Sep 16 03:04:45 UTC 2017.

ian@attic‑u16:~$ cat /etc/timezone
Asia/Ulaanbaatar
ian@attic‑u16:~$ ls ‑l /etc/localtime
lrwxrwxrwx 1 root root 36 Sep 16 12:04 /etc/localtime ‑> /usr/share/zoneinfo/Asia/Ulaanbaatar
Figure 2. Selecting a city using dpkg-reconfigure tzdata

For RPM-based systems such as CentOS 6 that do not use systemd initialization, you manually update /etc/localtime. Recall that this is usually a link to a file in the /usr/share/zoneinfo tree. The link can be either a hard link or a symbolic link. It can only be a hard link if /etc and /usr are mounted on the same file system. If you look at the number of links roa time zone file in a long directory listing, you will notice that many zones already have multiple links. These represent different names for the same time zone, for example /usr/share/zoneinfo/Asia/Calcutta and /usr/share/zoneinfo/Asia/Kolkata are two names for India Standard Time. Listing 11 explores my current timezone and shows how to change it to Kolkata time using a hard link.
Listing 11. Updating the link for /etc/localtime
[root@attic4‑cent ~]##Display current localtime link
[root@attic4‑cent ~]#ls ‑l /etc/localtime
‑rw‑r‑‑r‑‑. 4 root root 3519 Apr  3 10:15 /etc/localtime
[root@attic4‑cent ~]##What files are hard links to this?
[root@attic4‑cent ~]#find /usr/share/zoneinfo/ ‑samefile /etc/localtime
/usr/share/zoneinfo/America/New_York
/usr/share/zoneinfo/posixrules
/usr/share/zoneinfo/US/Eastern
[root@attic4‑cent ~]##Which files ahre Kolkata time?
[root@attic4‑cent ~]#find /usr/share/zoneinfo/ ‑samefile /usr/share/zoneinfo/Asia/Kolkata
/usr/share/zoneinfo/Asia/Calcutta
/usr/share/zoneinfo/Asia/Kolkata
[root@attic4‑cent ~]##Verify only two hard links
[root@attic4‑cent ~]#ls ‑l /usr/share/zoneinfo/Asia/Kolkata
‑rw‑r‑‑r‑‑. 2 root root 267 Apr  3 10:15 /usr/share/zoneinfo/Asia/Kolkata
[root@attic4‑cent ~]##Check current time
[root@attic4‑cent ~]#date
Tue Sep 26 15:16:21 EDT 2017
[root@attic4‑cent ~]##Backup localtime and set Kolkata time
[root@attic4‑cent ~]#mv /etc/localtime /etc/localtime.bak
[root@attic4‑cent ~]#ln /usr/share/zoneinfo/Asia/Kolkata /etc/localtime
[root@attic4‑cent ~]##Check number of links and current time
[root@attic4‑cent ~]#ls ‑l /etc/localtime
‑rw‑r‑‑r‑‑. 3 root root 267 Apr  3 19:45 /etc/localtime
[root@attic4‑cent ~]#date
Wed Sep 27 00:49:53 IST 2017
For RPM-based systems such as Fedora 26 that use systemd initialization, use the datetimectl command that is discussed in the section, .
Configure the Network Time Protocol
The Network Time Protocol (NTP) is a protocol to synchronize computer clocks over a network. Synchronization is usually with UTC. NTP Version 4 is an Internet standard formalized in RFC 5905.
Time synchronization is accomplished by sending messages to time servers. A limited number of primary servers are synchronized with national standard time sources. Secondary servers get their time from primary servers or from other secondary servers. Client systems get their time from a secondary server. Secondary servers and clients on fast LANs can be accurate to within a few hundred microseconds. Simple Network Time Protocol (SNTP) is intended for primary servers equipped with a single reference clock, and for clients with a single upstream server and no dependent clients. The full NTP implementation is intended for secondary servers with multiple upstream servers and multiple downstream servers or clients. NTP and SNTP servers and clients are interoperable and can be intermixed.
The general operation is for a client to send a packet to a server, noting the time it is sent. The server marks the time the packet is received and also the time that a return packet is sent. The client notes the time the response is received. The client can then deduct the delay in the server from the total round trip. Half the round trip is then assumed as the difference between the client time and the server time. The accuracy of the time is therefore dependent on the network latency and the extent to which the latency is the same in both directions. The shorter the path to a time server, the more accurate the time is likely to be.
There is a huge number of computers on the Internet, so time servers are organized into strata. A relatively small number of stratum 1 servers maintain very accurate time from a source such as an atomic clock. These are usually primary servers. A larger number of stratum 2 servers (secondary servers) get their time from stratum 1 servers and make it available to an even larger number of stratum 3 servers, and so on. The pool.ntp.org project is a virtual cluster of time servers providing the default time server for most of the major Linux distributions and many networked appliances. Round robin DNS servers accomplish NTP load balancing by distributing NTP server requests among a number of available servers.
The configuration of NTP and examples in the remainder of this section use CentOS 6 with upstart system initialization. Systems, such as my Fedora 26 or Ubuntu 16.04 LTS workstations use systemd initialization and manage time synchronization somewhat differently as I will show you in the next section.
If you use a graphical interface, you might be able to set your NTP time servers using a dialog similar to that in Figure 3.
Figure 3. Setting NTP servers graphically
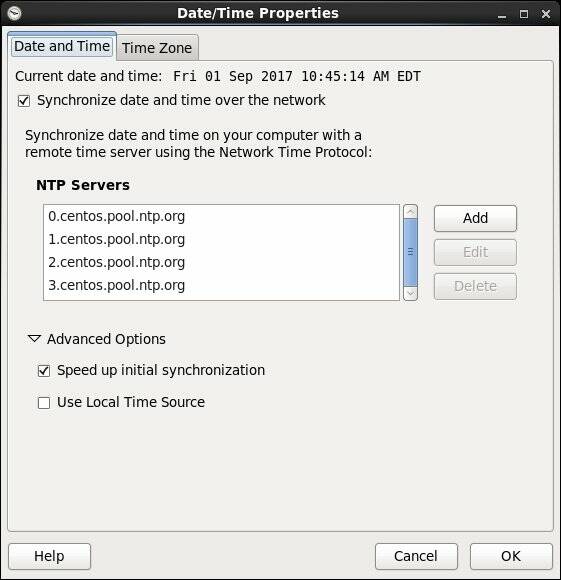
NTP configuration information is kept in /etc/ntp.conf, so you can also edit that file and then restart the ntpd daemon after you save it. Listing 12 shows an example /etc/ntp.conf file using the time servers from Figure 3.
Listing 12. Example /etc/ntp.conf
#For more information about this file, see the man pages
#ntp.conf(5), ntp_acc(5), ntp_auth(5), ntp_clock(5), ntp_misc(5), ntp_mon(5).

driftfile /var/lib/ntp/drift

#Permit time synchronization with our time source, but do not
#permit the source to query or modify the service on this system.
restrict default kod nomodify notrap nopeer noquery
restrict ‑6 default kod nomodify notrap nopeer noquery

#Permit all access over the loopback interface.  This could
#be tightened as well, but to do so would effect some of
#the administrative functions.
restrict 127.0.0.1
restrict ‑6 ::1

#Hosts on local network are less restricted.
#restrict 192.168.1.0 mask 255.255.255.0 nomodify notrap

#Use public servers from the pool.ntp.org project.
#Please consider joining the pool (https://www.pool.ntp.org/join.html).
server 0.centos.pool.ntp.org iburst
server 1.centos.pool.ntp.org iburst
server 2.centos.pool.ntp.org iburst
server 3.centos.pool.ntp.org iburst
Your distribution should have set up host names such a 0.vendor.pool.ntp.org, 1.vendor.pool.ntp.org, 2.vendor.pool.ntp.org, and 3.vendor.pool.ntp.org to use time servers from pool.ntp.org. These may be anywhere in the world. NTP is designed to find a suitable server for you.
Each host name in the pool usually resolves to a few different servers using IPV4 or IPV6 protocols. The servers change frequently to help balance load. Listing 13 shows the DNS responses for 2.centos.pool.ntp.org at the particular time I ran the command and then again a few hours later.
Listing 13. Round robin NTP server pool
[ian@attic4‑cent ~]$ #First query
[ian@attic4‑cent ~]$  dig 2.centos.pool.ntp.org  ANY +noall +answer

; <<>> DiG 9.8.2rc1‑RedHat‑9.8.2‑0.62.rc1.el6_9.4 <<>> 2.centos.pool.ntp.org ANY +noall +answer
;; global options: +cmd
2.centos.pool.ntp.org.    149    IN    AAAA    2001:67c:24c:1::21
2.centos.pool.ntp.org.    149    IN    AAAA    2620:10a:800f::13
2.centos.pool.ntp.org.    149    IN    AAAA    2001:628:21f0:80::80:160
2.centos.pool.ntp.org.    149    IN    AAAA    2001:bc8:2bf2:100::
2.centos.pool.ntp.org.    149    IN    A    88.99.87.132
2.centos.pool.ntp.org.    149    IN    A    195.154.253.69
2.centos.pool.ntp.org.    149    IN    A    5.20.0.20
2.centos.pool.ntp.org.    149    IN    A    193.225.126.78
[ian@attic4‑cent ~]$  dig 2.centos.pool.ntp.org  ANY +noall +answer

[ian@attic4‑cent ~]$ #A few hours later
; <<>> DiG 9.8.2rc1‑RedHat‑9.8.2‑0.62.rc1.el6_9.4 <<>> 2.centos.pool.ntp.org ANY +noall +answer
;; global options: +cmd
2.centos.pool.ntp.org.    149    IN    A    193.4.58.44
2.centos.pool.ntp.org.    149    IN    A    23.227.184.157
2.centos.pool.ntp.org.    149    IN    A    86.59.80.170
2.centos.pool.ntp.org.    149    IN    A    88.99.174.22
2.centos.pool.ntp.org.    149    IN    AAAA    2600:3c03::f03c:91ff:fe08:894c
2.centos.pool.ntp.org.    149    IN    AAAA    2600:3c03::f03c:91ff:fe6e:1470
2.centos.pool.ntp.org.    149    IN    AAAA    2a02:2290::16
2.centos.pool.ntp.org.    149    IN    AAAA    2a01:4f8:171:1e68::2
NTP commands
The ntpdate command can set your system time from an NTP time server as shown in Listing 14. If the ntpd service is already running you see an error. In this case, stop the ntpd service first as I illustrate here.
Listing 14. Setting system time from an NTP server using ntpdate
[root@attic4‑cent ~]#ntpdate 2.centos.pool.ntp.org
18 Sep 21:50:37 ntpdate[11724]: the NTP socket is in use, exiting
[root@attic4‑cent ~]#service ntpd stop
Shutting down ntpd:                                          OK  [root@attic4‑cent ~]#ntpdate 2.centos.pool.ntp.org
18 Sep 21:50:56 ntpdate[11757]: step time server 192.154.108.74 offset 0.741883 sec
[root@attic4‑cent ~]##restart ntpd
[root@attic4‑cent ~]#service ntpd start
Starting ntpd:                                               OK
The ntpdate command is now deprecated. Indeed, the man page typically says: "After a suitable period of mourning, the ntpdate program is to be retired from this distribution". Use the ntpd command with the -q option, to perform the equivalent function. This causes the ntpd daemon to start and then to exit after setting the clock. Be aware that if the ntpd daemon is already running, ntpd -qntpd-q will quietly exit, leaving a failure message in /var/log/messages as shown in Listing 15.
Listing 15. Setting system time using ntpd-q
[root@attic4‑cent ~]#service ntpd stop
Shutting down ntpd:                                          OK  [root@attic4‑cent ~]#ntpd ‑q
ntpd: time set +0.650151s
[root@attic4‑cent ~]#service ntpd start
Starting ntpd:                                               OK
The ntpd command uses the time server information from /etc/ntp.conf, or a configuration file provided on the command line. See the man page for more information and details about ntpd.
Another related command is ntpq, which allows you to query the NTP daemon, mainly for debugging purposes. The -p option is a handy way of printing out the peers currently known to the NTP server and some basic information about them. Listing 16 shows an example with server names in numeric (dotted decimal) format. See the man page for more details.
Listing 16. Listing peer time servers using ntpq
[root@attic4‑cent ~]#ntpq ‑pn
     remote           refid      st t when poll reach   delay   offset  jitter
==============================================================================
+129.250.35.251  249.224.99.213   2 u    2   64  377   20.071  275.063 393.086
*74.117.214.3    .PPS.            1 u   64   64  177   84.016  278.482 316.834
‑45.77.99.195    19.50.153.240    3 u    1   64  377   20.401  542.667 331.001
+152.2.133.53    .PPS.            1 u   62   64  177   20.886  150.999 386.669
The 'refid' column shows the source that the peer is using and the 'st' column shows the stratum of that source. 'Reach' is an octal number indicating how many queries were successful with 377 being the best value. For more information on NTP debugging, install the ntp-doc package. On my CentOS 6 system, this installs a set of HTML files rooted at /usr/share/doc/ntp-4.2.6p5/html.
Time and time zone management with systemd
As with many of the internals of Linux, some of the information I have covered has changes or alternatives if your system uses the systemd system and service manager. In this final section I cover some of the things you should know about the changes, although they are not part of the April 2015 LPI objectives.
The examples in this section are from Ubuntu 16.04 LTS.
Systemd includes systemd-timesyncd.service by default. You can check whether the services is running using the systemctl command as shown in Listing 17.
Listing 17. Using systemctl status systemd-timesyncd.service
iian@attic‑u16:~$ systemctl status systemd‑timesyncd.service
● systemd‑timesyncd.service ‑ Network Time Synchronization
   Loaded: loaded (/lib/systemd/system/systemd‑timesyncd.service; enabled; vendor preset: enabled
  Drop‑In: /lib/systemd/system/systemd‑timesyncd.service.d
           └─disable‑with‑time‑daemon.conf
   Active: active (running) since Mon 2017‑09‑18 22:24:50 EDT; 16h ago
     Docs: man:systemd‑timesyncd.service(8)
 Main PID: 751 (systemd‑timesyn)
   Status: "Synchronized to time server 91.189.89.198:123 (ntp.ubuntu.com)."
   CGroup: /system.slice/systemd‑timesyncd.service
           └─751 /lib/systemd/systemd‑timesyncd

Sep 18 22:24:50 attic‑u16 systemd[1]: Starting Network Time Synchronization...
Sep 18 22:24:50 attic‑u16 systemd[1]: Started Network Time Synchronization.
Sep 18 22:25:21 attic‑u16 systemd‑timesyncd[751]: Synchronized to time server 91.189.89.198:123 (
Systemd-timesyncd.service implements a Simple NTP (SNTP) client. The systemd porting guide advises systems to request a vendor NTP pool from pool.ntp.org and the default NTP servers are compiled in. See the DISTRO_PORTING file (typically /usr/share/doc/systemd/DISTRO_PORTING). The small configuration file as shown in Listing 18 allows you to override the default time servers and also to provide backup servers.
Listing 18. Using timesyncd.conf
ian@attic‑u16:~$ cat /etc/systemd/timesyncd.conf
# This file is part of systemd.
#
# systemd is free software; you can redistribute it and/or modify it
# under the terms of the GNU Lesser General Public License as published by
# the Free Software Foundation; either version 2.1 of the License, or
# (at your option) any later version.
#
#Entries in this file show the compile time defaults.
#You can change settings by editing this file.
#Defaults can be restored by simply deleting this file.
#
#See timesyncd.conf(5) for details.

Time#NTP=
#FallbackNTP=ntp.ubuntu.com
Use the timedatectl command to interact with systemd-timesyncd.service. You can get status information using the status command of timedatectl as shown in Listing 19.
Listing 19. Status information using timedatectl
ian@attic‑u16:~$ timedatectl status
      Local time: Tue 2017‑09‑19 15:18:05 EDT
  Universal time: Tue 2017‑09‑19 19:18:05 UTC
        RTC time: Tue 2017‑09‑19 19:18:05
       Time zone: America/New_York (EDT, ‑0400)
 Network time on: yes
NTP synchronized: yes
 RTC in local TZ: no
Other timedatectl commands allow you to set the time or time zone and also list available time zones. You can also use timedatectl to enable or disable NTP time synchronization.
Systemd-timesyncd.service does not provide as much accuracy as a full NTP daemon, although it is sufficiently accurate for most systems. You can use specific servers in the timesyncd.conf file to help provide better accuracy or you install an NTP daemon such as openntpd. If you do, you will need to disable systemd-timesyncd.service. Also, do not use timedatectl as you inadvertently stop your ntpd daemon.
This concludes your introduction to time settings on Linux. We have come a long way from the days of depending on the bell tower in the town square for time information!