Tutorial
Analyze data faster using Spark and Cloud Object Storage
Use Apache Spark to gain insights into your dataArchive date: 2023-02-09
This content is no longer being updated or maintained. The content is provided “as is.” Given the rapid evolution of technology, some content, steps, or illustrations may have changed.Data is being produced at dizzying rates across industries, including for genomics by sequencers, for media and entertainment with very high resolution formats, and for Internet of Things (IoT) by multitudes of sensors. IBM Cloud Object Storage technology offers high-capacity, cost-effective storage for these applications. But it is not enough to store the data. You also need to derive value from it, which you can do using Apache Spark, the leading big data analytics processing engine. Spark runs up to 100 times faster than Hadoop MapReduce, and it combines SQL, streaming, and complex analytics.
Learning objectives
This tutorial describes how to enable Spark to use Stocator to query data stored in IBM Cloud Object Storage. You learn how to use Stocator, which is an open-source software that acts as a driver.
- Install and configure Spark and Stocator.
- Configure Stocator to use Cloud Object Storage.
Prerequisites
Before beginning this tutorial, you need:
- An IBM Cloud account. If you don't already have an account, you can sign up for one here.
- Maven installed on your computer.
Estimated time
One hour.
Steps
Install and configure Spark
- Download Spark from the Apache site. Refer to the Building Spark page for instructions on how to build Spark. To create the steps in this how-to guide, we used Spark 3.5.3 and built from source in the home directory
~/spark-3.5.3/.
Create Cloud Object Storage
Use the IBM Cloud dashboard to locate an existing Cloud Object Storage. If you don't have one, click here to provision one.

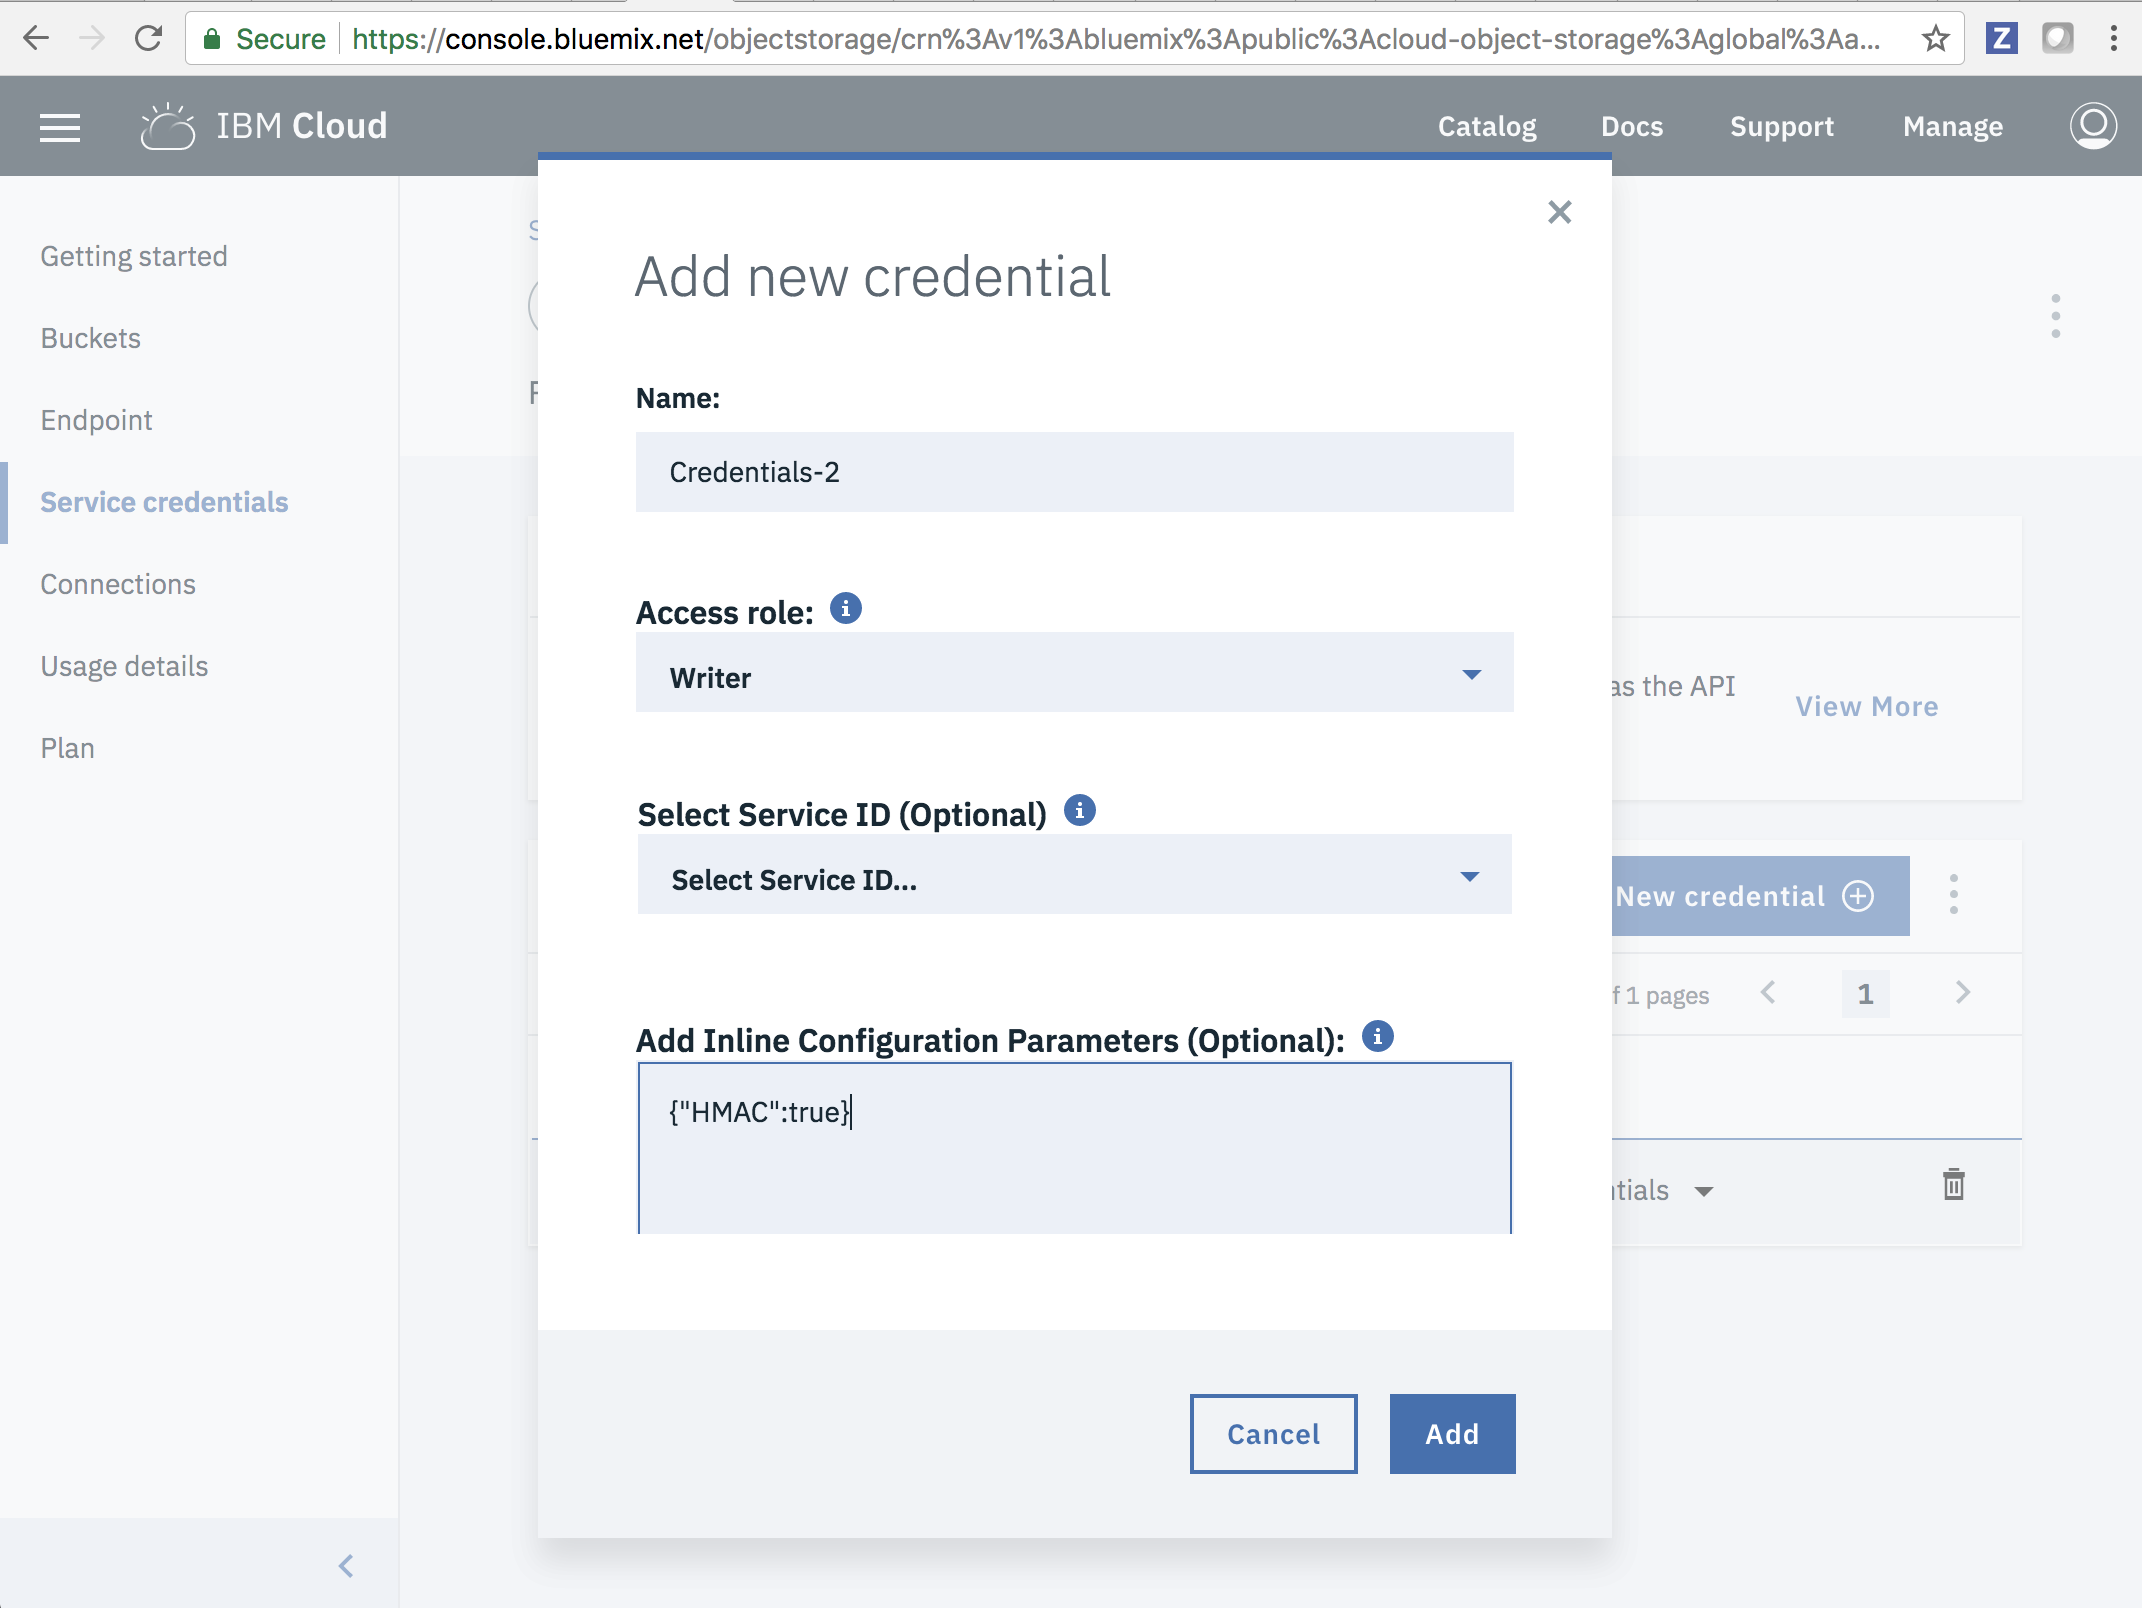
After provisioning, go to the Service Credentials section and create New Credentials with HMAC set to true. Specify the following in the Add Inline Configuration Parameters (Optional) field:
{"HMAC":true}Now you have an access key and secret key pair which Stocator uses.
View the credentials and take note. You should get a JSON object like the following example:
{
  "apikey": "APIKEY123",
  "cos_hmac_keys": {
    "access_key_id": "YOUR_ACCESS_KEY",
    "secret_access_key": "YOUR_SECRET_KEY"
  },
  "endpoints": "https://cos-service.bluemix.net/endpoints",
  "iam_apikey_description": "Auto generated apikey during resource-key operation for Instance - ",
  "iam_apikey_name": "auto-generated-apikey-",
  "iam_role_crn": "crn:v1:bluemix:public:iam::::serviceRole:Writer",
  "iam_serviceid_crn": "crn:v1:bluemix:public:iam-identity::a/123::serviceid:ServiceId-123",
  "resource_instance_id": "crn:v1:bluemix:public:cloud-object-storage:global:a/123:123::"
}
Install and Configure Stocator
Build Stocator from source. Use the following commands to get the source code from GitHub:
git clone https://github.com/CODAIT/stocator
cd stocator
mvn clean package -P all-in-one
Create a
core-site.xmlconfiguration file in~/spark-3.5.3/conf/core-site.xml(or wherever you have Spark installed) to point to your Cloud Object Storage:Get the access key and secret key from your credentials. Details of the configuration are here.
<configuration>

<property>
  <name>fs.stocator.scheme.list</name>
  <value>cos</value>
</property>
<property>
  <name>fs.cos.impl</name>
  <value>com.ibm.stocator.fs.ObjectStoreFileSystem</value>
</property>
<property>
  <name>fs.stocator.cos.impl</name>
  <value>com.ibm.stocator.fs.cos.COSAPIClient</value>
</property>
<property>
  <name>fs.stocator.cos.scheme</name>
  <value>cos</value>
</property>

<property>
  <name>fs.cos.myCos.access.key</name>
  <value>YOUR_ACCESS_KEY</value>
</property>
<property>
  <name>fs.cos.myCos.secret.key</name>
  <value>YOUR_SECRET_KEY</value>
</property>

<!-- Choose the relevant endpoint from https://cos-service.bluemix.net/endpoints -->
<property>
  <name>fs.cos.myCos.endpoint</name>
  <value>http://s3-api.us-geo.objectstorage.softlayer.net</value>
</property>

<property>
  <name>fs.cos.myCos.v2.signer.type</name>
  <value>false</value>
</property>

<!-- This property auto creates bucket if it's not existing -->
<property>
  <name>fs.cos.myCos.create.bucket</name>
  <value>true</value>
</property>

</configuration>
Launch Spark with Stocator enabled
For advanced users, see the Using Stocator with Apache Spark compilation instructions to recompile your Spark installation again with Stocator.
This guide will use Spark with the standalone jar you built earlier which should be in the target directory of Stocator. You need to do this everytime you want to use Spark with Stocator. The jar file you built earlier will be like stocator-1.0.17-SNAPSHOT-jar-with-dependencies.jar.
To start Spark with Stocator enabled, use spark-shell with the option
--jarsfollowed by the file:$ ~/spark-3.5.3/bin/spark-shell --jars target/stocator-1.0.17-SNAPSHOT-jar-with-dependencies.jar Welcome to ____ __ / __/__ ___ _____/ /__ _\ \/ _ \/ _ `/ __/ '_/ /___/ .__/\_,_/_/ /_/\_\ version 3.5.3 /_/ Using Scala version 2.11.8 (Java HotSpot(TM) 64-Bit Server VM, Java 1.8.0_121) Type in expressions to have them evaluated. Type :help for more information. scala>
Test Connection with IBM Cloud Object Storage
While you are still in the Spark shell with the Stocator enabled, try creating an object by following the commands below:
scala> val data = Array(1, 2, 3, 4, 5, 6, 7, 8)
scala> val distData = sc.parallelize(data)
The uri for your IBM Cloud Object Storage would be in the format of
cos://UNIQUE_BUCKET_NAME.myCos/.Replace
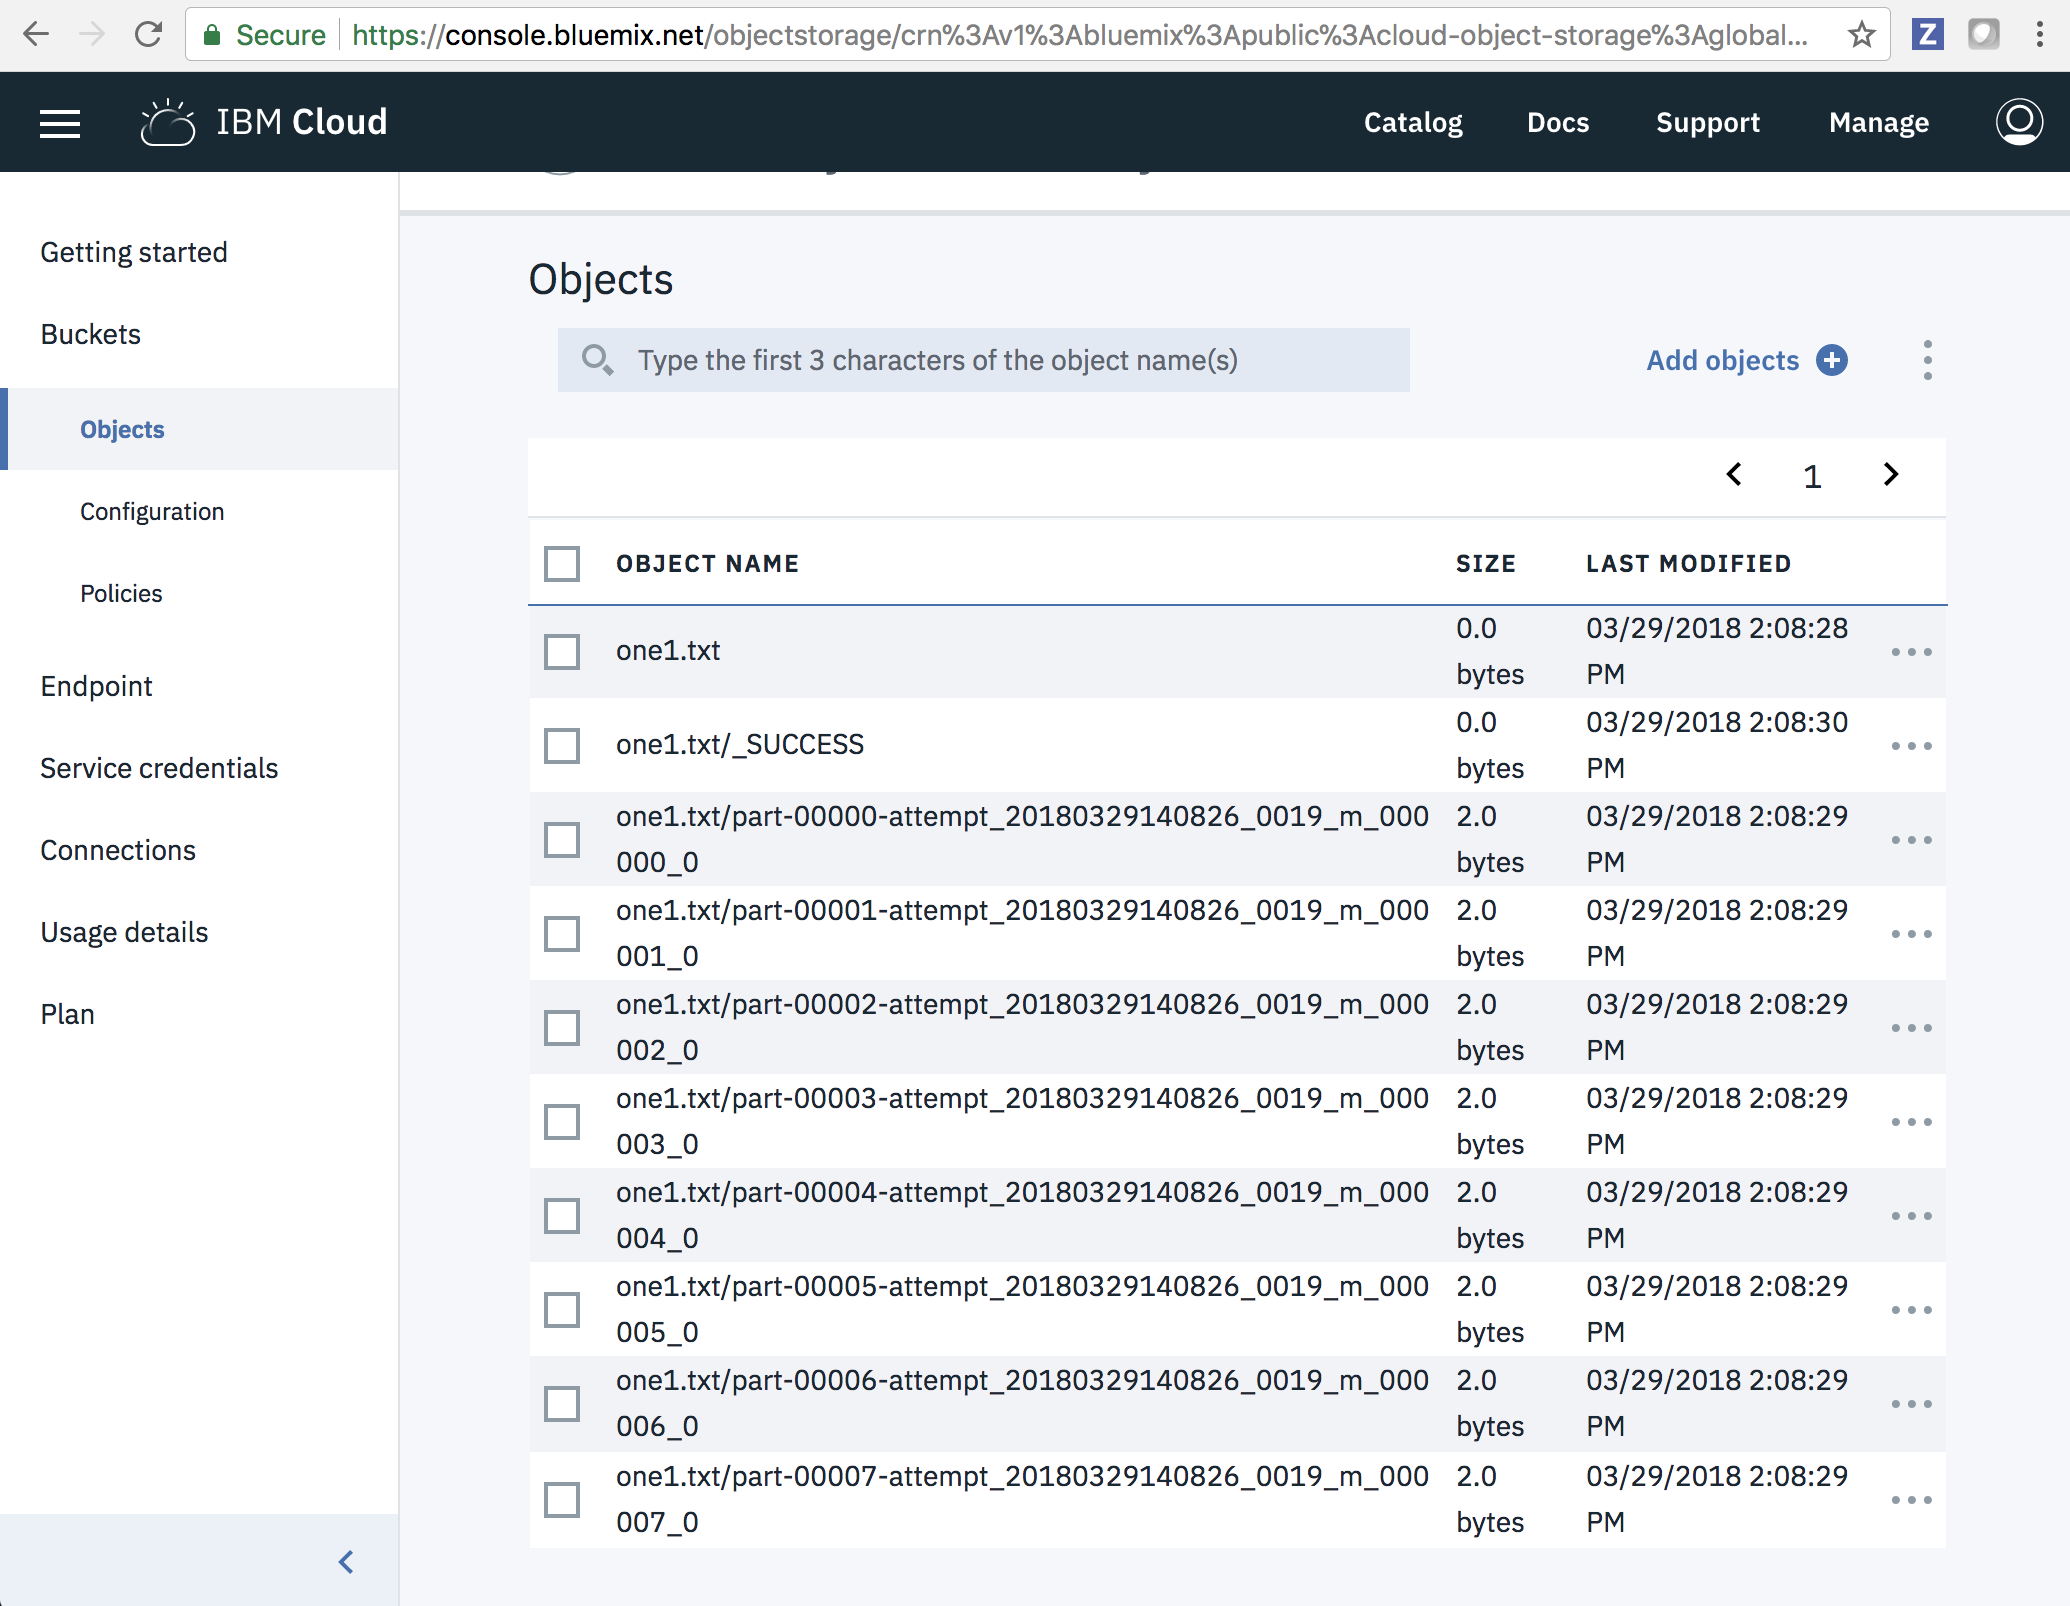
UNIQUE_BUCKET_NAMEwith your preferred bucket name which should be globally unique. Then save the data you created as a text file. Stocator will create one for you (if it doesn't exist) or if you prefer, you can create one in the IBM Cloud Object Storage dashboard:scala> distData.saveAsTextFile("cos://UNIQUE_BUCKET_NAME.myCos/one1.txt")You can check in your IBM Cloud Object Storage dashboard if the text file is created or do the following commands:
scala> val df = spark.sqlContext.read.textFile("cos://UNIQUE_BUCKET_NAME.myCos/one1.txt")
scala> df.show()
+-----+
|value|
+-----+
|    1|
|    2|
|    3|
|    4|
|    5|
|    6|
|    7|
|    8|
+-----+
Your Cloud Object Storage should now have these objects in the bucket you specified:
Exit out of the Spark shell context (Ctrl + C) now.
You can also test the connection using this simple Python script that distributes a single list of six elements across the Spark cluster, writes the data out into a parquet object, and finally reads it back in. The name of the parquet object is passed into the script as a parameter.
Save the block of code below as
sniff.test.pyand remember to changeUNIQUE_BUCKET_NAME:from pyspark import SparkContext from pyspark.sql import SQLContext from pyspark.sql.types import * import sys sc = SparkContext() sqlContext = SQLContext(sc) if (len(sys.argv) != 2): print "ERROR: This program takes object name as input" sys.exit(0) objectName = sys.argv[1] myList = [[1,'a'],[2,'b'],[3,'c'],[4,'d'],[5,'e'],[6,'f']] parallelList = sc.parallelize(myList).collect() schema = StructType([StructField('column1', IntegerType(), False), StructField('column2', StringType(), False)]) df = sqlContext.createDataFrame(parallelList, schema) df.printSchema() df.show() dfTarget = df.coalesce(1) dfTarget.write.parquet("cos://UNIQUE_BUCKET_NAME.myCos/" + objectName) dfRead = sqlContext.read.parquet("cos://UNIQUE_BUCKET_NAME.myCos/" + objectName) dfRead.show() print "Done!"Then do
spark-submit:$ ~/spark-3.5.3/bin/spark-submit --jars stocator-1.0.8-SNAPSHOT-jar-with-dependencies.jar sniff.test.py testing.parquet root |-- column1: integer (nullable = false) |-- column2: string (nullable = false) +-------+-------+ |column1|column2| +-------+-------+ | 1| a| | 2| b| | 3| c| | 4| d| | 5| e| | 6| f| +-------+-------+ +-------+-------+ |column1|column2| +-------+-------+ | 1| a| | 2| b| | 3| c| | 4| d| | 5| e| | 6| f| +-------+-------+ Done!
Summary
By configuring Spark with Stocator to connect to your IBM Cloud Object Storage, you can quickly access your stored data using object store semantics rather than the older storage connectors that were designed to work with file systems.