Tutorial
Setting up and using the IBM MQ Console on z/OS
Learn how to view and edit MQ objects using the IBM MQ Console on z/OSIn this tutorial, you will learn how to set up the IBM MQ Console on z/OS using basic authentication. You will also learn how to access the MQ Console and view and edit MQ objects.
The security configuration defined in this tutorial is not sufficient for use in a production environment. For more information regarding MQ Console security, see the IBM MQ documentation.
Important: The following restriction applies when using the IBM MQ Console to manage queue managers on z/OS for the IBM MQ 9.4 release:
- The MQ Console must be adjusted for each new version of MQ on z/OS. To bypass this requirement, consider configuring the standalone web console. Read more in the standalone server documentation.
Prerequisites
You will need access to a z/OS system. If you are not able to access a test z/OS environment, please reach out to me at dorothy.quincy@ibm.com to provision a sample lab environment in the Washington Systems Center.
You should be familiar with IBM MQ for z/OS, Interactive System Productivity Facility/Time Sharing Option (ISPF/TSO), System Display and Search Facility (SDSF), and UNIX System Services (USS).
The following software needs to be installed or configured on z/OS:
Java. Follow the instructions in the WebSphere Application Server Liberty Java SDK installation guide to install IBM SDK, Java Technology Edition on z/OS.
IBM MQ. We are using IBM MQ 9.4 in this tutorial. Follow the instructions in the IBM MQ documentation.
UNIX System Services (USS) must be active on z/OS. Plan with a system administrator if USS configuration is needed.
A ZFS file system must be mounted (in this case,
M940CD.SCSQZFSis mounted on/usr/lpp/mqm/V9R4MX).
Steps
To configure the console, these are the main steps:
Run the CRTMQWEB executable. This script creates the WebSphere Liberty user directory that contains the MQM server configuration and log files.
Add the MQWEBS and MQANGEL JCL to the started task library.
Customize the XML files for the web server created by running the CRTMQWEB executable.
Access the MQ Console.
View and edit MQ objects by using the MQ Console.
Step 1. Run the CRTMQWEB executable
For this tutorial, you create a data set to contain all the relevant MQ Console JCL. It is called ZQS1.MQ.WEB.JCL. You use the MQWEBS, MQANGEL, and CRTMQWEB JCL samples that are contained in ZQS1.MQ.WEB.JCL.
The JCL executes the
CRTMQWEBexecutable in the MQ installation. From the ISPF main menu, go to option3.4to search for theZQS1.MQ.WEB.JCLJCL. In the Dsname Level field, specifyZQS1.MQ.WEB.JCL, and press Enter.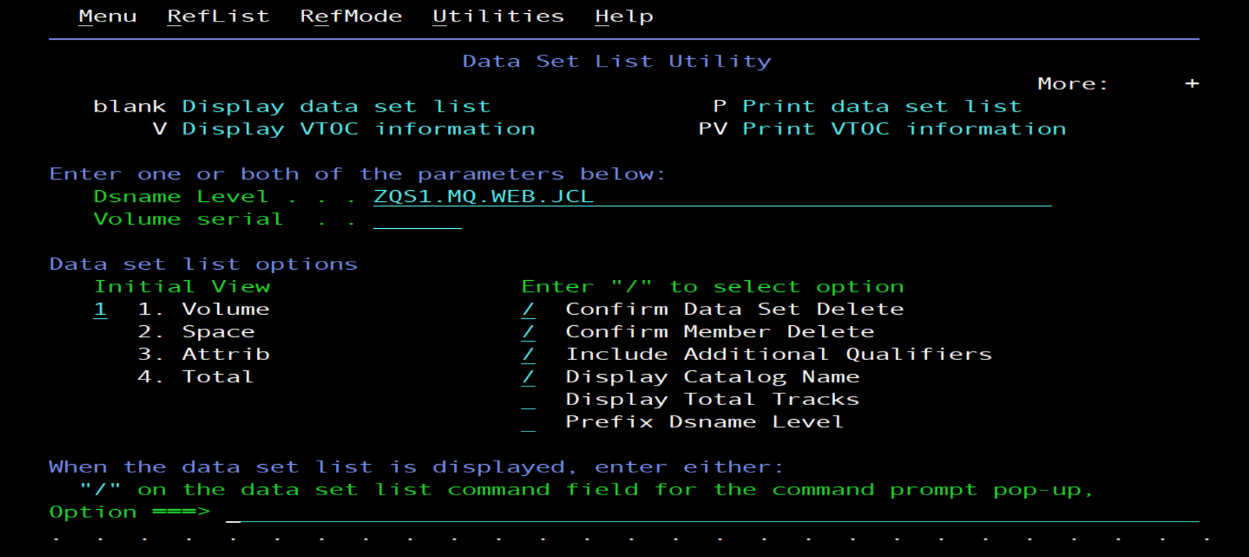
Specify an E to the left of the
ZQS1.MQ.WEB.JCLdata set name to browse its contents in edit mode.
Specify an E next to
CRTMQWEB, and then press Enter. This will put you in edit mode for the member.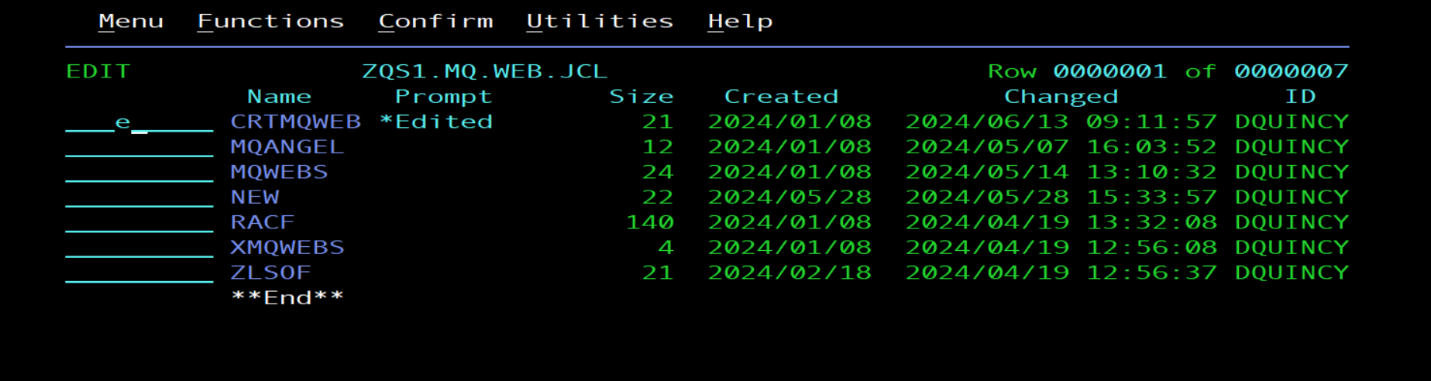
In the
CRTMQWEBJCL, update theJAVAHOME,MQPATH, andWLPUSERenvironment variables for your own z/OS environment.JAVAHOMEis where Java is installed in your z/OS environment.MQPATHis where the MQ binaries are accessible from.WLPUSERis where the server directory will be created.//CRTMQWEB JOB 'MQ WEB',CLASS=A,REGION=0M,MSGCLASS=H, // NOTIFY=&SYSUID //******************************************** //\* SET SYMBOLS //******************************************** //EXPORT EXPORT SYMLIST=(\*) // SET JAVAHOME='/usr/lpp/java/J8.0_64' // SET MQPATH='/usr/lpp/mqm/V9R4MX/web' // SET WLPUSER='/var/mqm' //******************************************** //\* Step crtmqweb - Use the crtmqweb command //******************************************** //CRTMQWEB EXEC PGM=IKJEFT01,REGION=0M //SYSTSPRT DD SYSOUT=\* //SYSERR DD SYSOUT=\* //STDOUT DD SYSOUT=\* //SYSTSIN DD \*,SYMBOLS=EXECSYS BPXBATCH SH + export JAVA\_HOME=&JAVAHOME; + export WLP\_USER\_DIR=&WLPUSER; + &MQPATH/bin/crtmqweb &WLPUSER -p MQ
Submit the JCL by typing “Submit” in the command line, and then press Enter.
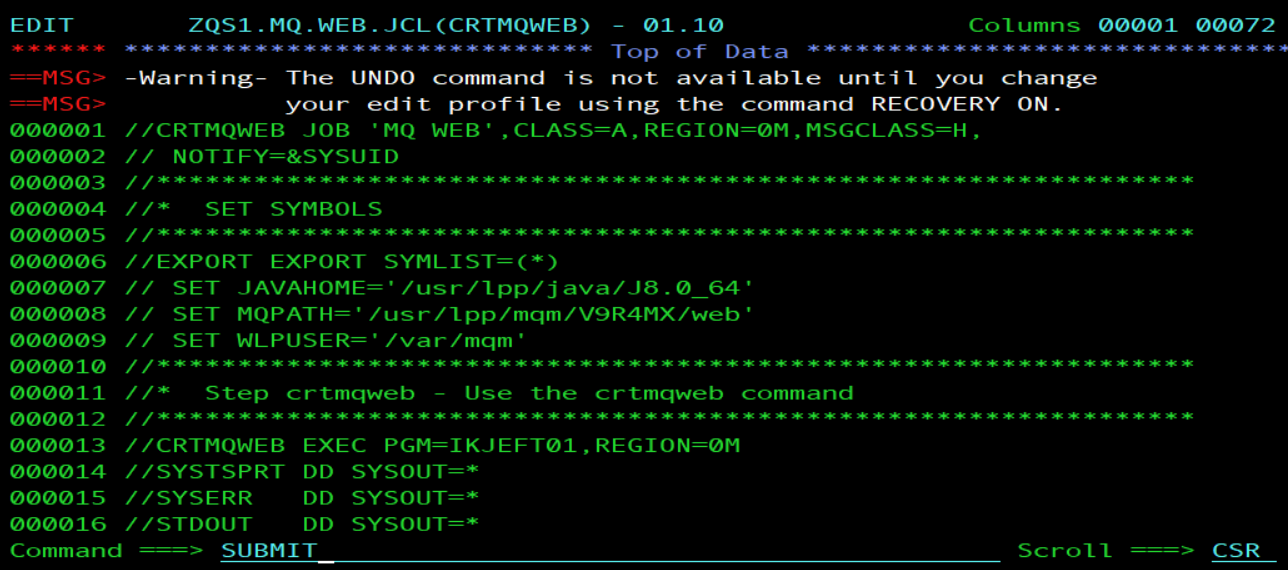
Your web server configuration should now be created in the directory /var/mqm/servers/mqweb.
Step 2. Add the MQWEBS and MQANGEL JCL to the started task library
Here, you add the necessary JCL to the started task library. You need an angel process run alongside the web server started task. What is that? The Liberty angel process is a started task that allows Liberty servers to use z/OS authorized services. It is long-lived and you can share it among multiple Liberty servers.
Next, check out the angel process. Use the F3 key to back out of
CRTMQWEB. Then, place an E to the left of theMQANGELmember, and then press Enter. Using the E edit function, make the following changes if necessary:Ensure
SET ROOTis pointed at the correct version of your IBM MQ installation. See the following example JCL forMQANGEL:
Now, check out the
MQWEBSJCL. Using the E edit function, make the following changes:- Ensure
USERDIRis pointing at the correct location for where the server has been built. - Ensure the DSN dependencies are using the correct version of IBM MQ libraries to match the version of IBM MQ you are using.
- Ensure your
PATHis pointing at the location where the ZFS file system has been mounted. - Ensure your
LIBPATHis pointing at the location of the IBM MQ java library. Ensure your
JAVA_HOMEreflects the Java installation on your z/OS environment.See the following example JCL for
MQWEBS:
- Ensure
You will not submit
MQANGELorMQWEBS; instead, you will add them to the SYS1.PROCLIB. SYS1.PROCLIB is a system library in which the procedures that are included with the product are placed when you run the starter job. Back out ofMQANGEL, and then navigate to option 3.3 from the main menu. Specify C and then specify the member you would like to copy next to Name.Important: You must use single quotes around the data set names.
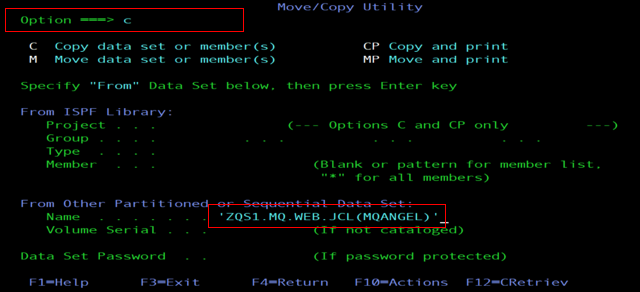
Specify the destination for the copy to be
SYS1.PROCLIB(MQANGEL).
Repeat this copy process for
ZQS1.MQ.WEB.JCL(MQWEBS).
Now both MQANGEL and MQWEBS will be included in the SYS1.PROCLIB as started tasks. You can navigate to SYS1.PROCLIB using 3.4 if you would like to confirm they are there.
Step 3. Customize the XML files for the server created by running the CRTMQWEB executable
To configure the MQ Console, you will customize the WebSphere Liberty server that is spun up by running CRTMQWEB. The XML files used to customize the MQ Console are located in the /var/mqm/servers/mqweb directory.
Navigate to the
/var/mqm/servers/mqwebdirectory from option 3.4 in ISPF. In the mqweb directory, the script creates several XML files. You need to modify these files.Put an L to the left of the mqweb option to browse its contents. You should see several files. Notice the read-write permissions required here.
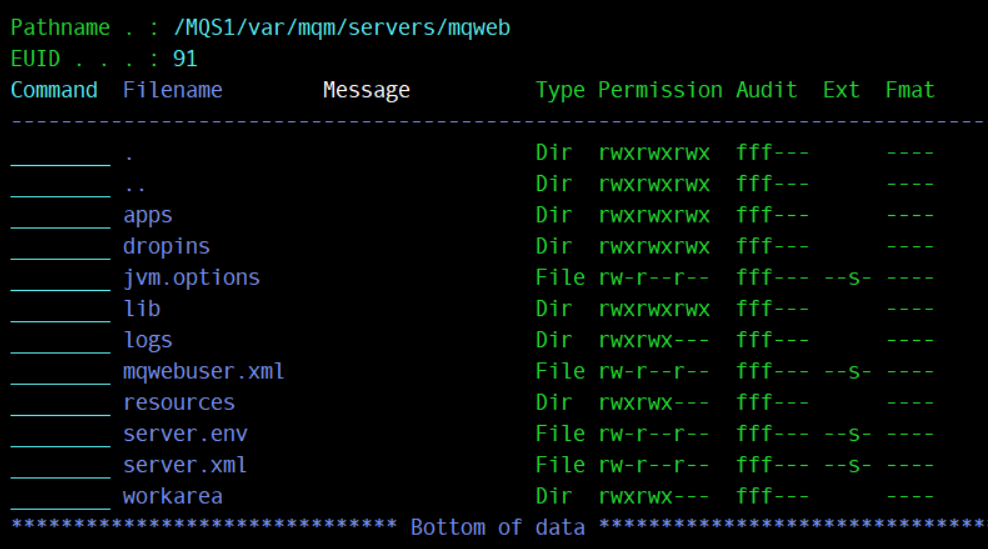
Type EA next to
mqwebuser.xmlto open the XML file in edit mode. An EDIT Entry Panel, like the one shown below, will be displayed. Press Enter twice to continue until you see the code in edit mode.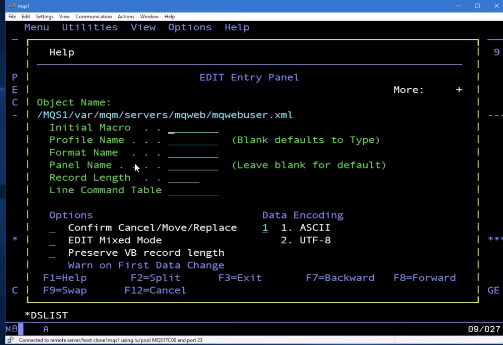
Once in edit mode, make sure the mqwebuser.xml contents reflect the code below. An easy way to do this is delete the initial contents and copy/paste the below lines into the file. Save the XML file, and back out using F3.
 <?xml version="1.0" encoding="UTF-8"?>
 <server>
 <featureManager>
 <feature>appSecurity-2.0</feature>
 </featureManager>
 <webAppSecurity allowFailOverToBasicAuth="true"/>
 <variable name="httpsPort" value="9443"/>
 <variable name="httpHost" value="-1"/>
 <variable name="mqRestMessagingEnabled" value="true"/>
 <httpEndpoint host="\*" httpPort="-1" httpsPort="9443" id="defaultHttpEndpoint"/>
 </server>
Edit the
server.xmlfile. Add this line:<include location="basic_registry.xml"/>. Save the XML file, and back out using F3.<server> <include location="${wlp.install.dir}/mq/etc/mqweb.xml"/> <include location="mqwebuser.xml"/> <include location="basic_registry.xml"/> </server>To create this
basic_registry.xmlfile, pull the sample XML file from the MQ installation.Type tso omvs in your command line and press Enter. An OMVS panel should appear.
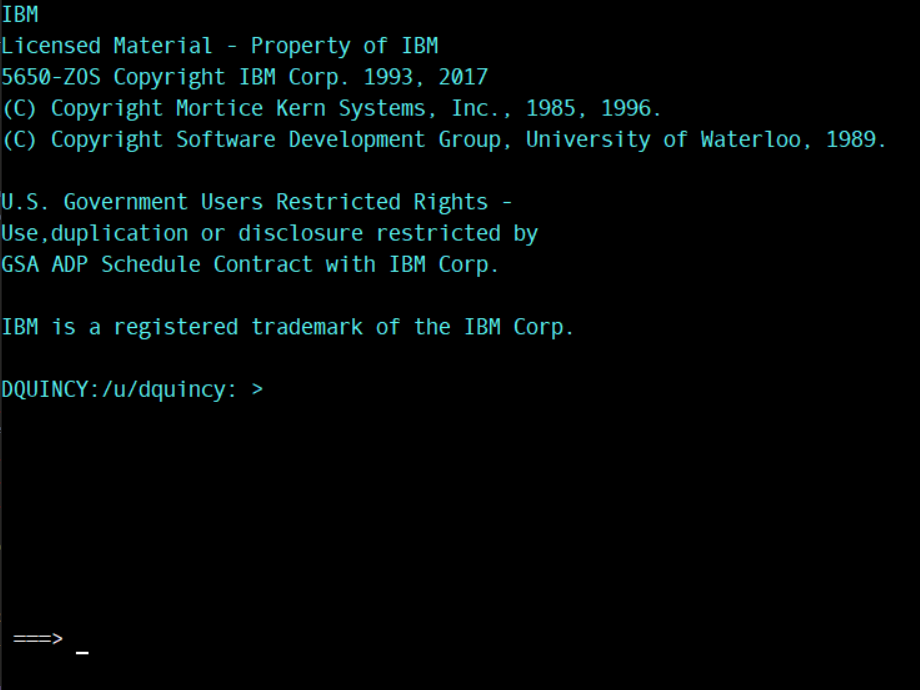
Once in OMVS, type
ls /usr/lpp/mqm/V9R4MX/web/mq/samp/configuration. When you press Enter, you should see a list of the XML files in the directory, includingbasic_registry.xml.
Change directories to
/var/mqm/servers/mqweb, and then execute this command:cp /usr/lpp/mqm/V9R4MX/web/mq/samp/configuration/basic_registry.xml .Important: Do not miss the last
.mark. It specifies you want the copy to be made to the directory you are currently in.
Enter exit in the command line to quit out of OMVS. Back out of the
/MQS1/var/mqm/servers/mqwebdirectory, and then re-enter it. Now, you should see the basic_registry file in the directory! Browse thebasic_registry.xmlfile using VA to look at what credentials users will be able to use for the MQ Console.
Make note of the mqadmin username and password. You will need those later.

Step 4. Access the MQ Console
Now that you are all configured, you can start and open the web console.
From the ISPF main menu, type
SDSFand press Enter. On the new popup menu, type a/in the command line and press Enter.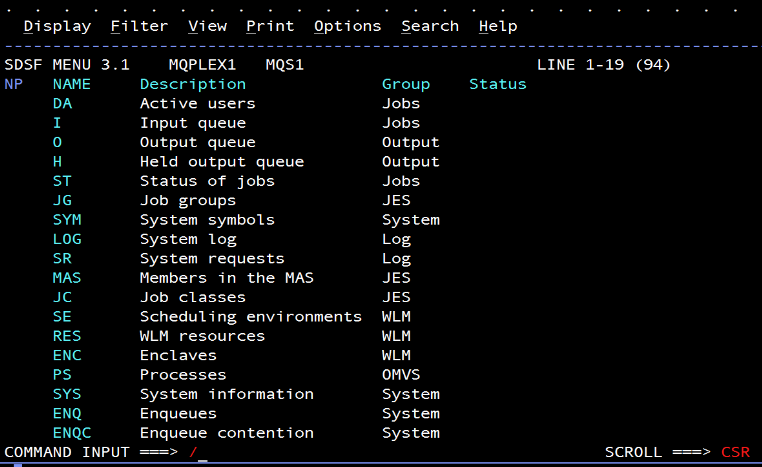
In the command window, type the command
s mqwebsto start the MQ Console.Note: You can always stop the MQ Console by using the opposite command
p mqwebsfrom the SDSF command shell.If you navigate to DA from the SDSF main menu. Narrow down the active tasks by specifying a prefix with the command
prefix mq*. You will seeMQWEBSis now running!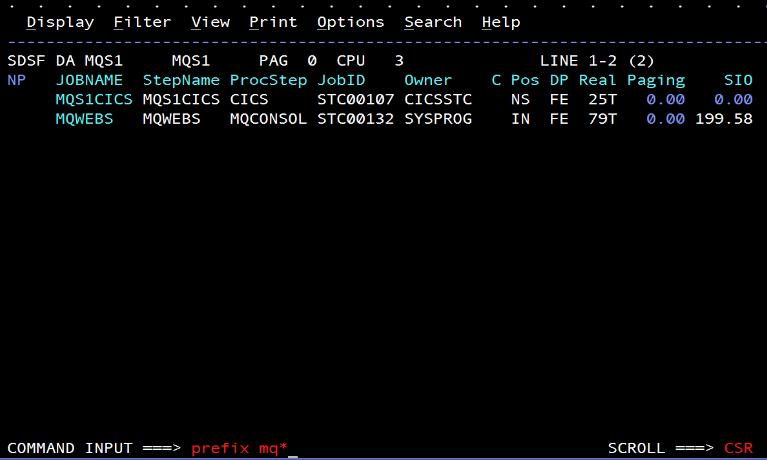
Tech tip: Troubleshoot using the ST function of SDSF. You might have a JCL error with
MQWEBSif the MQ Console does not start with thes mqwebscommand.Open a browser (Chrome is recommended) in your virtual machine, and go to this web address,
https://zos_ip_address:9443/ibmmq/console, wherezos_ip_addressis your z/OS environment, to open the MQ Console.Tech tip: Troubleshoot any errors in the MQ Console itself by using the logs provided by the Liberty server in
/var/mqm/servers/mqweb.On the MQ Console login screen, use the credentials you saw in the
basic_registry.xmlto login. In case you missed it, the default credentials are mqadmin/mqadmin.
Step 5. View and edit MQ objects by using the MQ Console
If no queue managers are running, go back to your z/OS environment, and from the SDSF command shell, enter the commands, where
+cpfis your queue manager name.+cpf START QMGR+cpf START CHINIT
From the Home page in the MQ Console, select Manage to open a list of queue managers. You can create or manage them from here.
To see your local z/OS queue manager, select the Local Queue Managers tab.

Selecting a queue manager will display the queues and other objects associated with this queue manager.
If you are using a queue manager with IBM MQ version 9.4 for z/OS, you will be able to view storage usage, including storage classes, buffer pools, and page sets.
Navigate to investigate your buffer pools and page set utilization to determine which queues are consuming the most memory and storage.

Summary and next steps
You now have an MQ Console set up on your z/OS environment. If you are not able to access a test z/OS environment, please reach out to me at dorothy.quincy@ibm.com to provision a sample lab environment in the Washington Systems Center.
With this tutorial, you have also enabled IBM MQ for z/OS REST capabilities by configuring the web server, so feel free to explore. Getting started with IBM MQ REST
The next step here is to tighten the security by upgrading from basic authentication to using the SAF registry. You can find more information about that in the MQ documentation.
Acknowledgements
I would like to thank Mitch Johnson in the Washington Systems Center for developing the JCL that is used in this tutorial.