Tutorial
Setting up a streaming queue in the IBM MQ Console
Streaming messages from a local queue to a streaming queue using the IBM MQ ConsoleIn the article, "Introduction to streaming queues," you discovered how a streaming queue can provide you with valuable insights into your enterprise. In this tutorial, you learn how to set one up yourself. (You can read more about setting up and configuring streaming queues in the IBM MQ streaming queue documentation.)
In this tutorial, you will learn:
- How to set up a streaming queue in the IBM MQ Console
- How to stream messages from a local queue to a streaming queue
Prerequisites
- Git
- Java
- Maven
- JSON parser
- The latest version of the IBM MQ allclient
- You need to set up a queue manager, which you can do by following the instructions for your preferred platform in the Ready, Set, Connect series.
- You then need to set up the IBM MQ Console by following the Setting up and using the IBM MQ Console tutorial so you can view and modify the queues easily.
Steps
Step 1. Creating a streaming queue
To create a new queue that you use as a streaming queue, open the MQ Console.
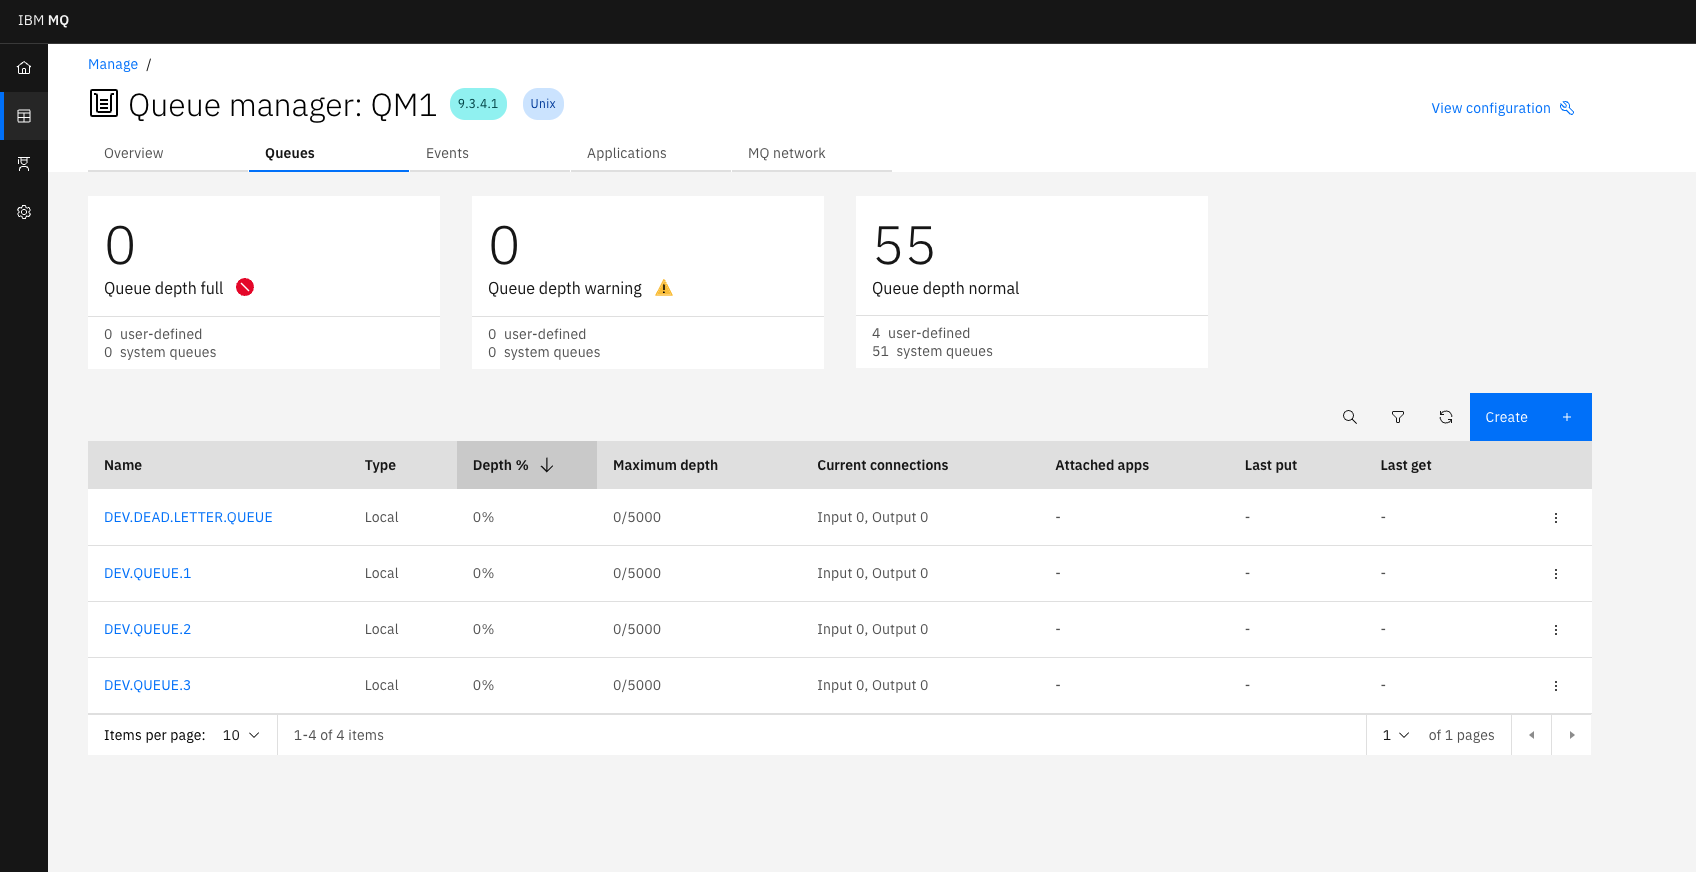
Click the Create button. In the next window, choose Local as your queue type.
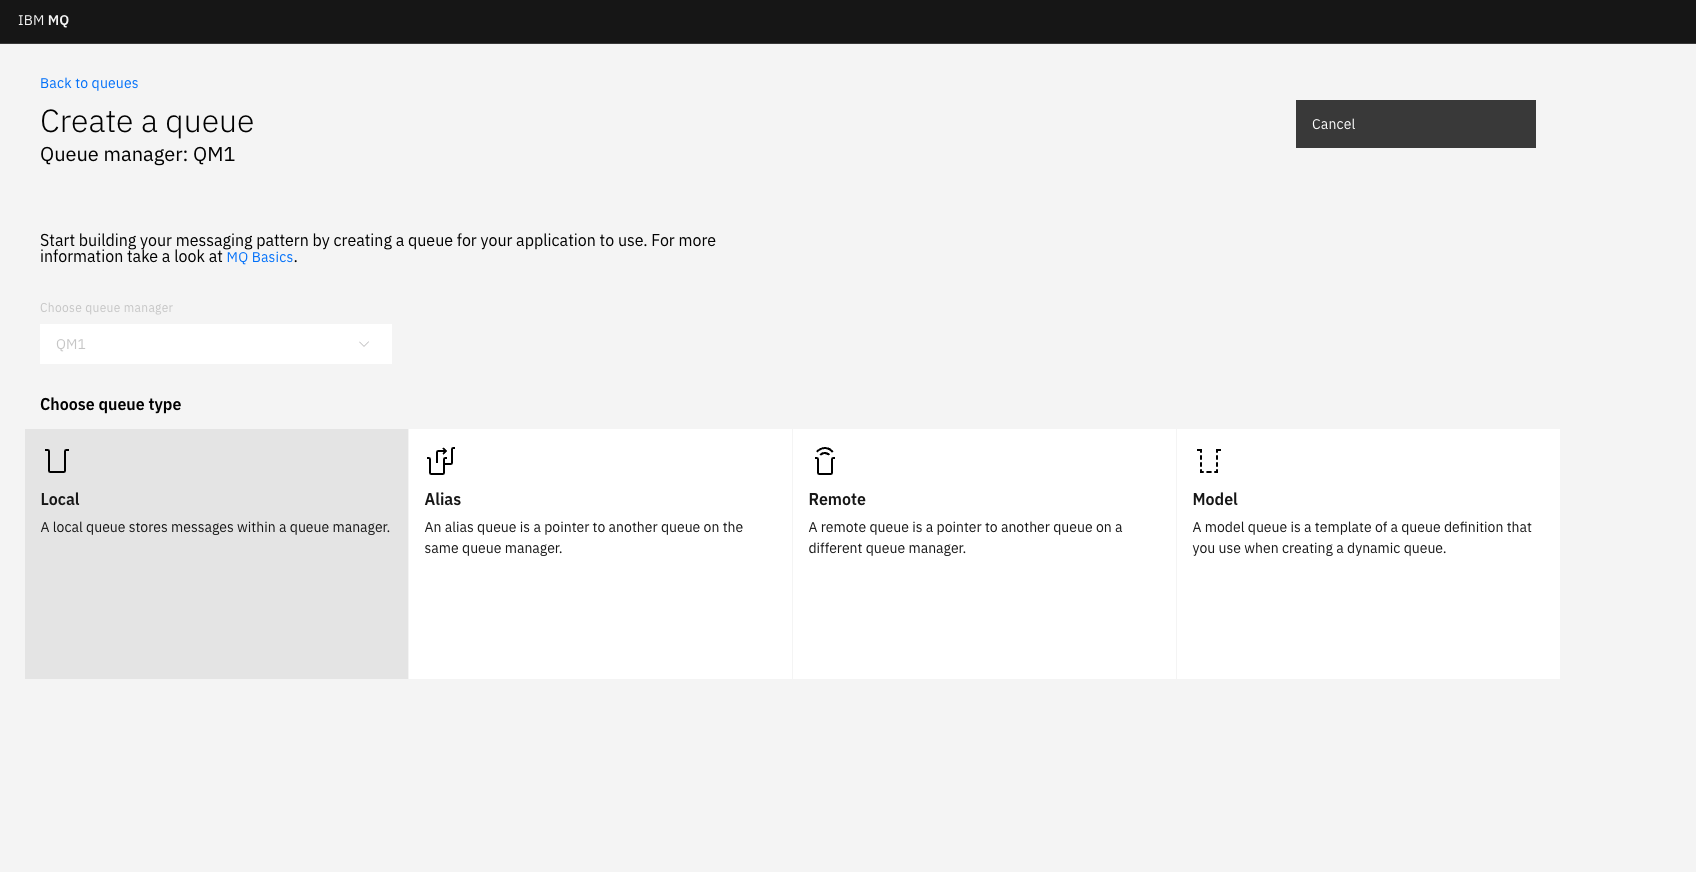
Depending on your configuration, you could choose to stream to an 'Alias' or 'Remote' queue, and reasons why you might want to do this are discussed in the Introduction to streaming queues article, but you can stick with a 'Local' queue for simplicity.
You can name this queue whatever you'd like. This example uses the DEV. prefix to comply with the security assumed for the default developer configuration, for example: DEV.QUEUE.STREAM.
You have now created a queue ready to stream your messages to.
Step 2. Configuring a queue to stream messages from
Now configure the DEV.QUEUE.1 queue, which is in your queue manager by default, so that messages that arrive on this queue are streamed to the queue you just created.
Click on the three dots at the end of the queue and click View configuration.
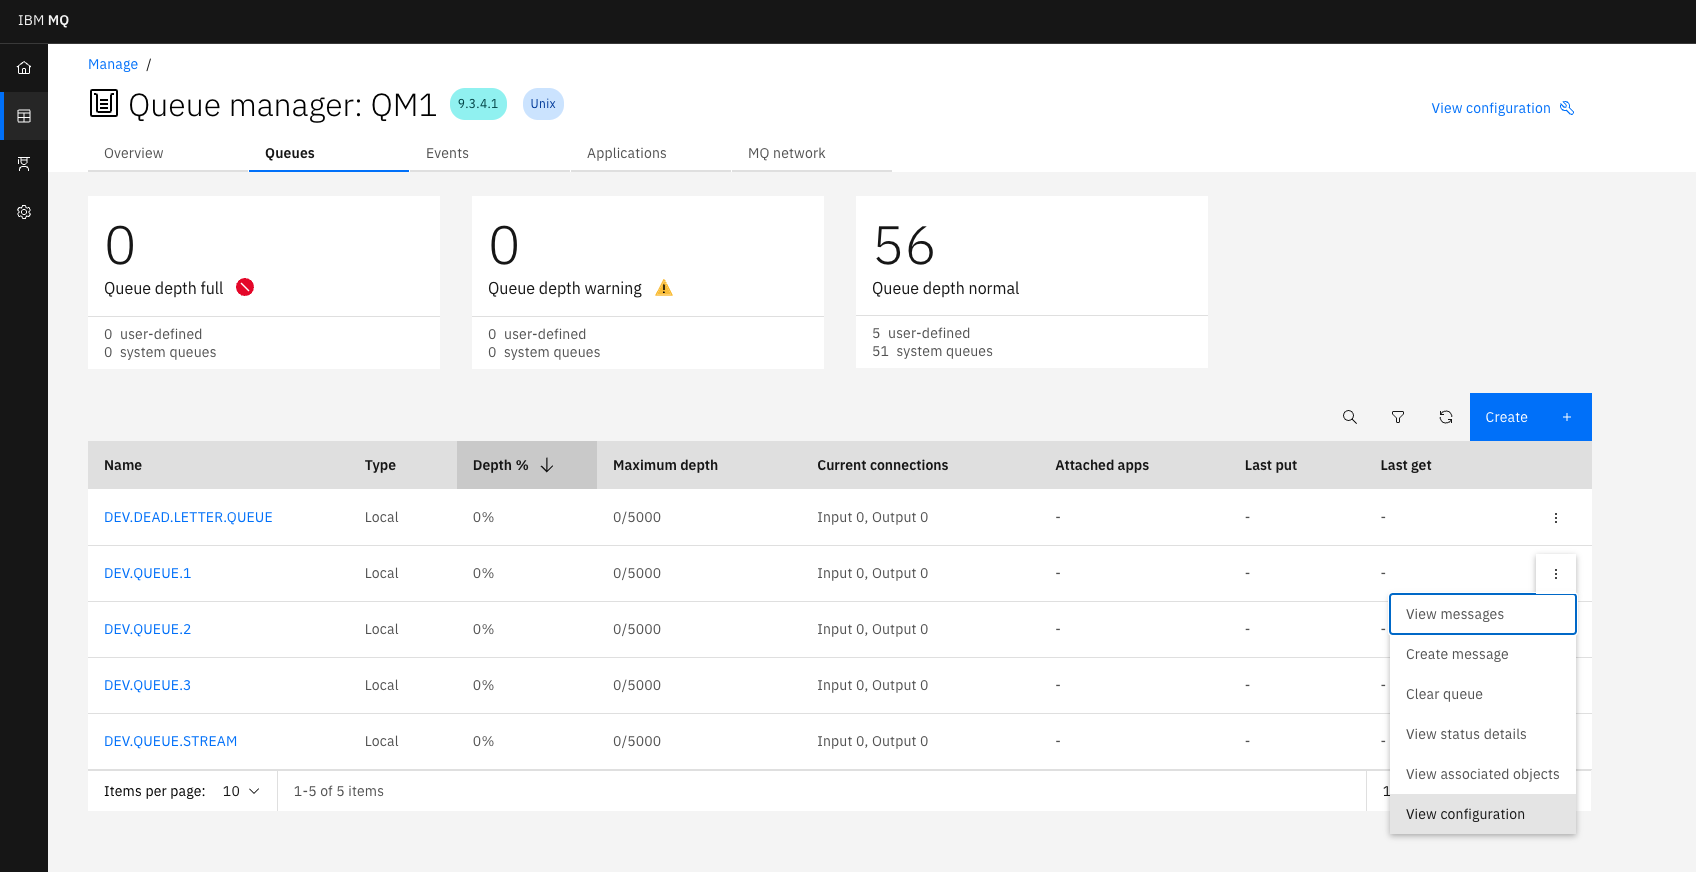
From here, navigate to the Storage section:
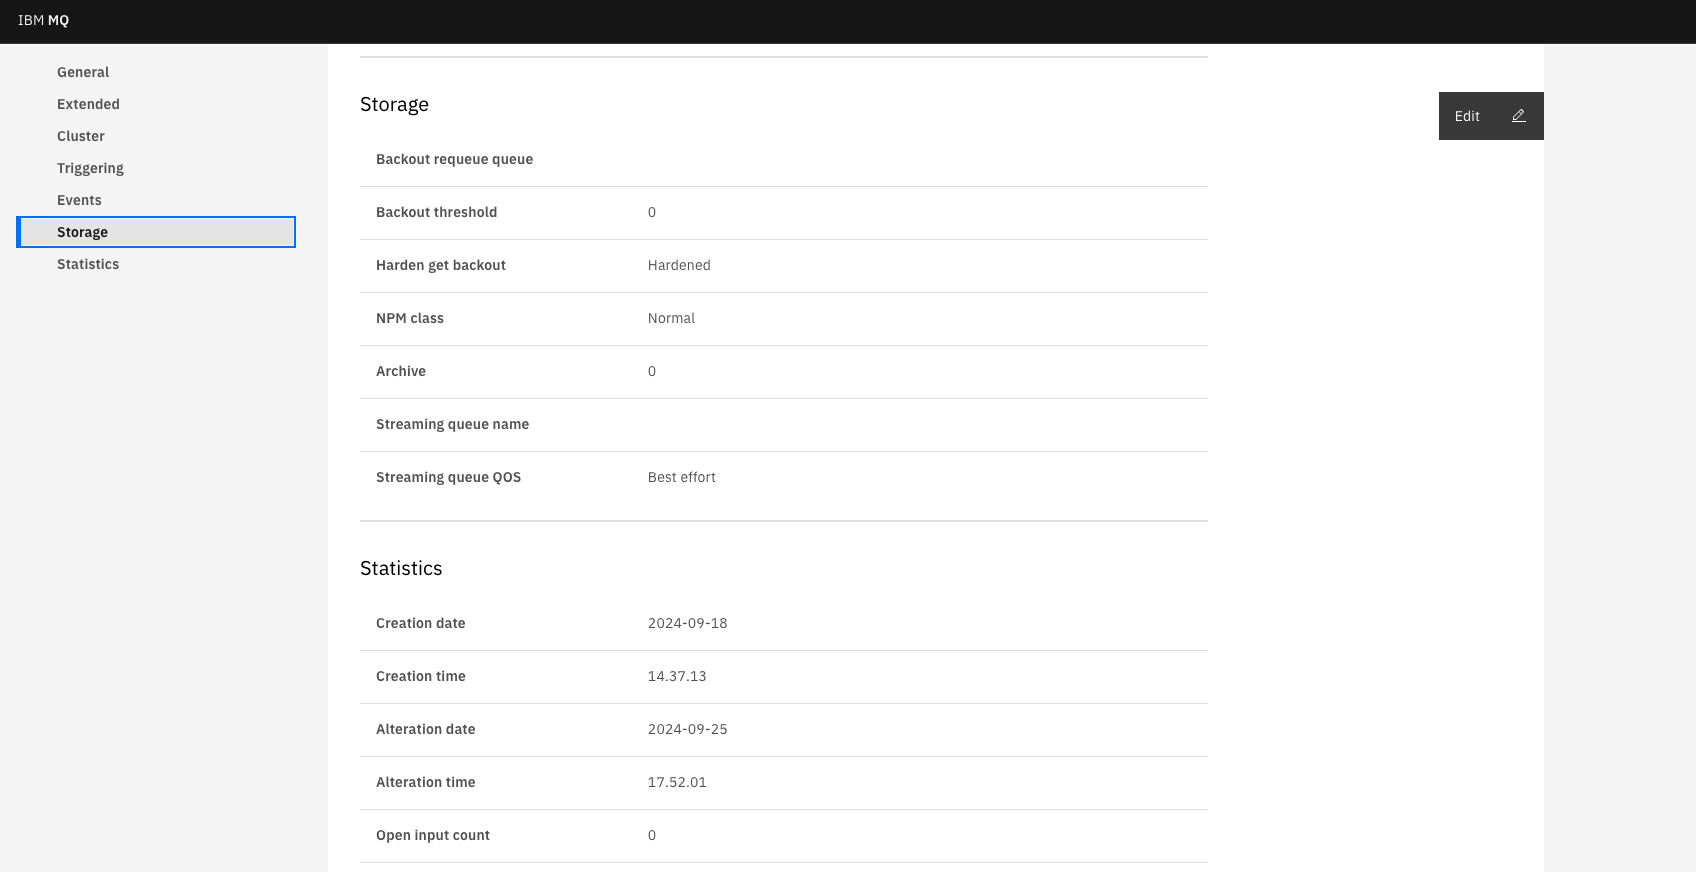
You'll notice that the Streaming queue name field is empty. In this field, you need to provide the name of the queue that you want to stream your messages to.
Click the Edit button and enter the name of the queue that you just created in Step 1 in the Streaming queue name field. For example, DEV.QUEUE.STREAM.
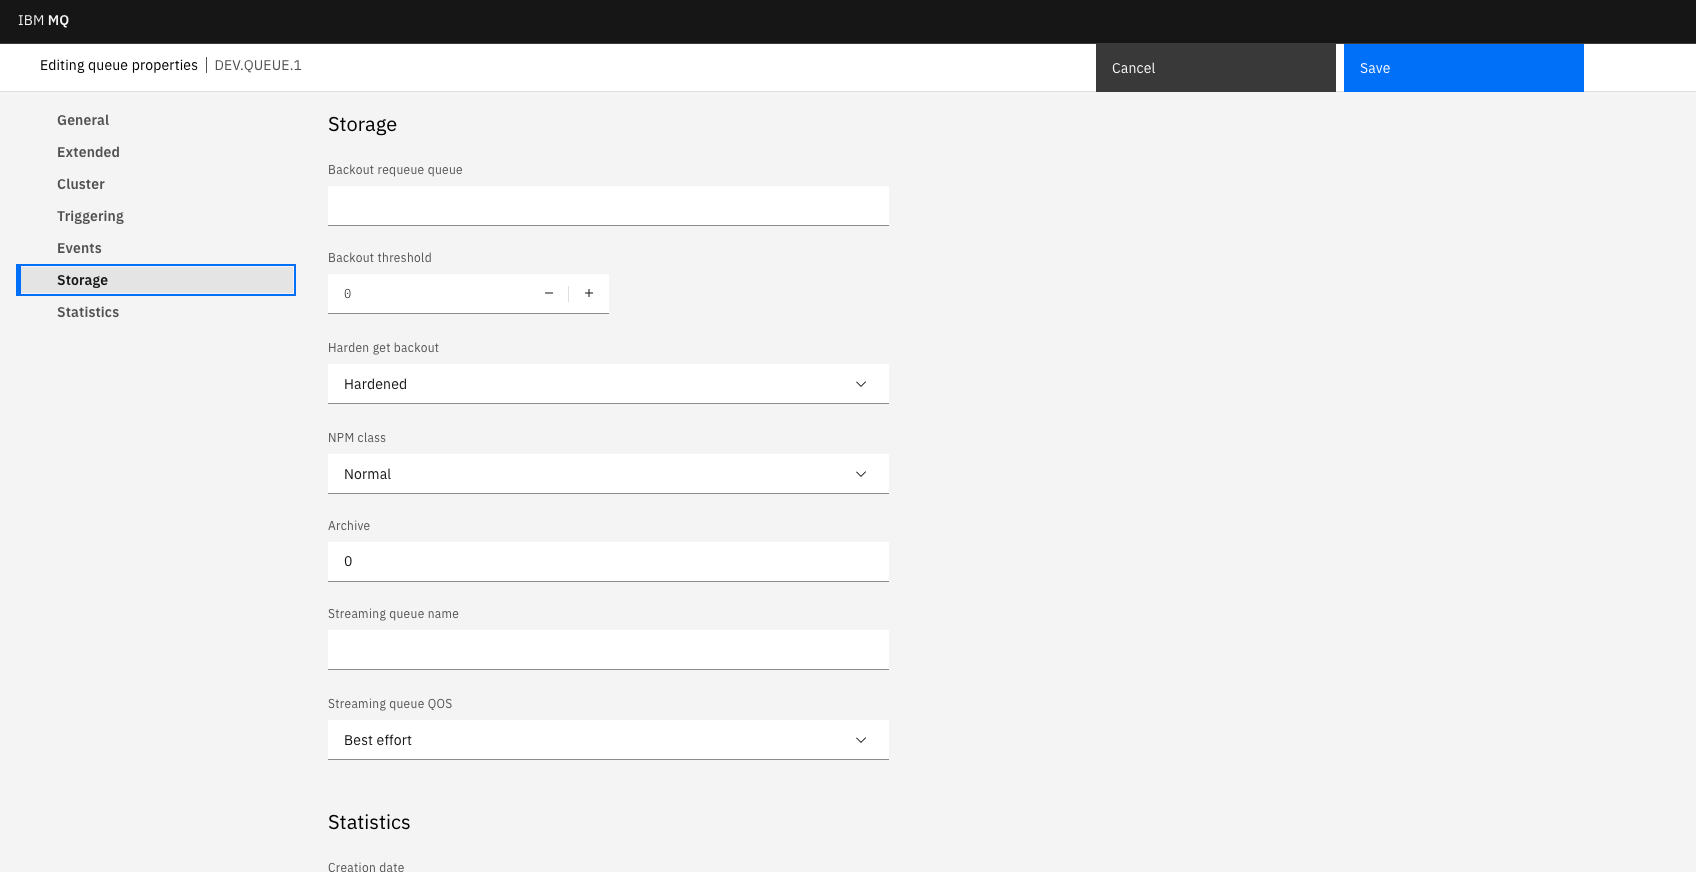
Notice the Streaming queue QOS field. This is set to 'Best effort' by default, which means that the delivery of the original message is prioritized before sending a copy to the streaming queue.
If you want to ensure that the original message is only delivered if the streamed message is delivered, you can set this to 'Must duplicate'.
Click Save.
You have now configured DEV.QUEUE.1 so that messages are streamed to your specific queue. Now carry out some work over this queue to see it in action.
Step 3. Putting messages to the queue
In this step, you use JmsPut.java as the example application to put messages onto your queue, which is found in the mq-dev-patterns repository.
First, clone the repo using this command:
git clone <https://github.com/ibm-messaging/mq-dev-patterns>
Then, navigate to the JMS directory in this repo, and follow the steps in the README to build the sample applications. If you already have this repo cloned, ensure your version is up to date.
Navigate to the env.json file in the mq-dev-patterns directory, and modify it to contain the connection information for your queue, for example:
{
  "MQ_ENDPOINTS": [{
    "HOST": "localhost",
    "PORT": "1414",
    "CHANNEL": "DEV.APP.SVRCONN",
    "QMGR": "QM1",
    "APP_USER": "app",
    "APP_PASSWORD": "passw0rd",
    "QUEUE_NAME": "DEV.QUEUE.1",
    "BACKOUT_QUEUE": "DEV.QUEUE.2",
    "MODEL_QUEUE_NAME": "DEV.APP.MODEL.QUEUE"
  }]
}
Now, run the program. If you used maven to build the JMS samples, run this command:
java -cp target/mq-dev-patterns-0.1.0.jar: com.ibm.mq.samples.jms.JmsPut
Otherwise, compile:
javac -cp ./com.ibm.mq.allclient-9.2.5.0.jar:./javax.jms-api-2.0.1.jar:./json-20230227.jar:. com/ibm/mq/samples/jms/JmsPut.java
And then run it.
java -cp ./com.ibm.mq.allclient-9.2.5.0.jar:./javax.jms-api-2.0.1.jar:./json-20230227.jar:. com.ibm.mq.samples.jms.JmsPut
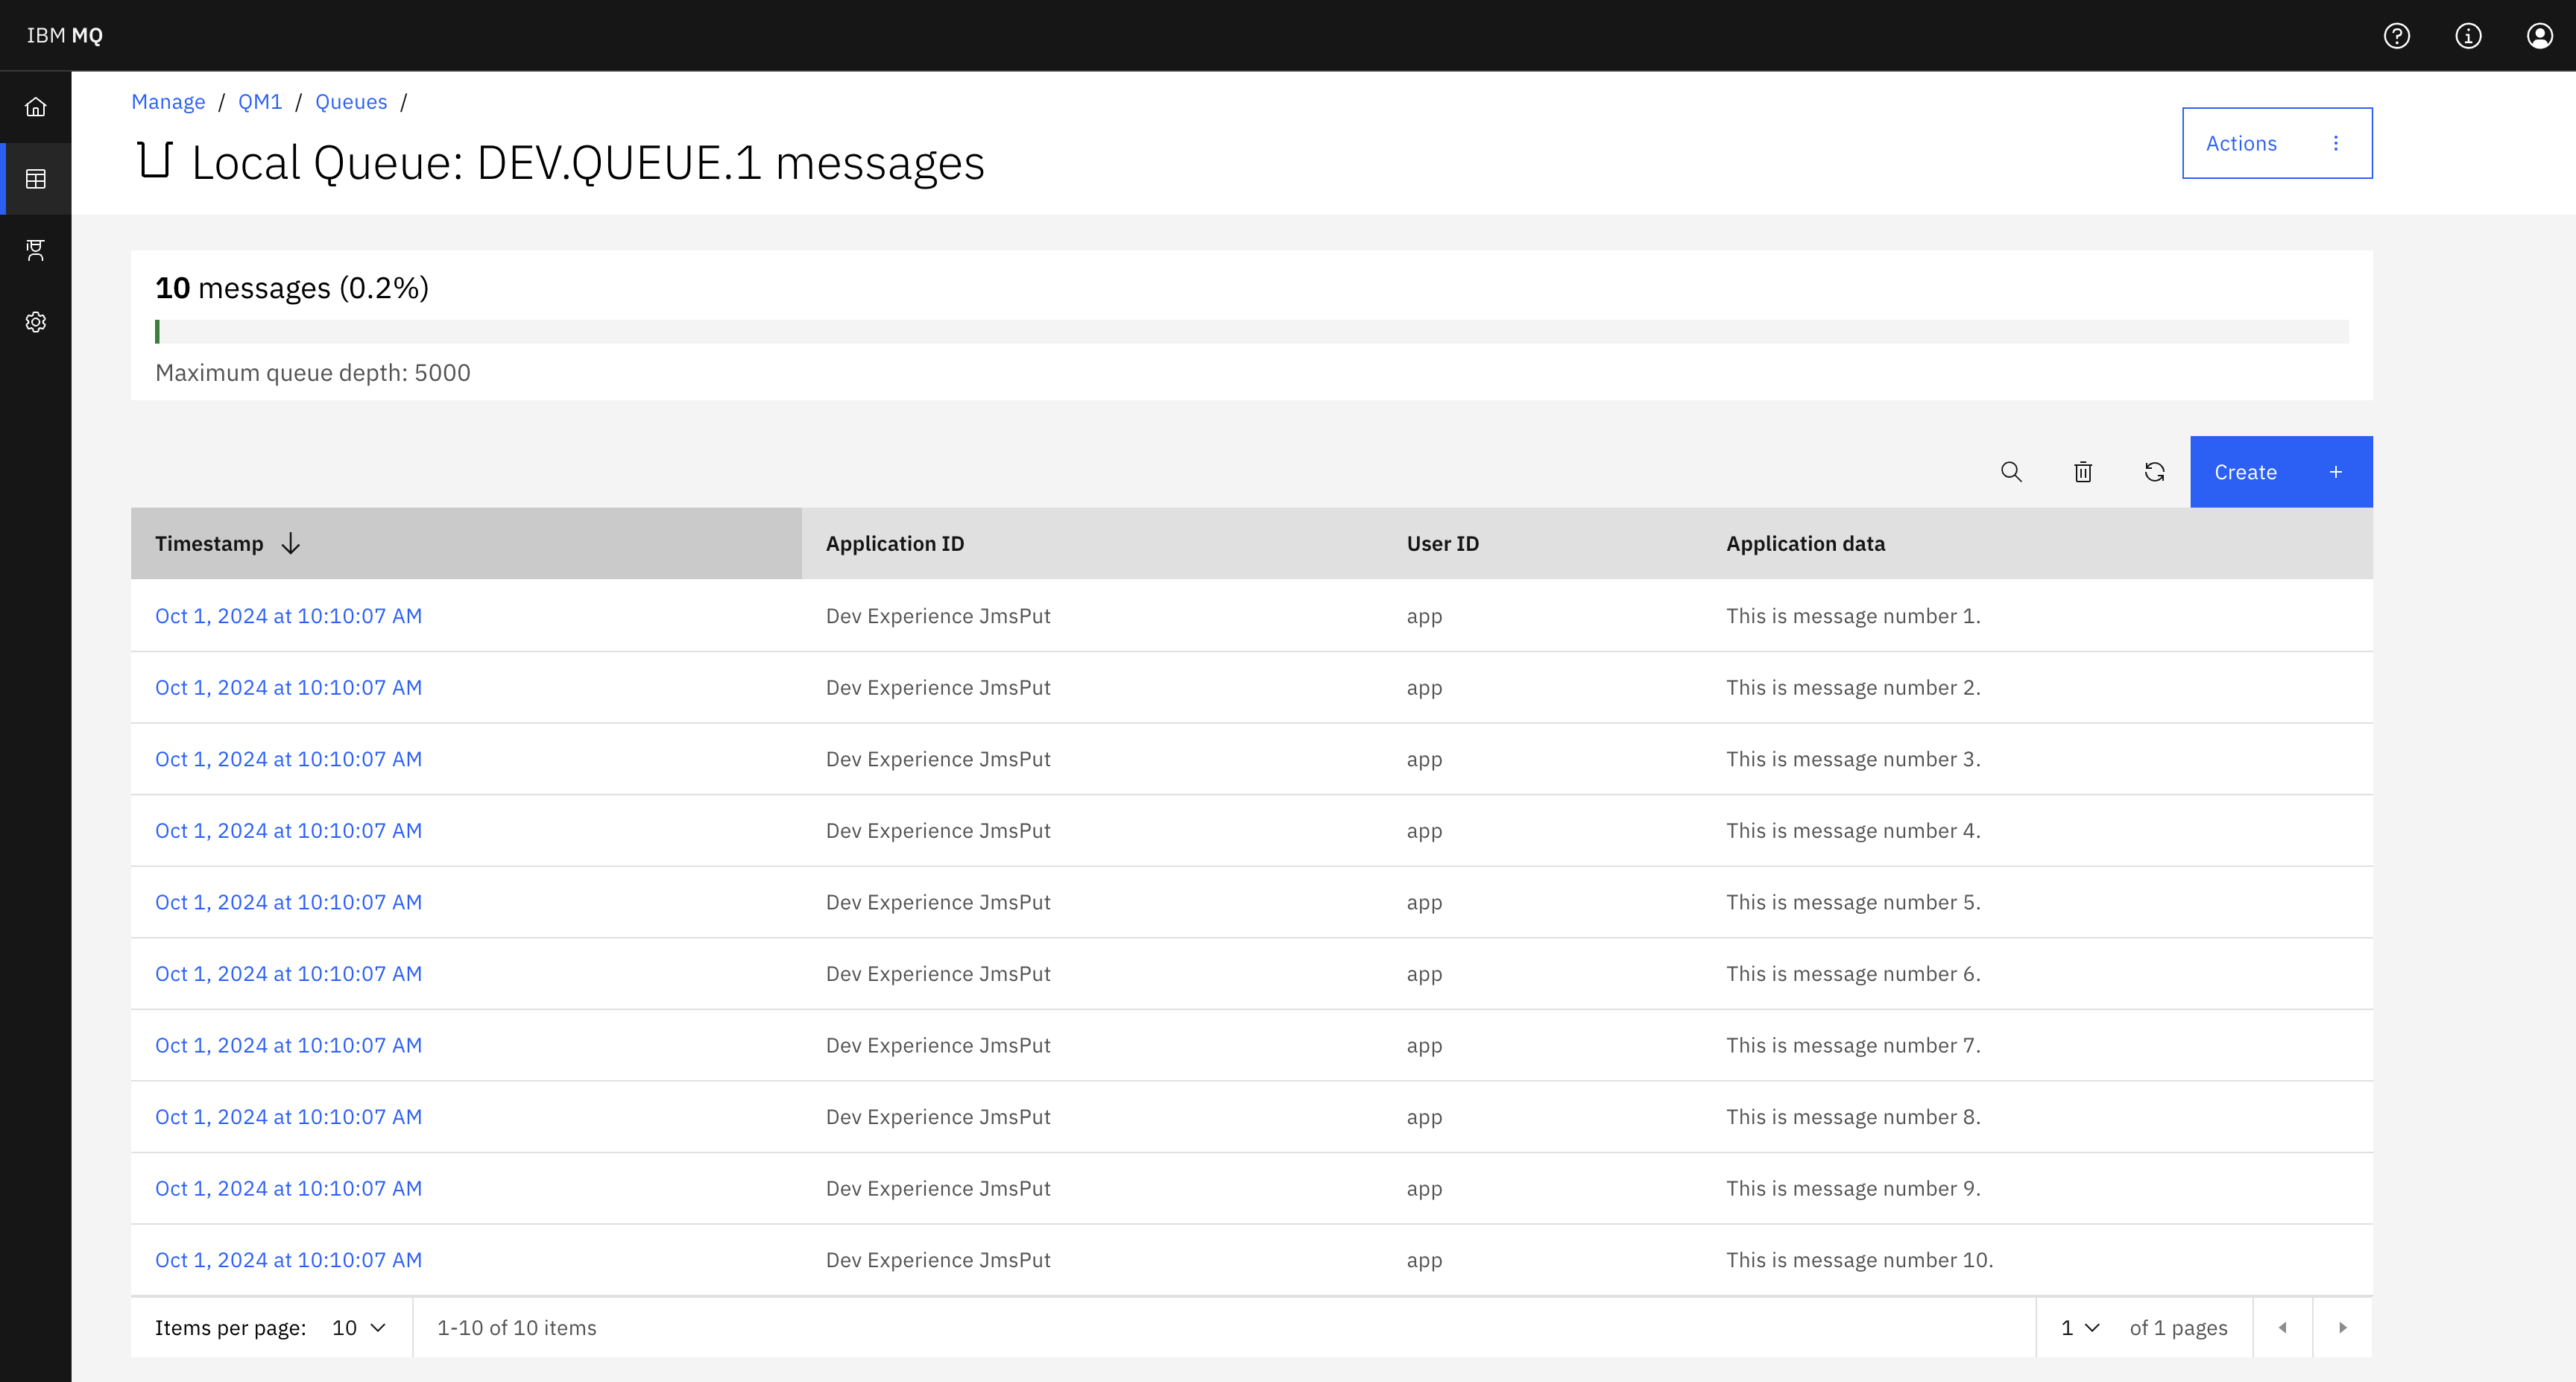
You should see 10 messages on DEV.QUEUE.1 like so:
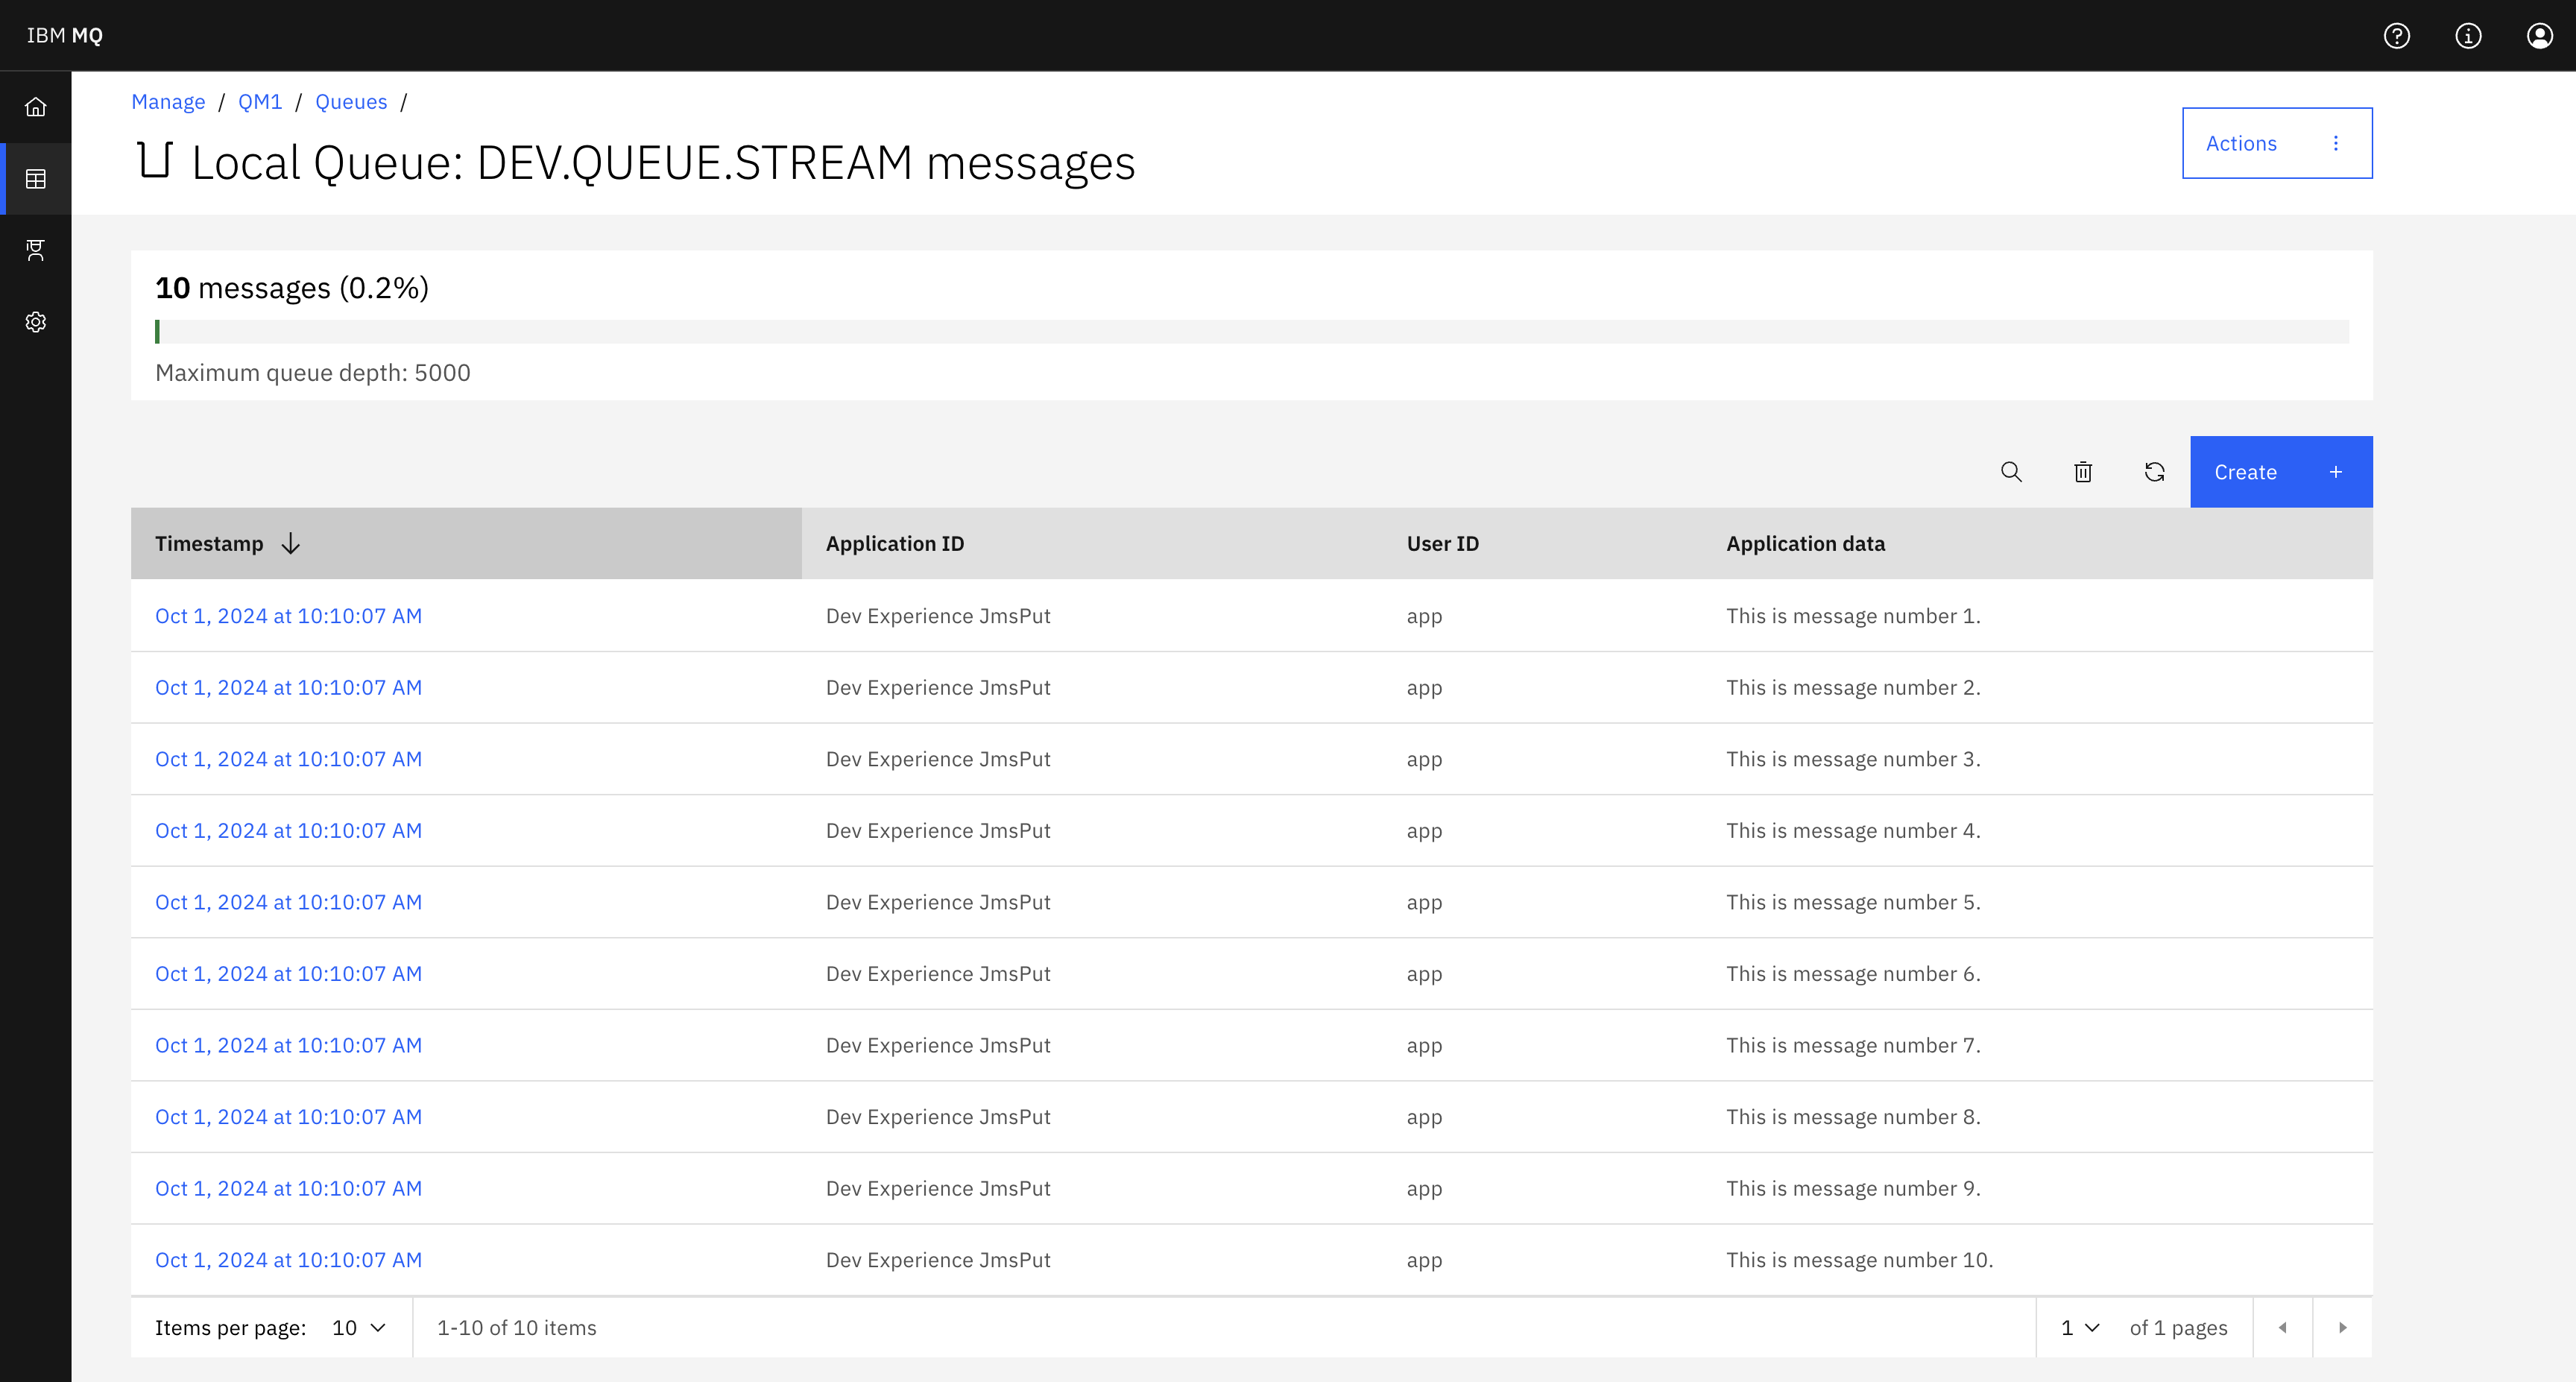
If you go to your streaming queue, you should also see 10 messages:
Step 4. Consuming messages from the queue
Now run JmsGet.java to consume the messages from your queue.
If you used maven to build the JMS samples, run this command:
java -cp target/mq-dev-patterns-0.1.0.jar: com.ibm.mq.samples.jms.JmsGet
Otherwise, compile:
javac -cp ./com.ibm.mq.allclient-9.2.5.0.jar:./javax.jms-api-2.0.1.jar:./json-20230227.jar:. com/ibm/mq/samples/jms/JmsGet.java
And then run:
java -cp ./com.ibm.mq.allclient-9.2.5.0.jar:./javax.jms-api-2.0.1.jar:./json-20230227.jar:. com.ibm.mq.samples.jms.JmsGet
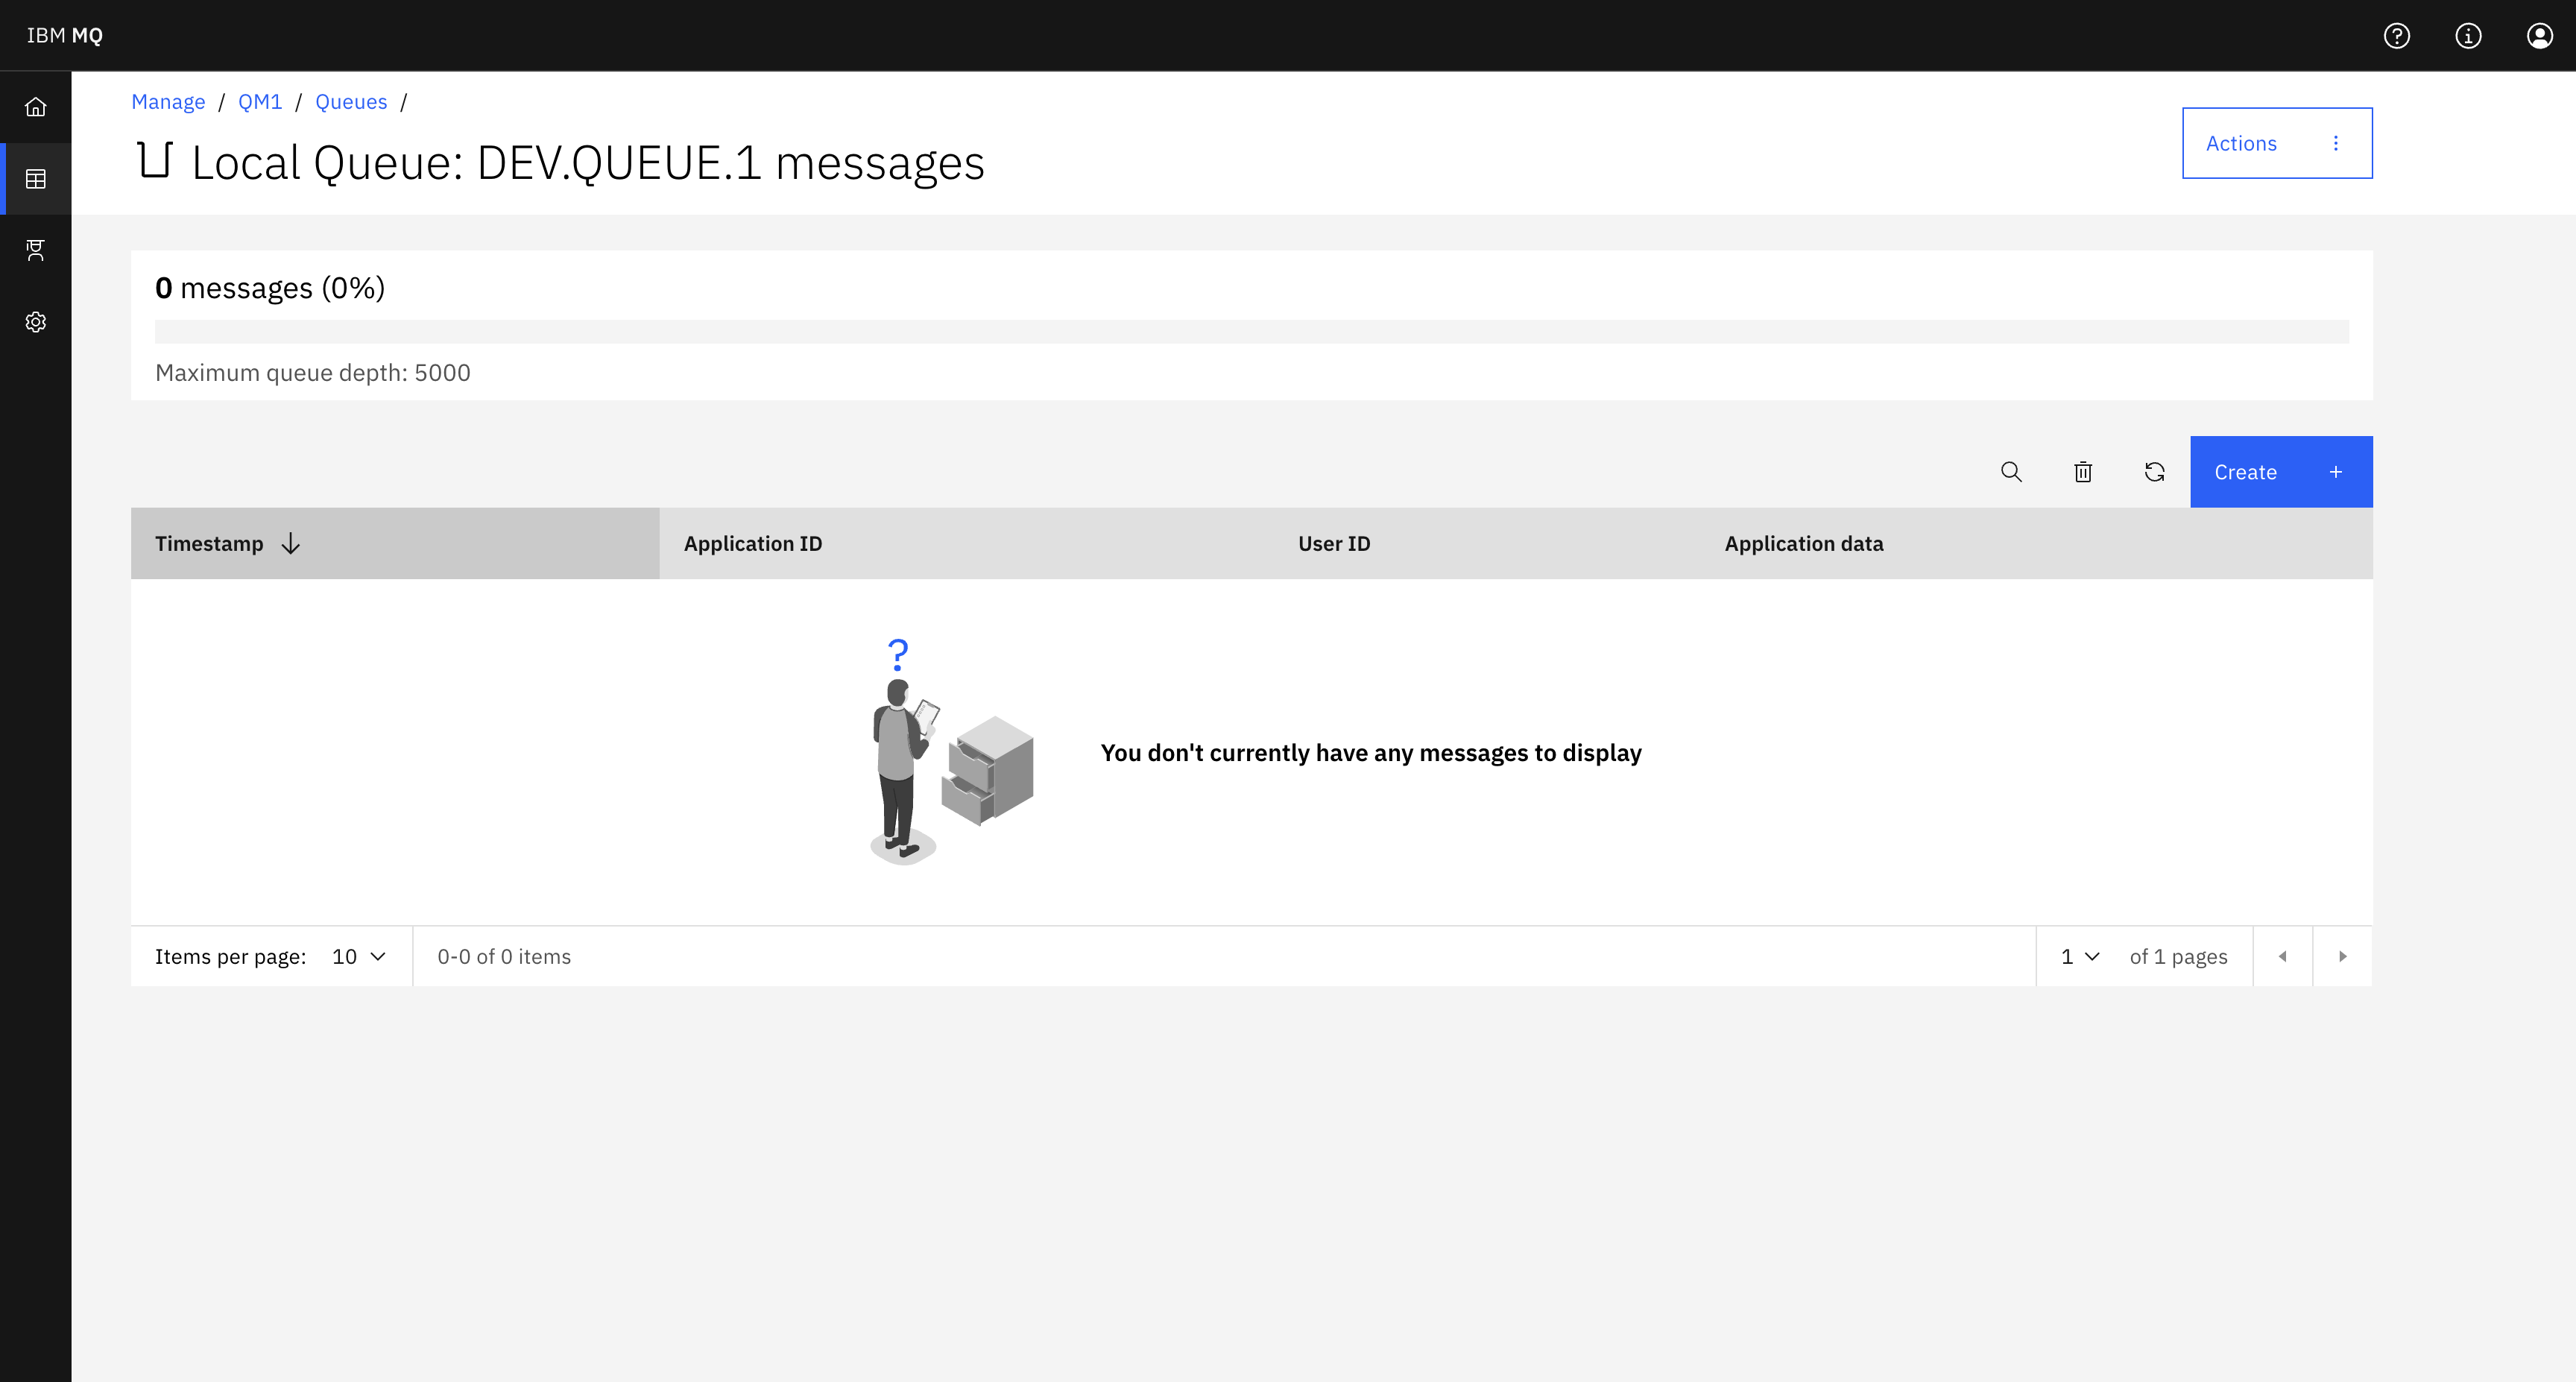
You should see that the messages have been drained off of DEV.QUEUE.1.
Take a look at the streaming queue again.
The messages are still there and serve as a record of the messages processed via DEV.QUEUE.1.
Summary and next steps
You can create a streaming queue and stream your messages to it without making any changes to your applications. Now that you have a streaming queue, try using them for some of the use cases covered in the "Introduction to streaming queues" article.