Tutorial
Accessibility for web development
Introduction to the IBM Equal Access ToolkitAccessibility considerations in design, development, and test ensure that your applications consider a wide range of user needs with regard to input and output modalities, including those with disabilities.
Consideration of accessibility throughout the application lifecycle is important because it widens the potential user base and enables a society where everyone can be independent, allowing everyone to do any task easily. For example, proper coding of a web page is critical so that a screen reader can help a person with visual impairment use it properly. IBM's project, IBM Equal Access Toolkit, including the Accessibility Checker, strives to give designers, developers, and testers a set of tools to make websites and applications accessible.
When building accessible applications, focus on:
- Shifting the design conversations from features to outcomes.
- Thinking past the first user who comes to mind.
- Building empathy and understand the user's context, not just their task.
- Understanding how the user interacts with the product.
Development projects traditionally go through five phases: Plan, Design, Develop, Verify, and Launch. Keep accessibility in mind through all phases of the project to ease the steps of developing and launching applications. The IBM Accessibility site has more in-depth guidance about how to incorporate accessibility into each of your development phases on its Equal Access Toolkit page.
In this tutorial, you will learn about the Equal Access Toolkit and how to use the Accessibility Checker in more detail by using the Chrome extension. The Accessibility Checker is a verification tool that can be used as an extension to your Chrome or Firefox browser, or as Karma or Nodejs plugins to allow testing within a CI pipeline such as Travis CI.
Steps
Install the toolkit on Chrome
- In Chrome, go to https://chrome.google.com/webstore/detail/ibm-equal-access-accessib/lkcagbfjnkomcinoddgooolagloogehp?hl=en-US.
- Click the Add to Chrome button. A confirmation dialog box opens.
- Click the Add extension button.
Learn to use the Accessibility Checker
There are some introductory videos on using the checker available that you may find helpful. The checker can be used on any website to see what issues a website has and how they can be fixed.
We will be using the Accessibility tool audit page that has been created for testing automated test tools.
Use the toolkit to review the page
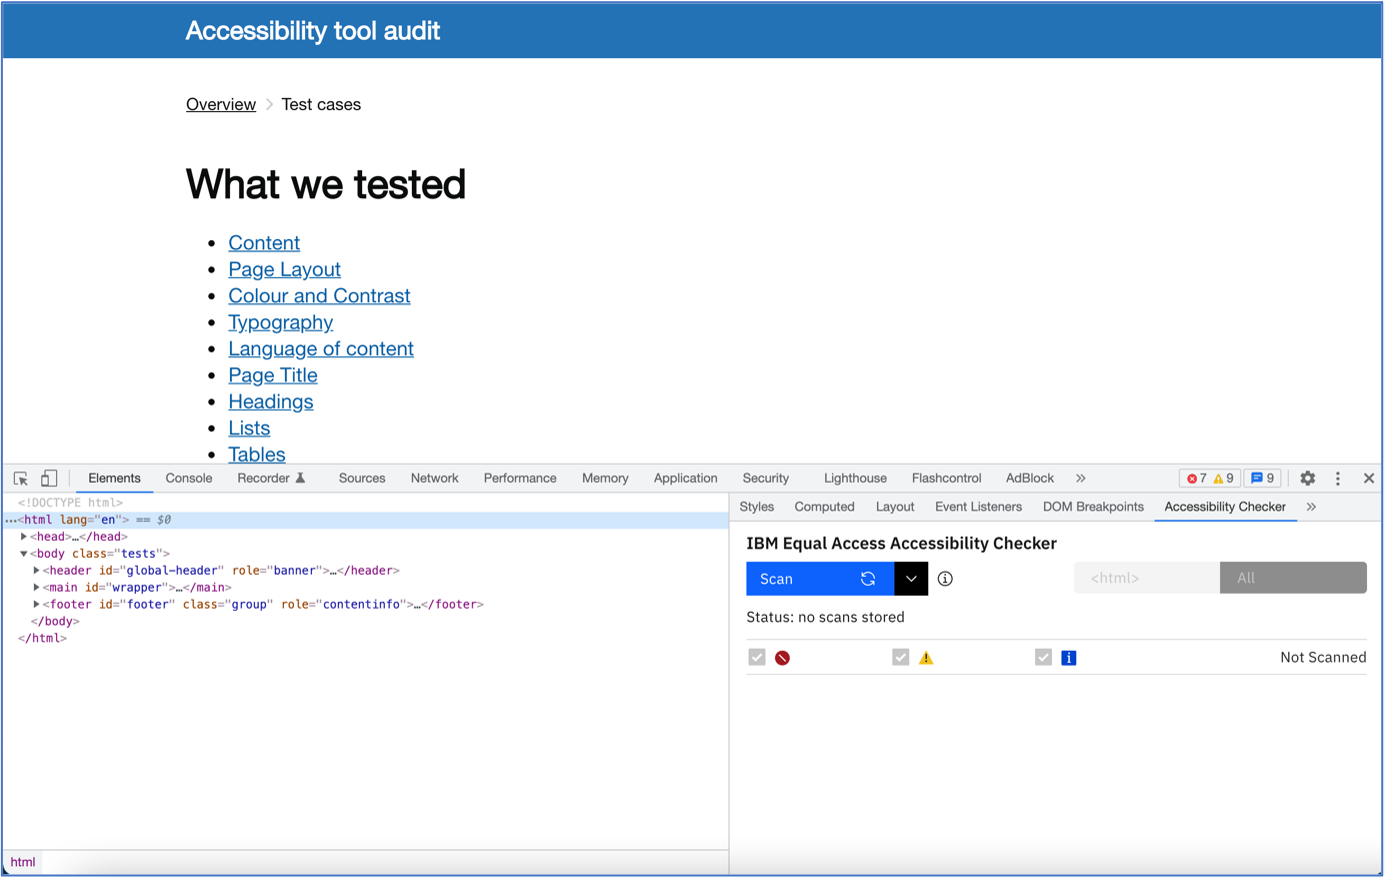
In Chrome, with the Accessibility tool audit page open, select View > Developer > Developer Tools. You can also right click on a page element and select Inspect from the popup menu.
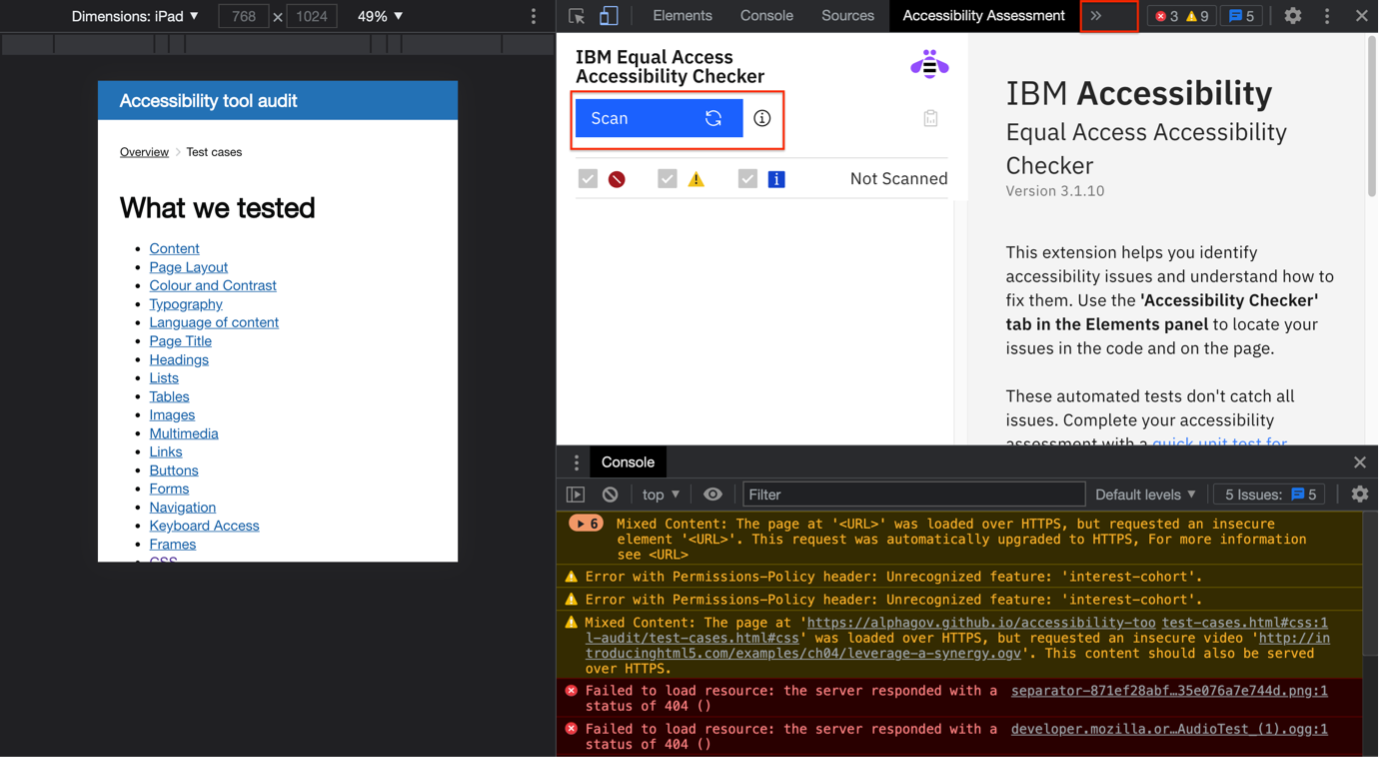
Two panels, each with subtabs, open in the browser window. We will only use the Accessibility Assessment subtab in the first panel right now.
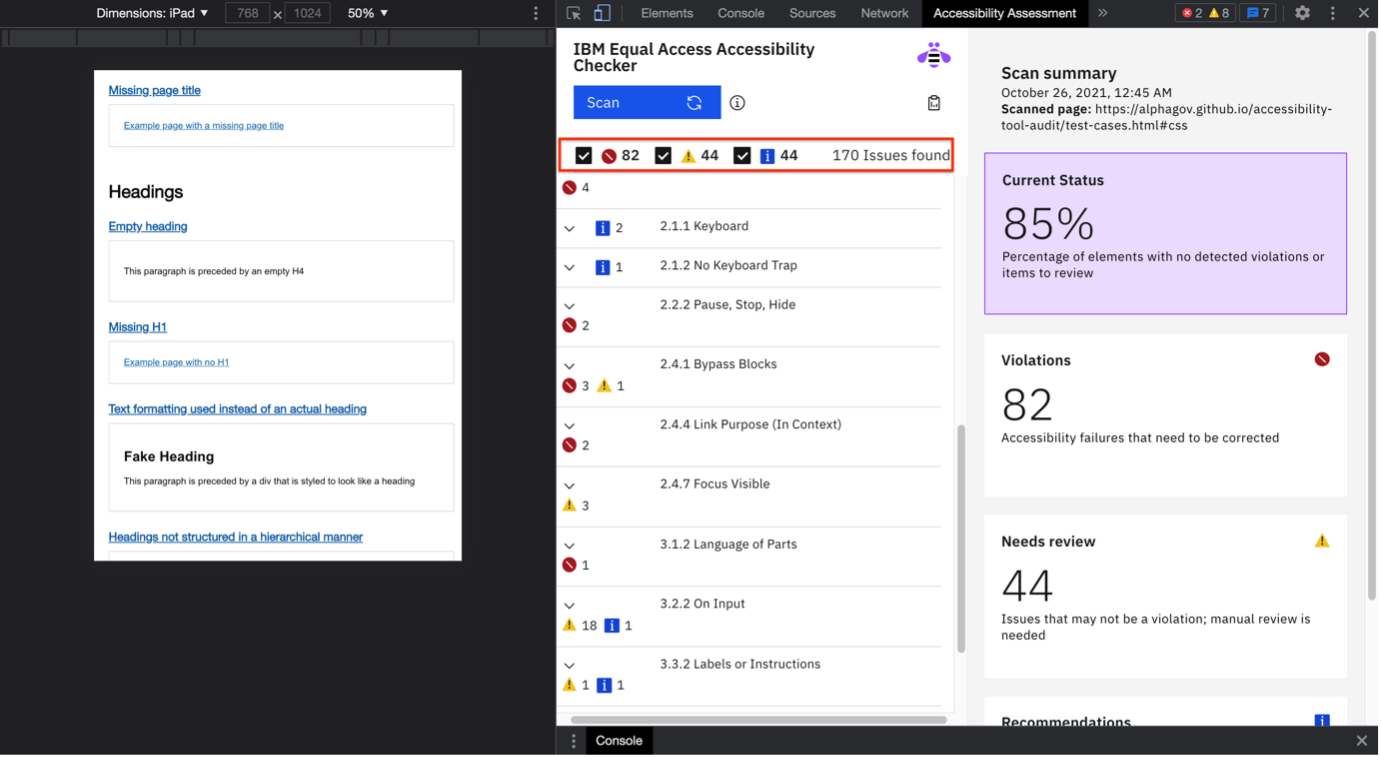
Click the Scan button to see what needs to be fixed and if any rules are being violated.
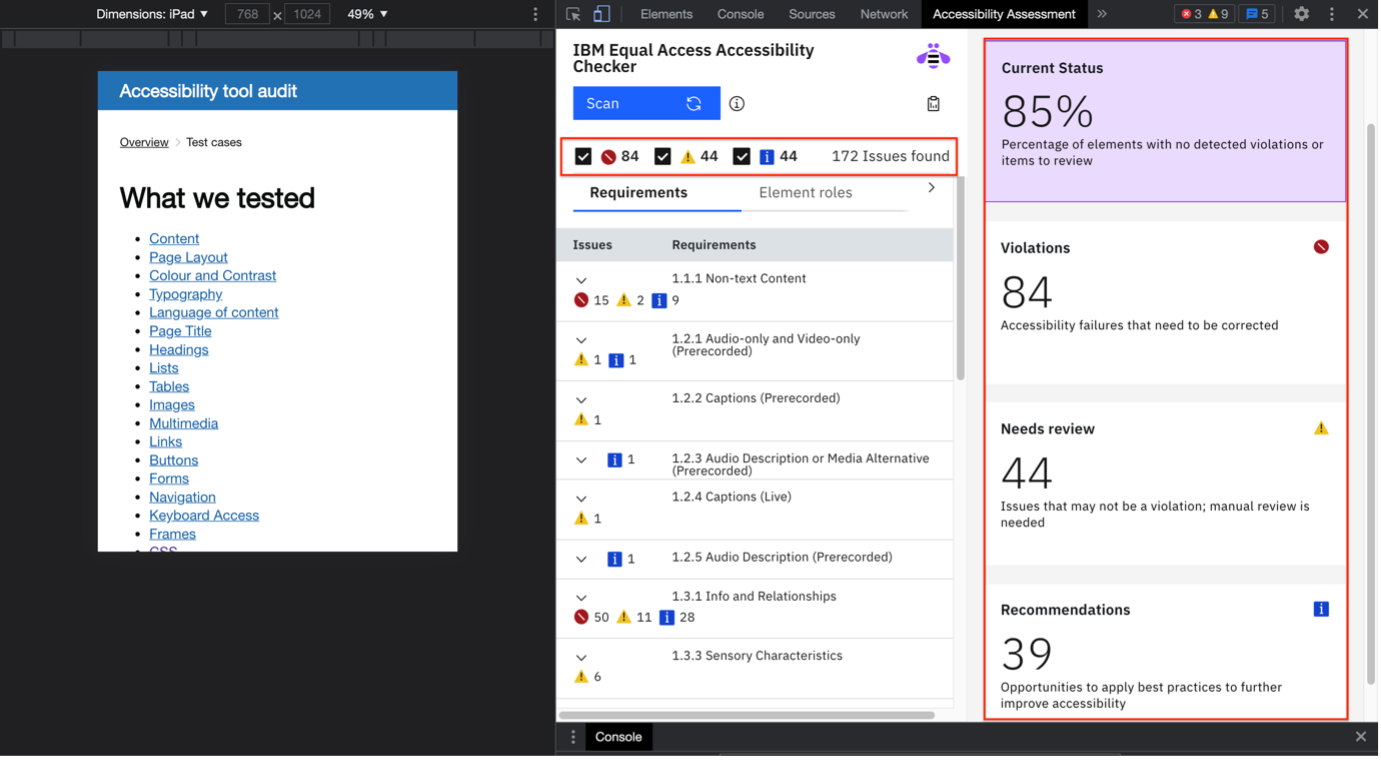
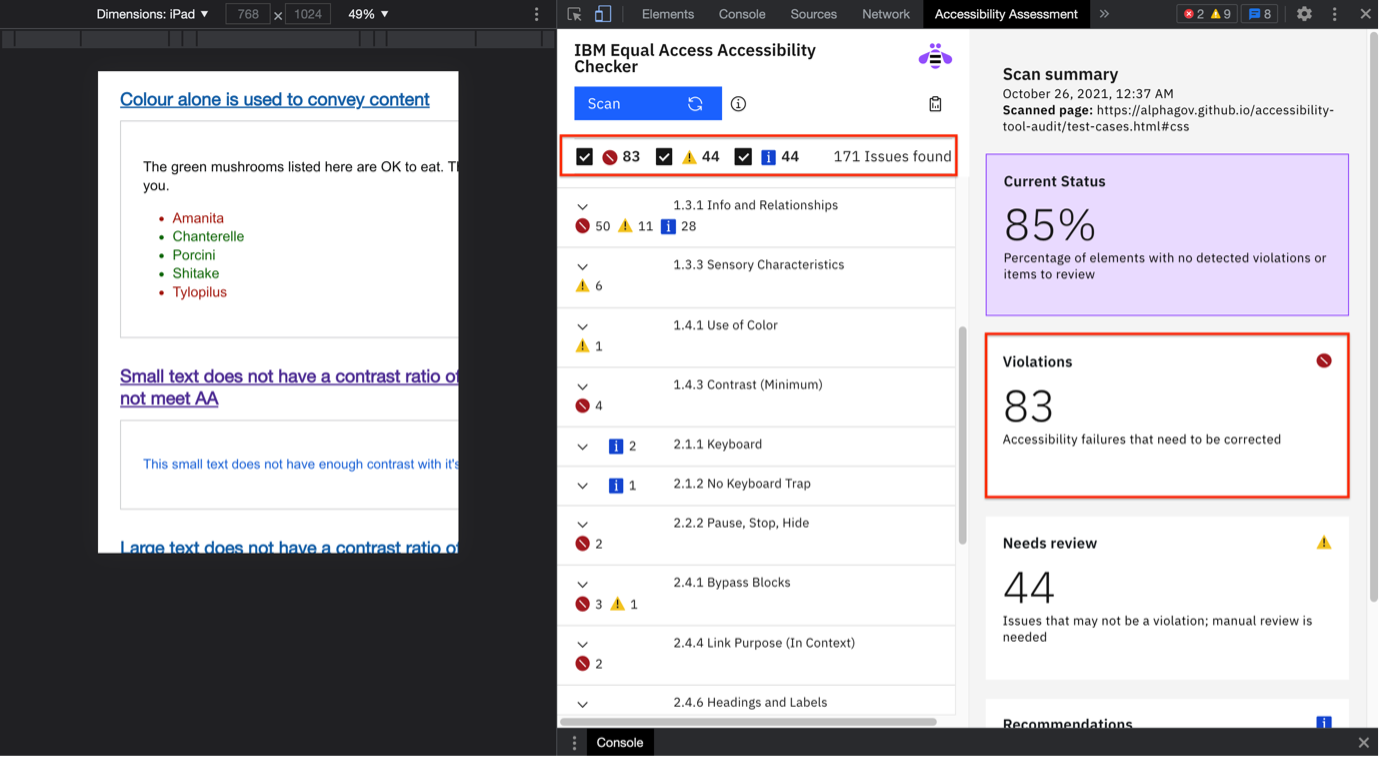
85% of the elements on this page need no checking or reviewing and are in-line with the rules and guidelines of accessibility. However, there are 84 violations, 44 items need review and 39 recommendations to improve the overall user experience. In total there are 172 issues found and 84 of them need immediate attention.
Fix the issues
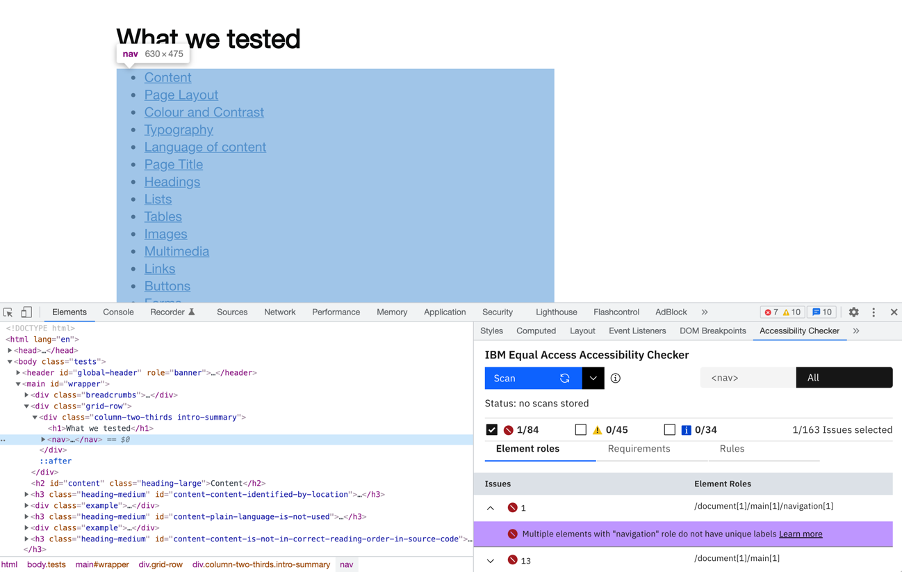
Open the Accessibility Checker tab in the second panel. Click on an issue in this subtab to highlight the corresponding code in the first panel. In this case, the issue related to navigation selects the nav element in the Elements panel and shows the element in the main page panel.
Let's look through some of the issues.
Issue 1
- In the Accessibility Checker subtab, click on the Requirements section heading to see the issues listed in groups by category.
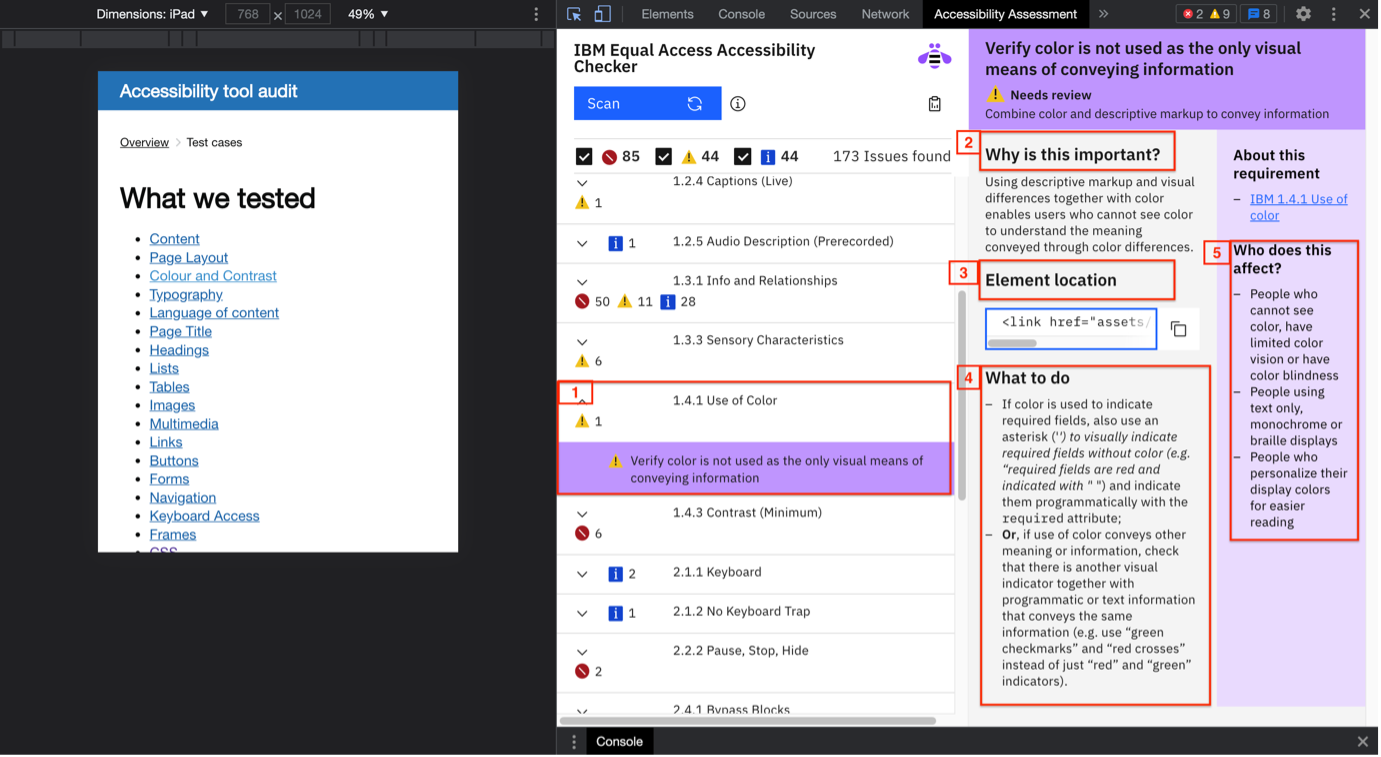
- We scrolled down and clicked on 1.4.1 Use of color (1) in the Requirements area to see a description of the issue.
- Click on the Learn more link after the description to load new information into the panel.
The panel displays additional important information.
- Why is this an important issue (2).
- Where can you find it in your code (3).
- How can you fix it (4).
- Who is affected by it (5).
Fix issue 1
Now let's find the issue in the code and fix it.
Refer to the Element Location section of the page to learn where in the code the issue is located
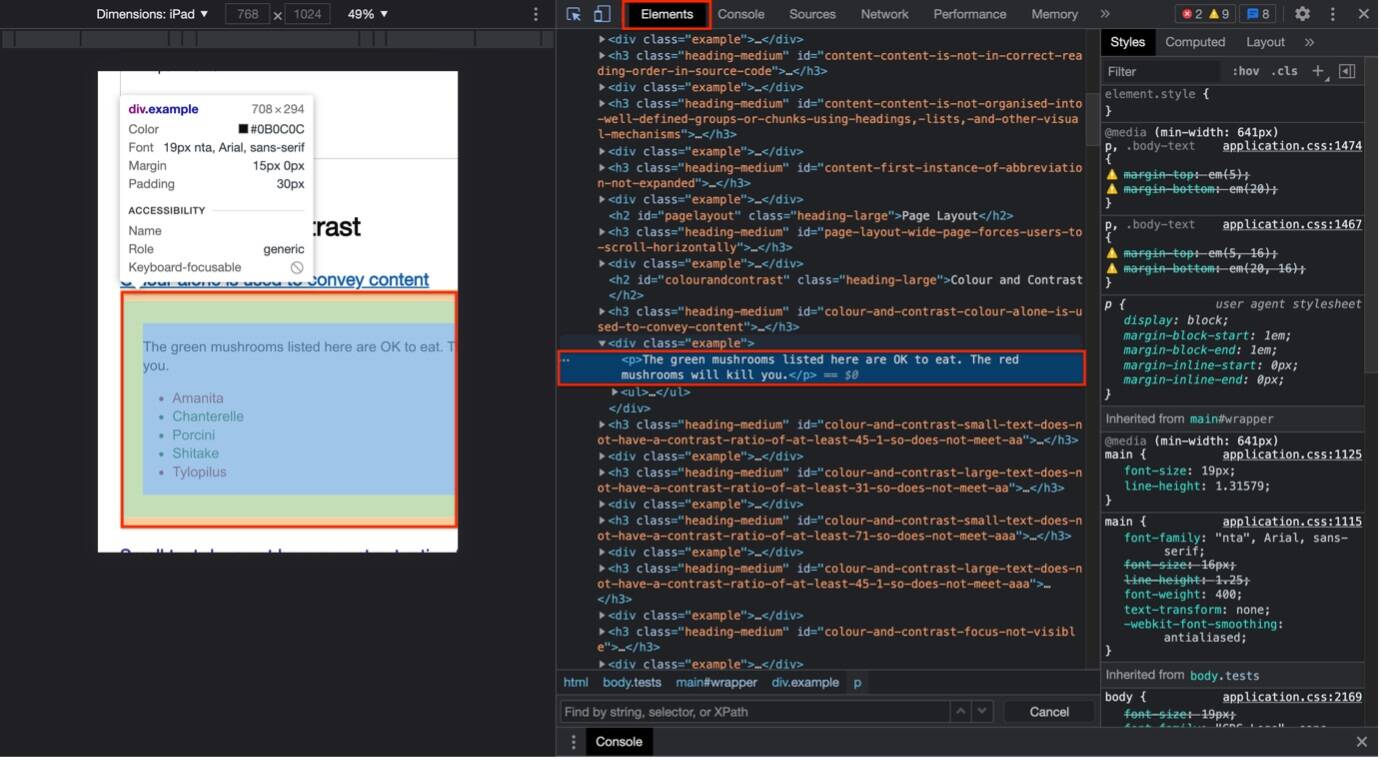
This fix is quite easy as the problem here is that we should never use just color to convey an important message.
In this example issue, the page's content is listing information about mushrooms that are safe to consume but it's only conveying the message through red and green color. That can be difficult for users who are colorblind. So, we should add some sort of other indicators as well. One idea is adding a check mark or cross next to the names can help people understand each mushrooms danger level.
Issue 2
Let's go back to the checker and pick another issue.
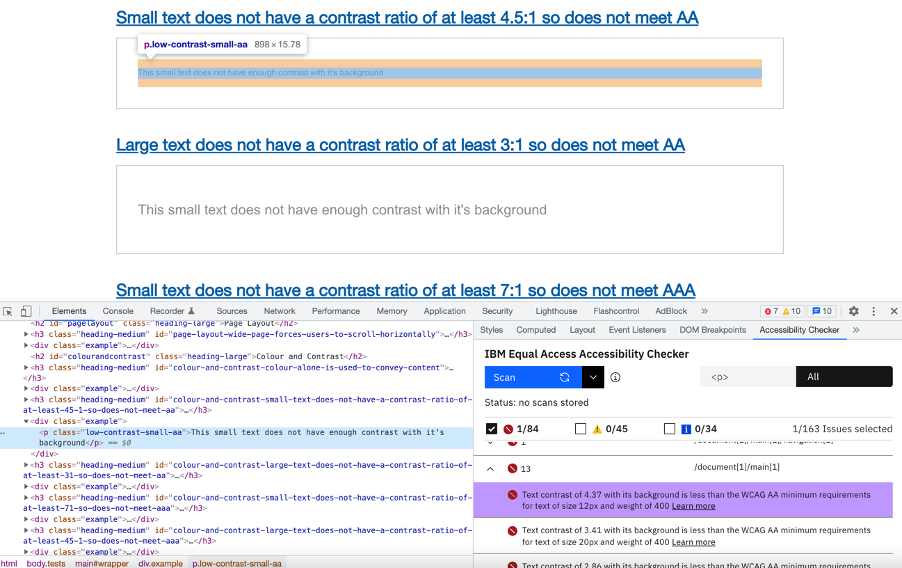
We went back to the Requirements area and chose an issue under 1.4.3. Contrast (Minimum). This issue is about the sizes and colors of the text displayed on the page.
Refer to the Element Location section of the page again to learn where in the code the issue is located. In this scenario, the text does not have enough contrast with the background and that can cause issues to people with low vision or people with vision impairment.
A benefit of the checker is that it works in real time. You don't necessarily have to change these things in the code straight away. You can first test them out in the inspect elements and see how it might affect your website and play around with it till you find something that works for you and then change them in the code later.

Fix issue 2
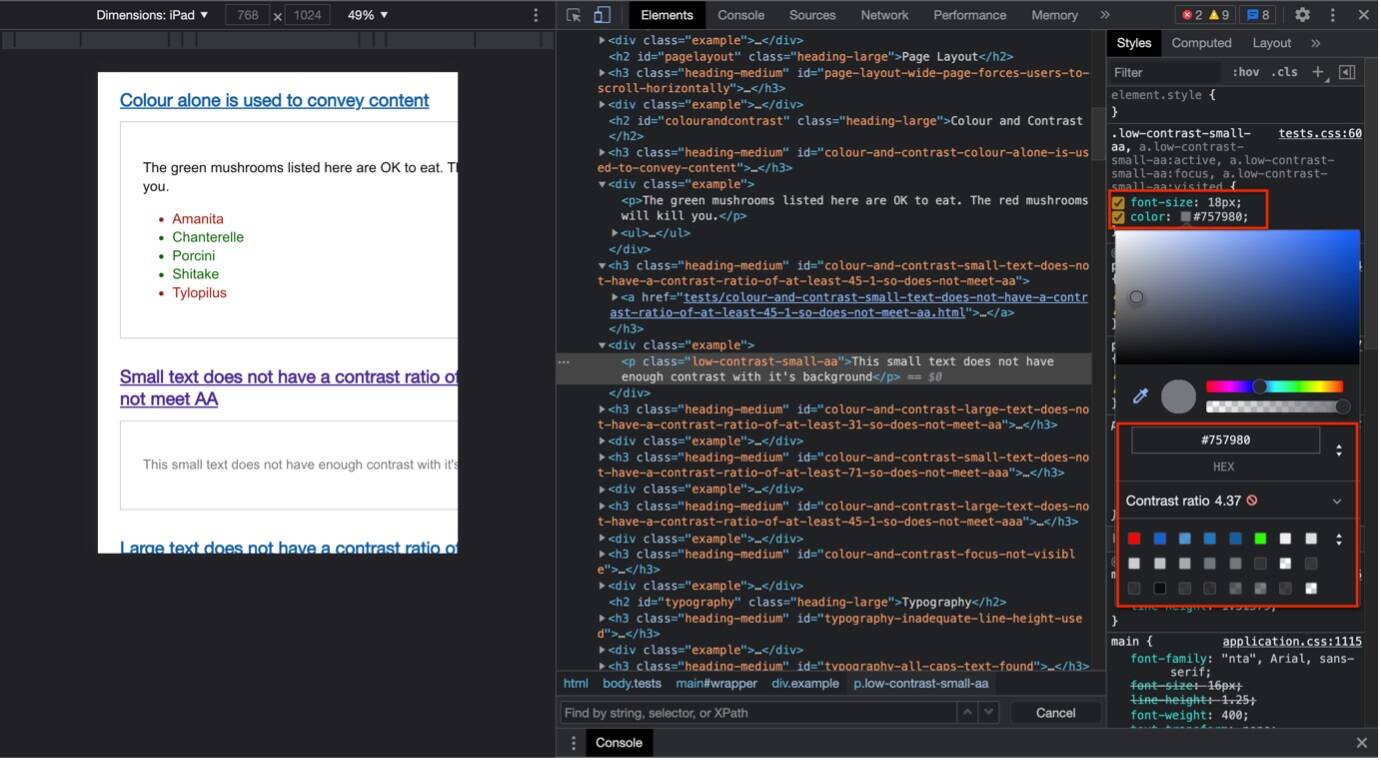
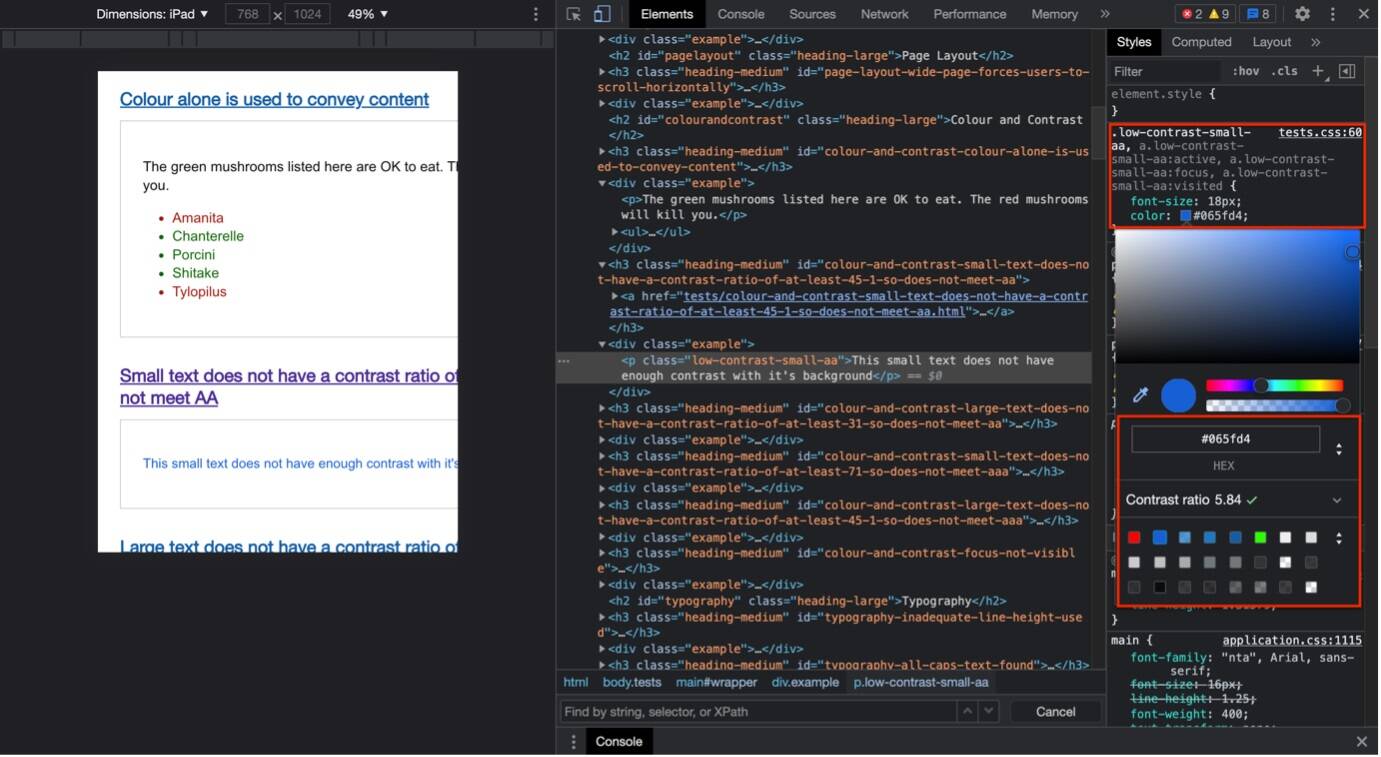
To fix this there are 2 things that need to be done.
- Click on the font and change it to 18 from 12.
- Next, click on color and you will find that the contrast ratio is not right. You can pick and choose different colors that might go with your website till you find the right with the correct contrast ratio.
Now that we successfully fixed 2 issues, we can go back to the checker page and scan again to see the updates reflected in the summary.
Issue 3
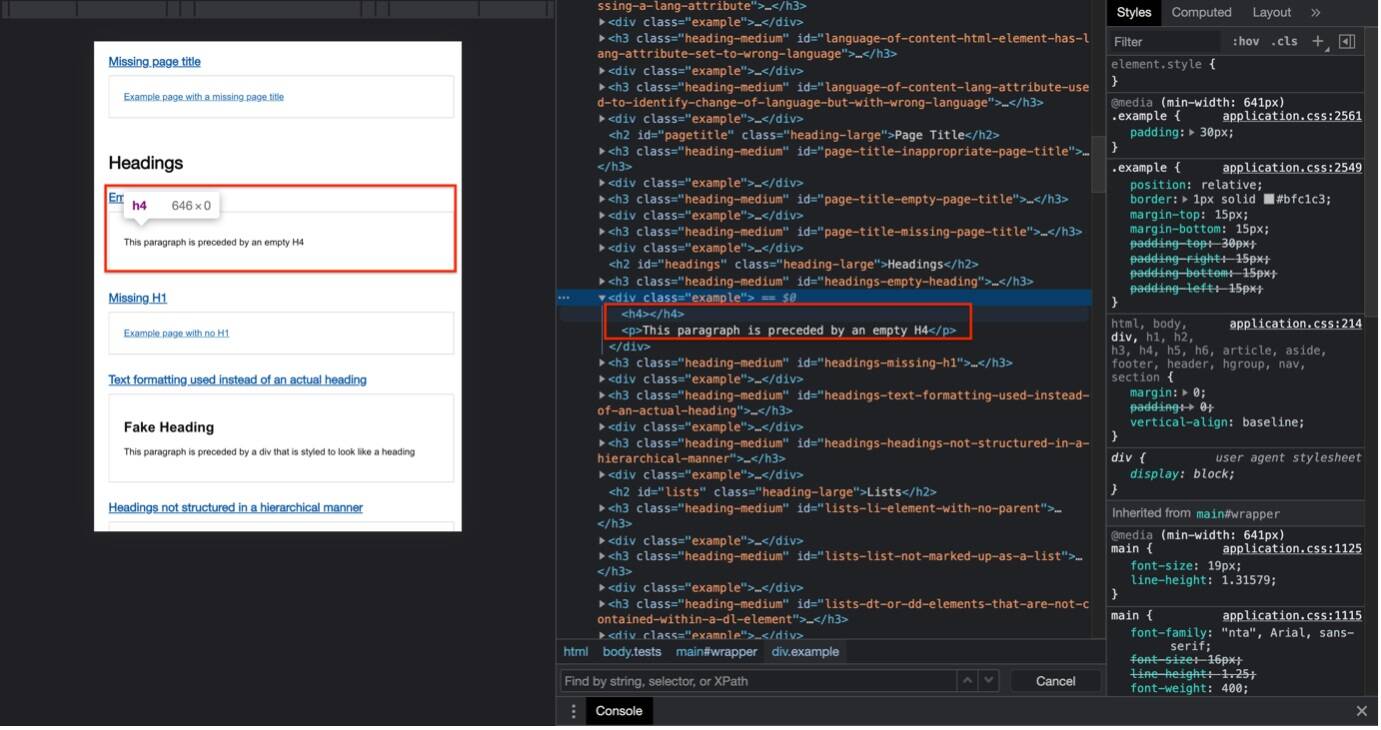
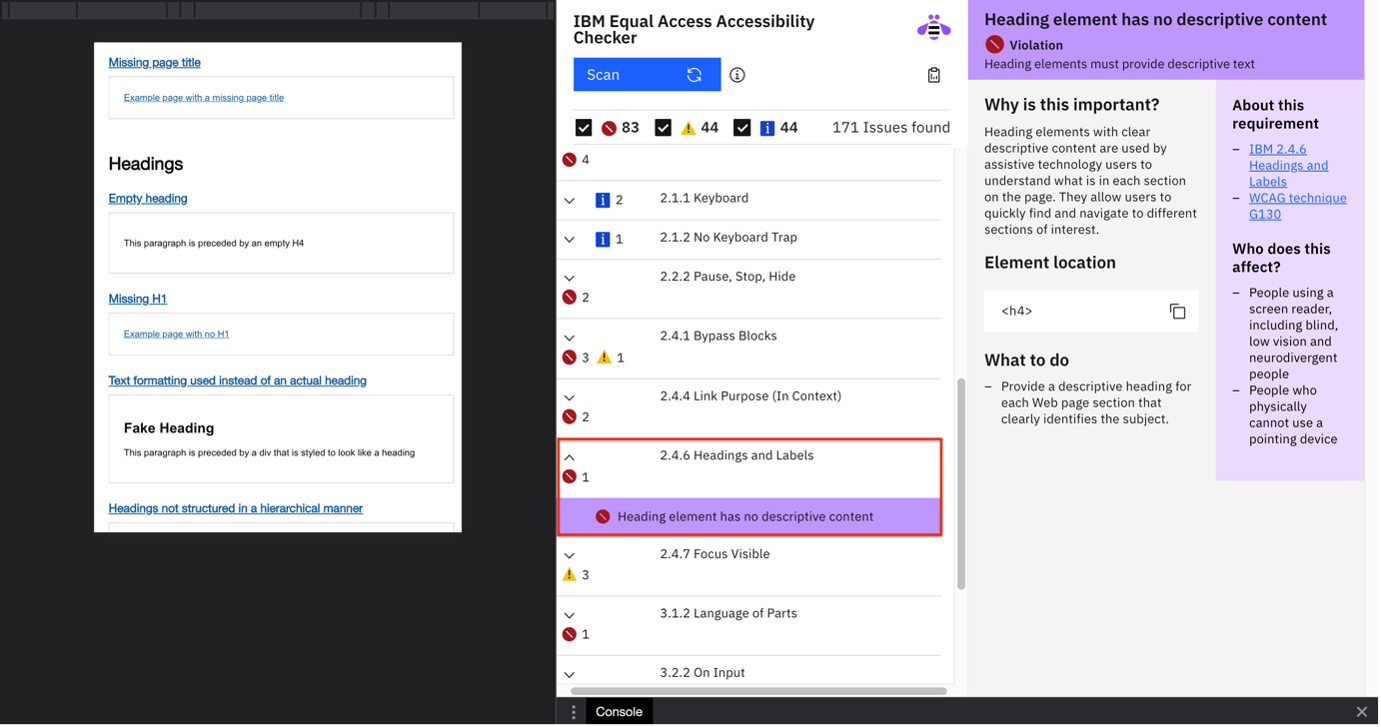
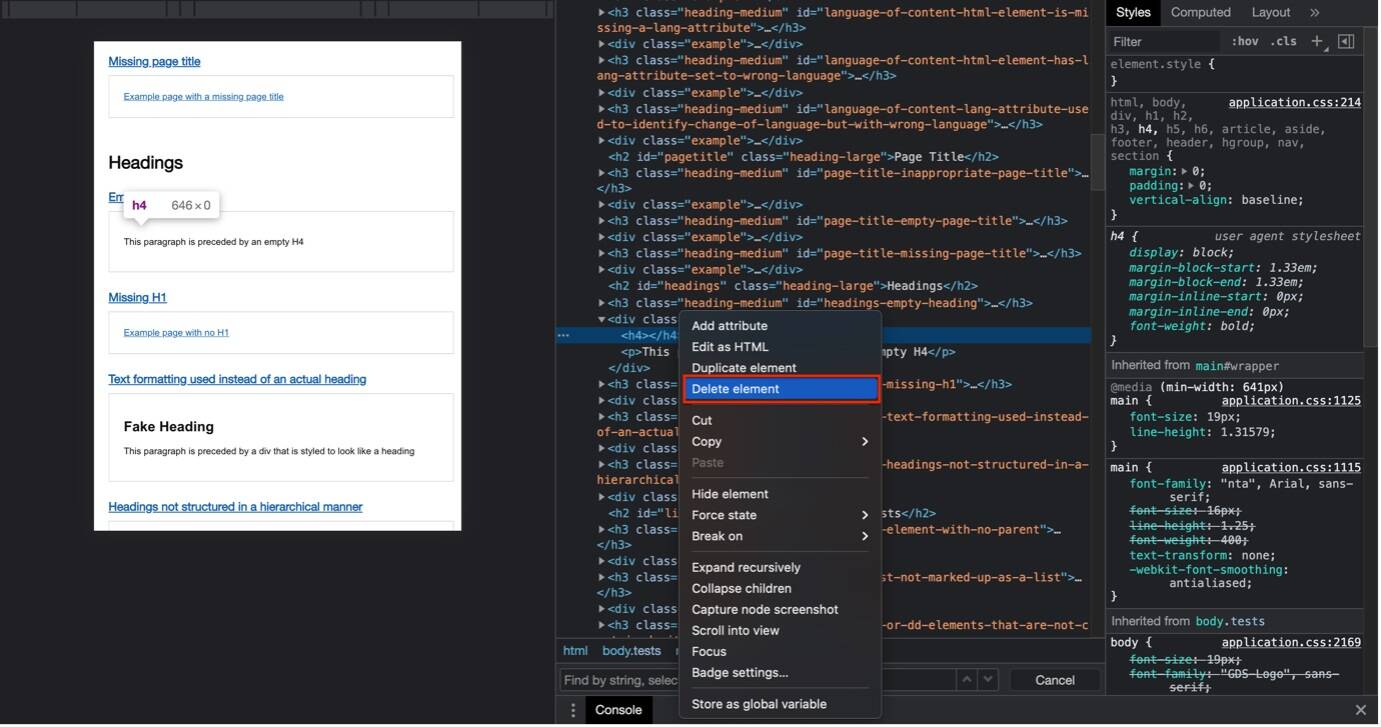
In this issue, it looks like some text was removed from the page but the element tag is still there and empty. There is an H4 tag without an actual heading. It's important to fix these as they can cause issue to people using screen readers or have low vision.
Fix issue 3
You can easily fix it, if you missed the heading add the heading or if you forgot to remove it simply delete the element as in our case.
Summary
Simple fixes and edits to code can help users have a better user experience. In no time we were able to fix 3 issues. If we spend more time in our sprints considering accessibility, we will not only be helping others but also be socially responsible.
Accessible software products allow people with disabilities to perform tasks that might otherwise be impossible. People with disabilities are enabled in their lives by products that help with daily life and tools in their work. Regardless of disability type, people can work alongside others and be active and productive.
So, to summarize, the Toolkit guides teams to embed accessibility directly into their workflow. This allows product teams to build accessible products quickly and efficiently without the need for outside consultancy.
It includes guidelines that "deliver phase-based guidance about accessibility to all members of a team creating an enterprise offering." The Accessibility Checker automation tools "allow developers or auditors to evaluate a web-based component or solution for accessibility issues."