Tutorial
Build AI agents with IBM Bob and watsonx Orchestrate
Automate agent workflows using MCP tools and IBM BobIn this hands-on tutorial, you build AI agents with watsonx Orchestrate, IBM Bob, and MCP tools, and then test, import, and verify the complete workflow end to end.
You'll use IBM Bob as an AI development partner. IBM Bob simplifies the entire process. Bob sets up the Python project. It builds and validates MCP tools. Bob deploys the tools and creates an agent in watsonx Orchestrate. You complete all tasks without manual work. You only give Bob approvals at key steps.
Bob helps developers move from idea to production faster. It reduces manual work and context switches. Bob provides full visibility, speed, and automation. It enforces best practices without sacrificing control or quality. Bob works within your IDE and understands your project context. Every interaction feels like working with a teammate.
"Perfect demonstration of the Jevons paradox: increased efficiency boosts productivity and increases consumption" - Neel Sundaresan, General Manager, Automation and AI
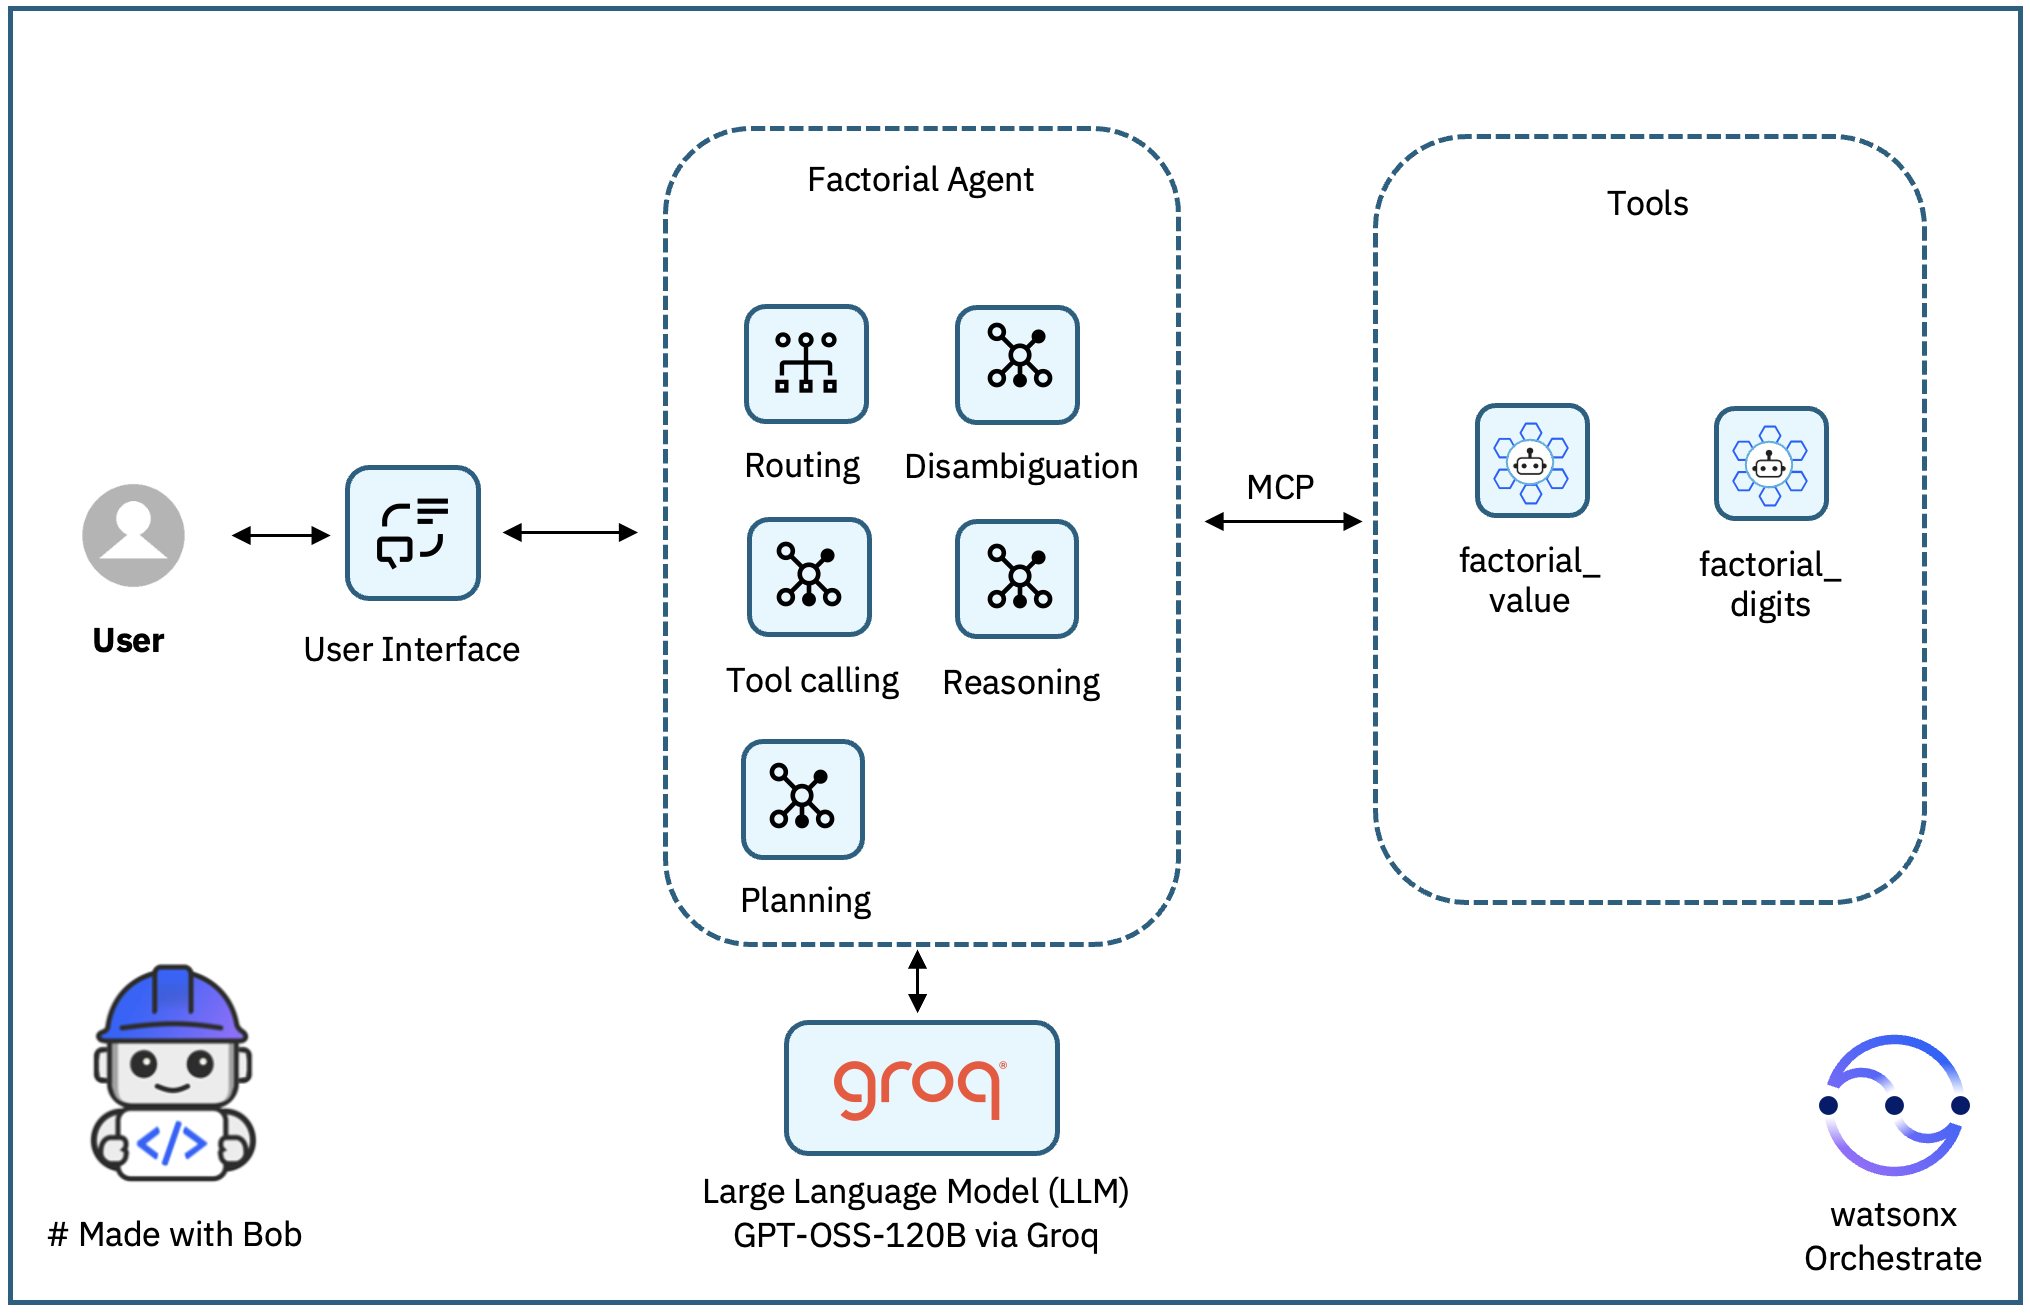
The following architecture diagram shows the complete workflow. Bob creates the project structure and Python virtual environment. It builds the MCP server with two mathematical tools: factorial_value and factorial_digits. Bob writes unit tests and builds an MCP client for end-to-end testing. It generates documentation and fixes issues automatically during verification. Bob creates the MCP tool and Factorial Agent on watsonx Orchestrate. It configures the agent to use the GPT-OSS-120B model via Groq for reasoning. Bob enforces best practices throughout to ensure quality code. You stay in control without context switching or manual debugging.
Watch Ahmed demonstrate the steps of this tutorial in video:
Video will open in new tab or window.
Prerequisites
IBM Bob installed. Sign up for IBM Bob free trial to get started.
A running local environment of watsonx Agent Development Kit (ADK). If you do not have an active instance, follow the getting started with watsonx Orchestrate ADK tutorial.
Steps
You will use IBM Bob to complete the following tasks with no manual work except giving Bob the approval:
- Step 1. Set up the Python project.
- Step 2. Build the MCP server with two tools, create unit tests, and write documentation
- Step 3. Deploy the MCP server and create an MCP client to validate it end to end
- Step 4. Import the MCP tools into watsonx Orchestrate.
- Step 5. Create a watsonx Orchestrate agent that uses the MCP tools.
- Step 6. Verify the agent in watsonx Orchestrate.
- (Optional) Step 7. Configure Bob to access the following MCP servers for watsonx Orchestrate:
- wxo-docs: Provides access to public documentation for the watsonx Orchestrate ADK.
- orchestrate-adk: Provides access to the watsonx Orchestrate software development kit (SDK) for creating agents and tools.
Step 1. Set up the Python project
In this step, you will ask IBM Bob to create the foundation for your project. Bob will create the project directory structure and activate the Python virtual environment. Bob will make sure the environment is ready for building the MCP server in the next step.
Open the IBM Bob IDE.
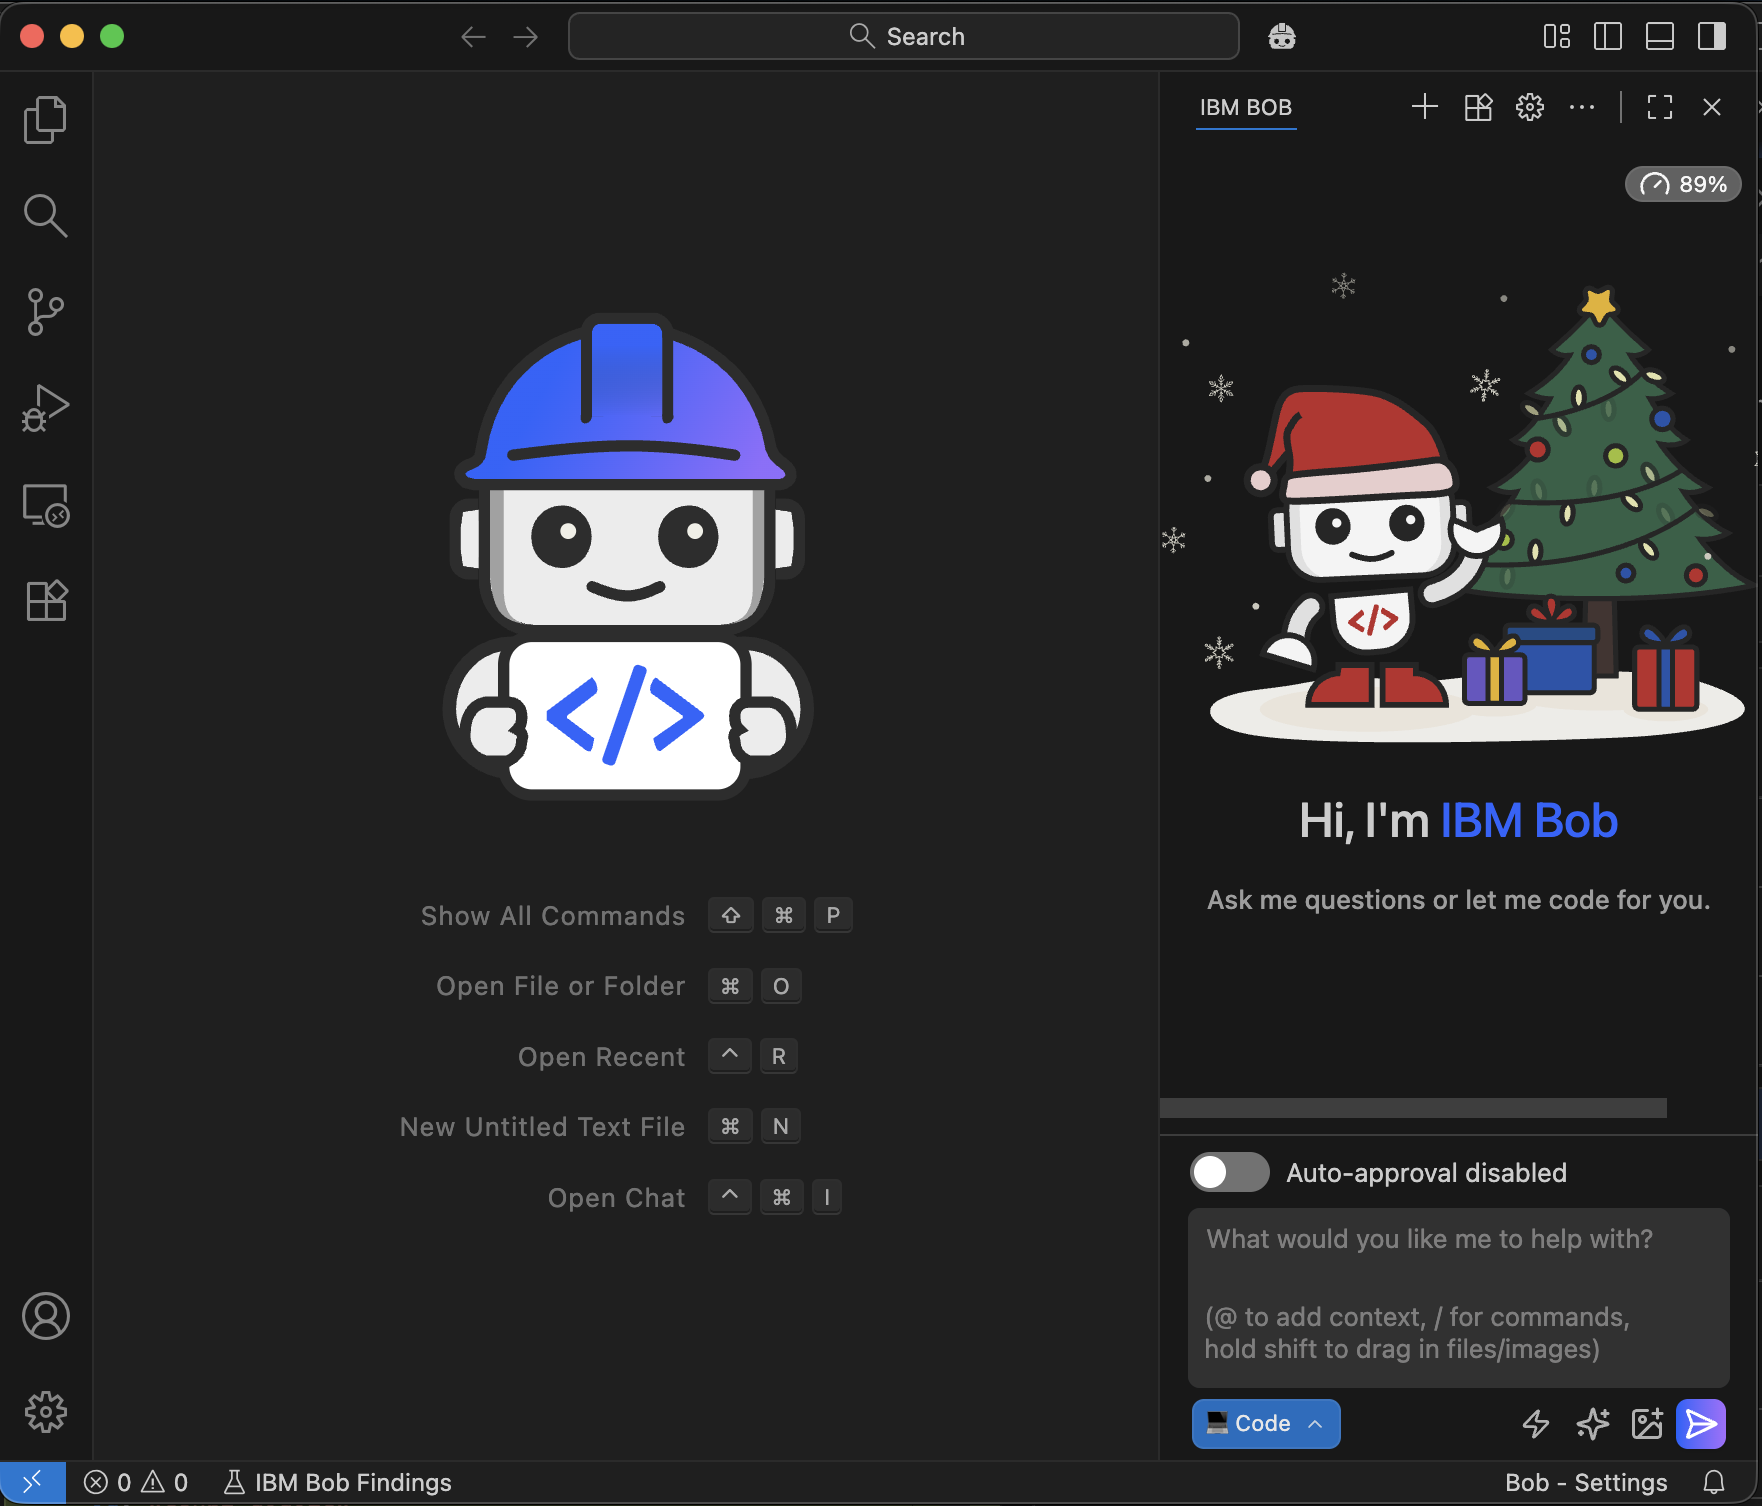
Ask Bob in natural language to use a specific folder for your project and your Python virtual environment. If you do not have a virtual environment, you can ask Bob to create it for you.
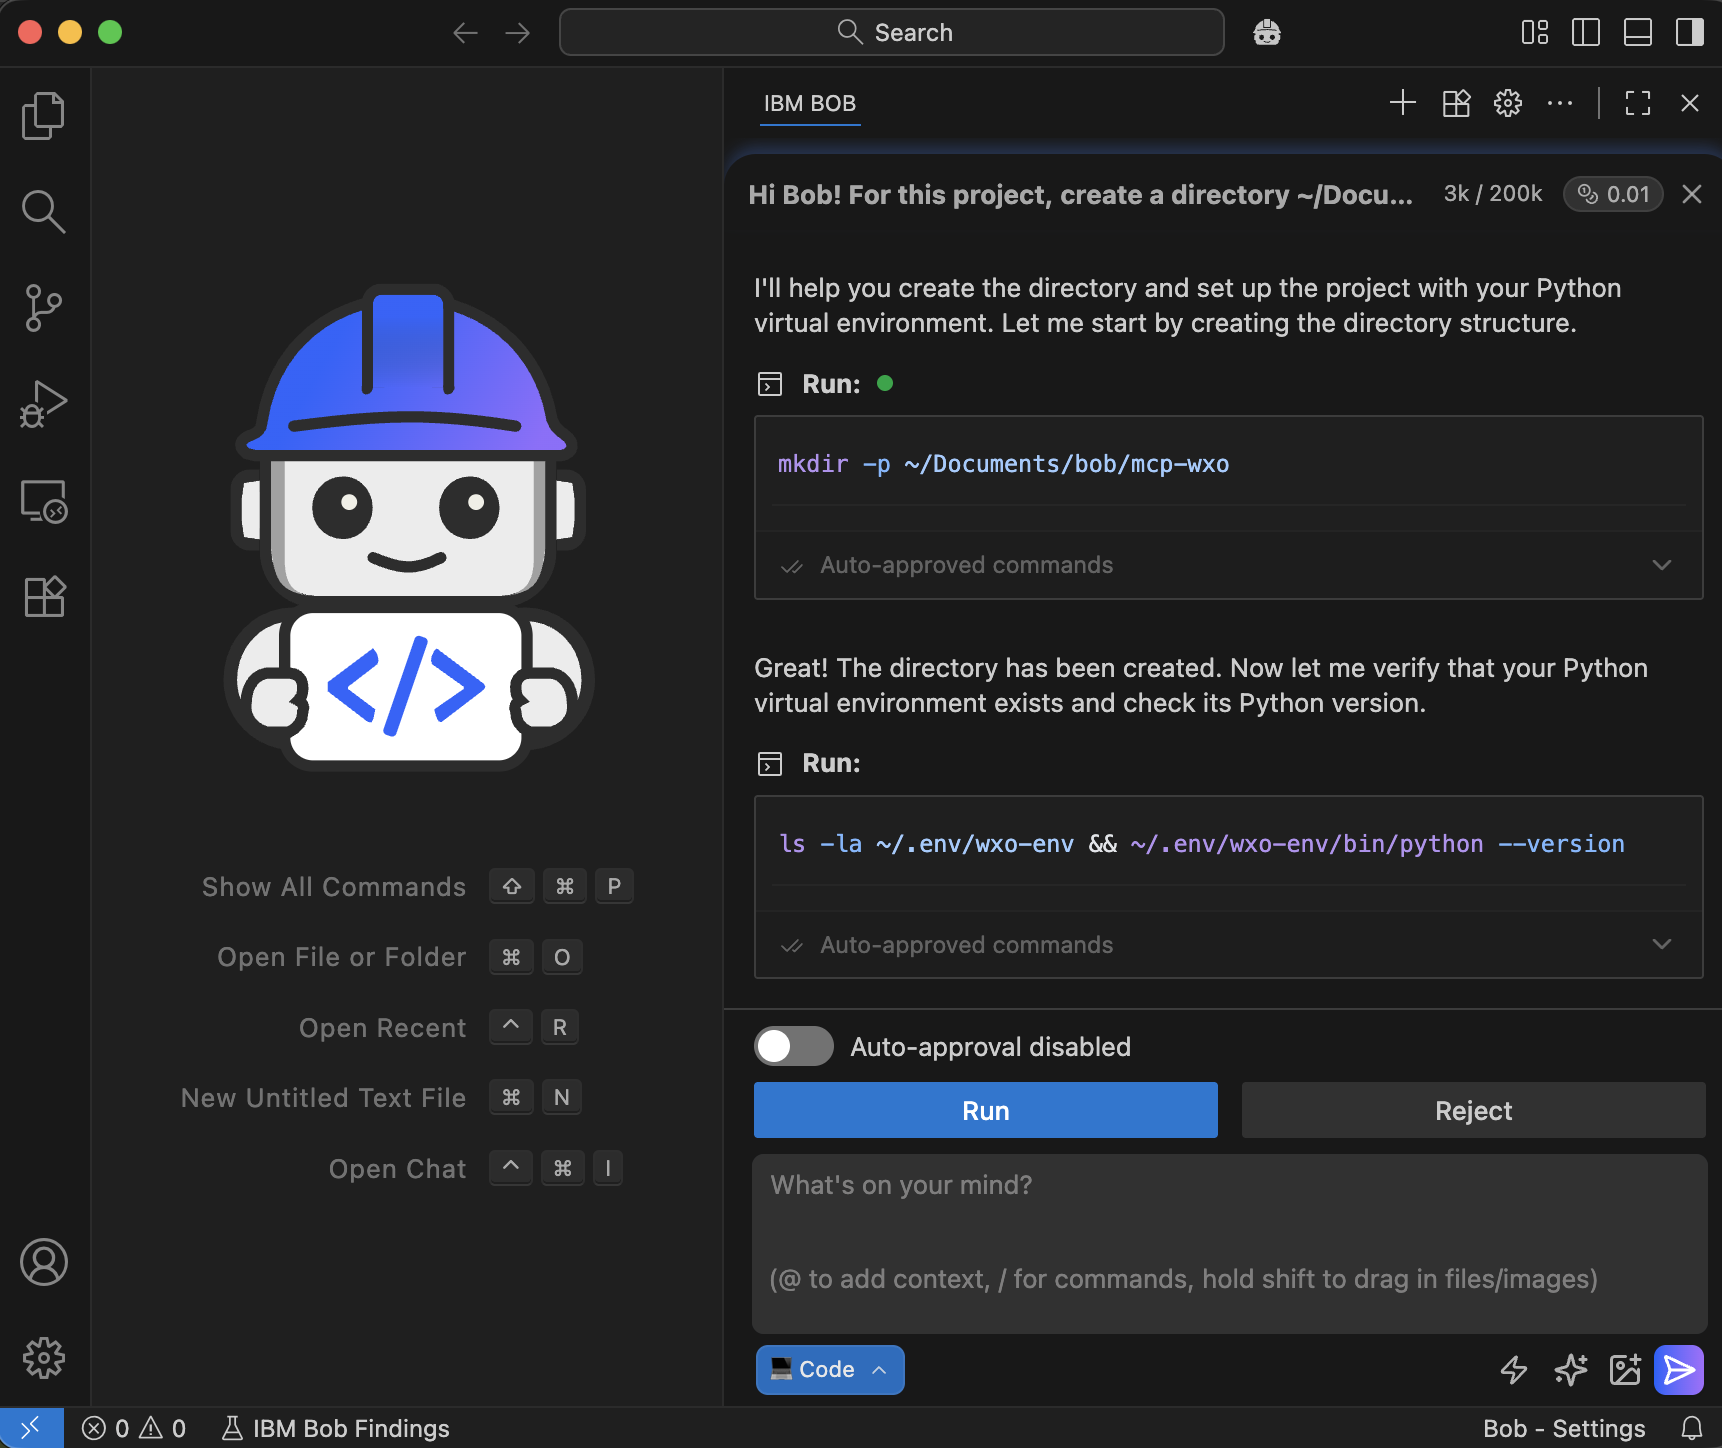
Hi Bob! For this project, create a directory ~/Documents/bob/mcp-wxo, and use my python virtual environment ~/.env/wxo-env.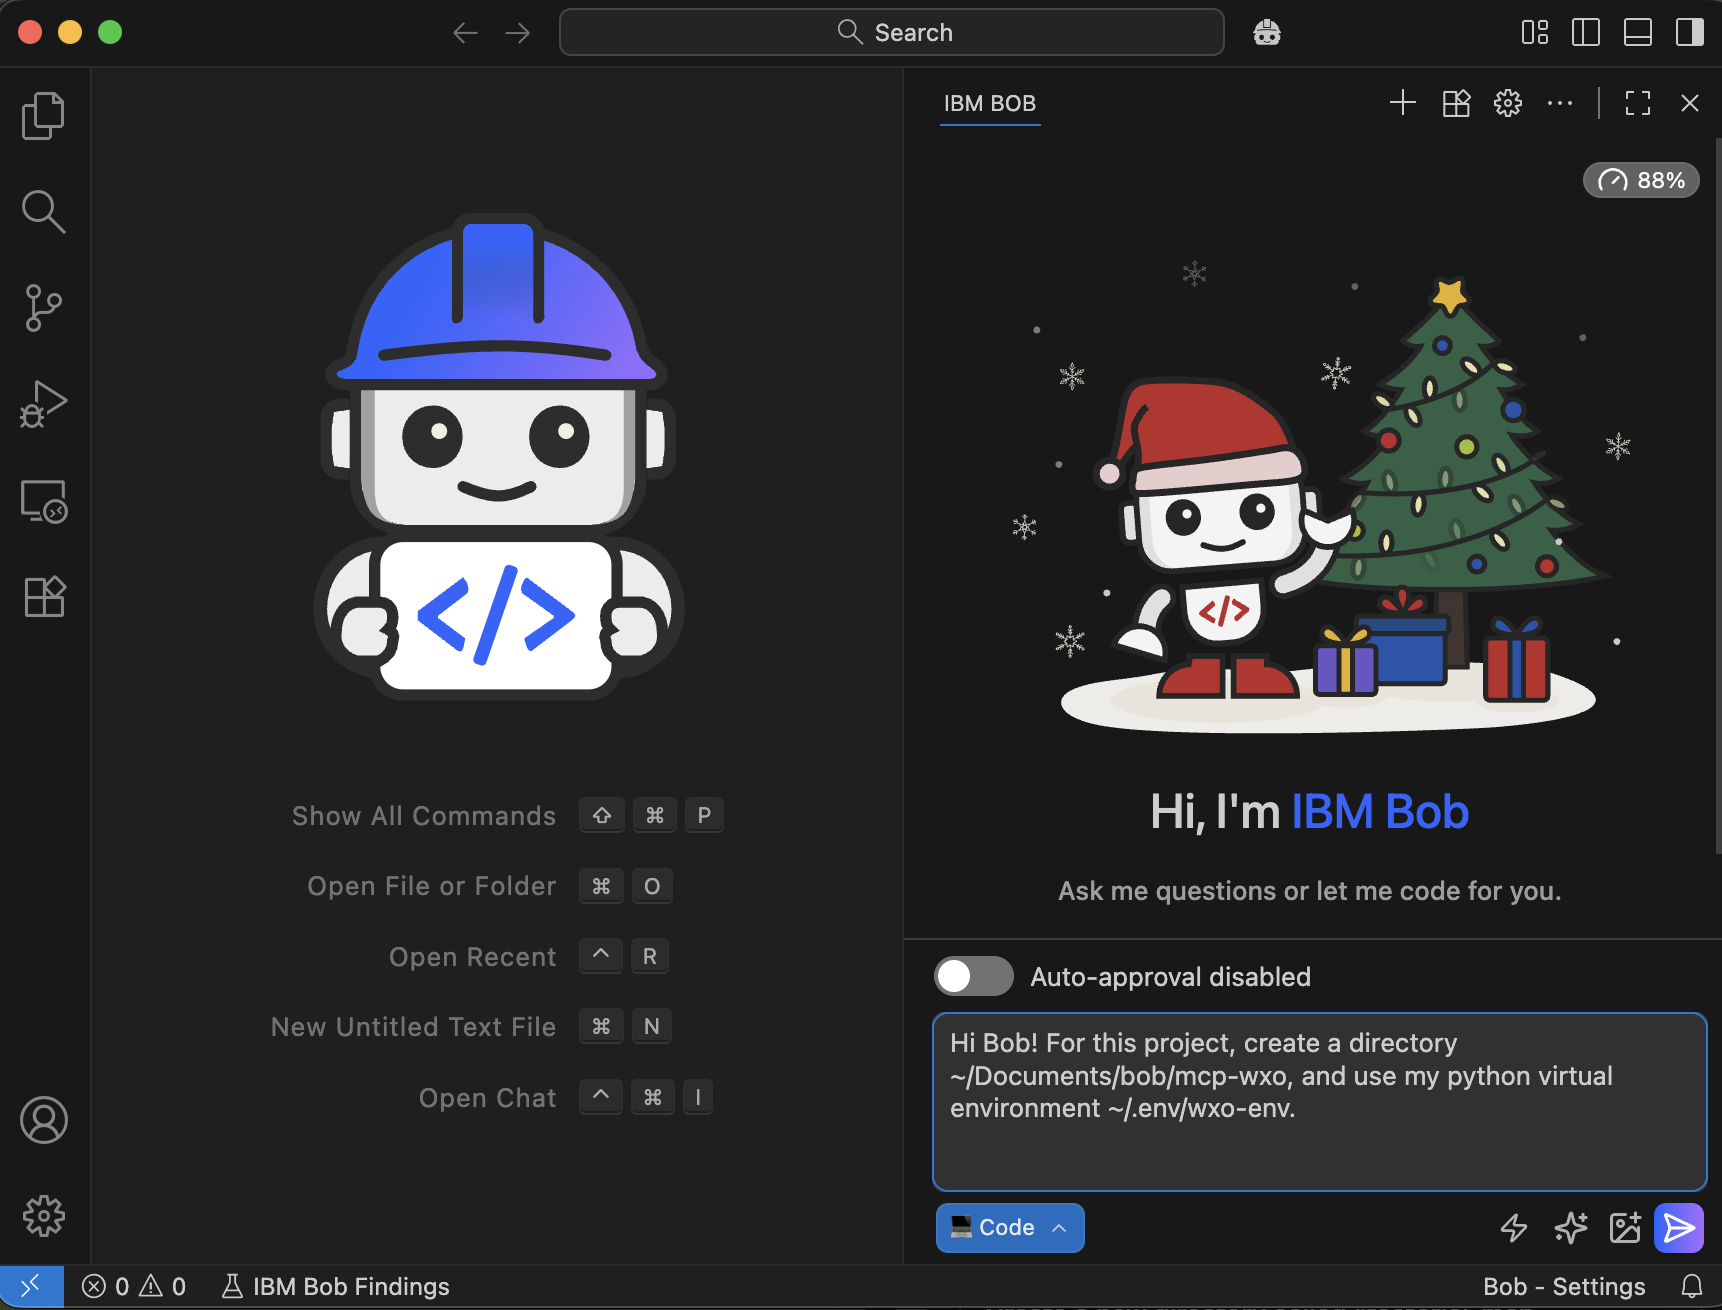
Bob asks you for approval step by step. You can configure “Auto-approval” if you want. Click Run to continue.
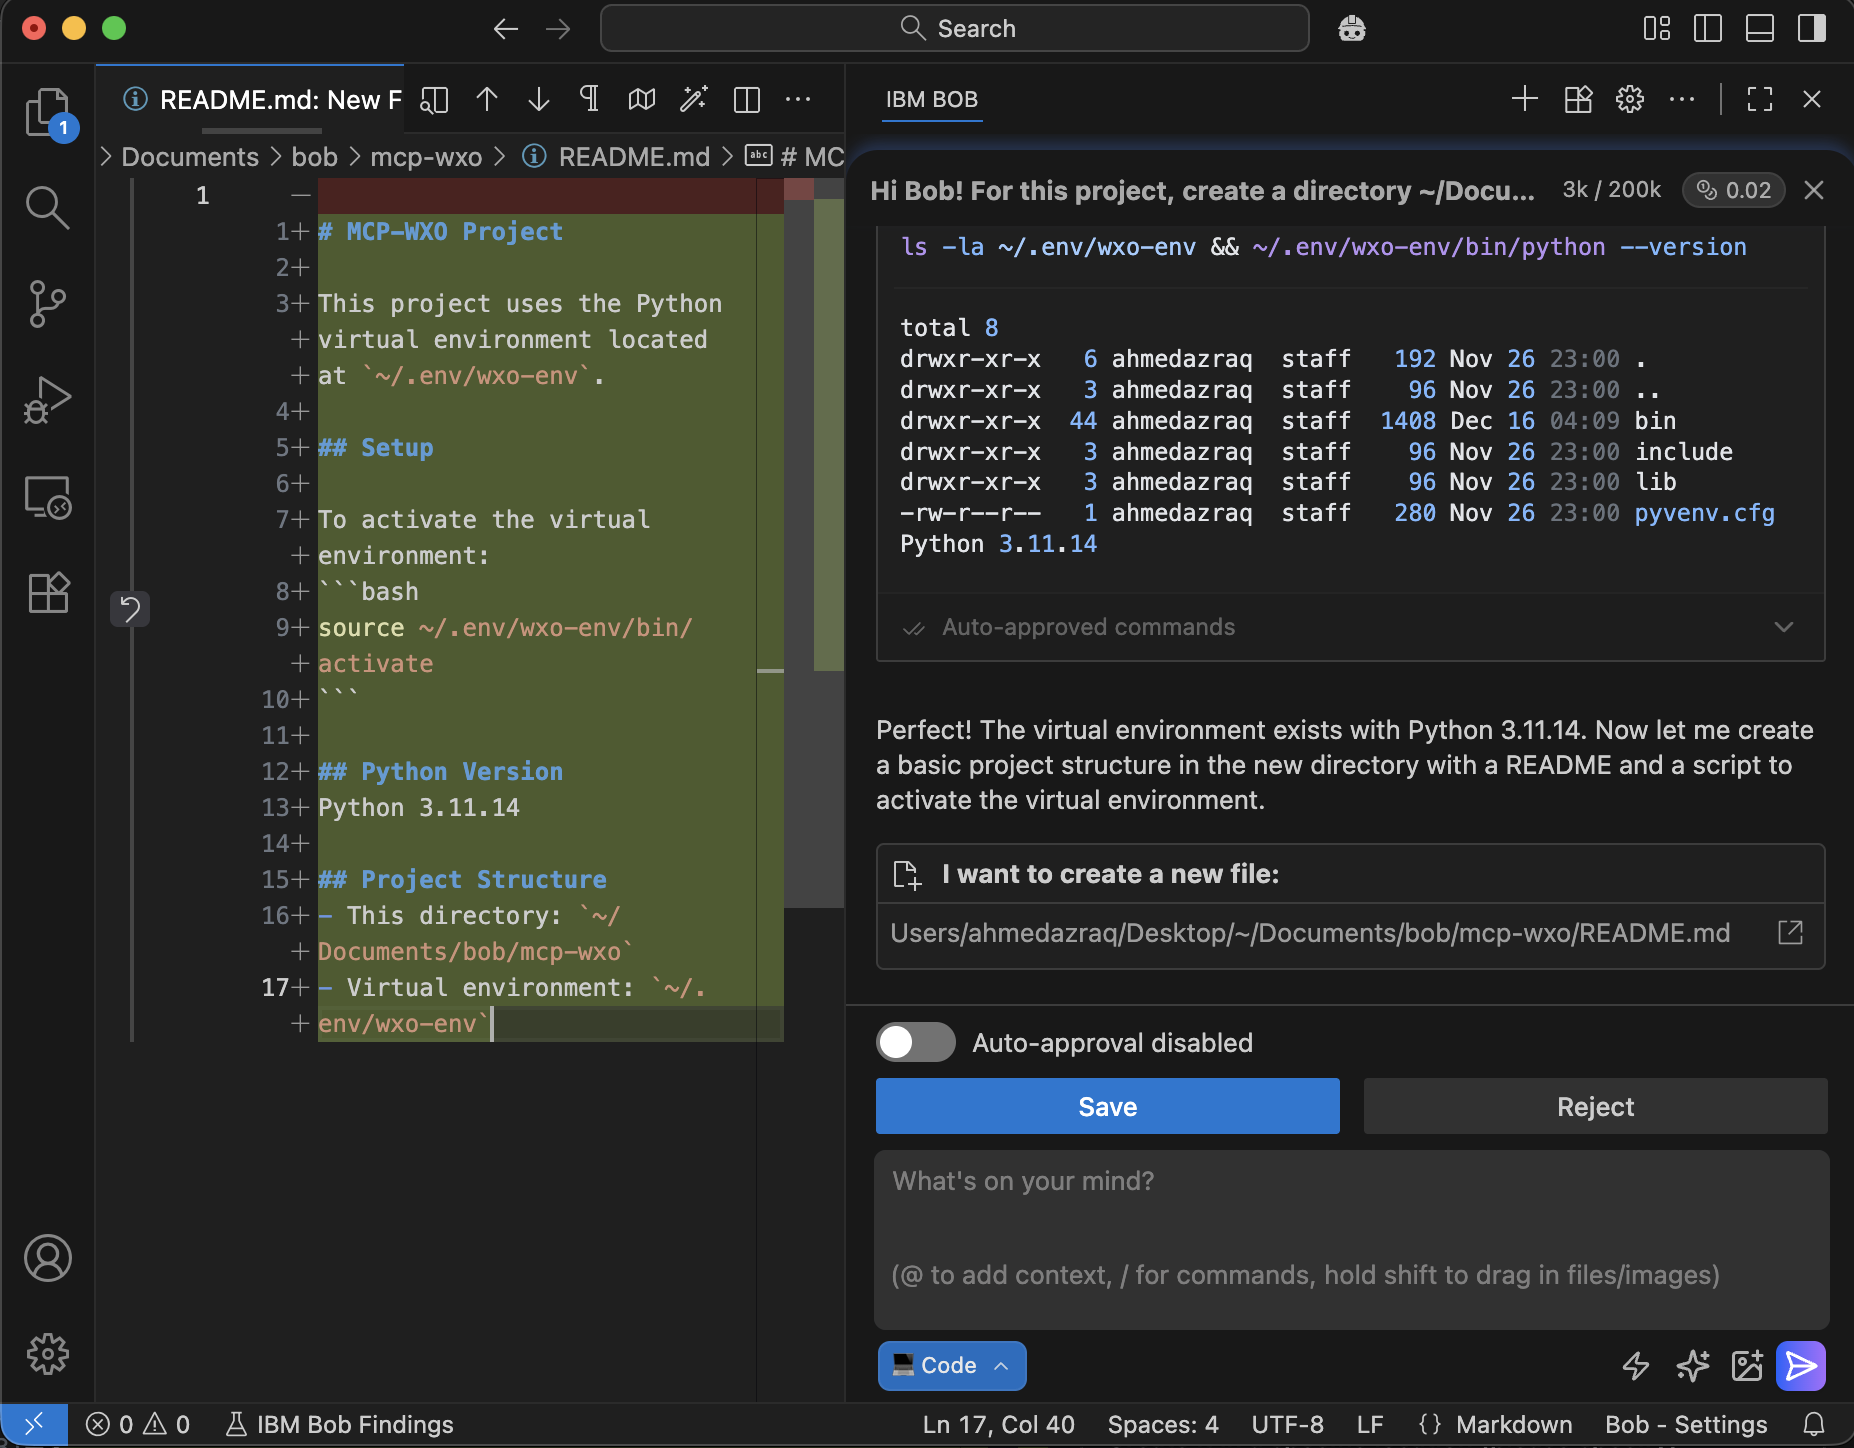
Bob creates the basic project structure with a Readme file. Click Save.
Ask Bob to activate the Python virtual environment.
Activate the python virtual environment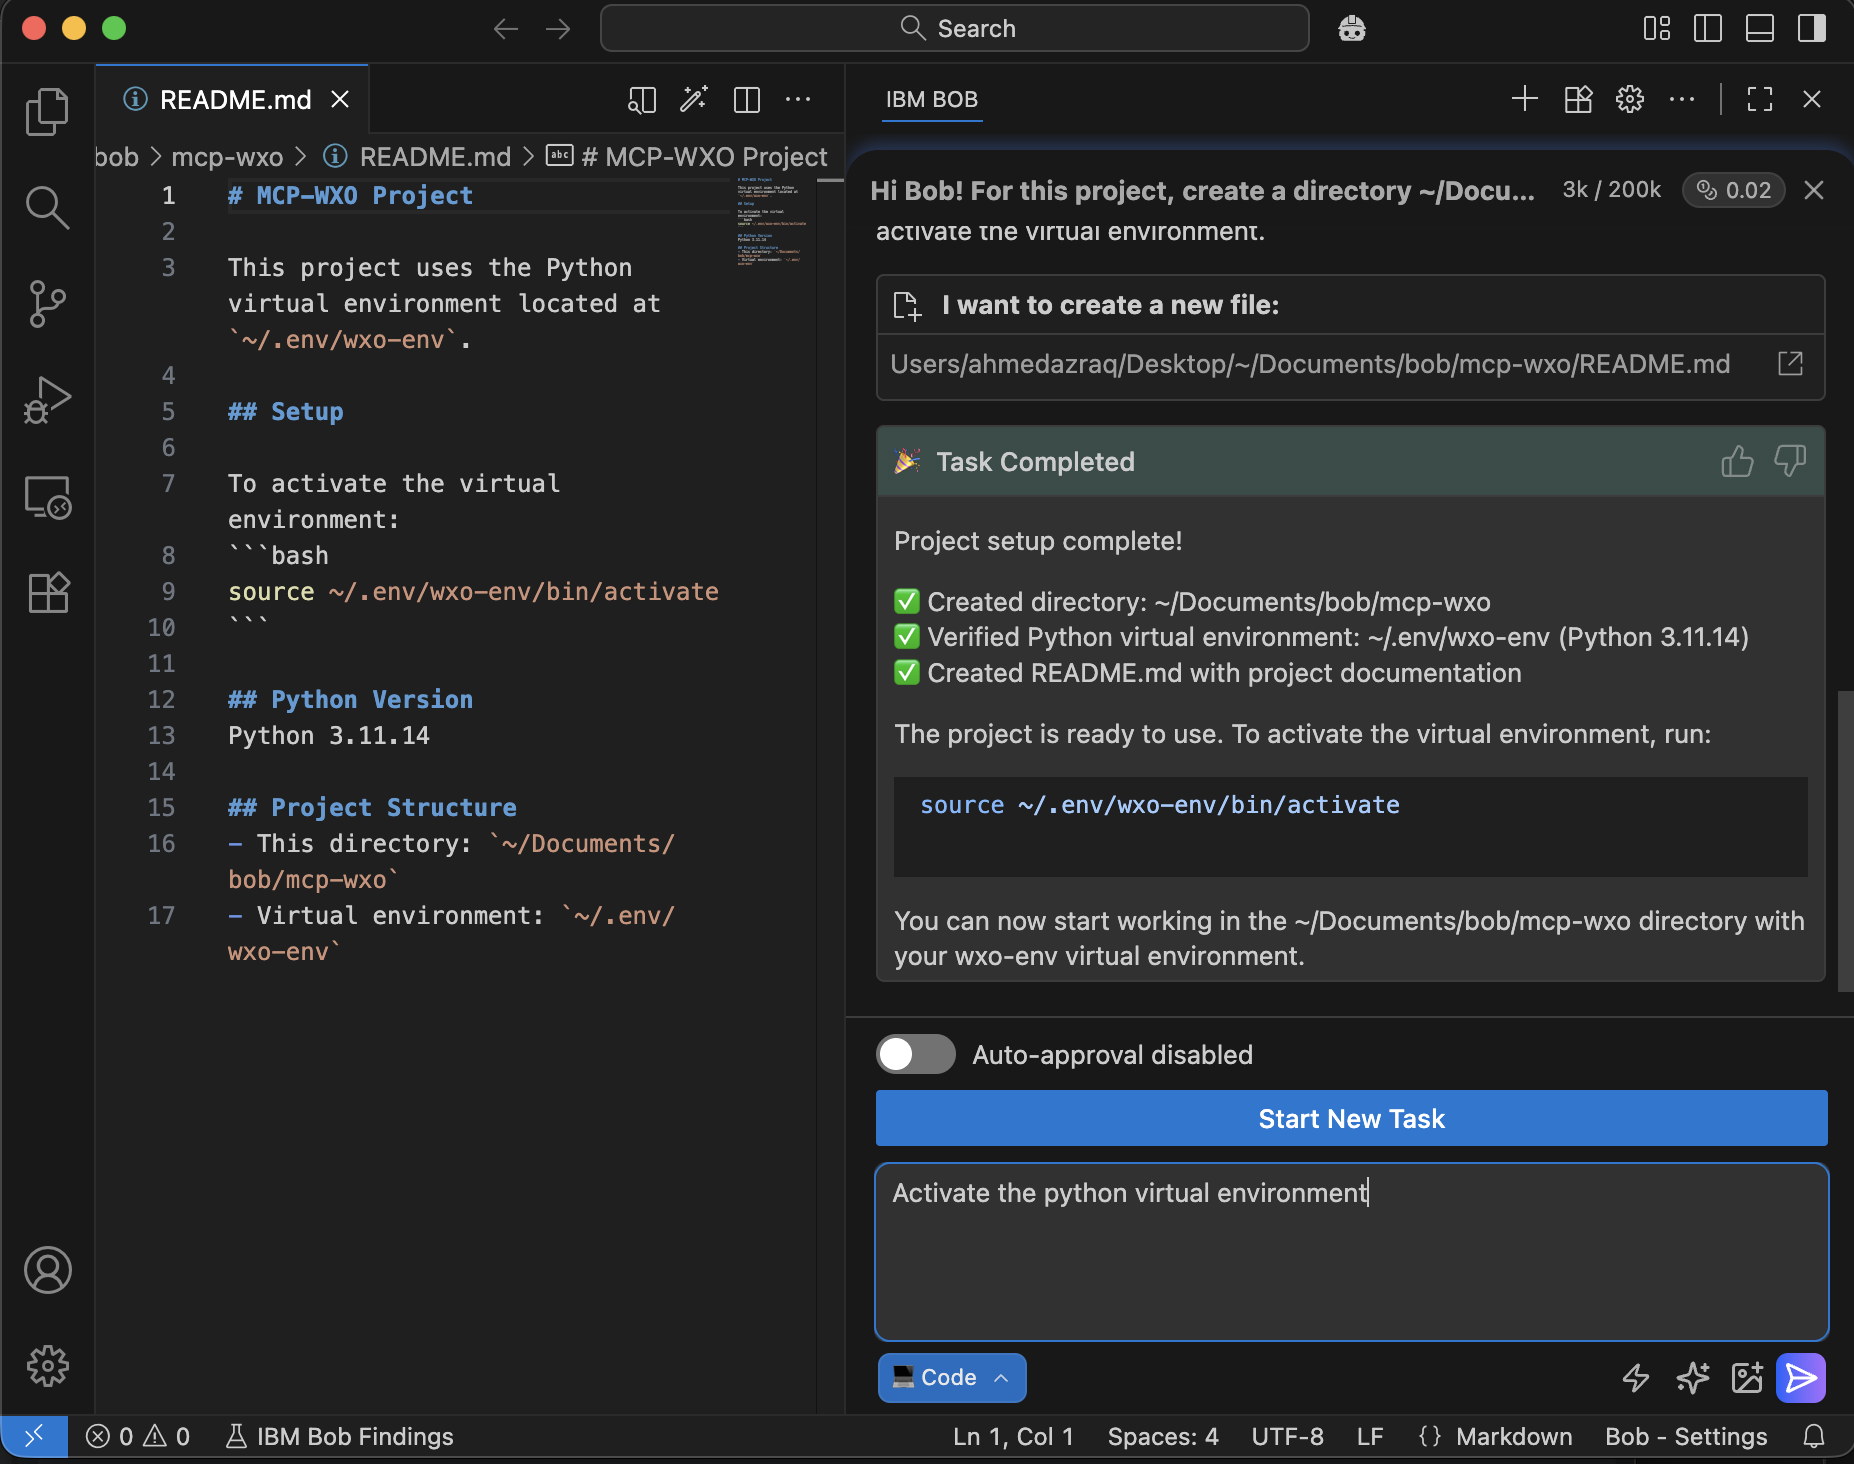
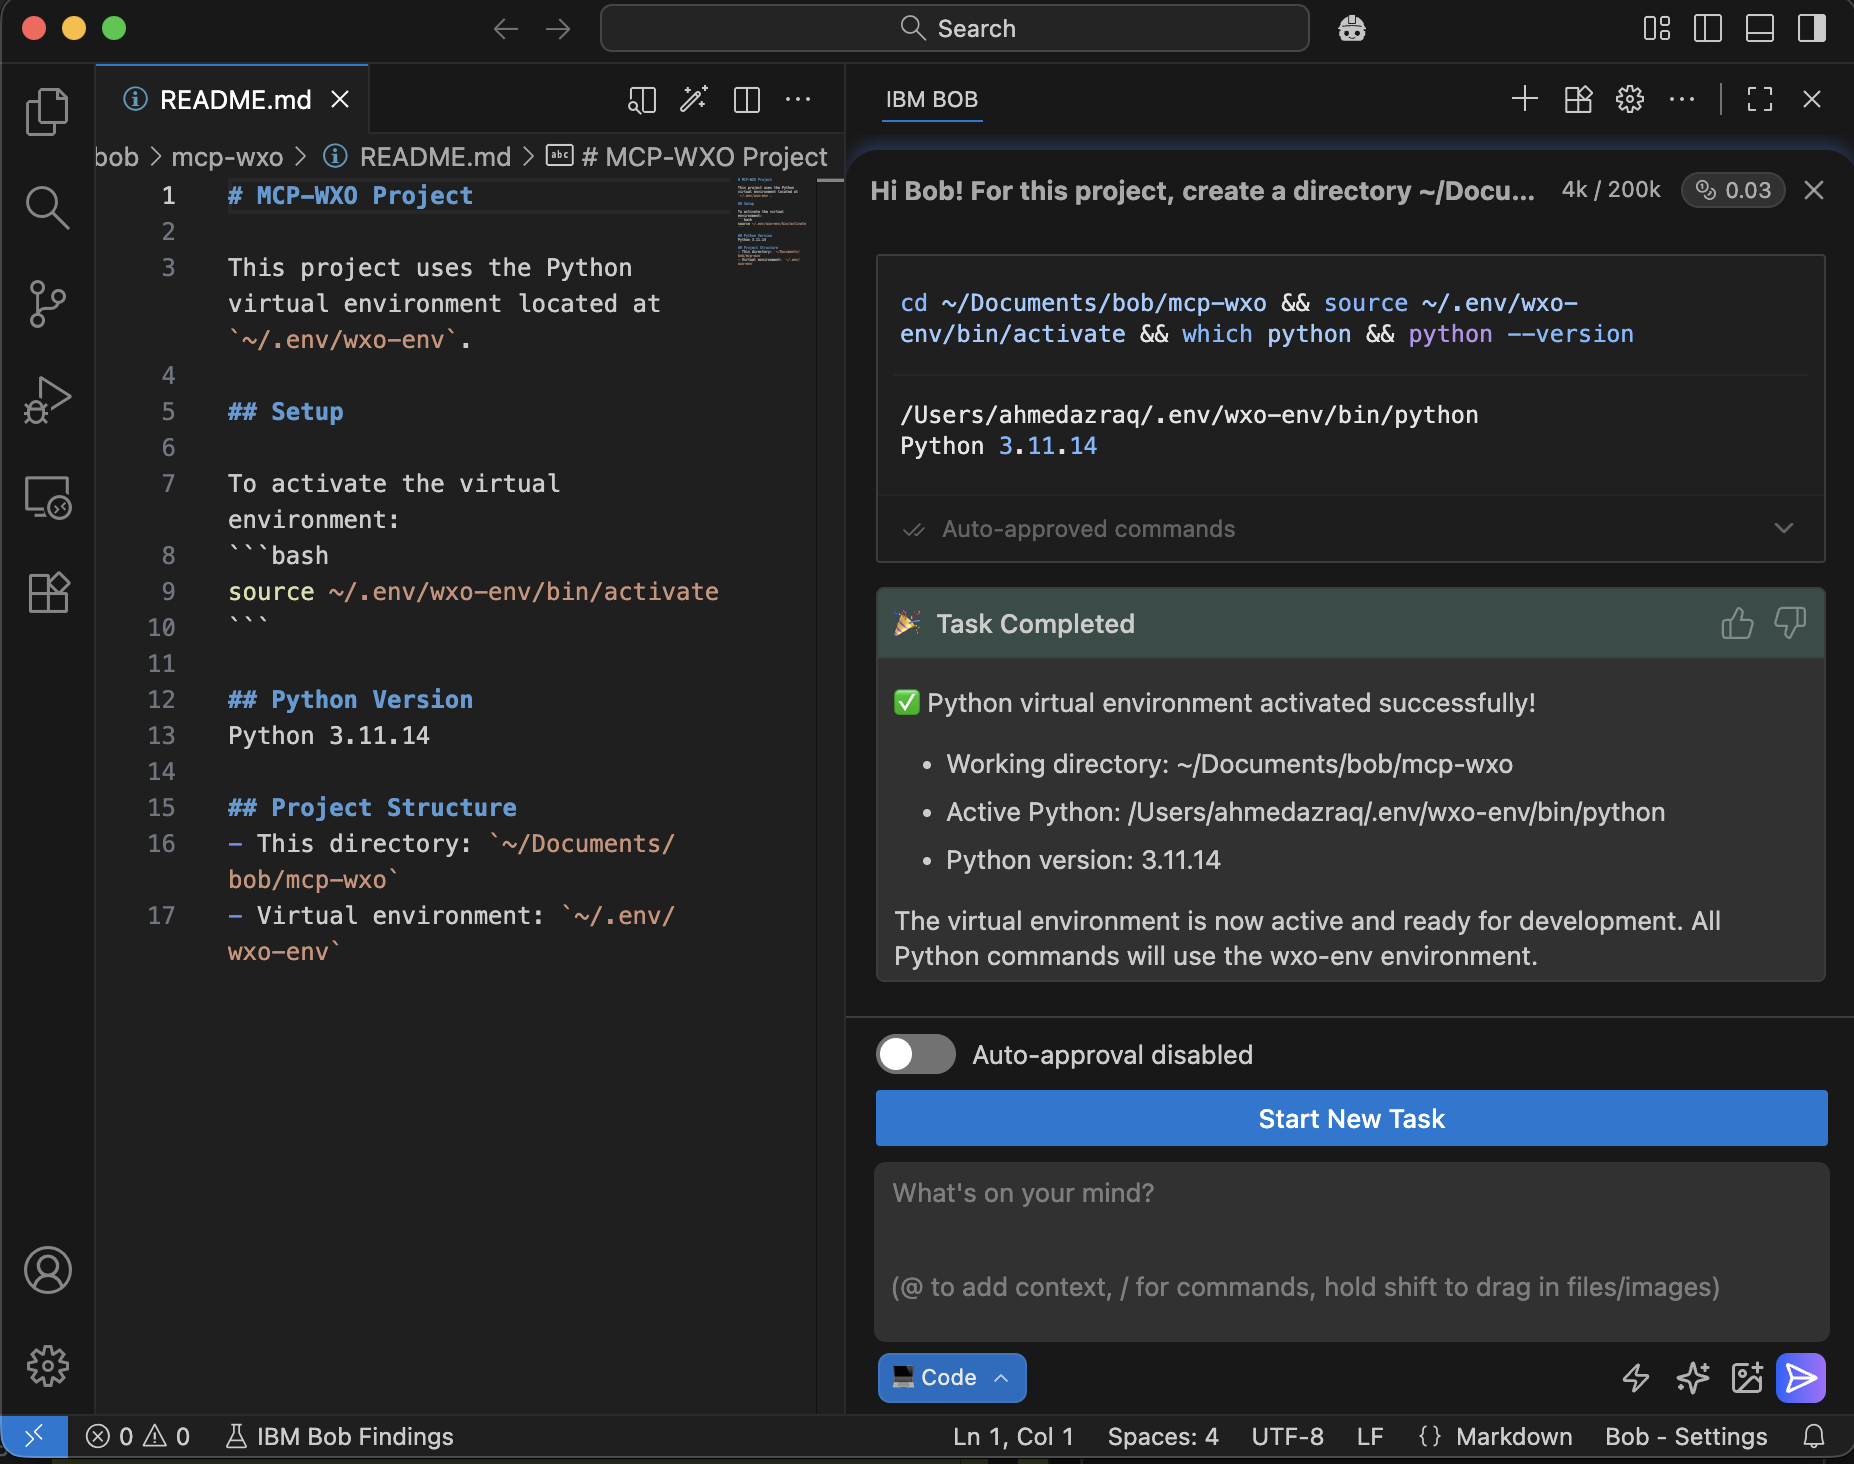
Bob shows that the task is completed successfully.
Step 2. Build the MCP server with two tools, create unit tests, and documentation
In this step, you will ask Bob to build an MCP server that includes two mathematical tools, verify the tools with unit tests, and generate documentation. Bob will use FastMCP to build the server, implement the tools with a shared helper function, write test scripts, fix any issues automatically, and produce documentation. Bob ensures everything meets best practices before moving forward.
Ask Bob in natural language to create the MCP server with two tools. Specify the purpose of each tool clearly.
Create MCP Server using FastMCP with two mathematical tools. The first tool “factorial_value” calculates and returns the exact value of n! (the factorial of a given non-negative integer). The second tool “factorial_digits” returns only the number of decimal digits in n!, which is useful when the factorial is too large to display in full. You can have both tools share a common helper function to compute the factorial and avoid duplication of code.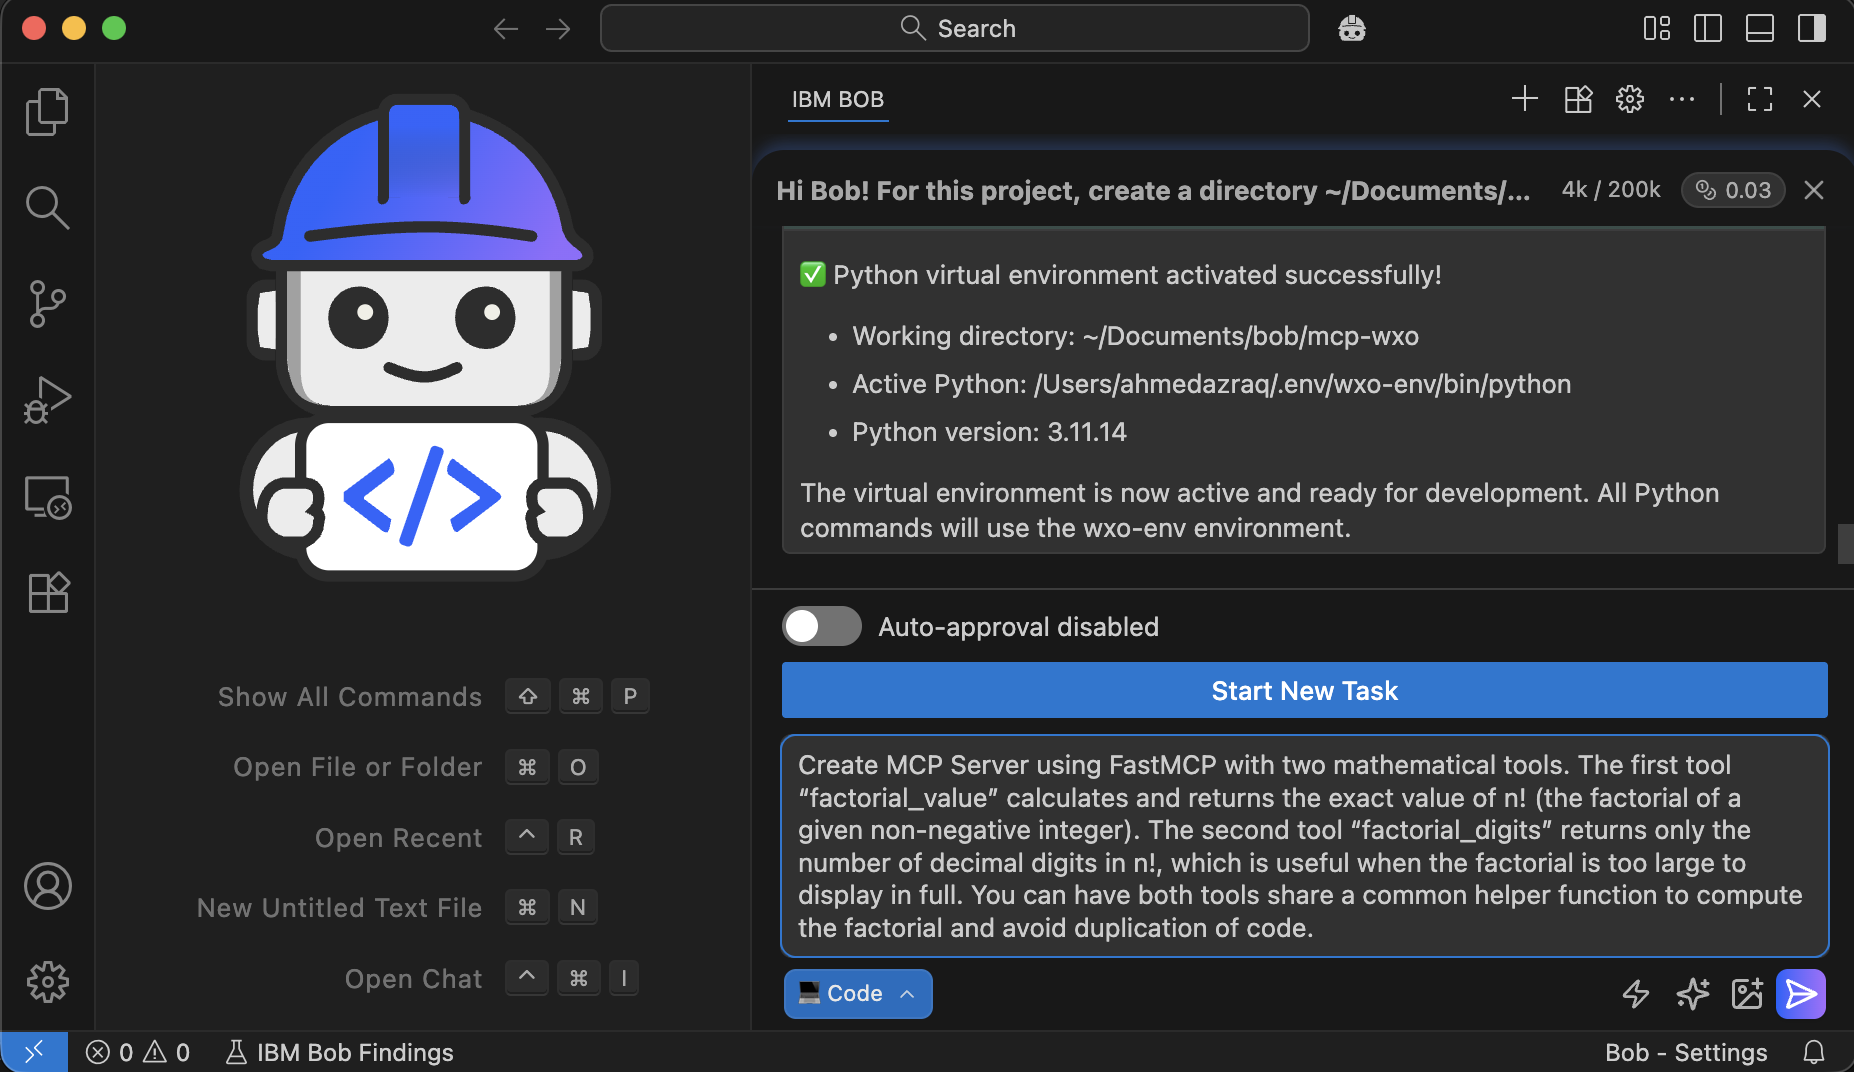
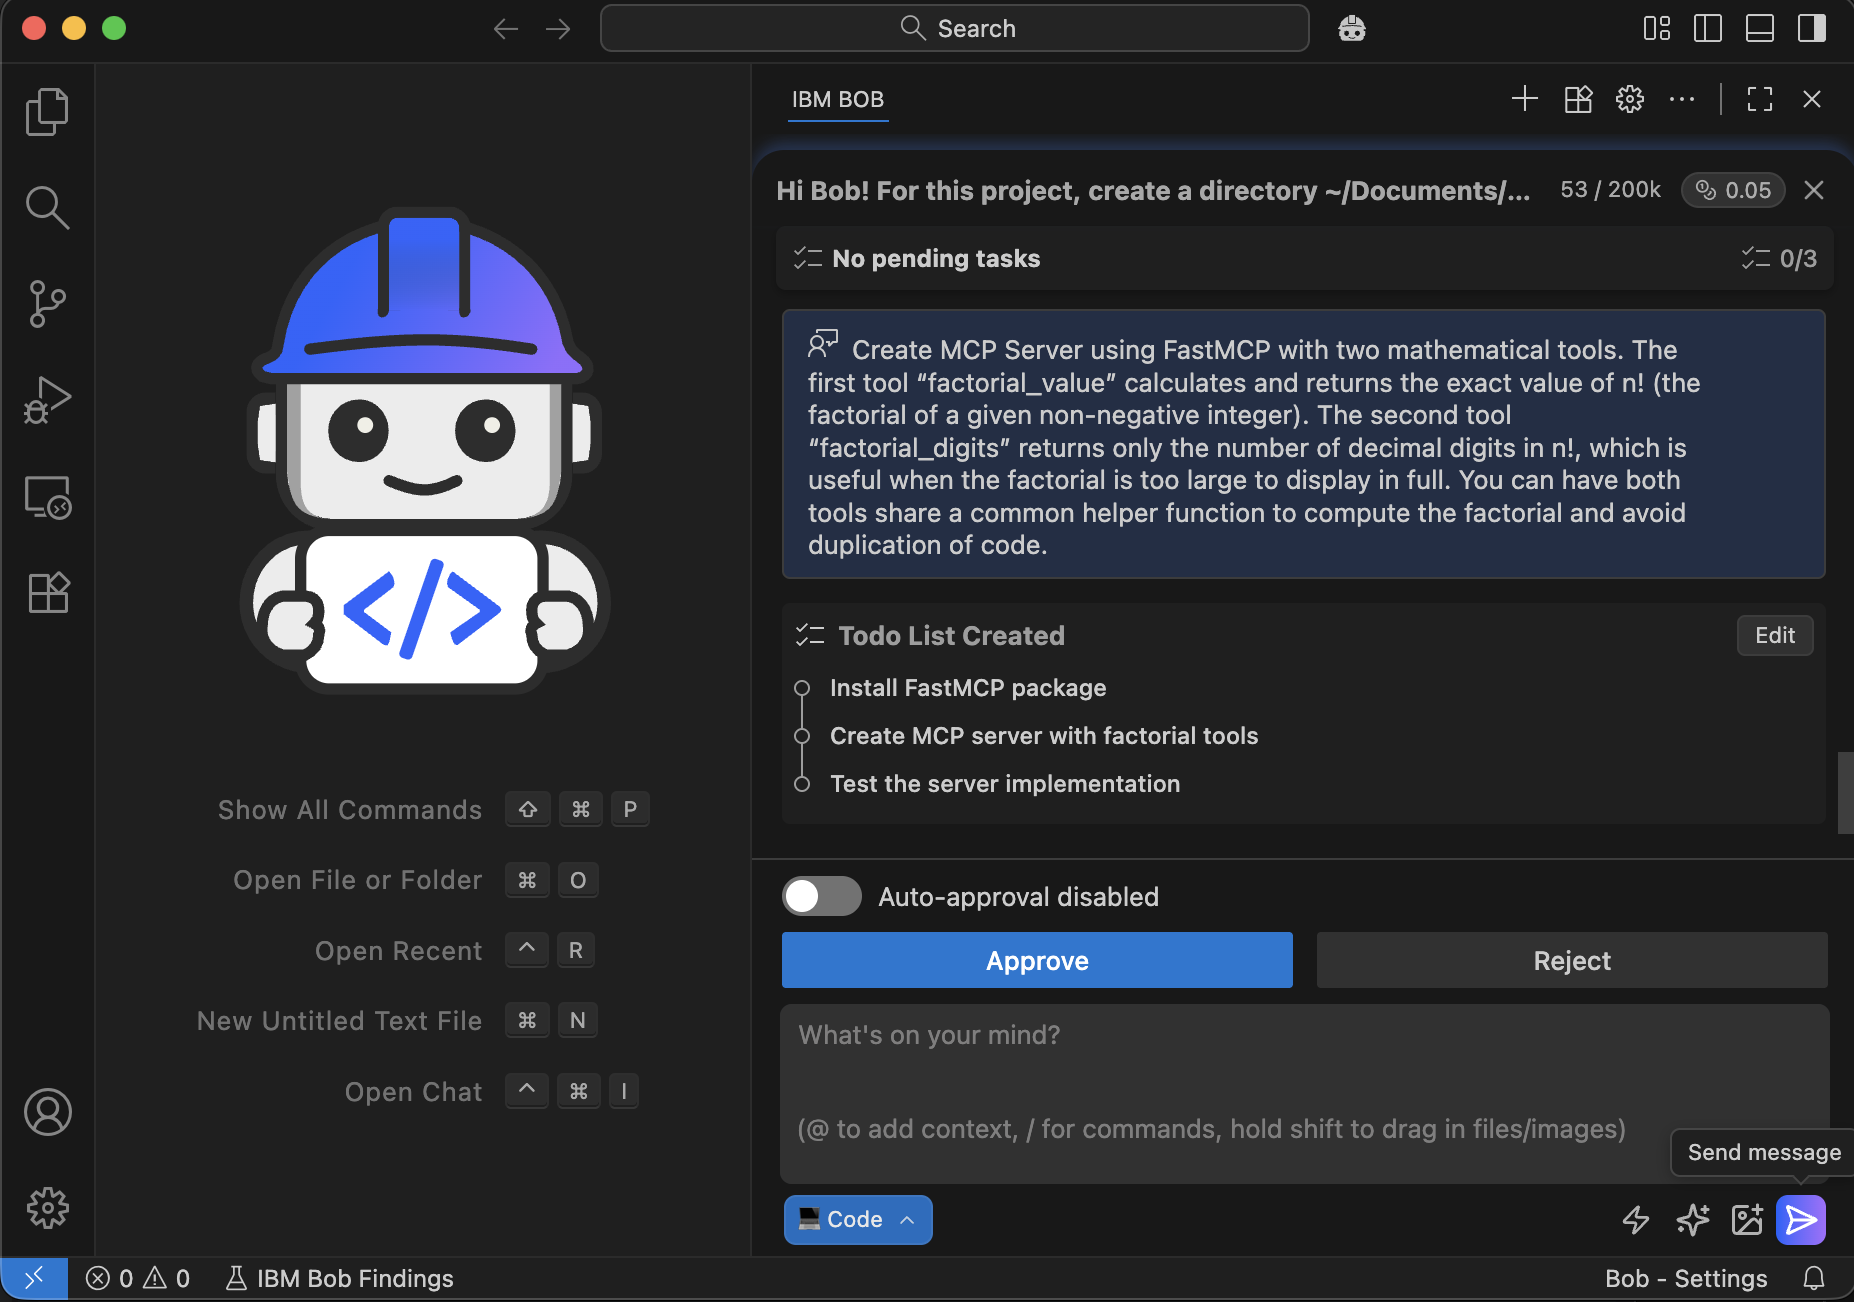
Bob plans the required tasks and shares the plan with you for approval. Click Approve.
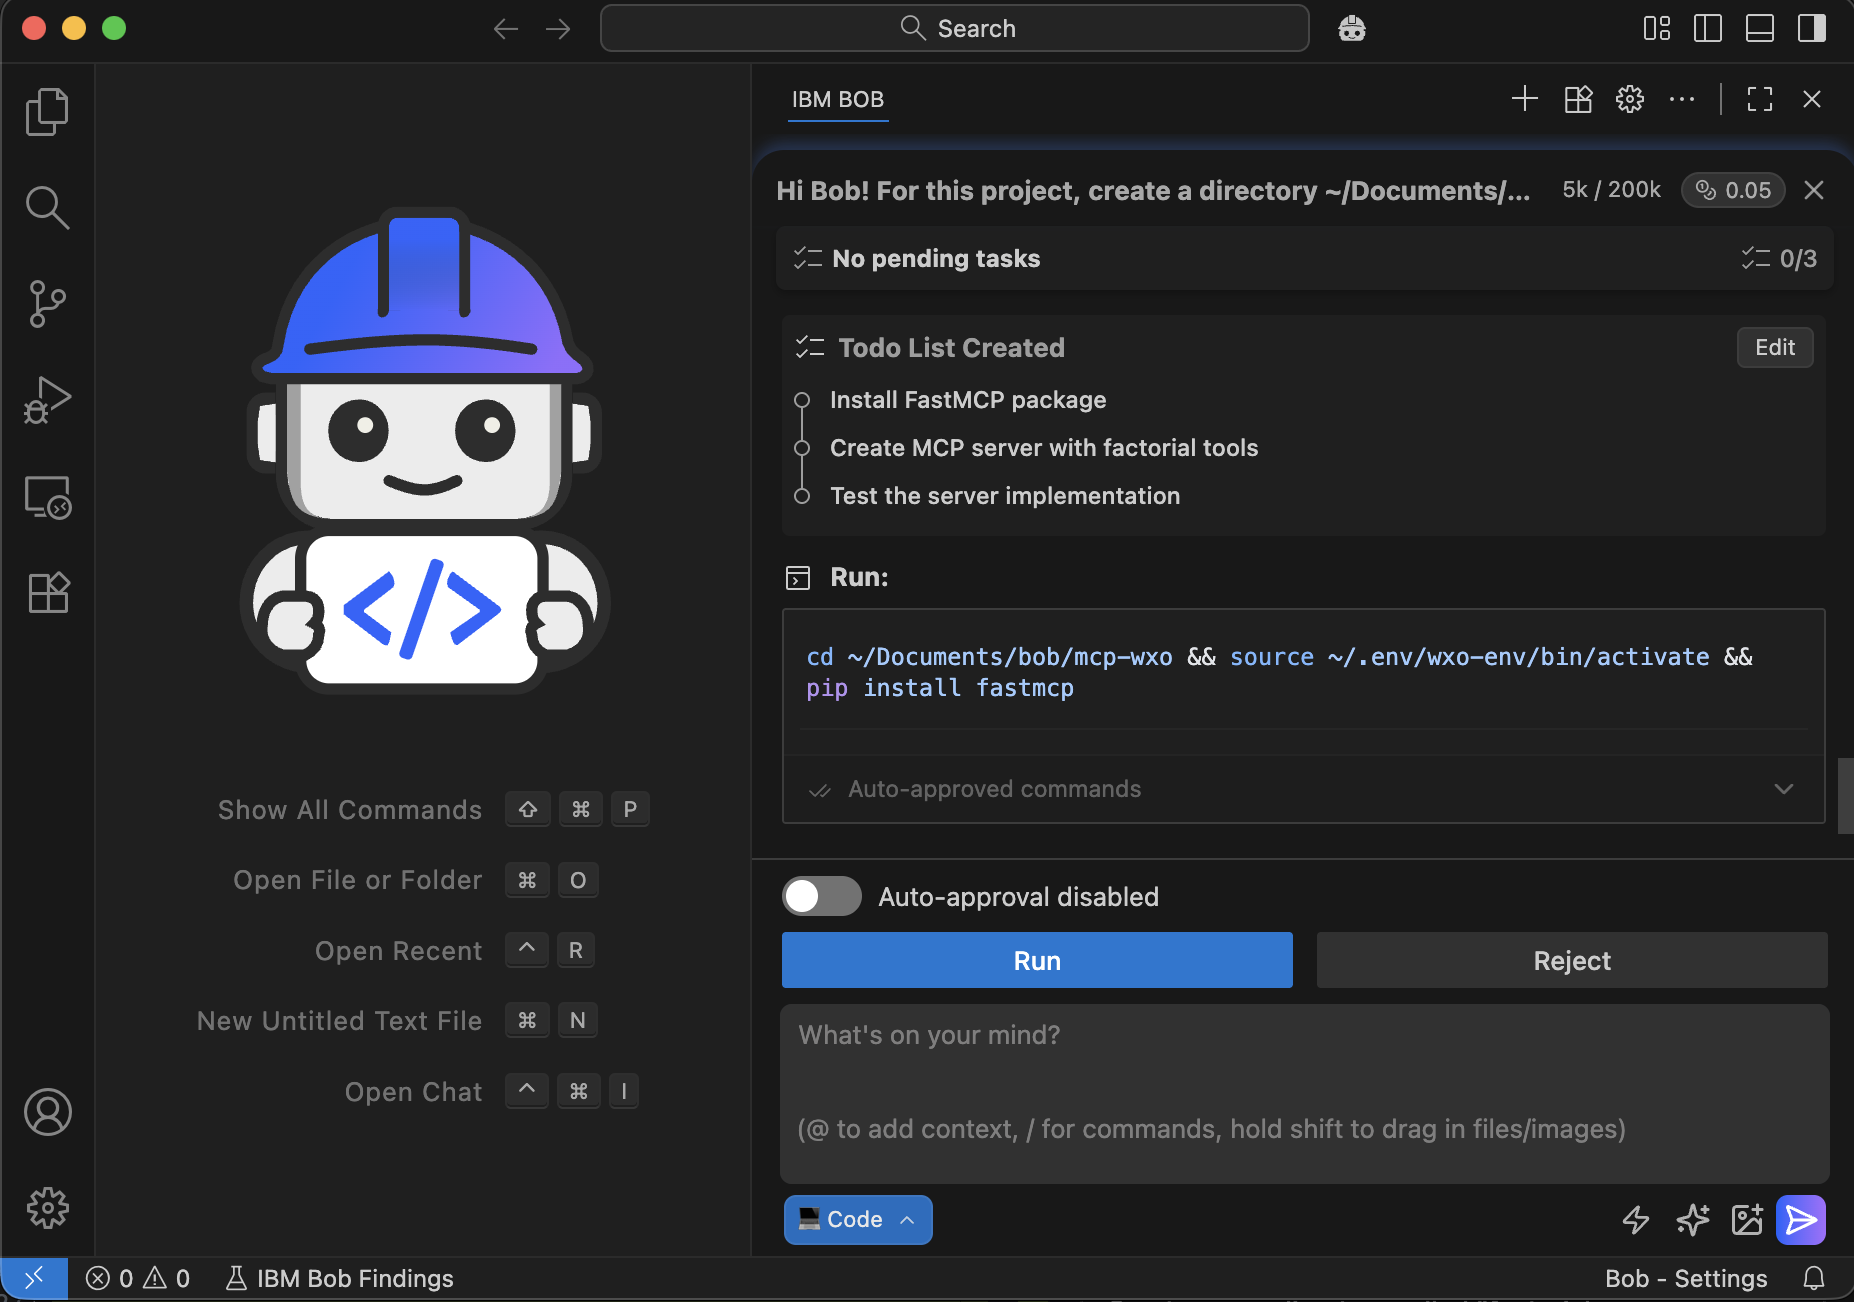
Bob starts executing the actions in this step. Bob installs FastMCP. Click Run to authorize Bob to perform the installation.
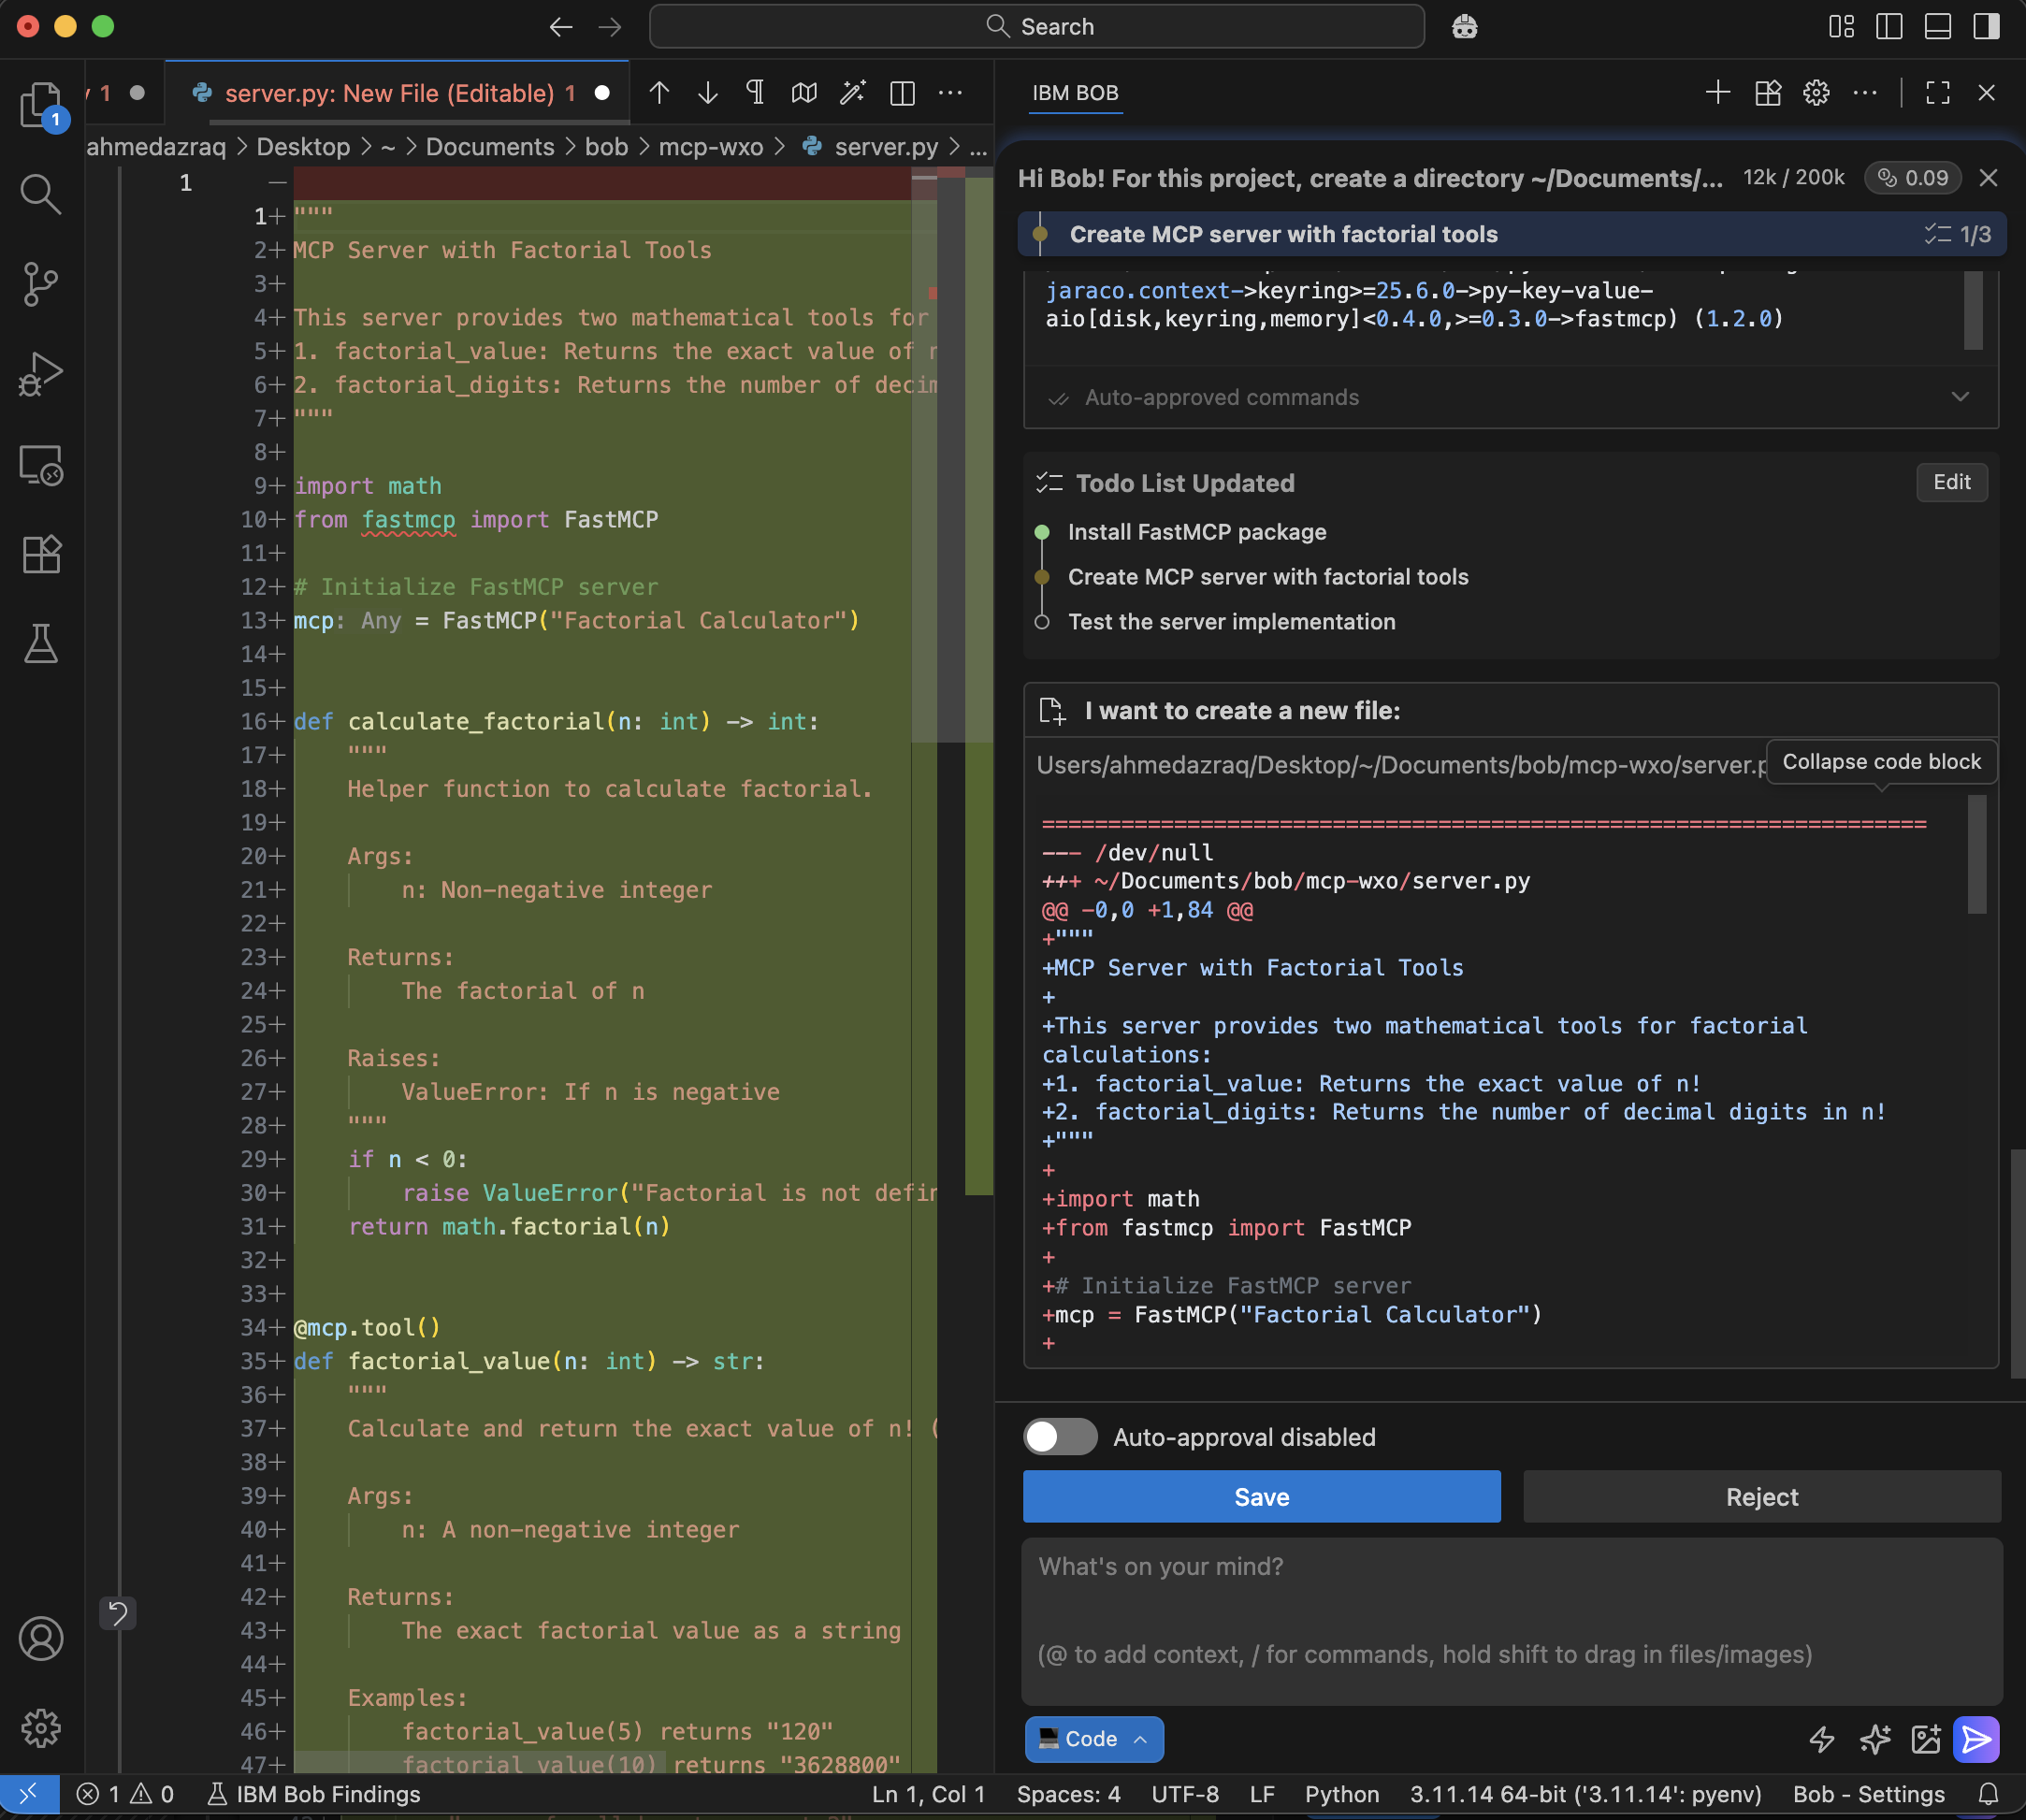
Bob creates the MCP Server code with the two tools as instructed and asks for your approval. Click Save to confirm.
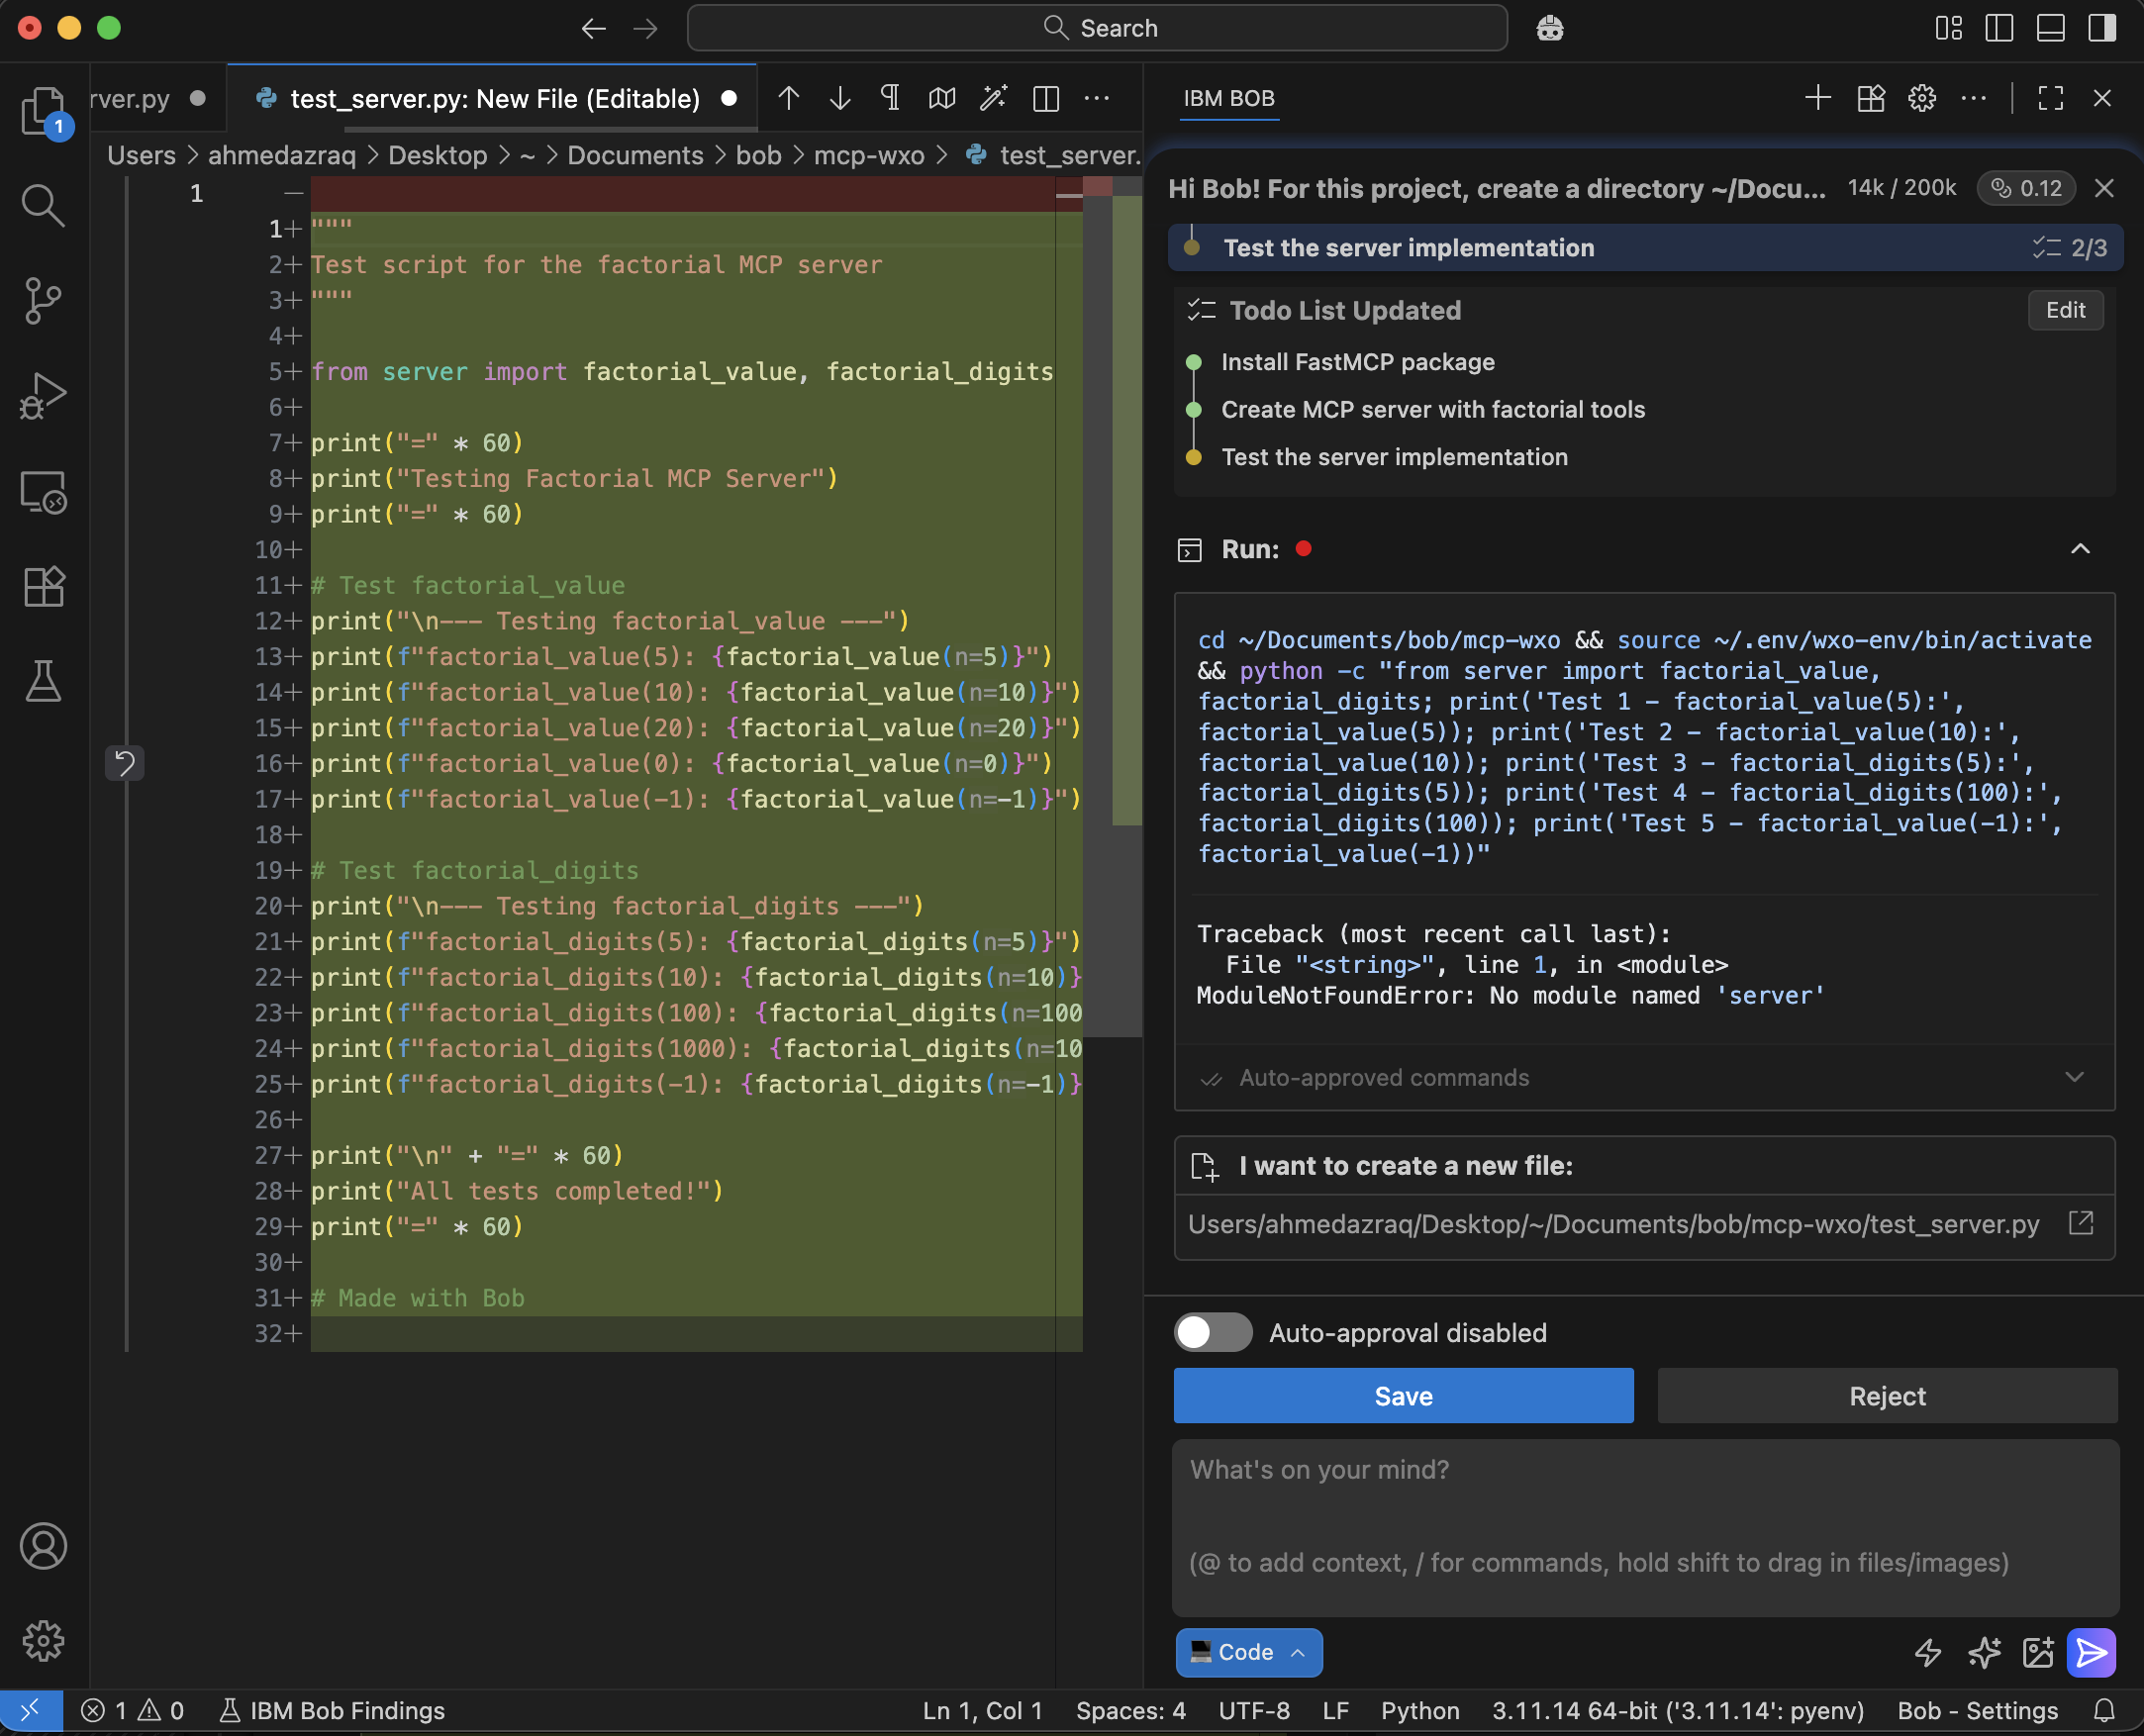
Next, Bob verifies the implementation. Bob creates a test script to check the MCP server and the tools.
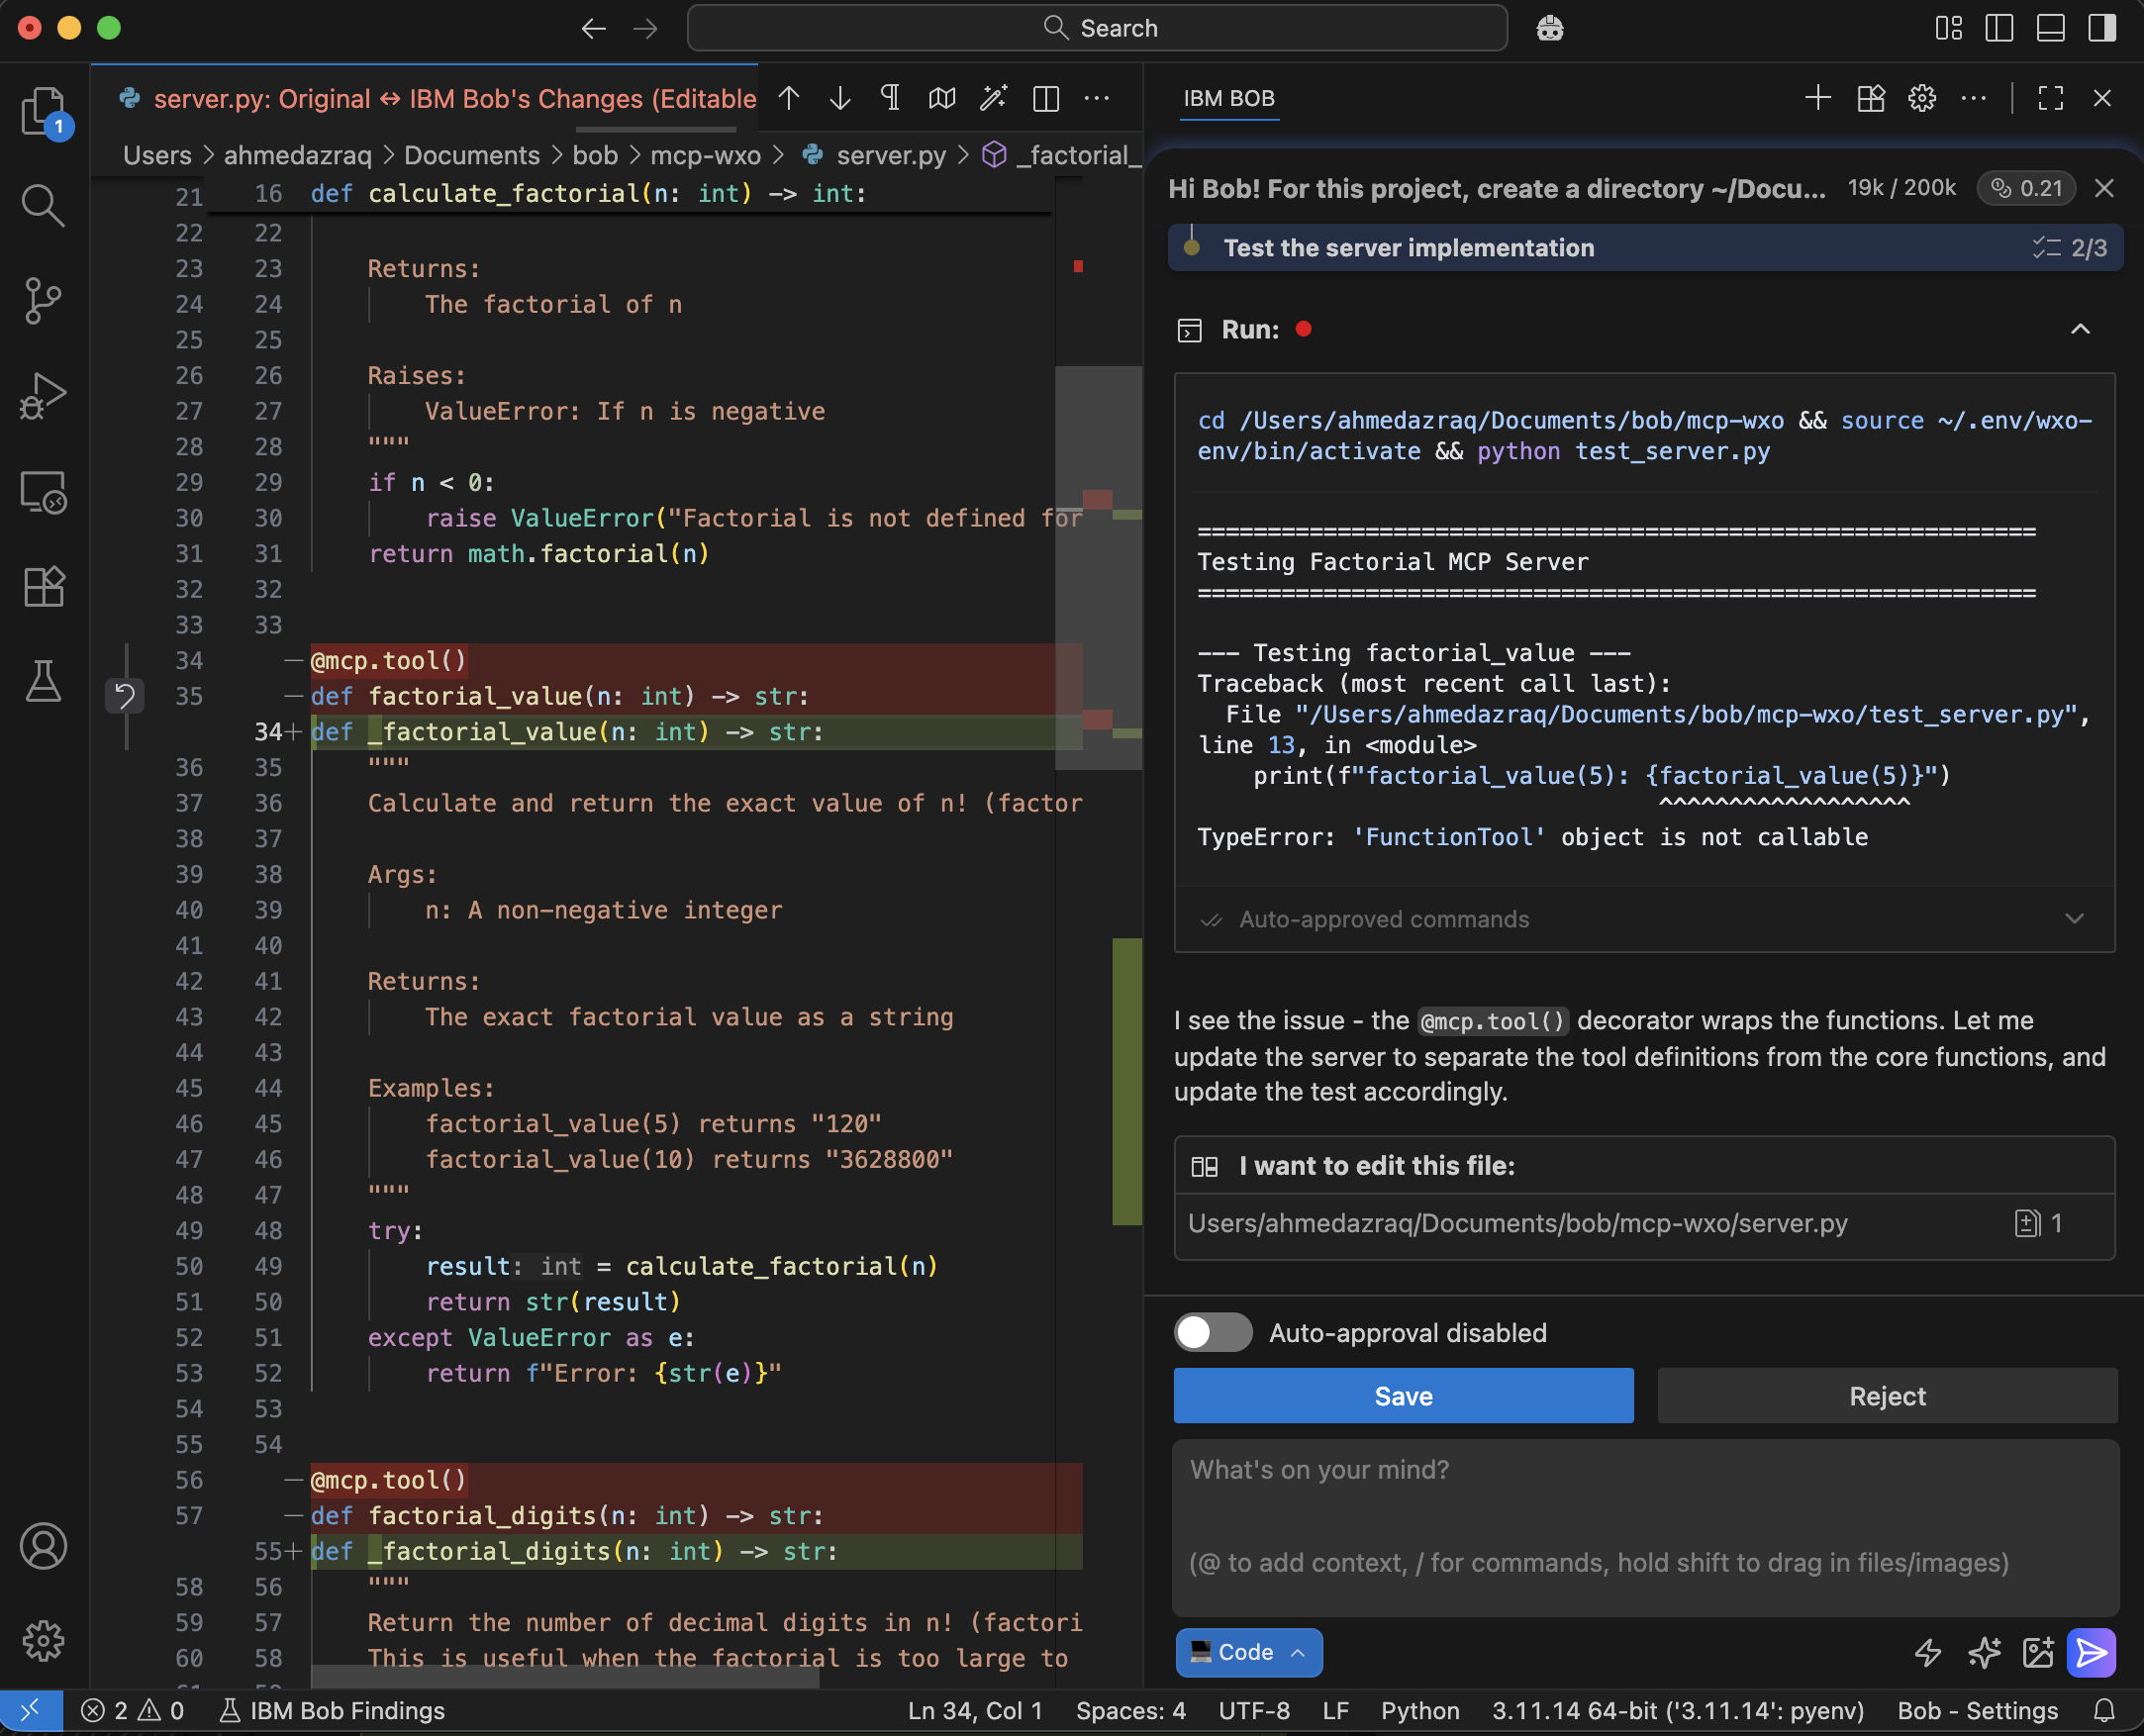
Bob finds problems in the code while running the test script. Bob debugs the code and fixes the issues automatically.
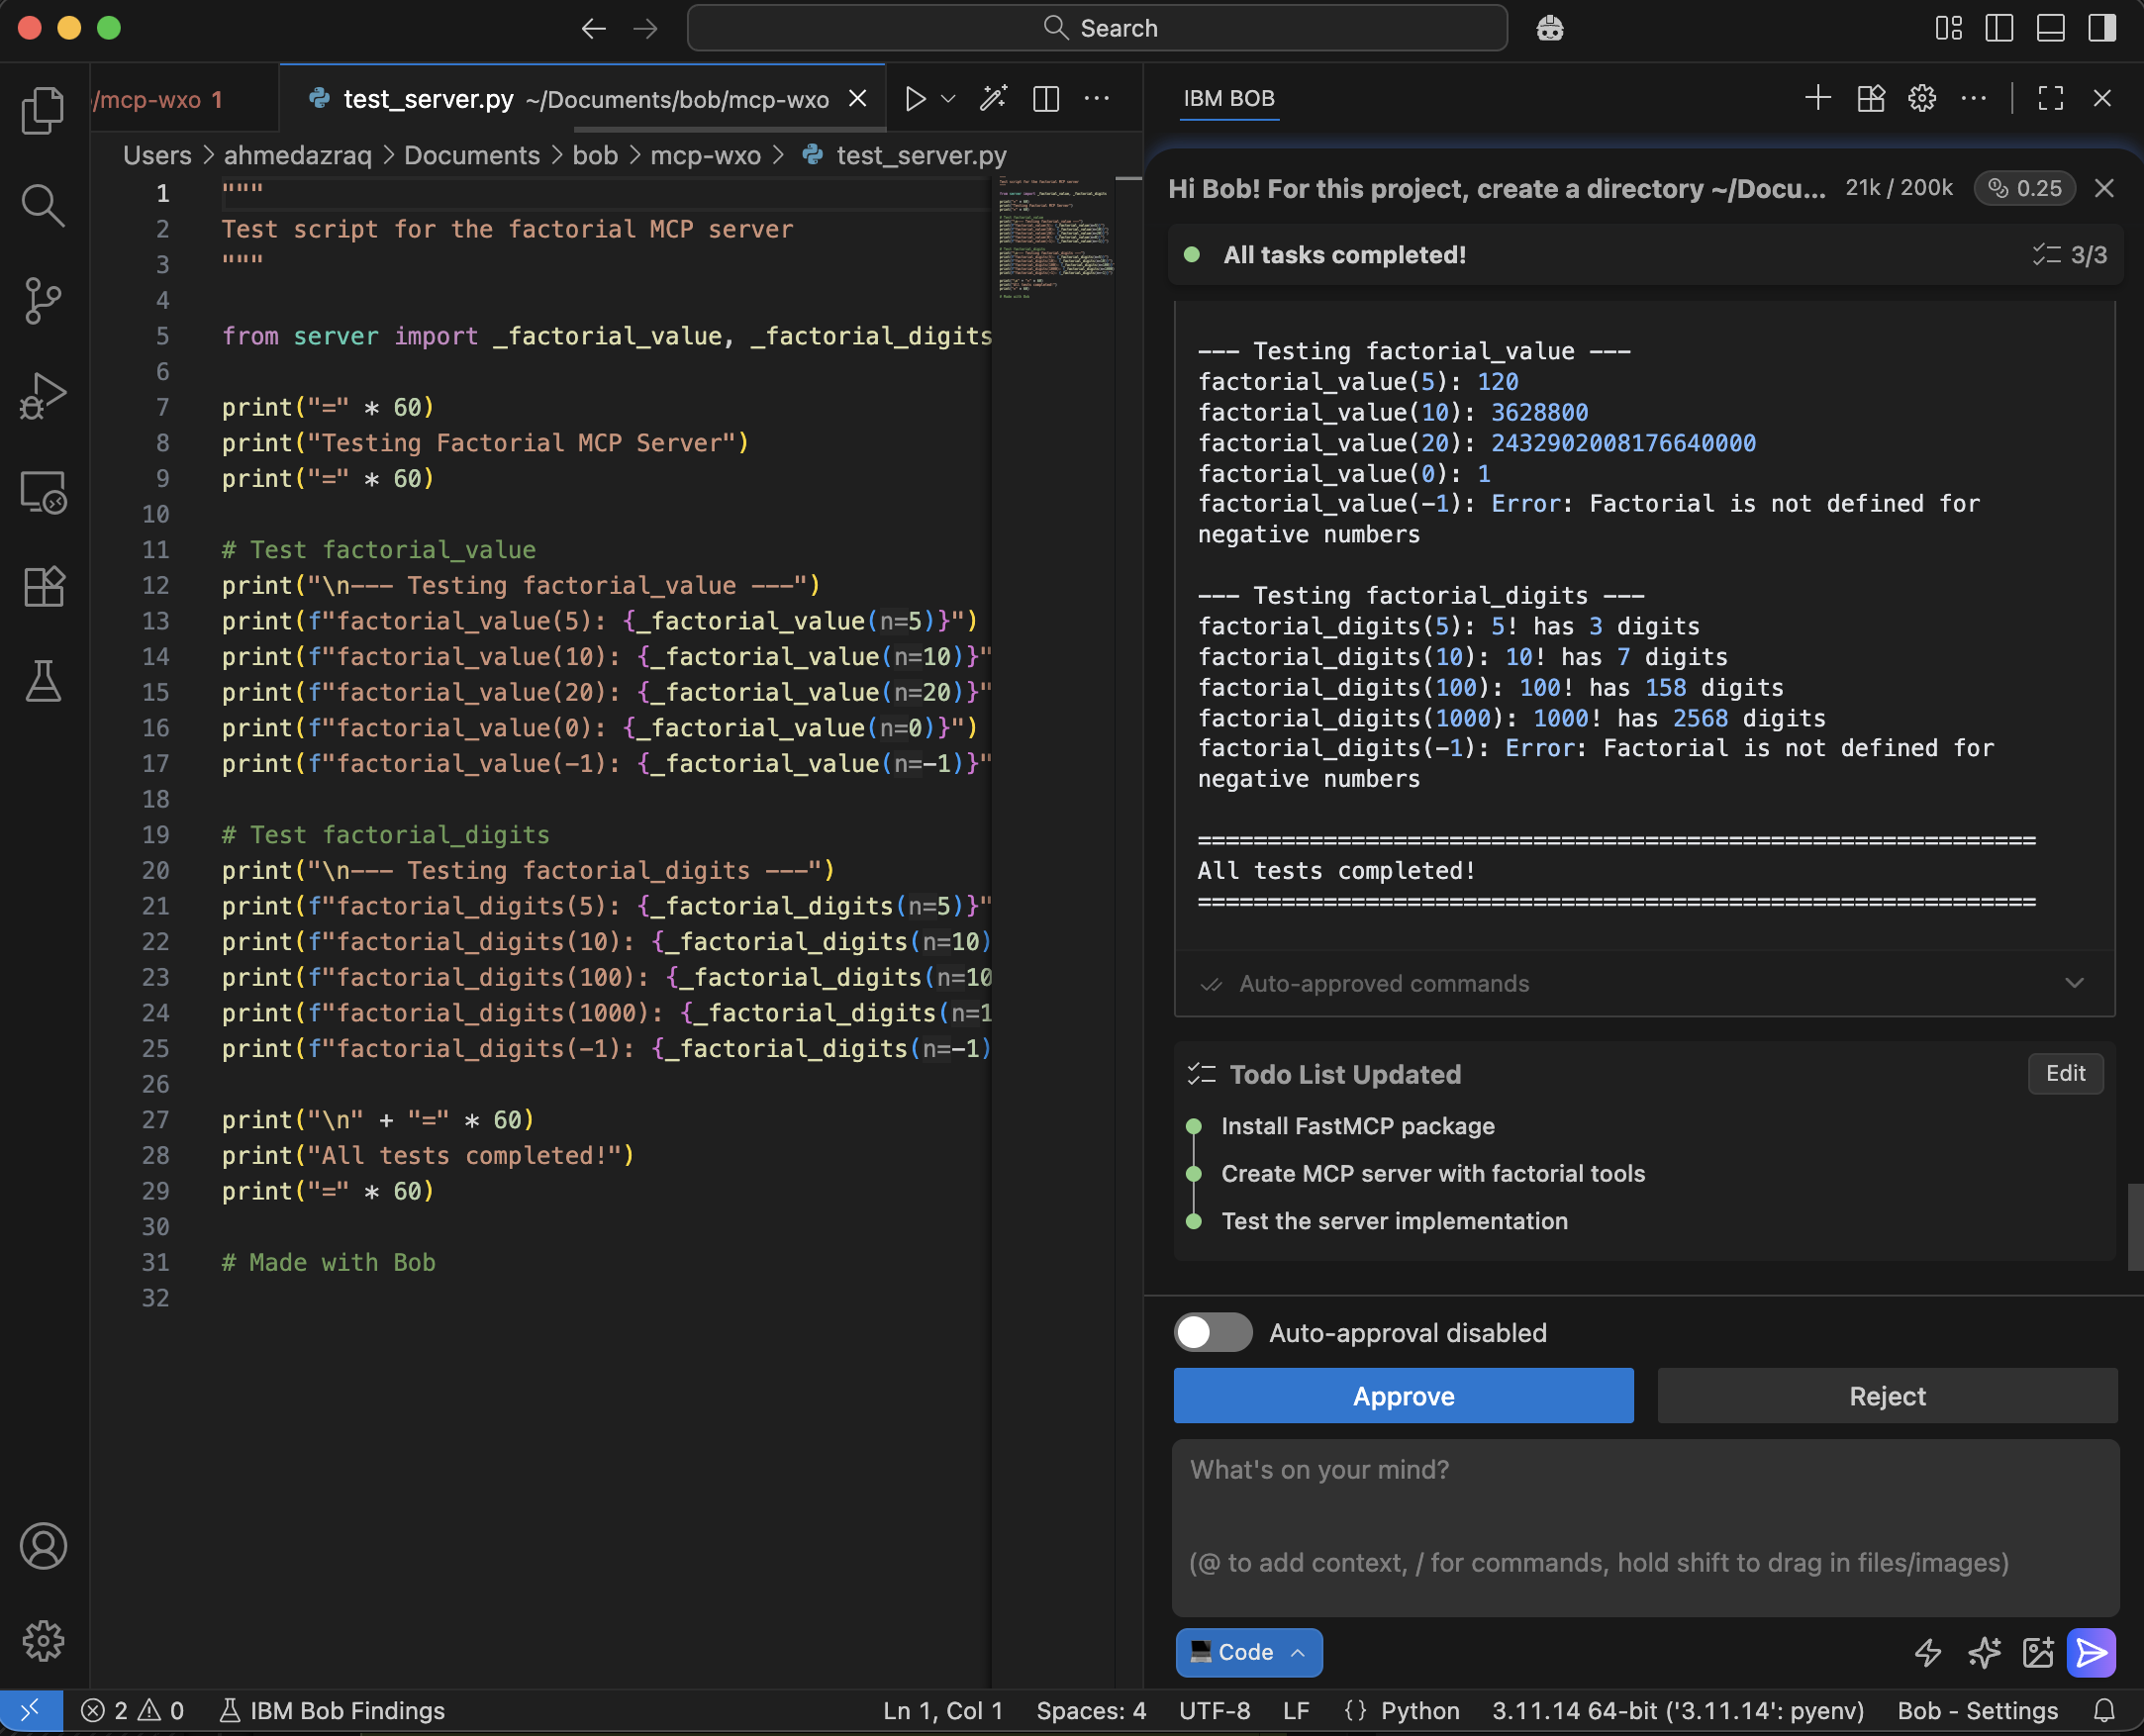
All verification tests are completed. Click Approve.
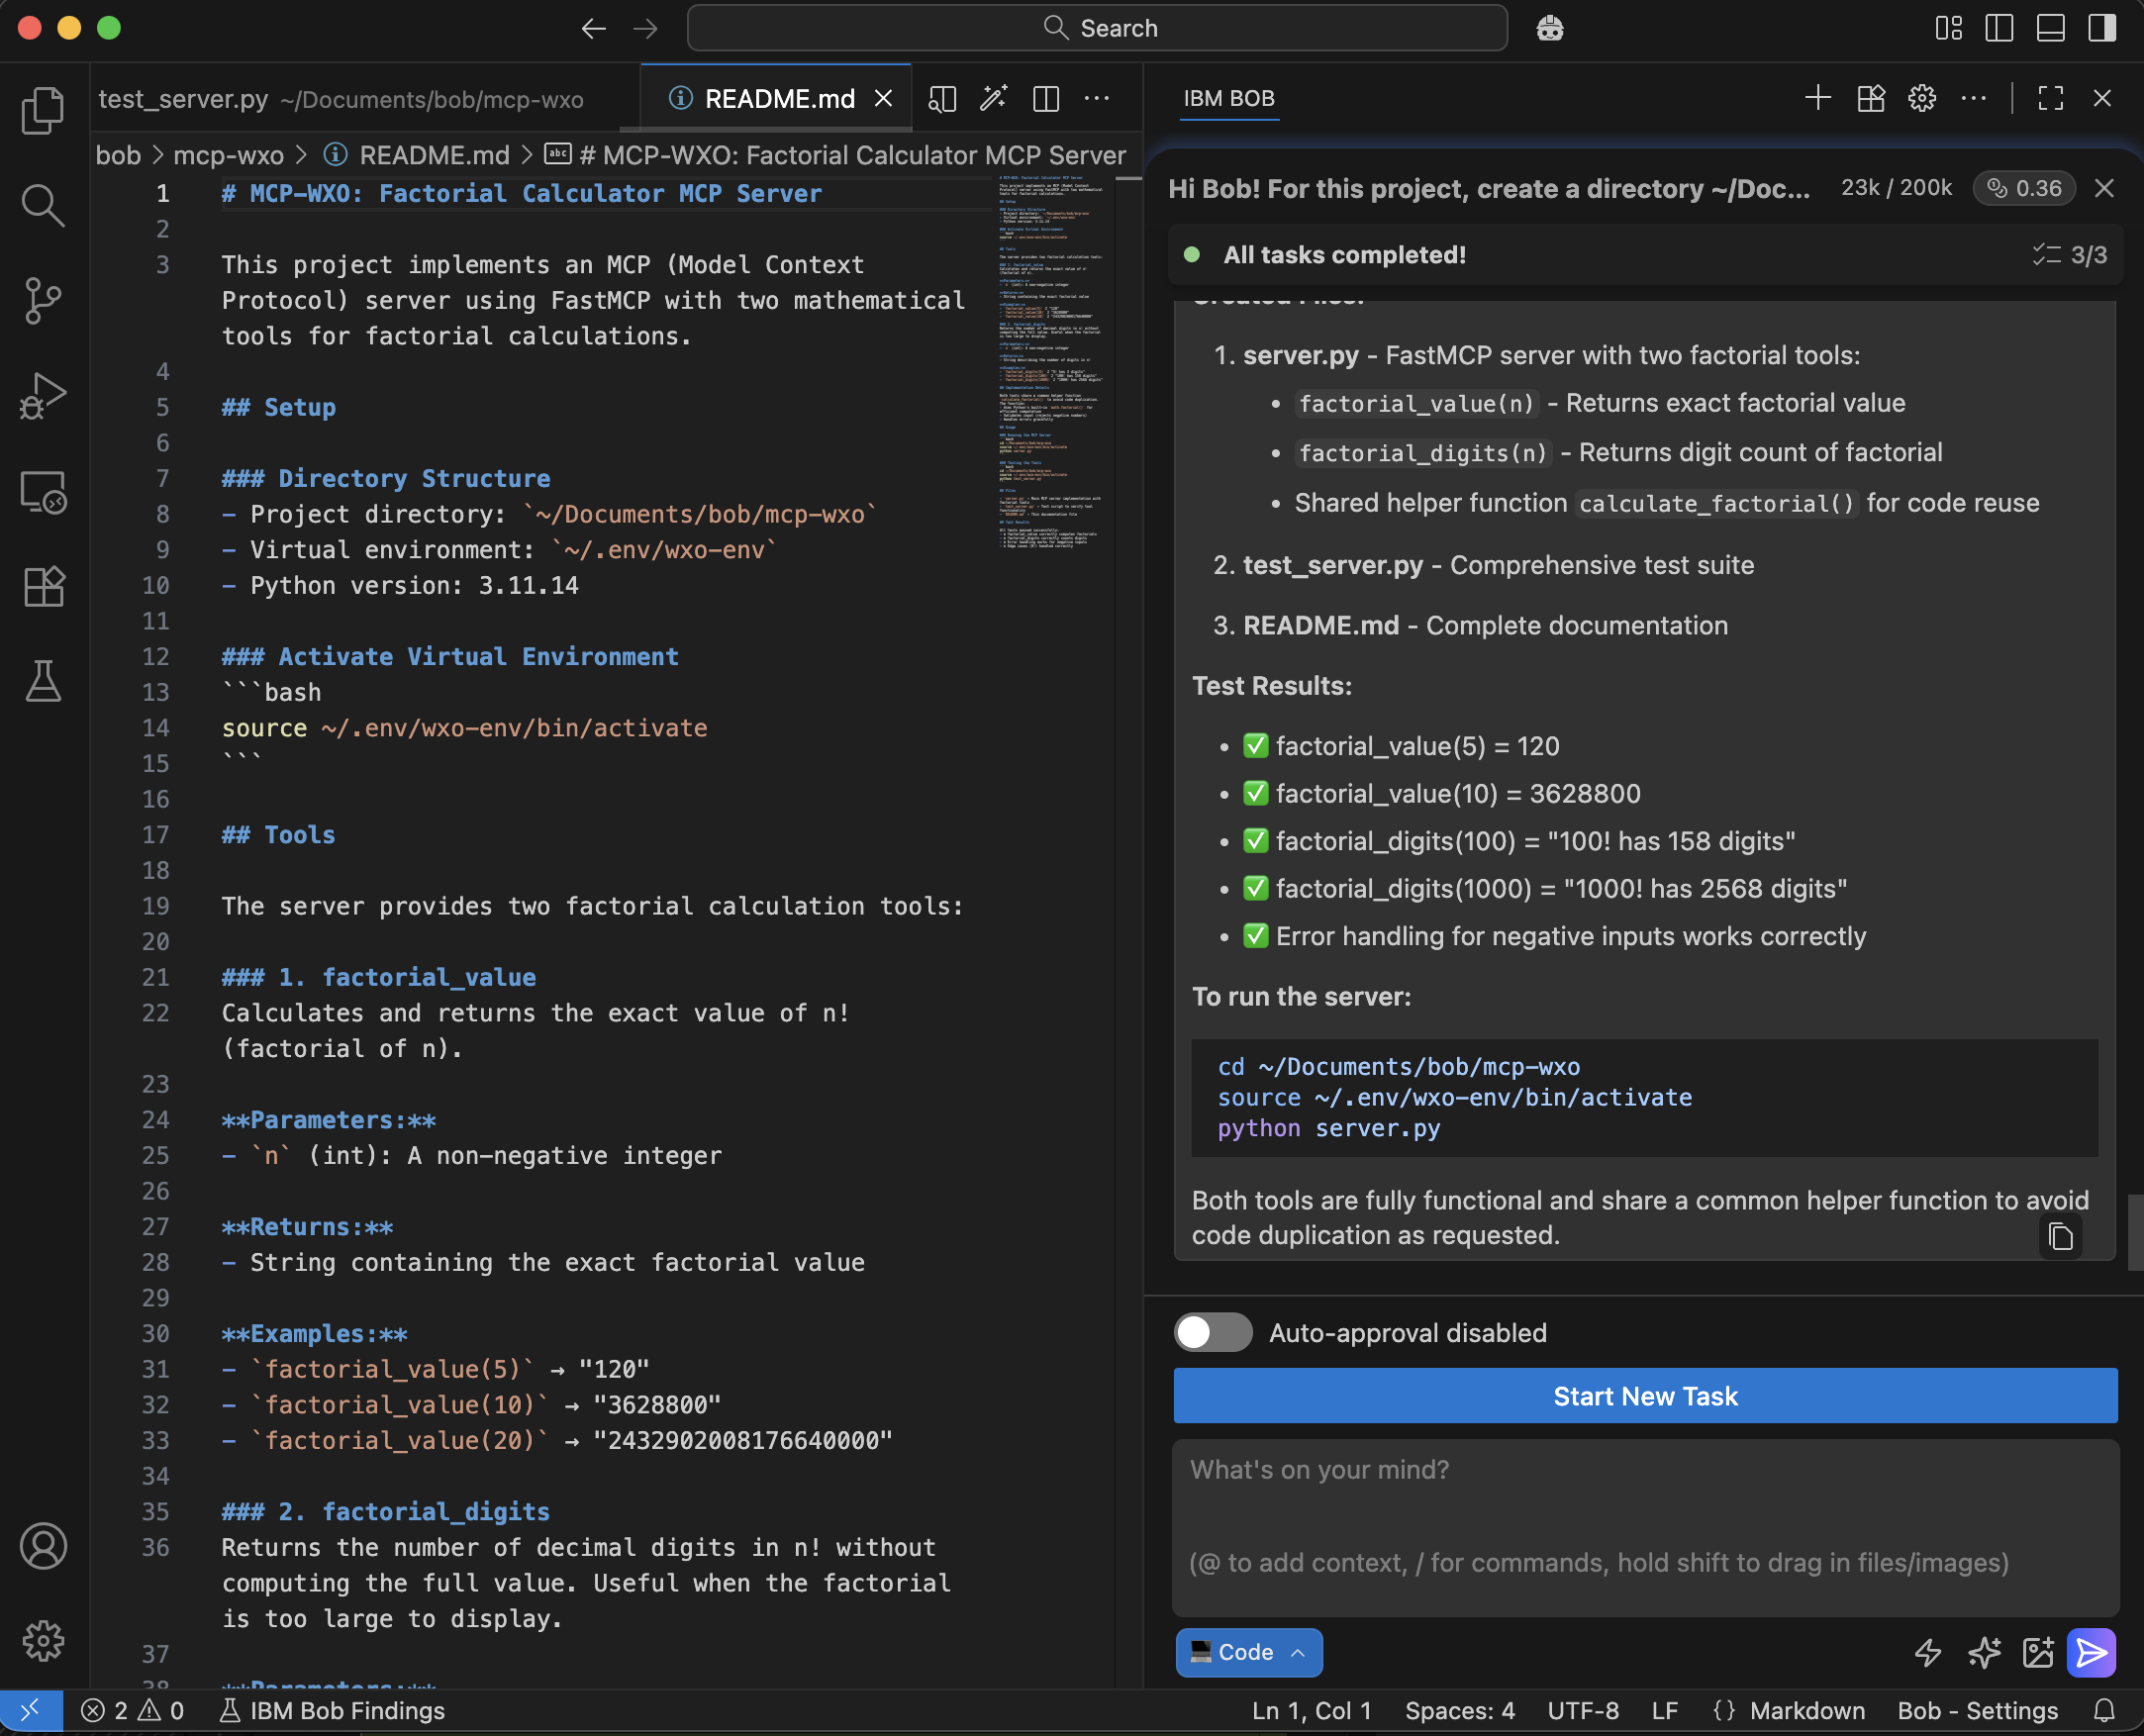
Bob generates documentation for the project.
Step 3. Start the MCP server and validate it with an MCP client
In this step, you will ask Bob to start the MCP server locally and create an MCP client that connects to the server. Bob will run the MCP server, build the client with test cases, execute the tests, and confirm that the tools work correctly through the MCP protocol with proper error handling.
Ask Bob in natural language to deploy the MCP server and create an MCP client to validate both MCP tools. Review Bob’s plan and click Approve.
Please start the MCP Server, and test the 2 MCP tools with MCP client.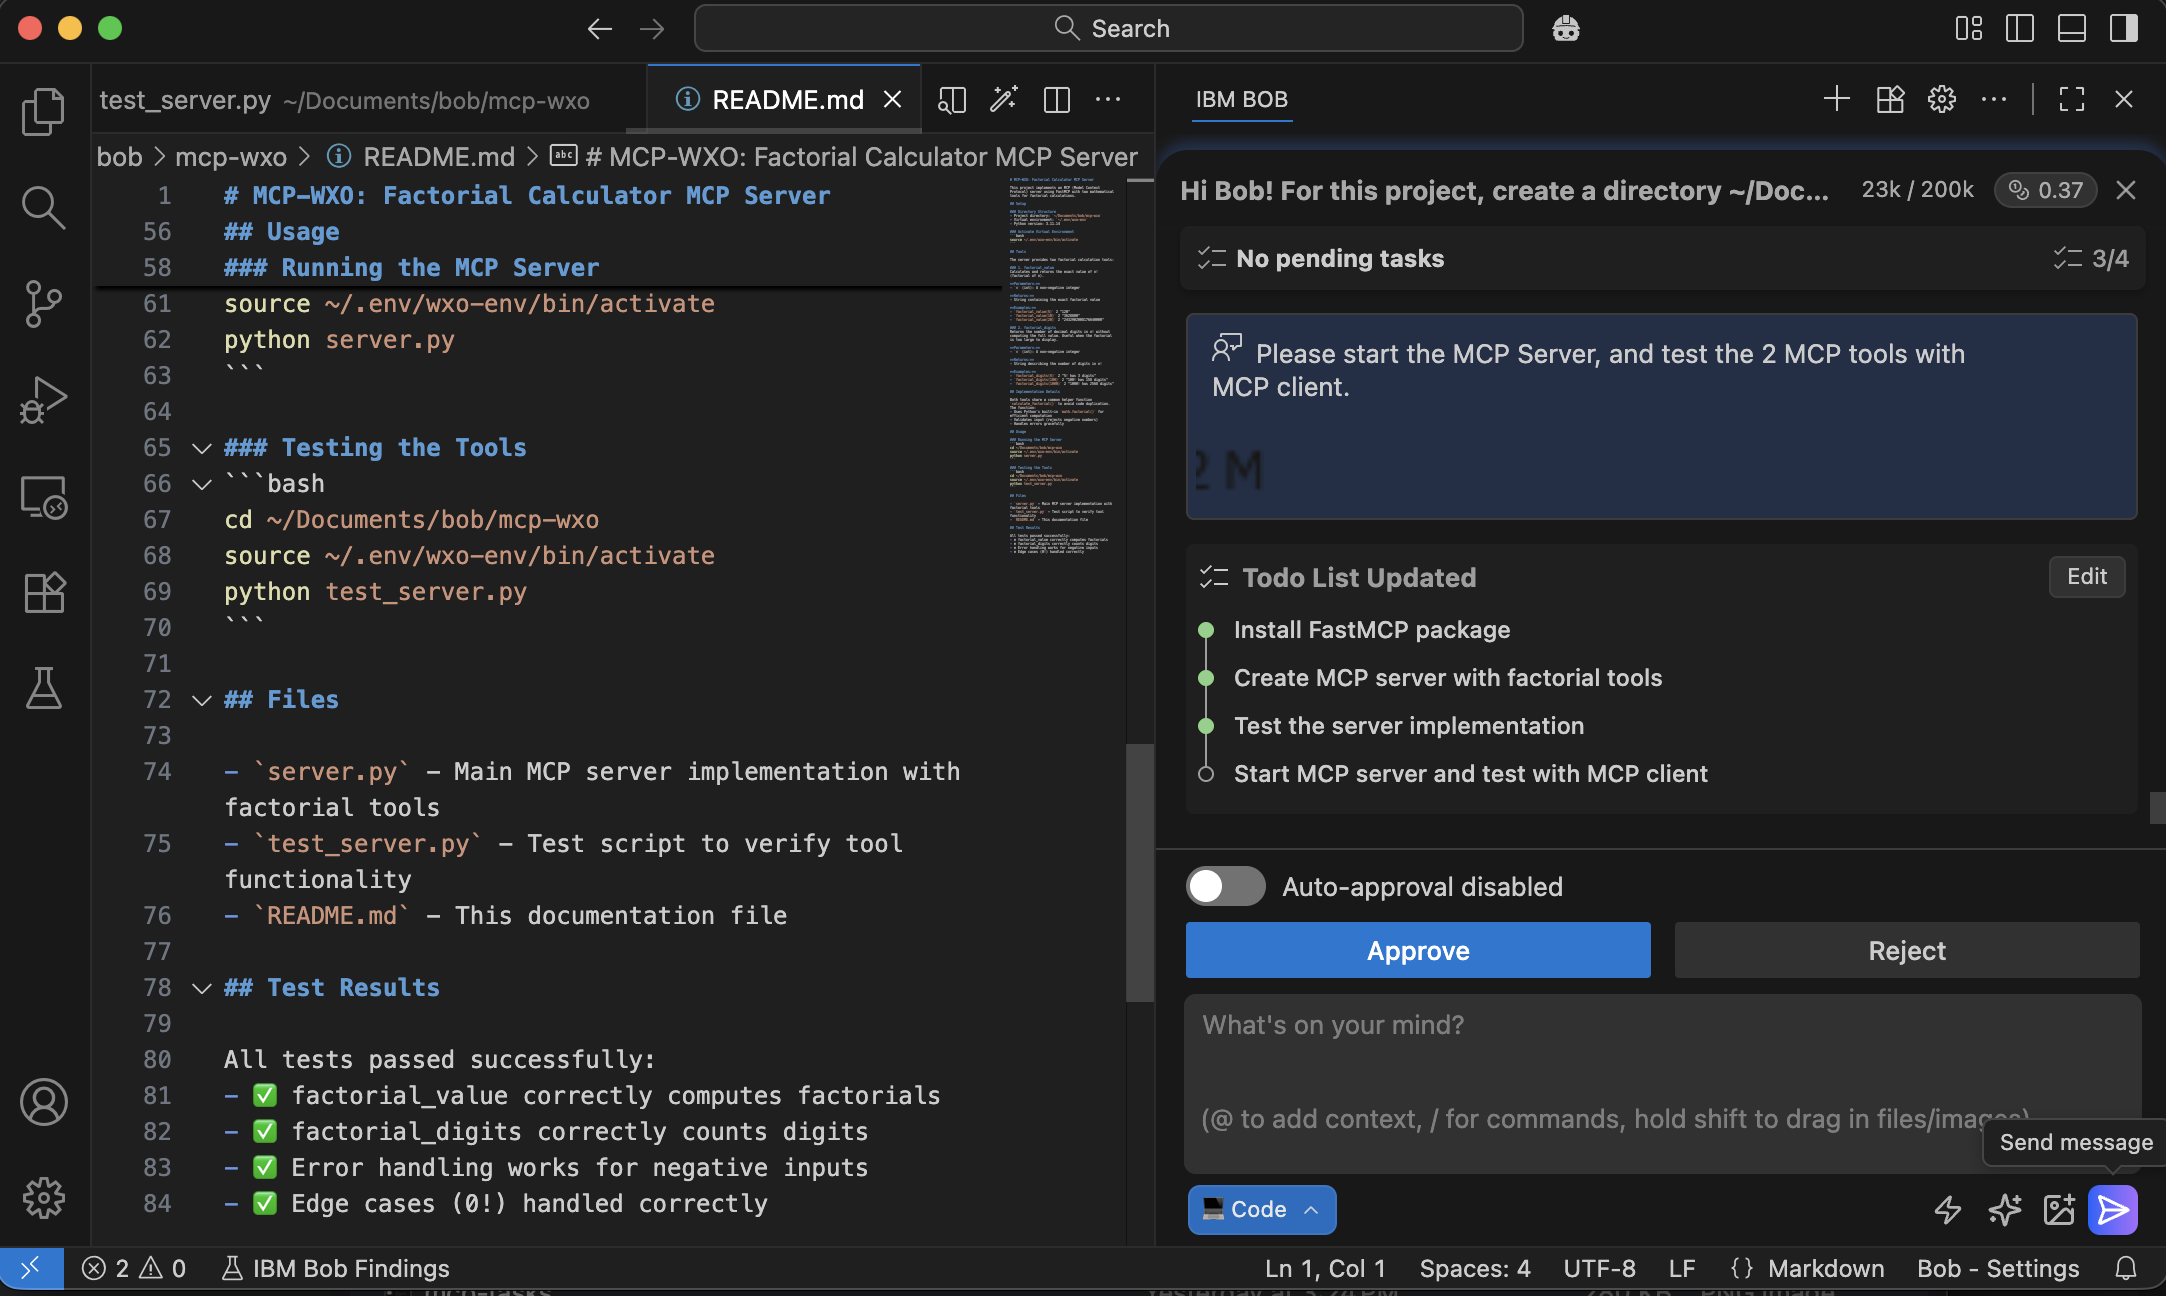
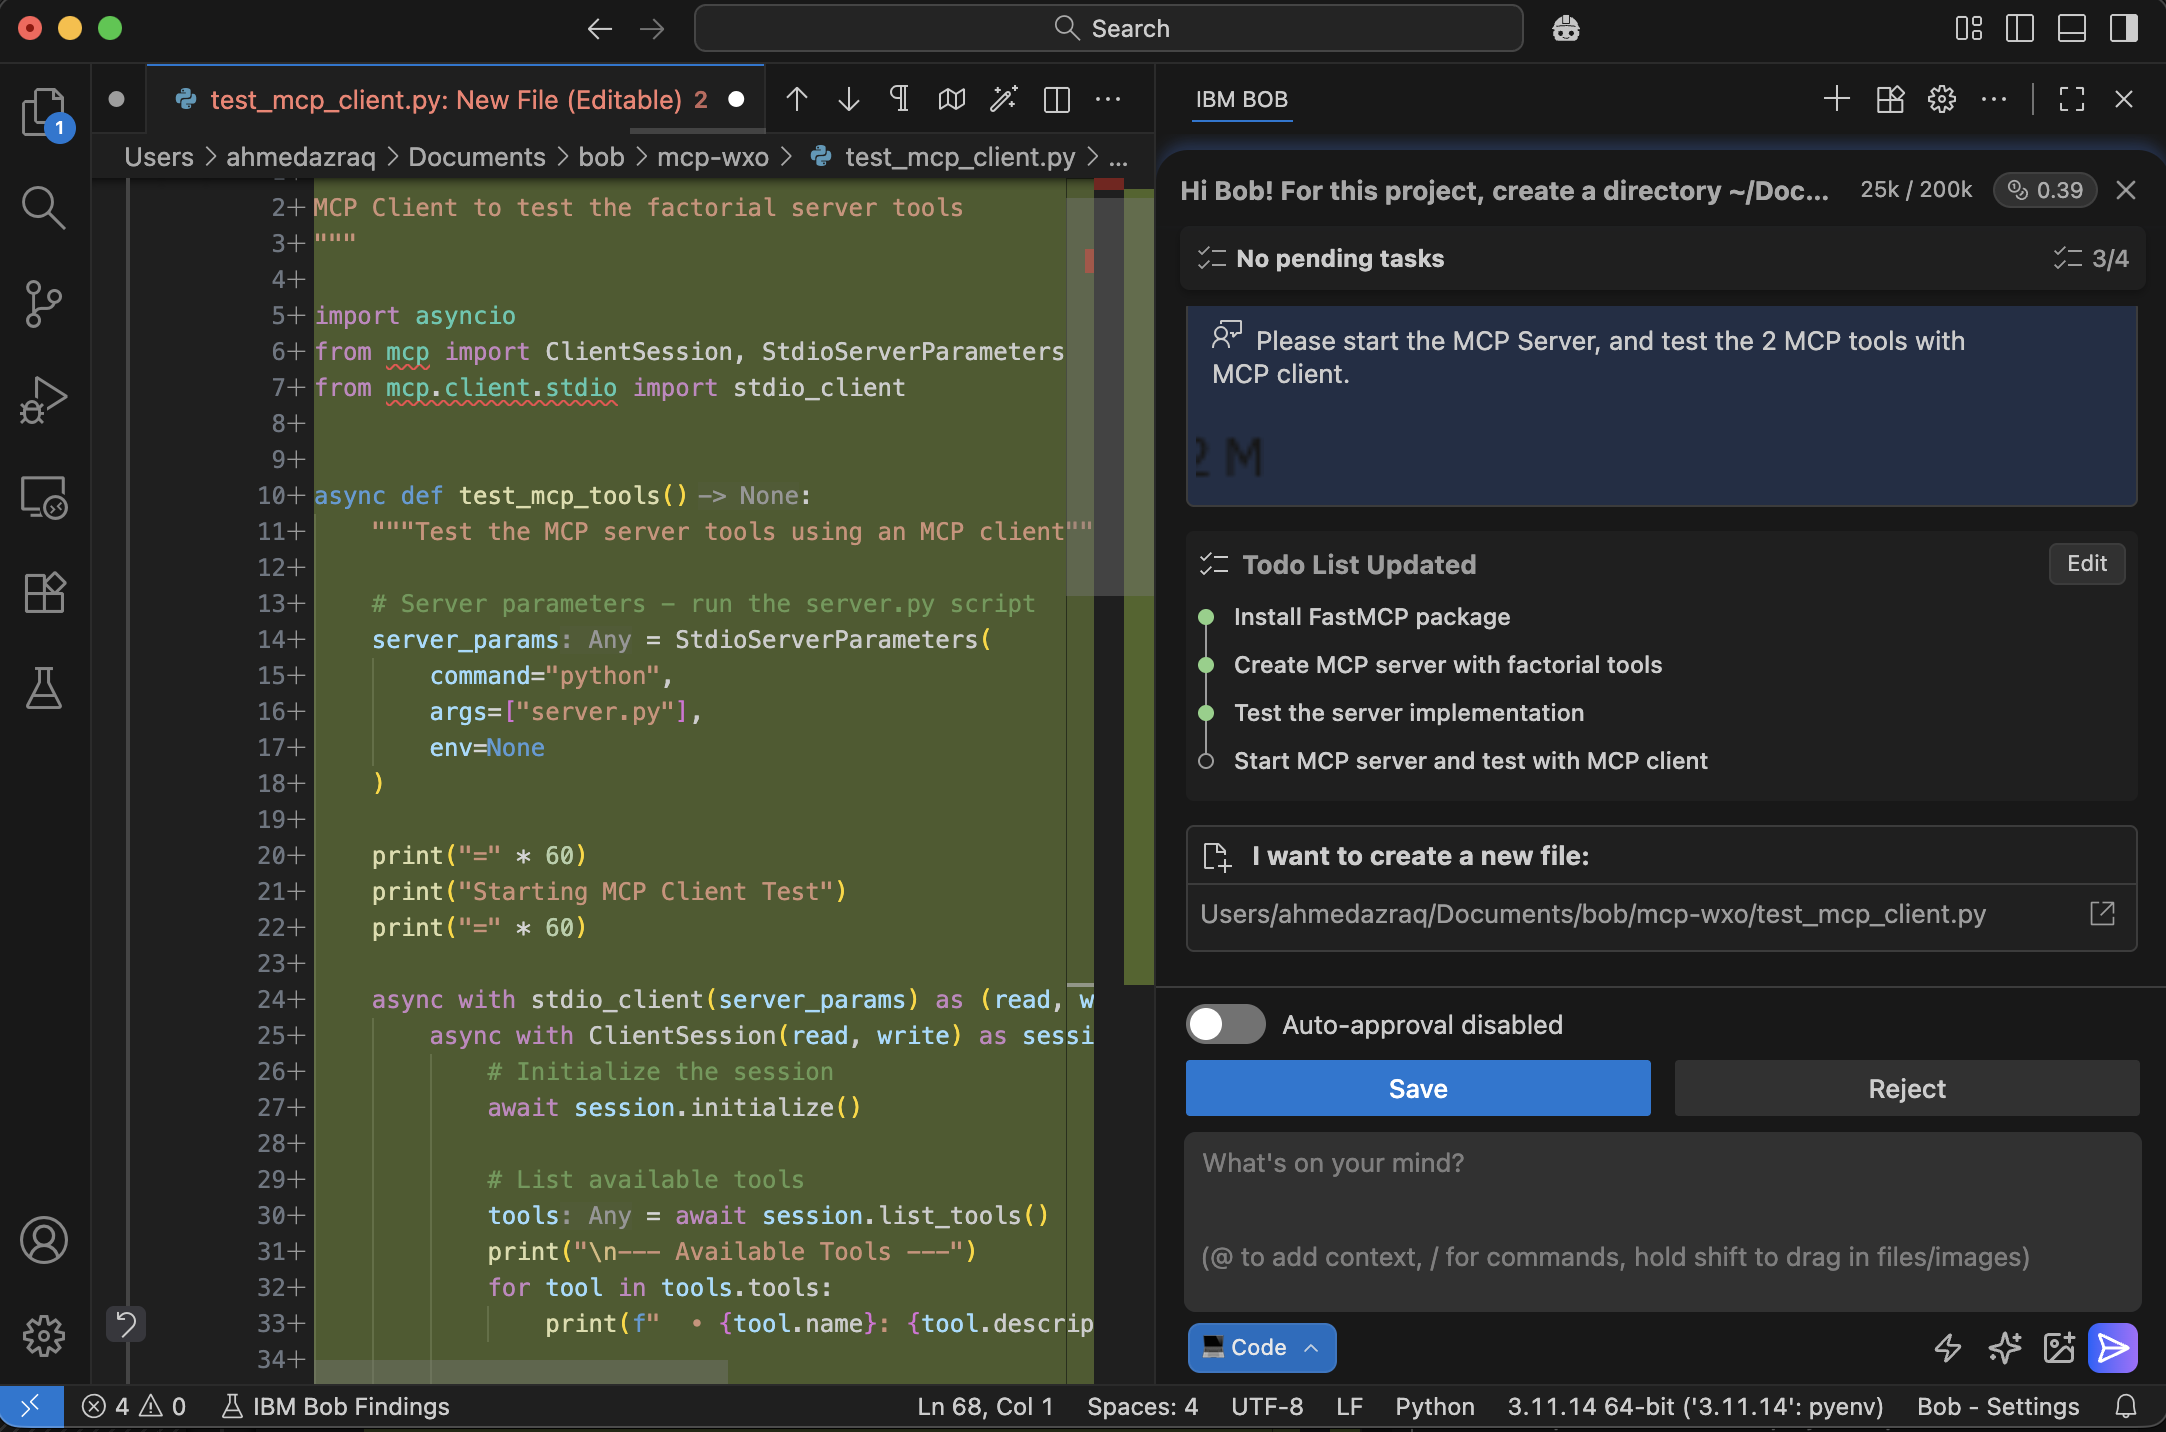
Bob creates the MCP client code with the test cases.
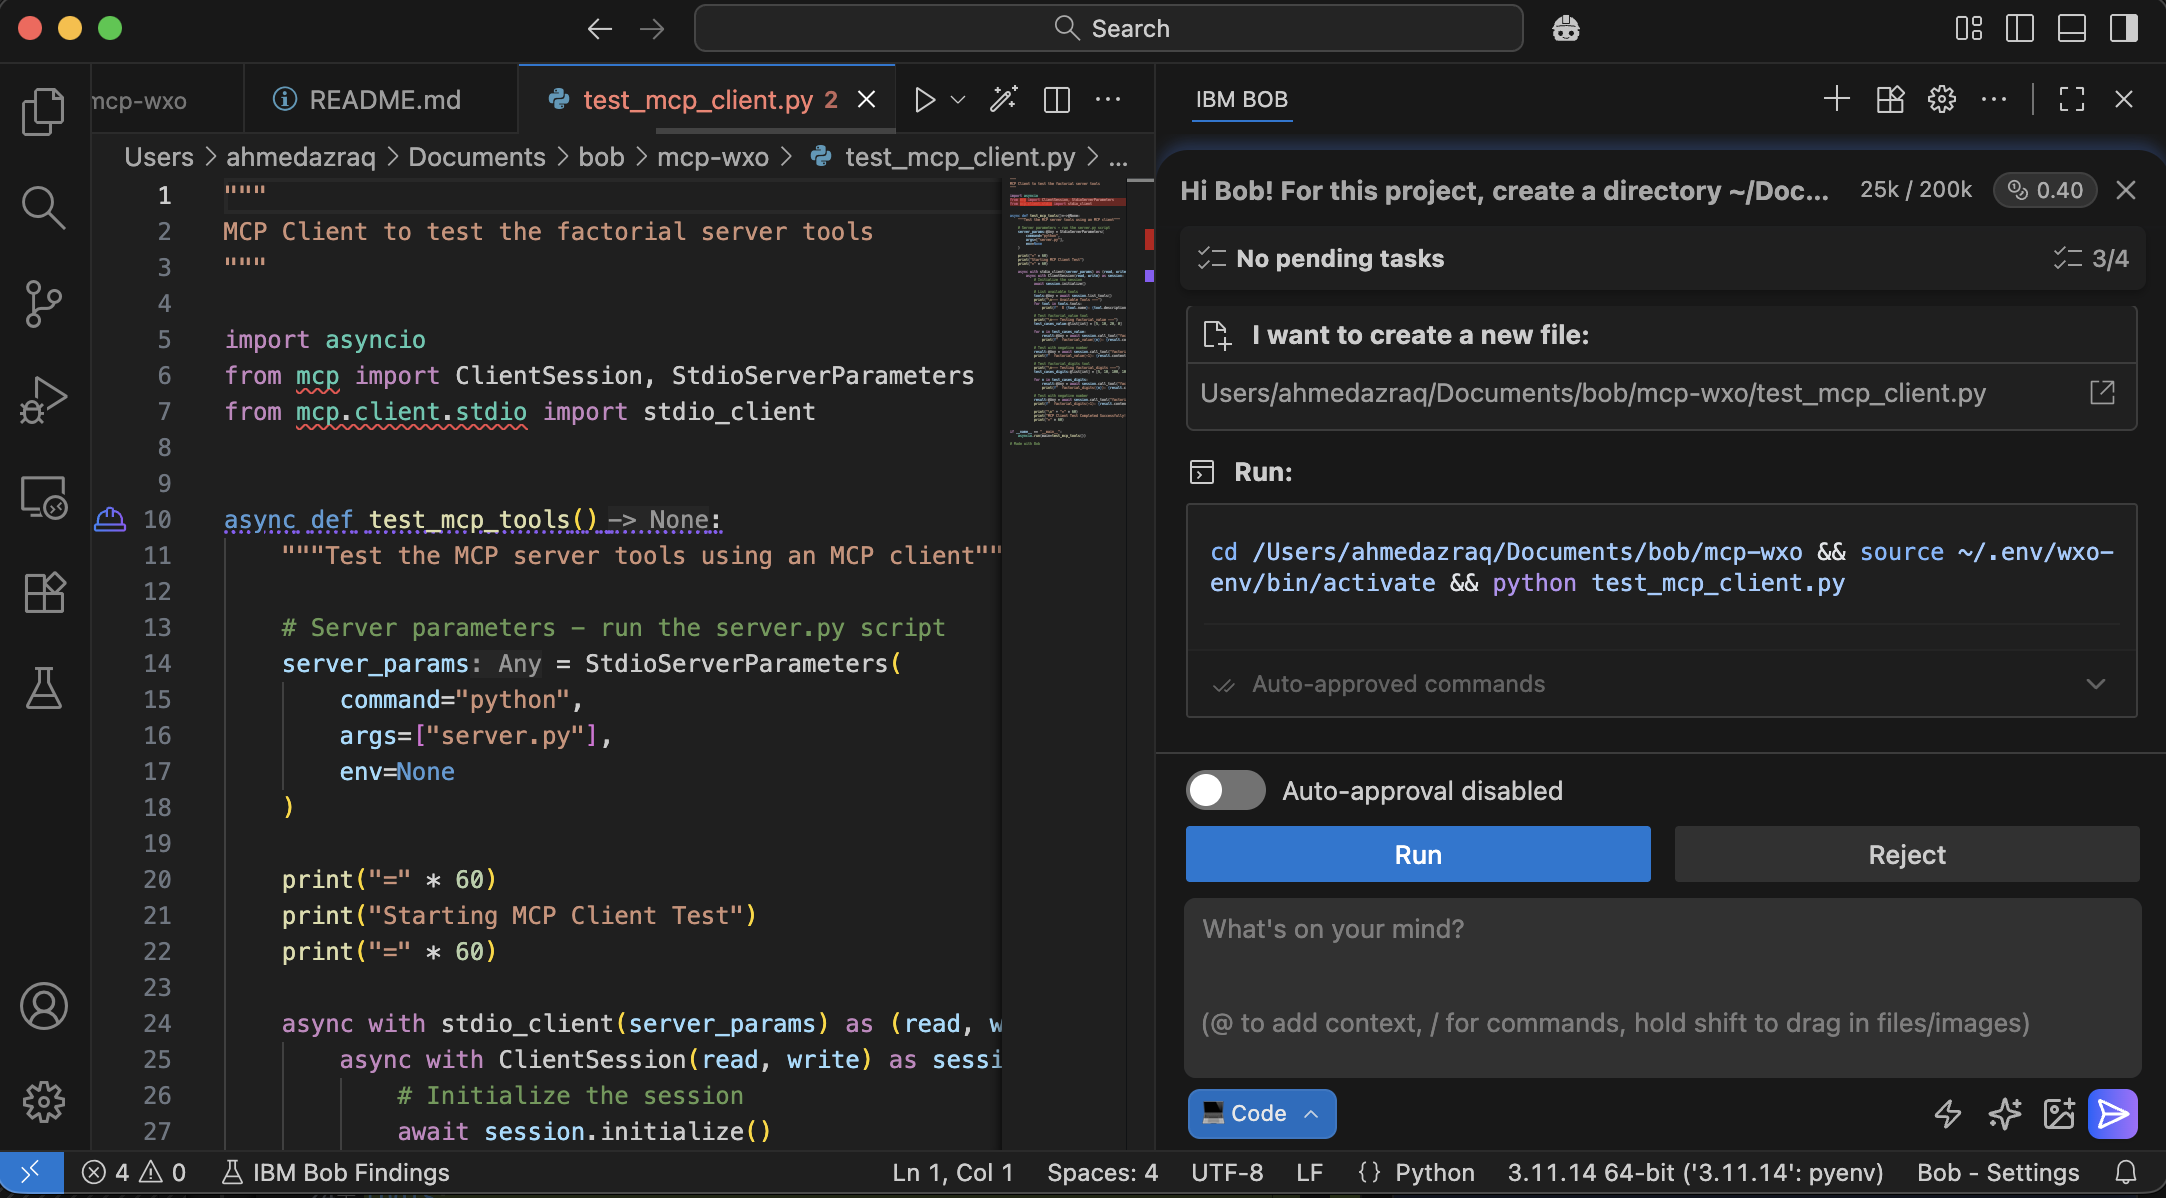
Bob starts the MCP client to connect with the MCP server.
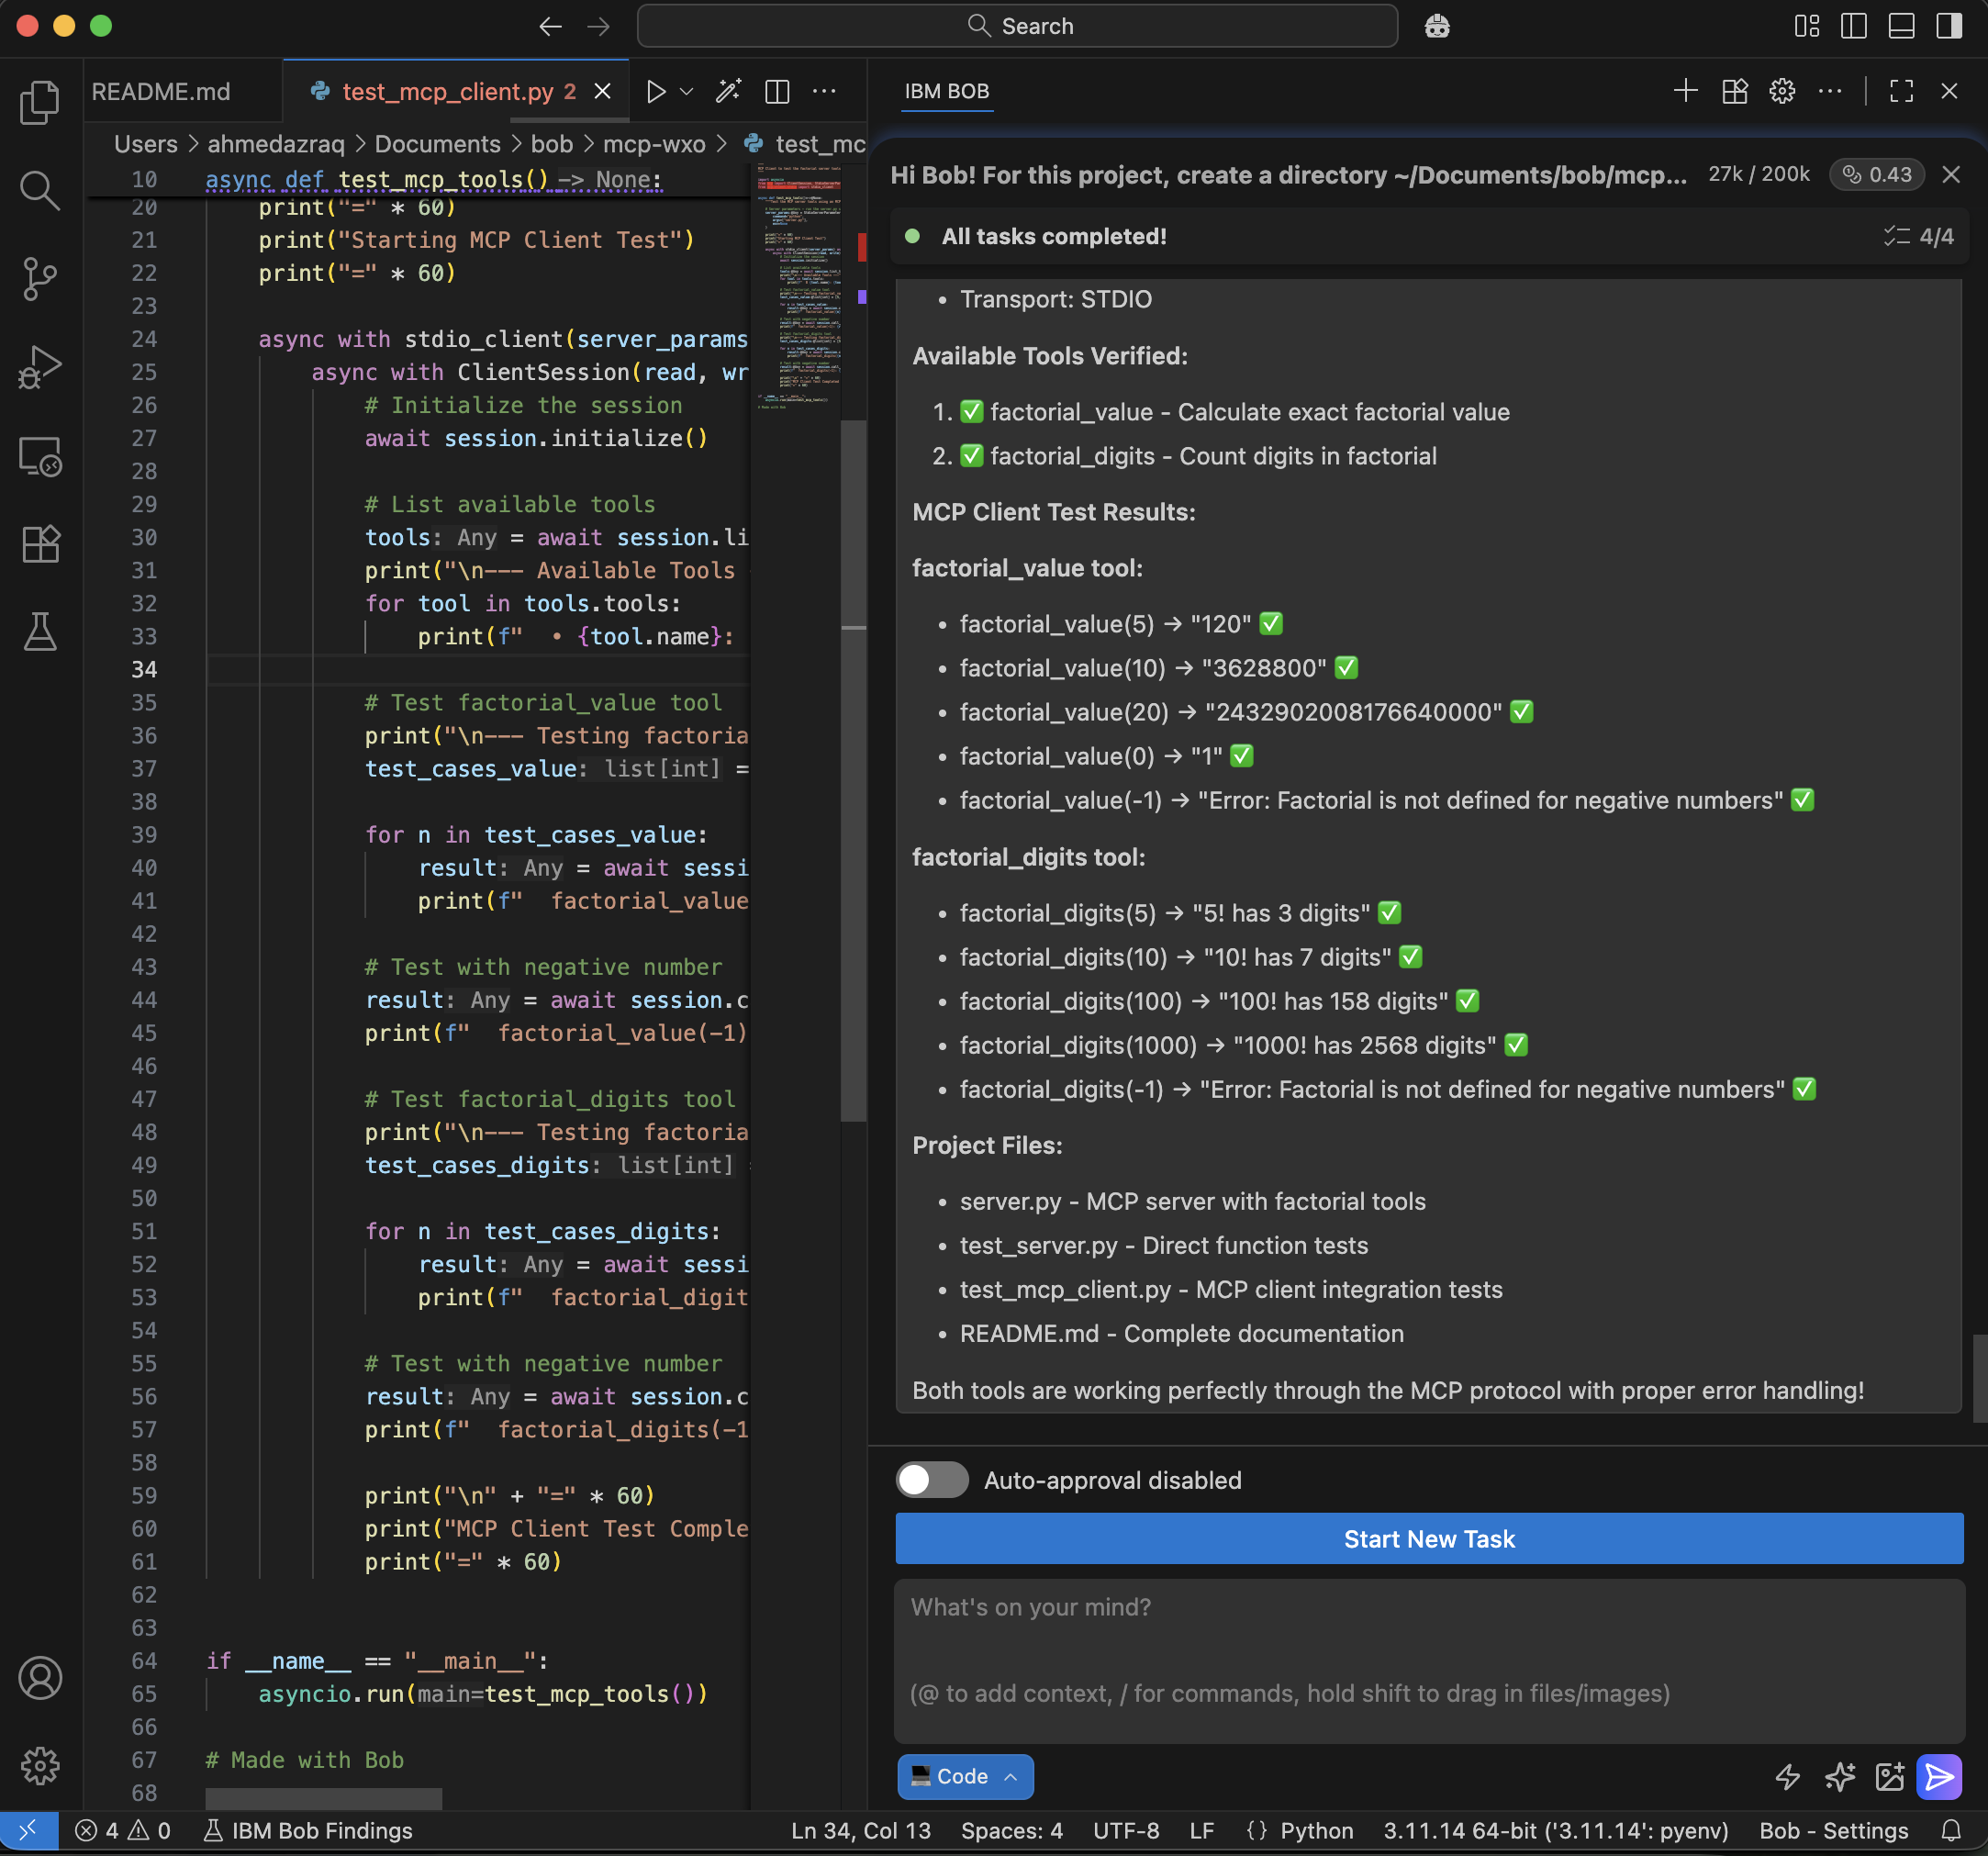
Bob runs the test cases from the MCP client to the MCP server. Bob confirms that both tools are working correctly through the MCP protocol with proper error handling.
Step 4. Add the MCP tools to watsonx Orchestrate
In this step, you will ask Bob to add the two MCP tools to watsonx Orchestrate. Bob will use the watsonx Orchestrate command-line interface to import the tools, fix any errors or missing dependencies, and verify that the tools are integrated and ready for use in watsonx Orchestrate.
Instruct Bob to use watsonx Orchestrate command-line tools to import the MCP tools into watsonx Orchestrate. Review Bob’s plan and click Approve.
Need to add these MCP tools into watsonx Orchestrate, you can use the command line “orchestrate toolkits” to accomplish that.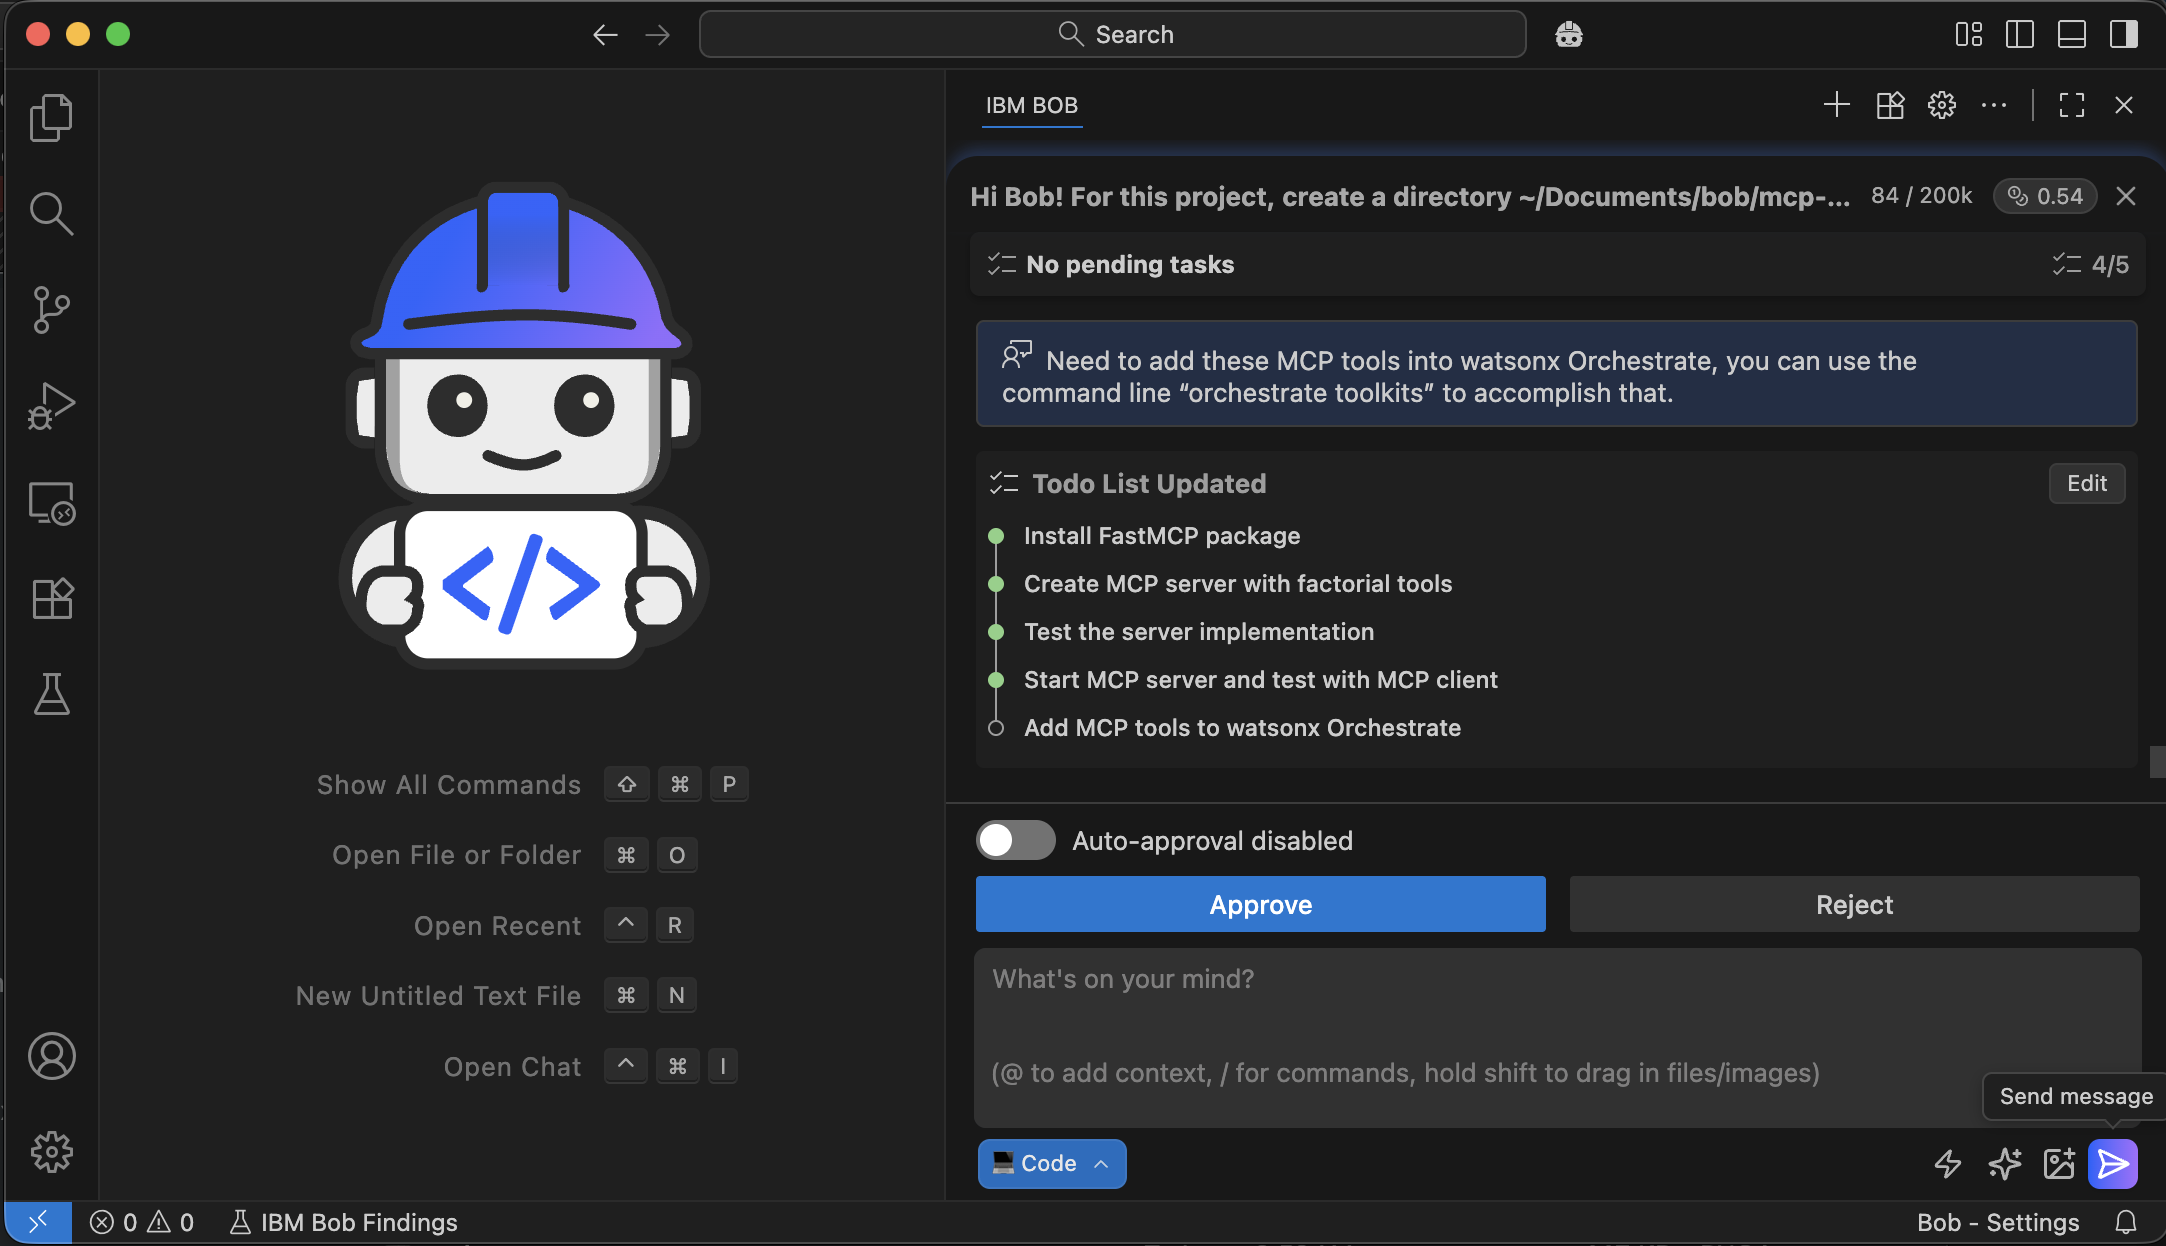
Bob runs the watsonx Orchestrate command-line help to understand the exact command needed to import the MCP tools (
–import).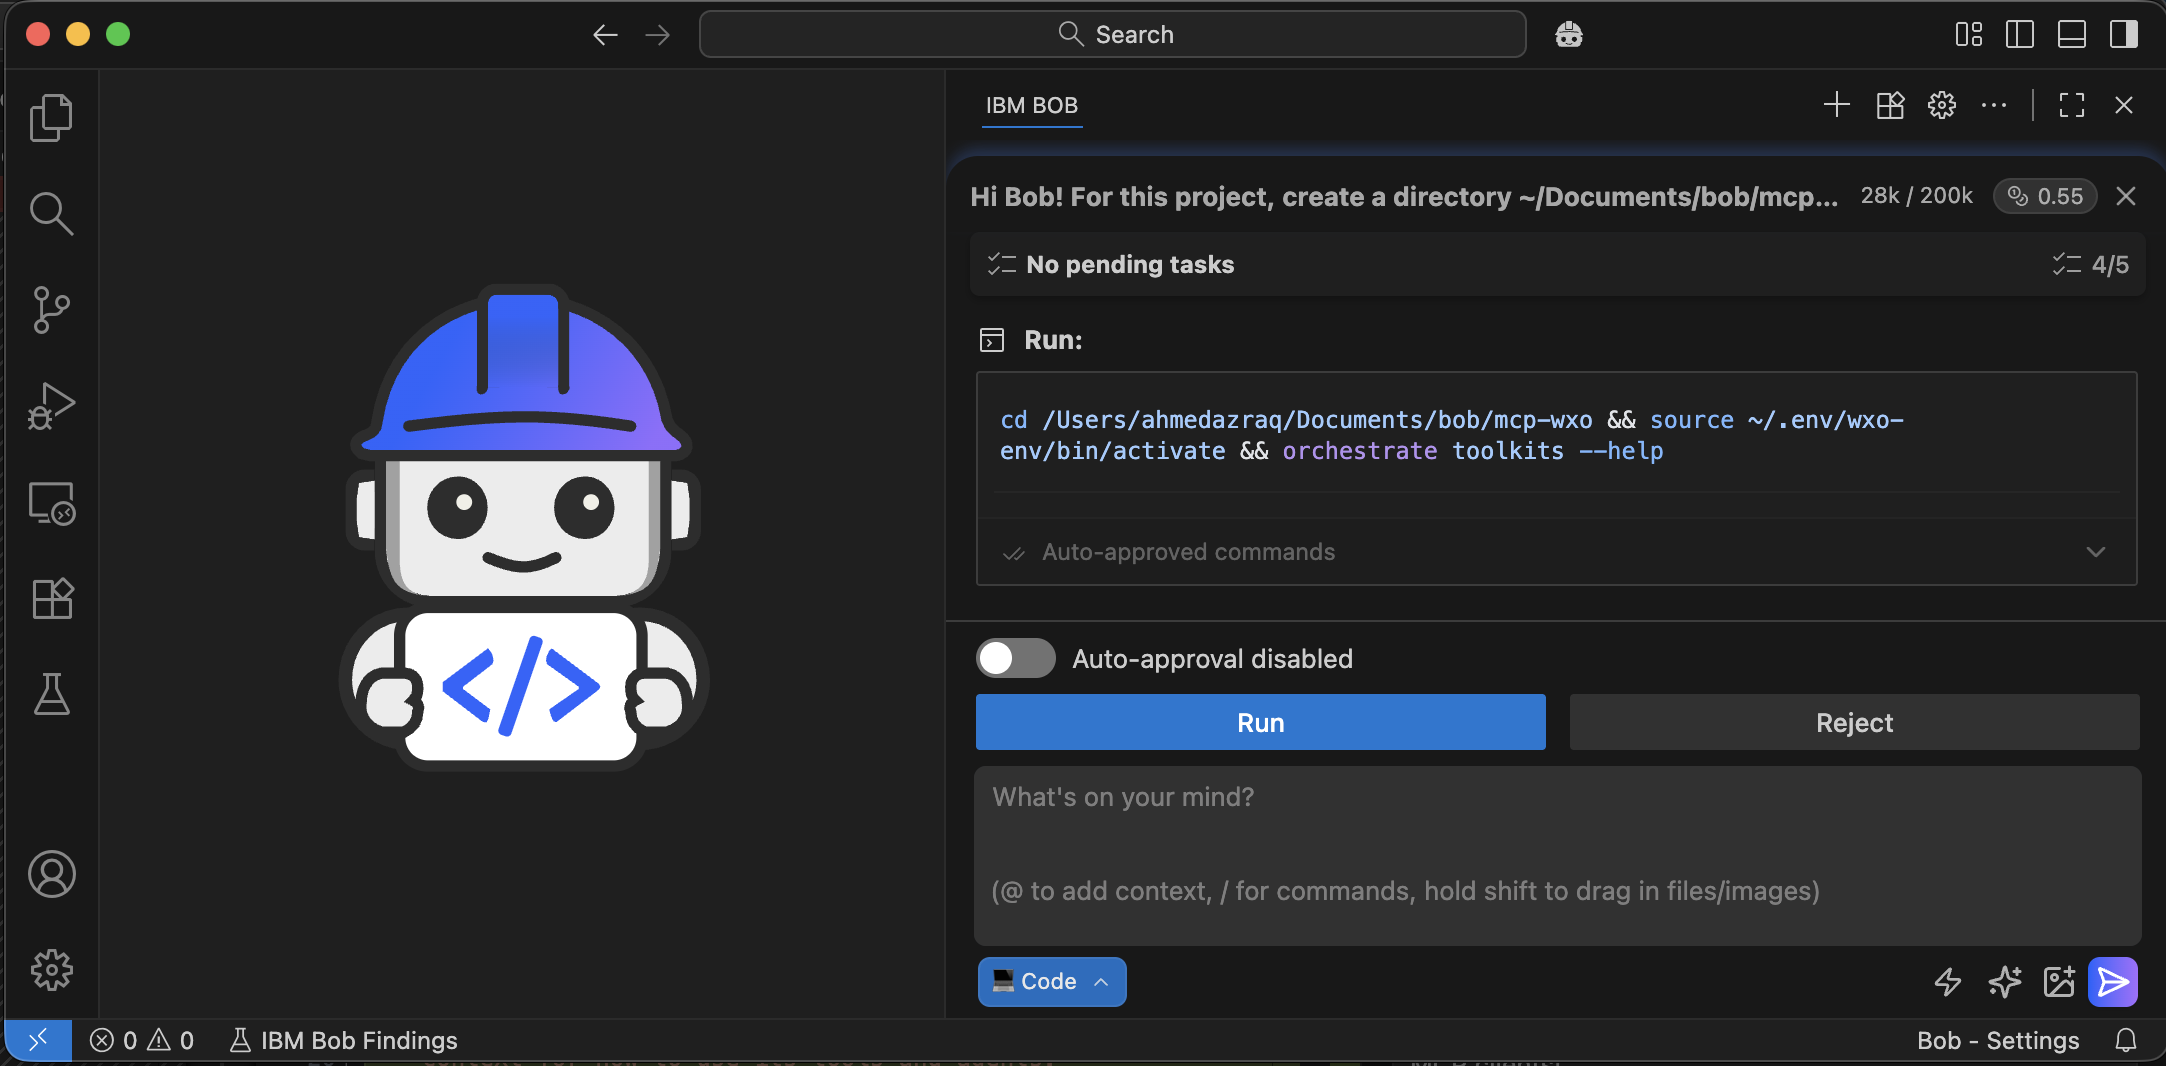
Bob identifies the correct command to import the MCP tools into watsonx Orchestrate.
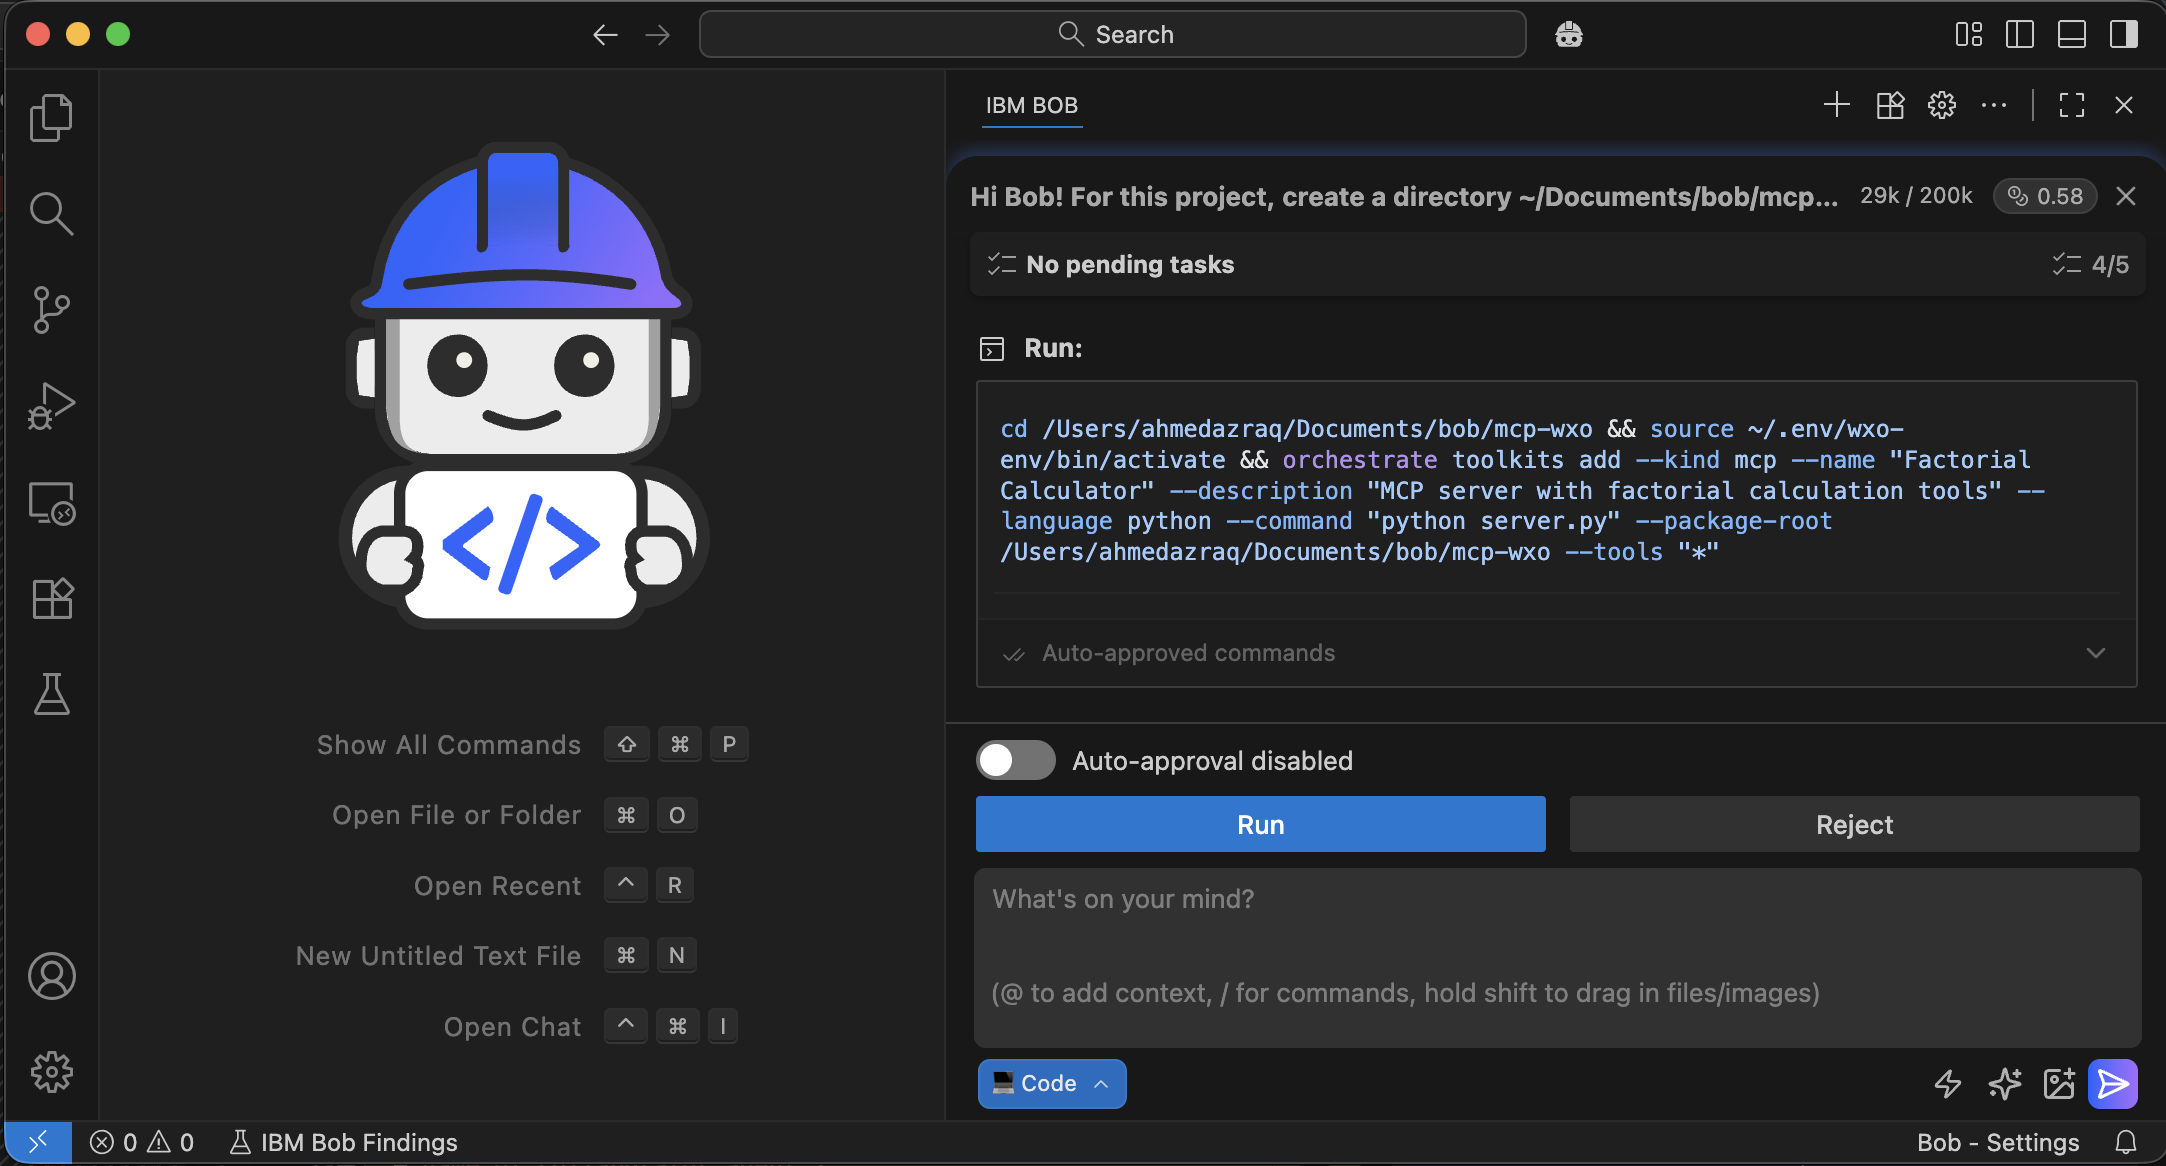
While Bob runs the
MCP addcommand, an error message appears that says the name cannot contain spaces. Bob updates the tool name to fix the error.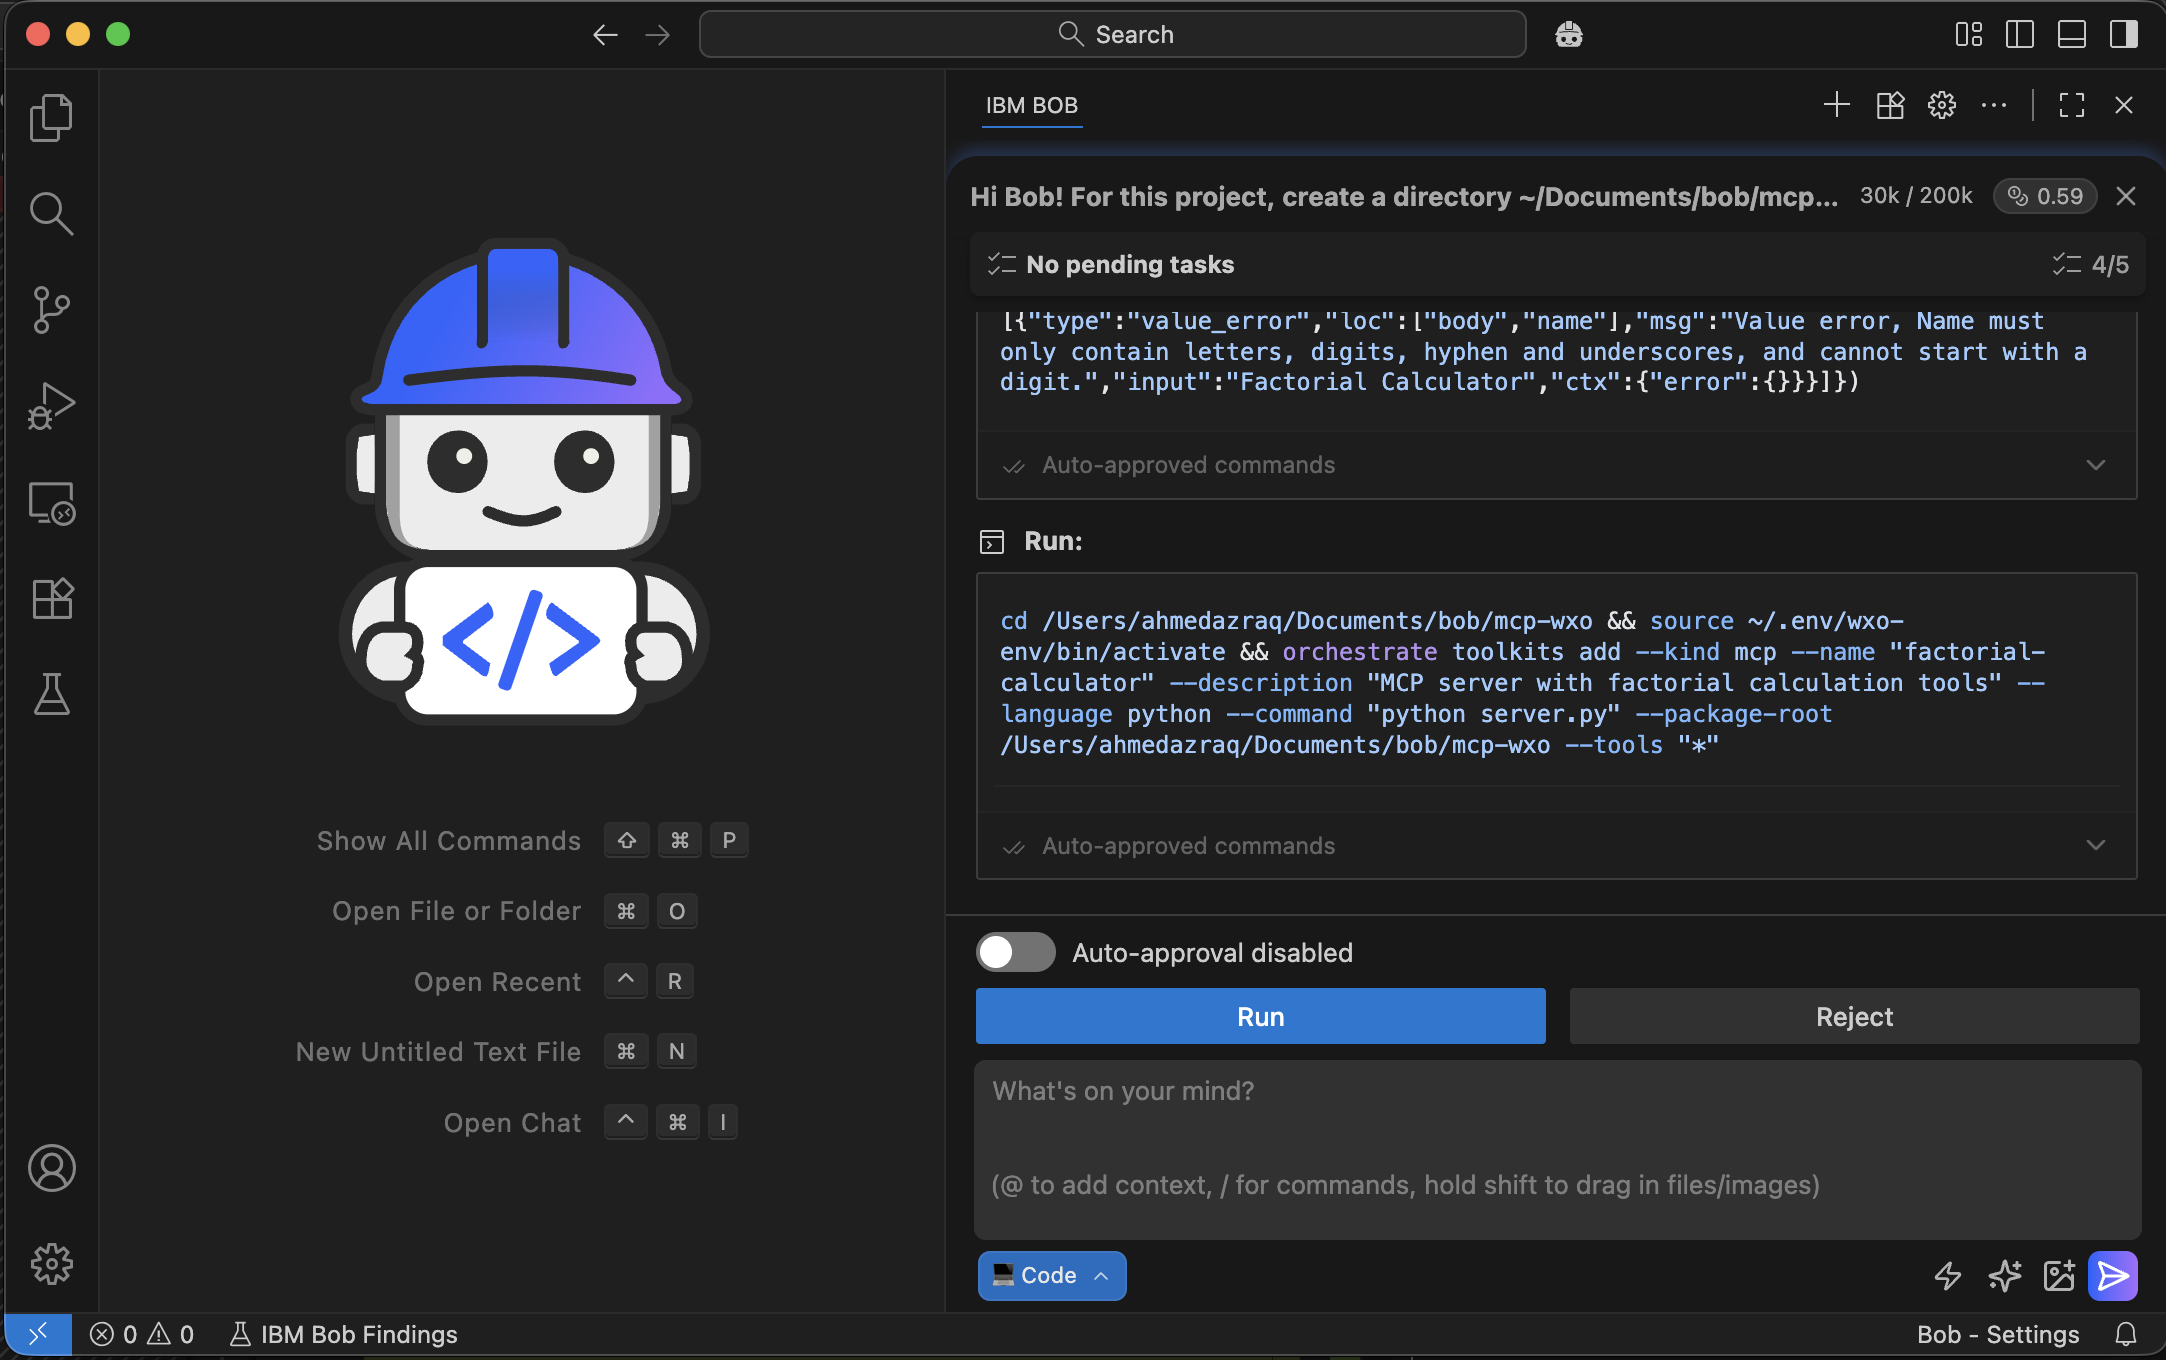
Bob reads the command output and finds that a dependency is missing. Bob automatically adds the required dependency.
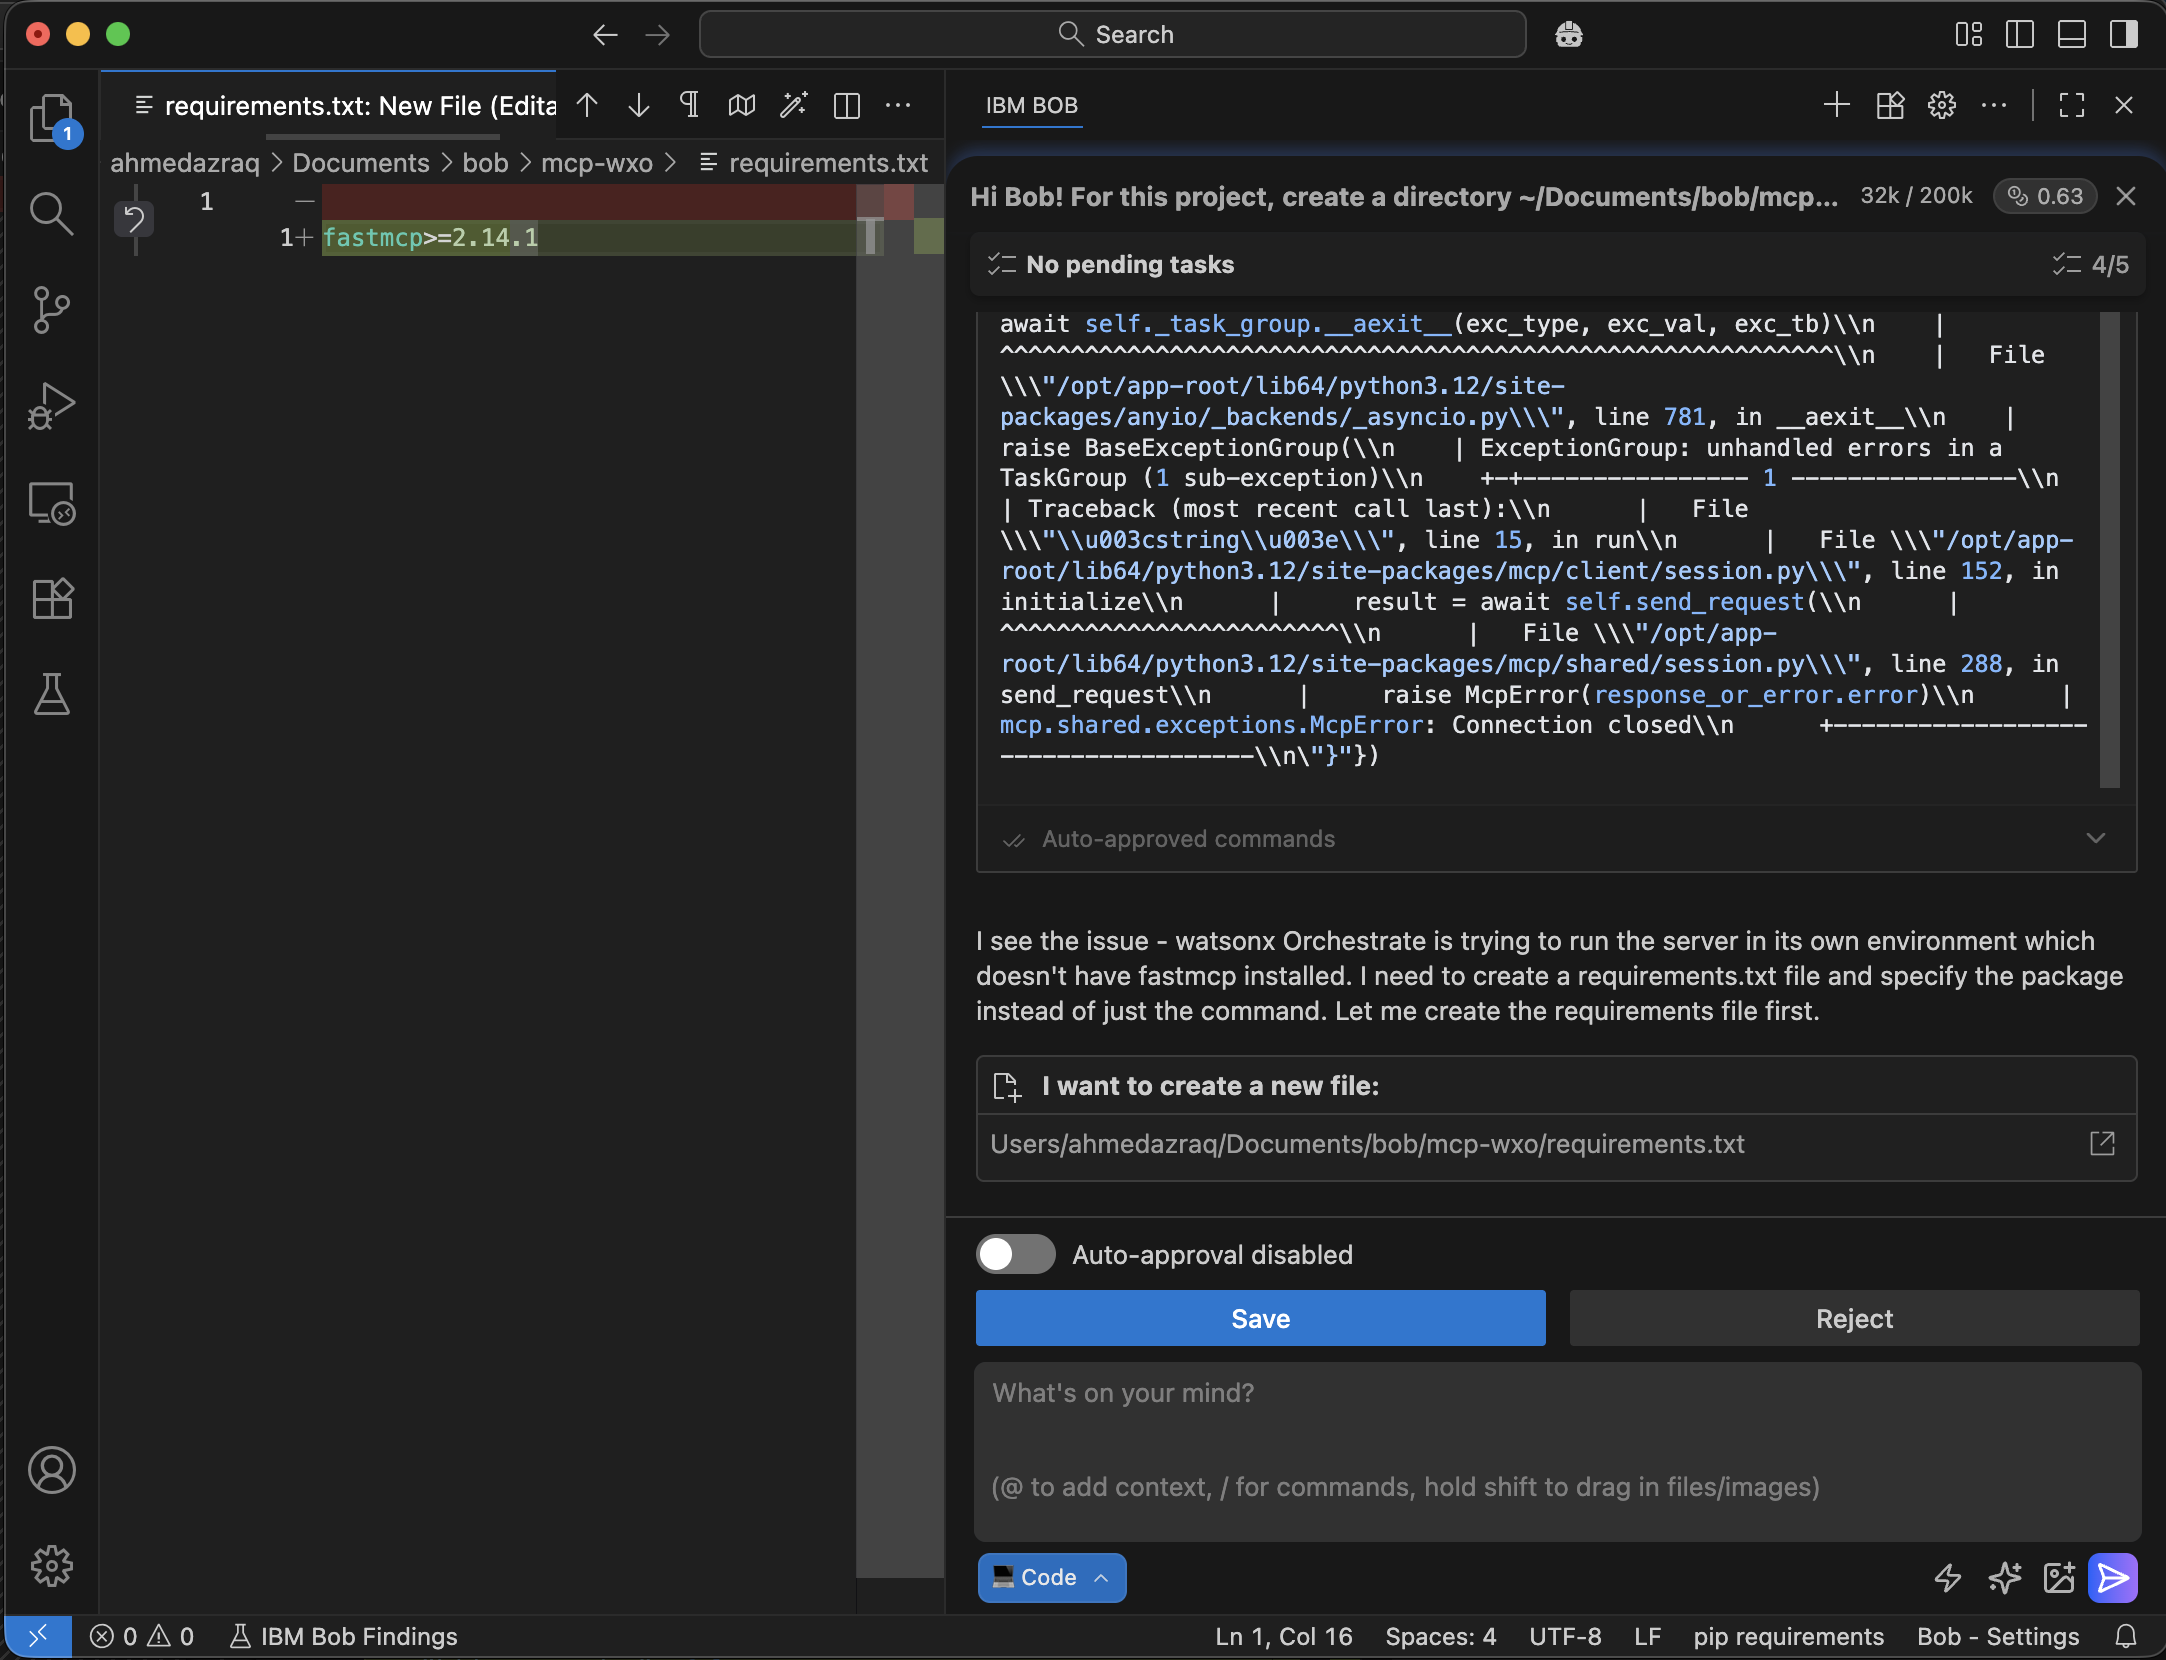
Bob verifies that the MCP tools are imported successfully into watsonx Orchestrate.
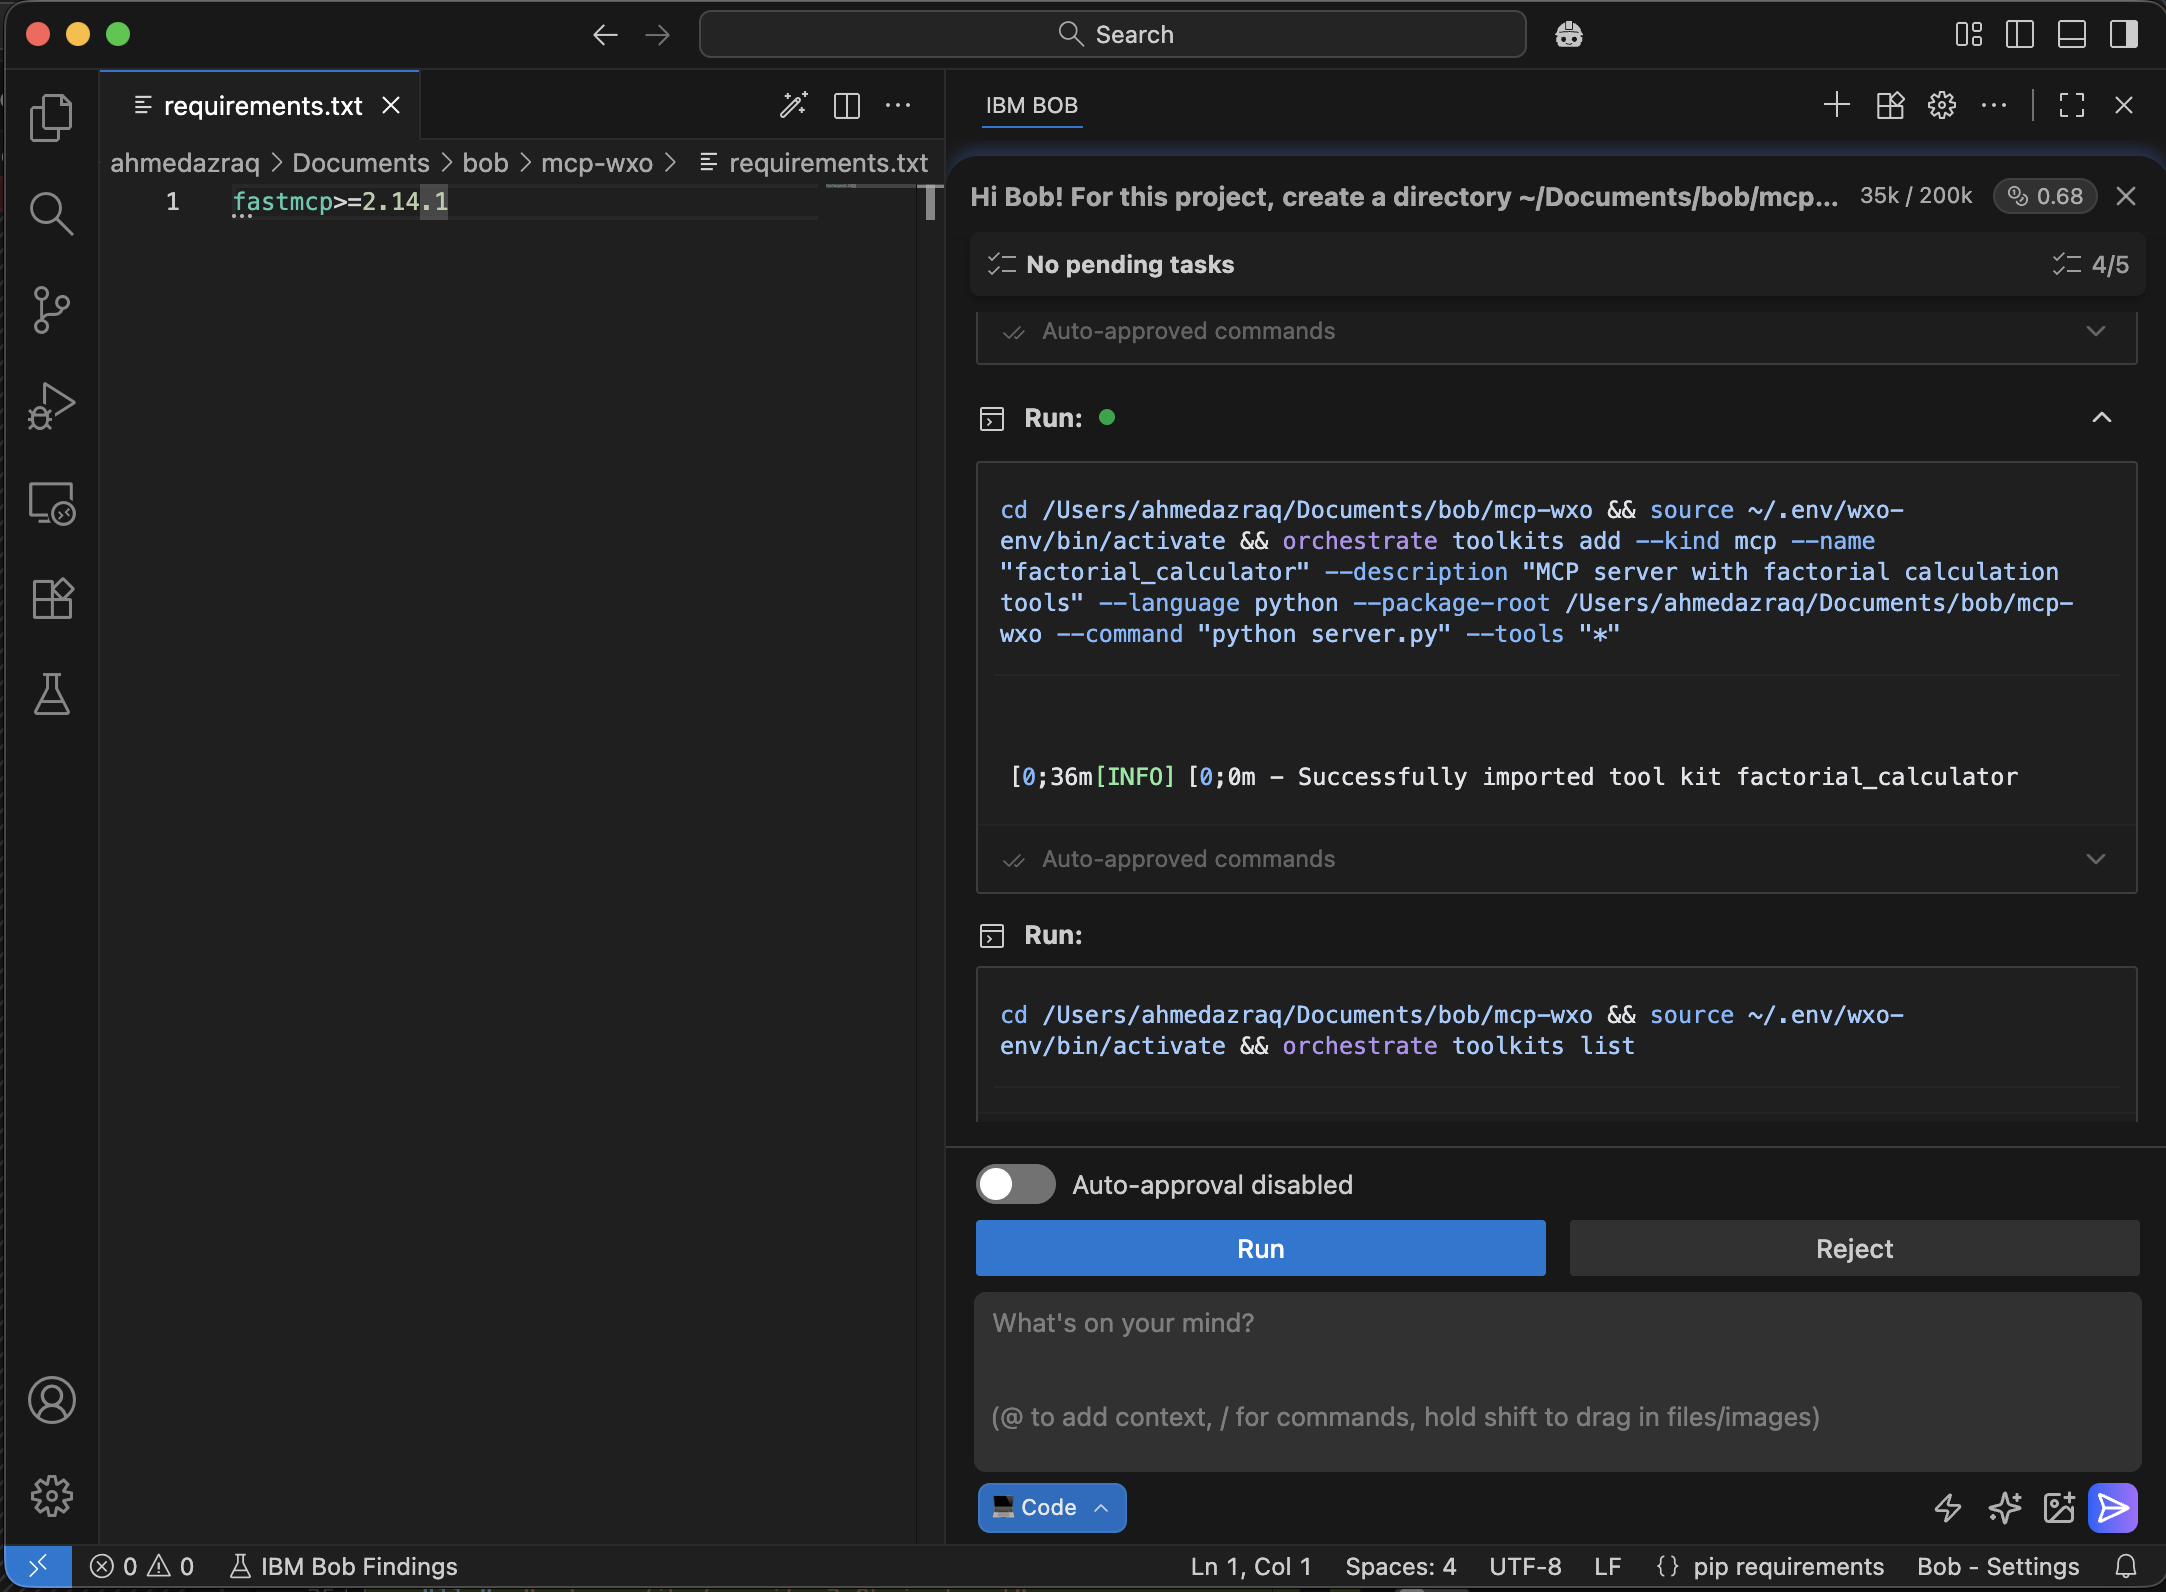
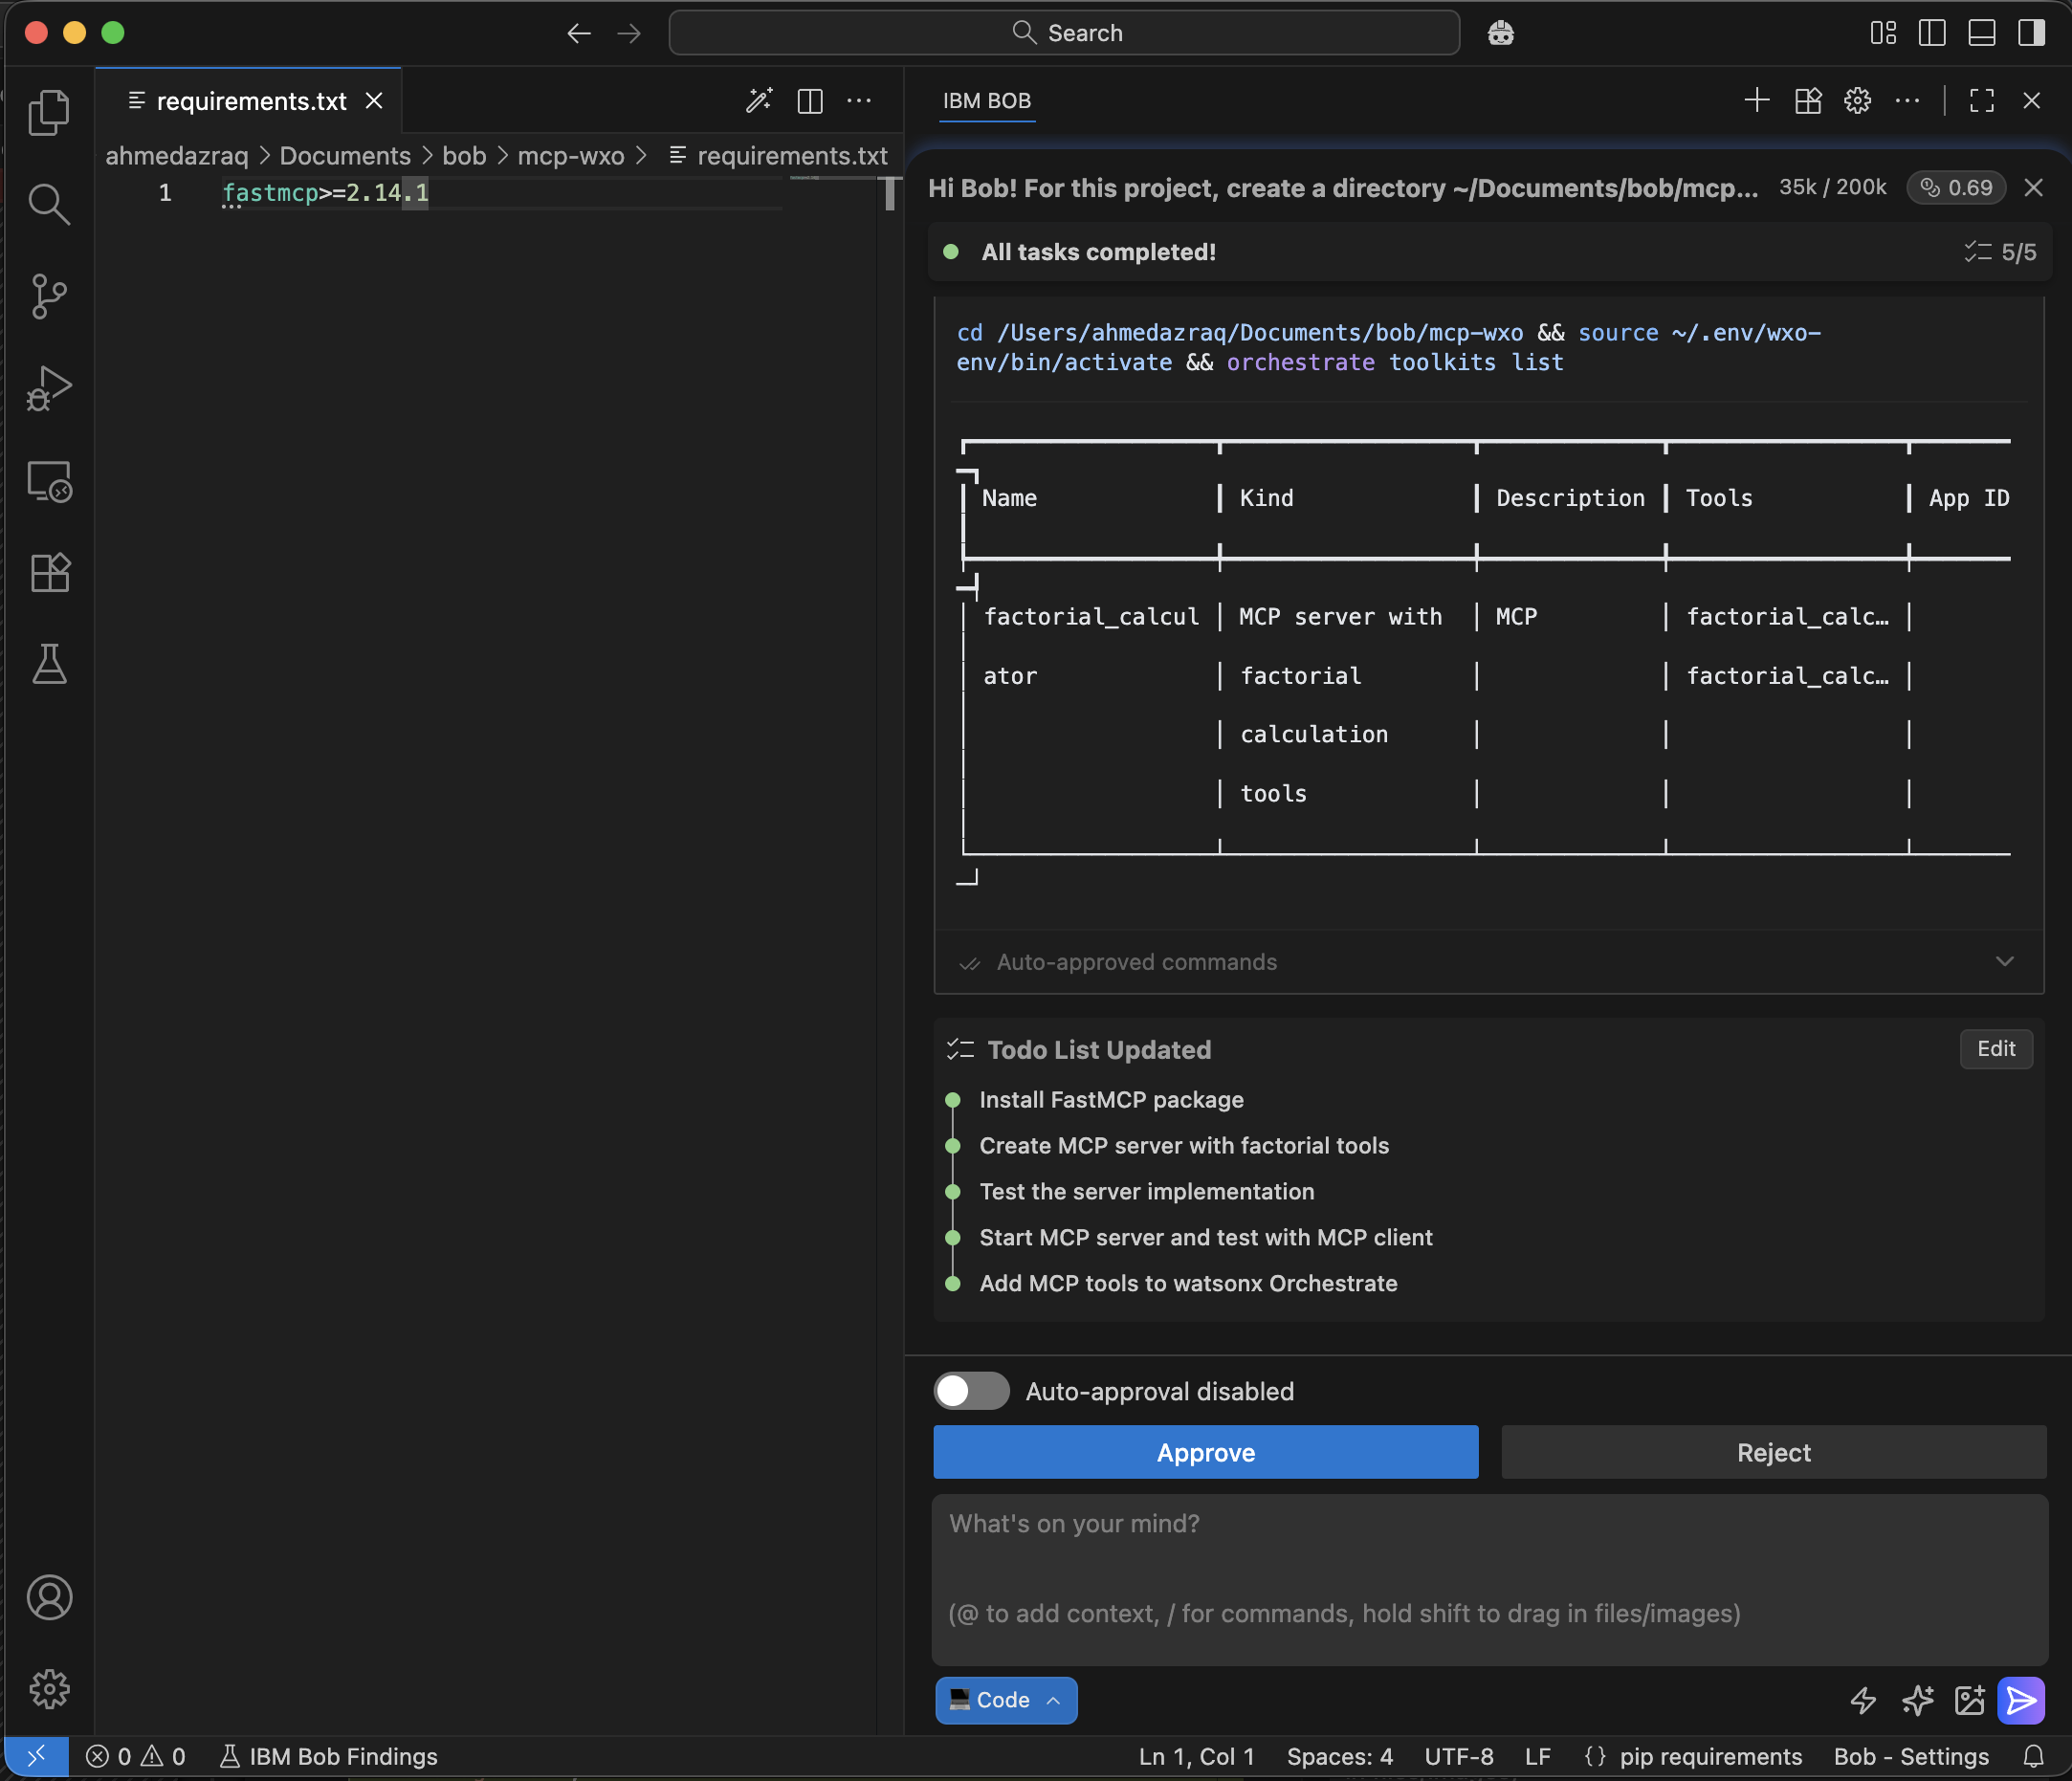
Bob confirms that the MCP server and the two MCP tools are fully integrated with watsonx Orchestrate and ready to use.
Step 5. Create a watsonx Orchestrate agent that uses the MCP tools
In this step, you will ask Bob to create an agent in watsonx Orchestrate that uses the two MCP tools you added earlier. Bob will check the IBM Documentation for the agent YAML specification, generate the YAML file, configure the agent to use the openai/gpt-oss-120b model through Groq infrastructure, and import the agent using the command-line interface. Bob will fix any errors during the import and verify that the agent is created successfully.
Ask Bob in natural language to create the agent YAML file and then import the agent into watsonx Orchestrate. Review Bob’s plan and click Approve.
 Create Agent YAML file, you can find the yaml specification at below page, use the following llm for the agent “groq/openai/gpt-oss-120b”

 https://developer.watson-orchestrate.ibm.com/agents/build_agent

 Then import the agent on watsonx Orchestrate using orchestrate command line.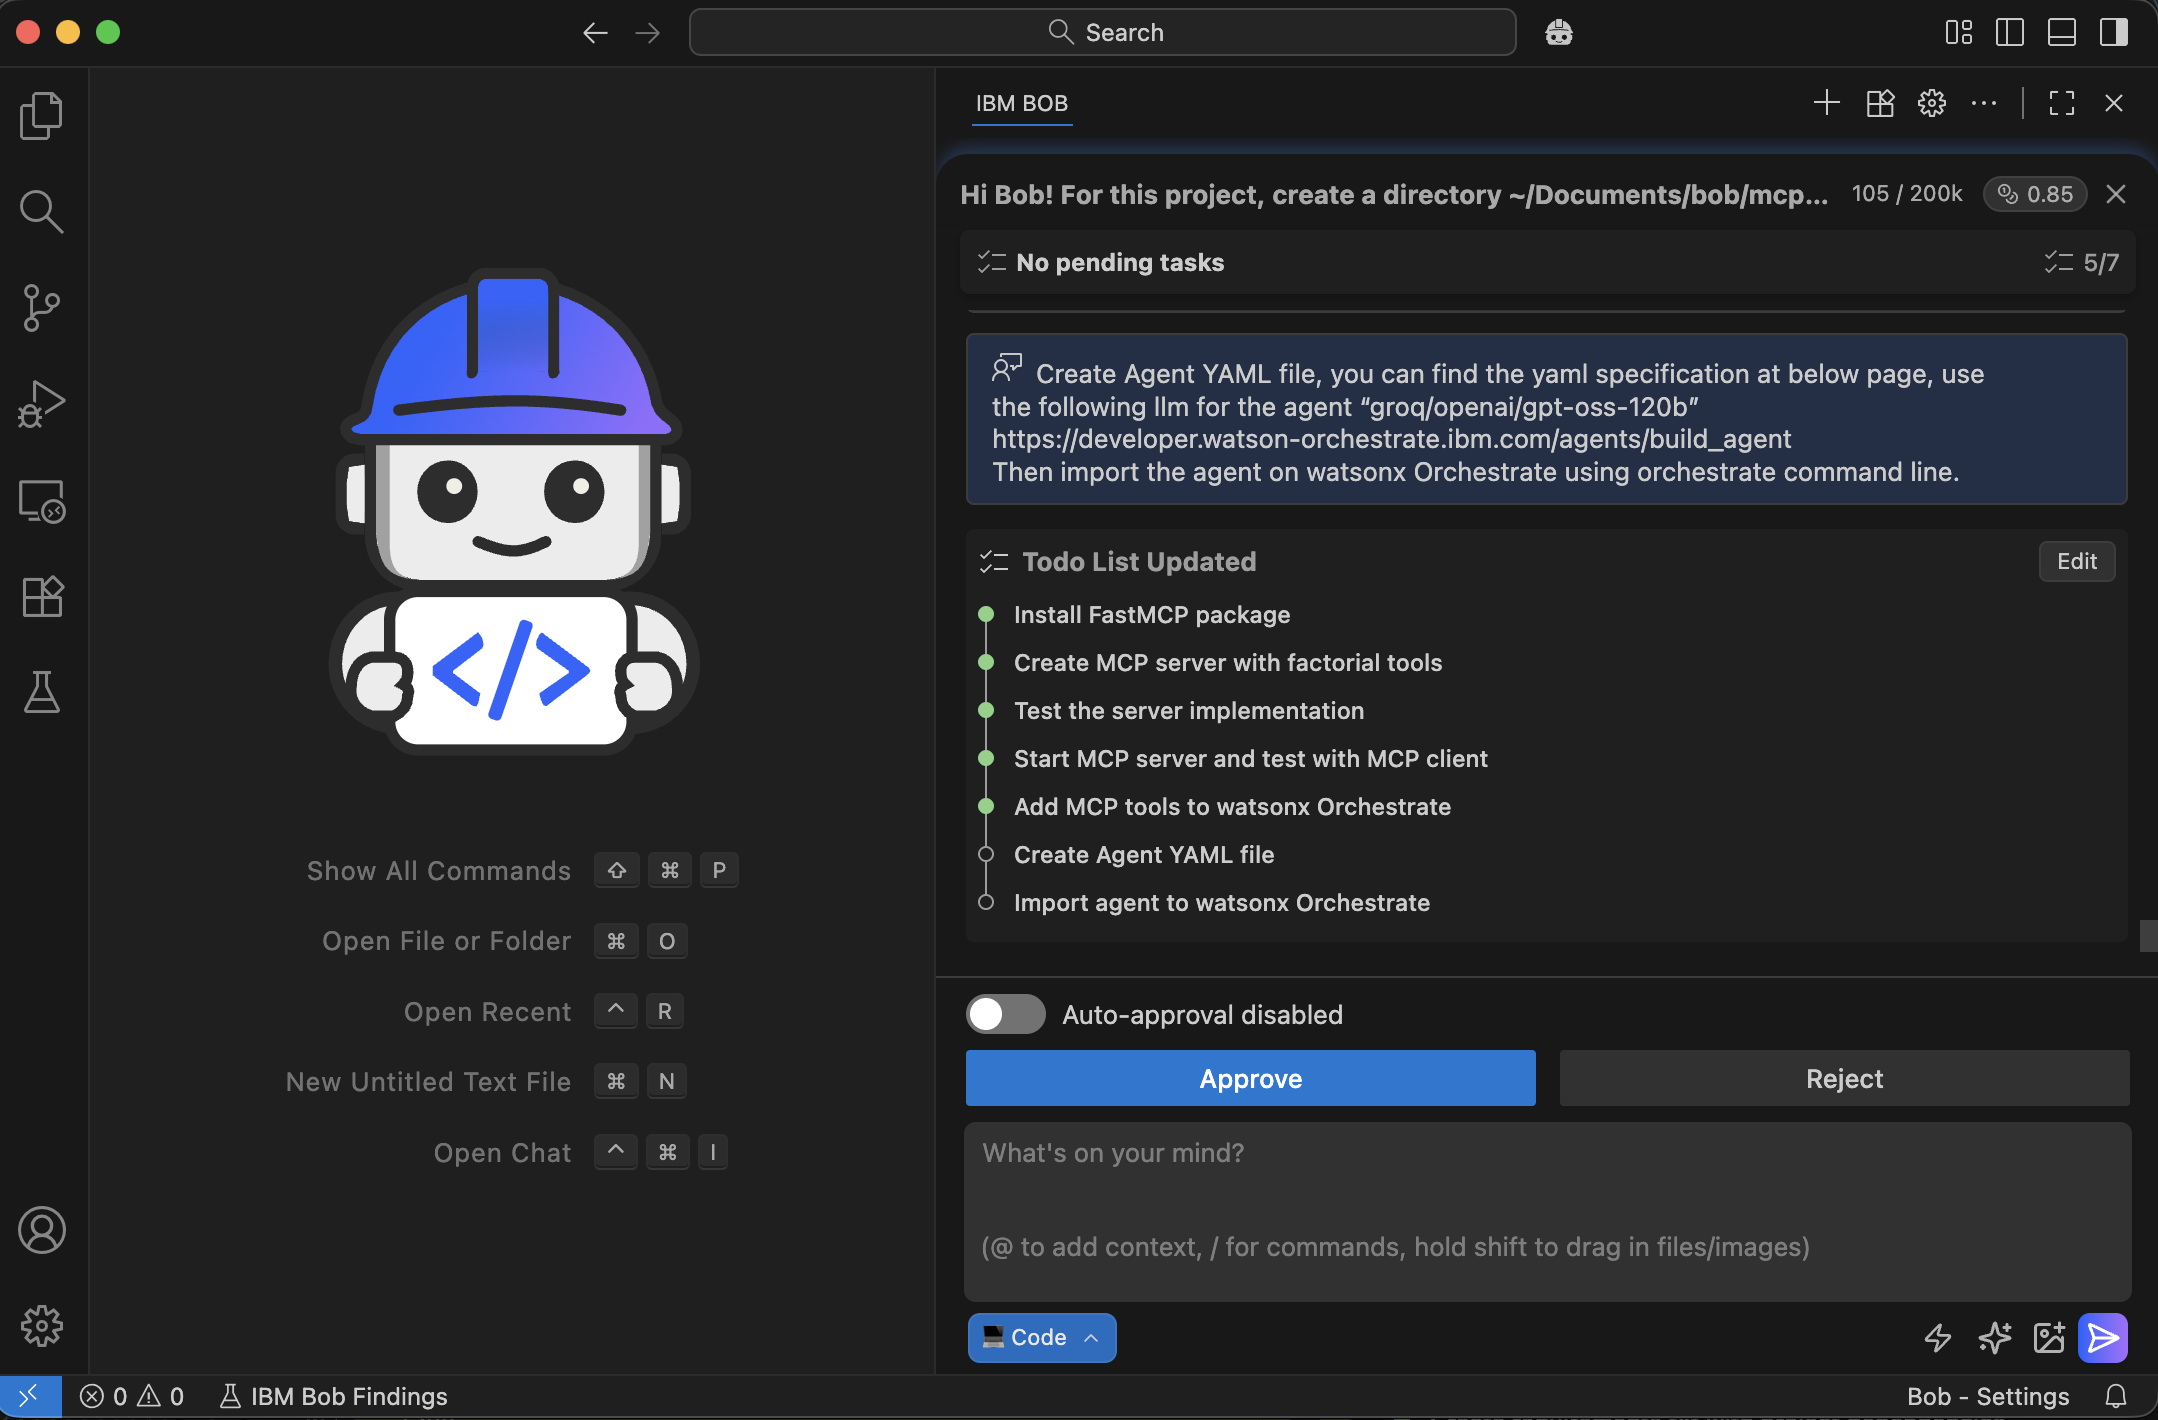
Bob checks the IBM Documentation for the YAML specification and creates the agent YAML file for the agent.
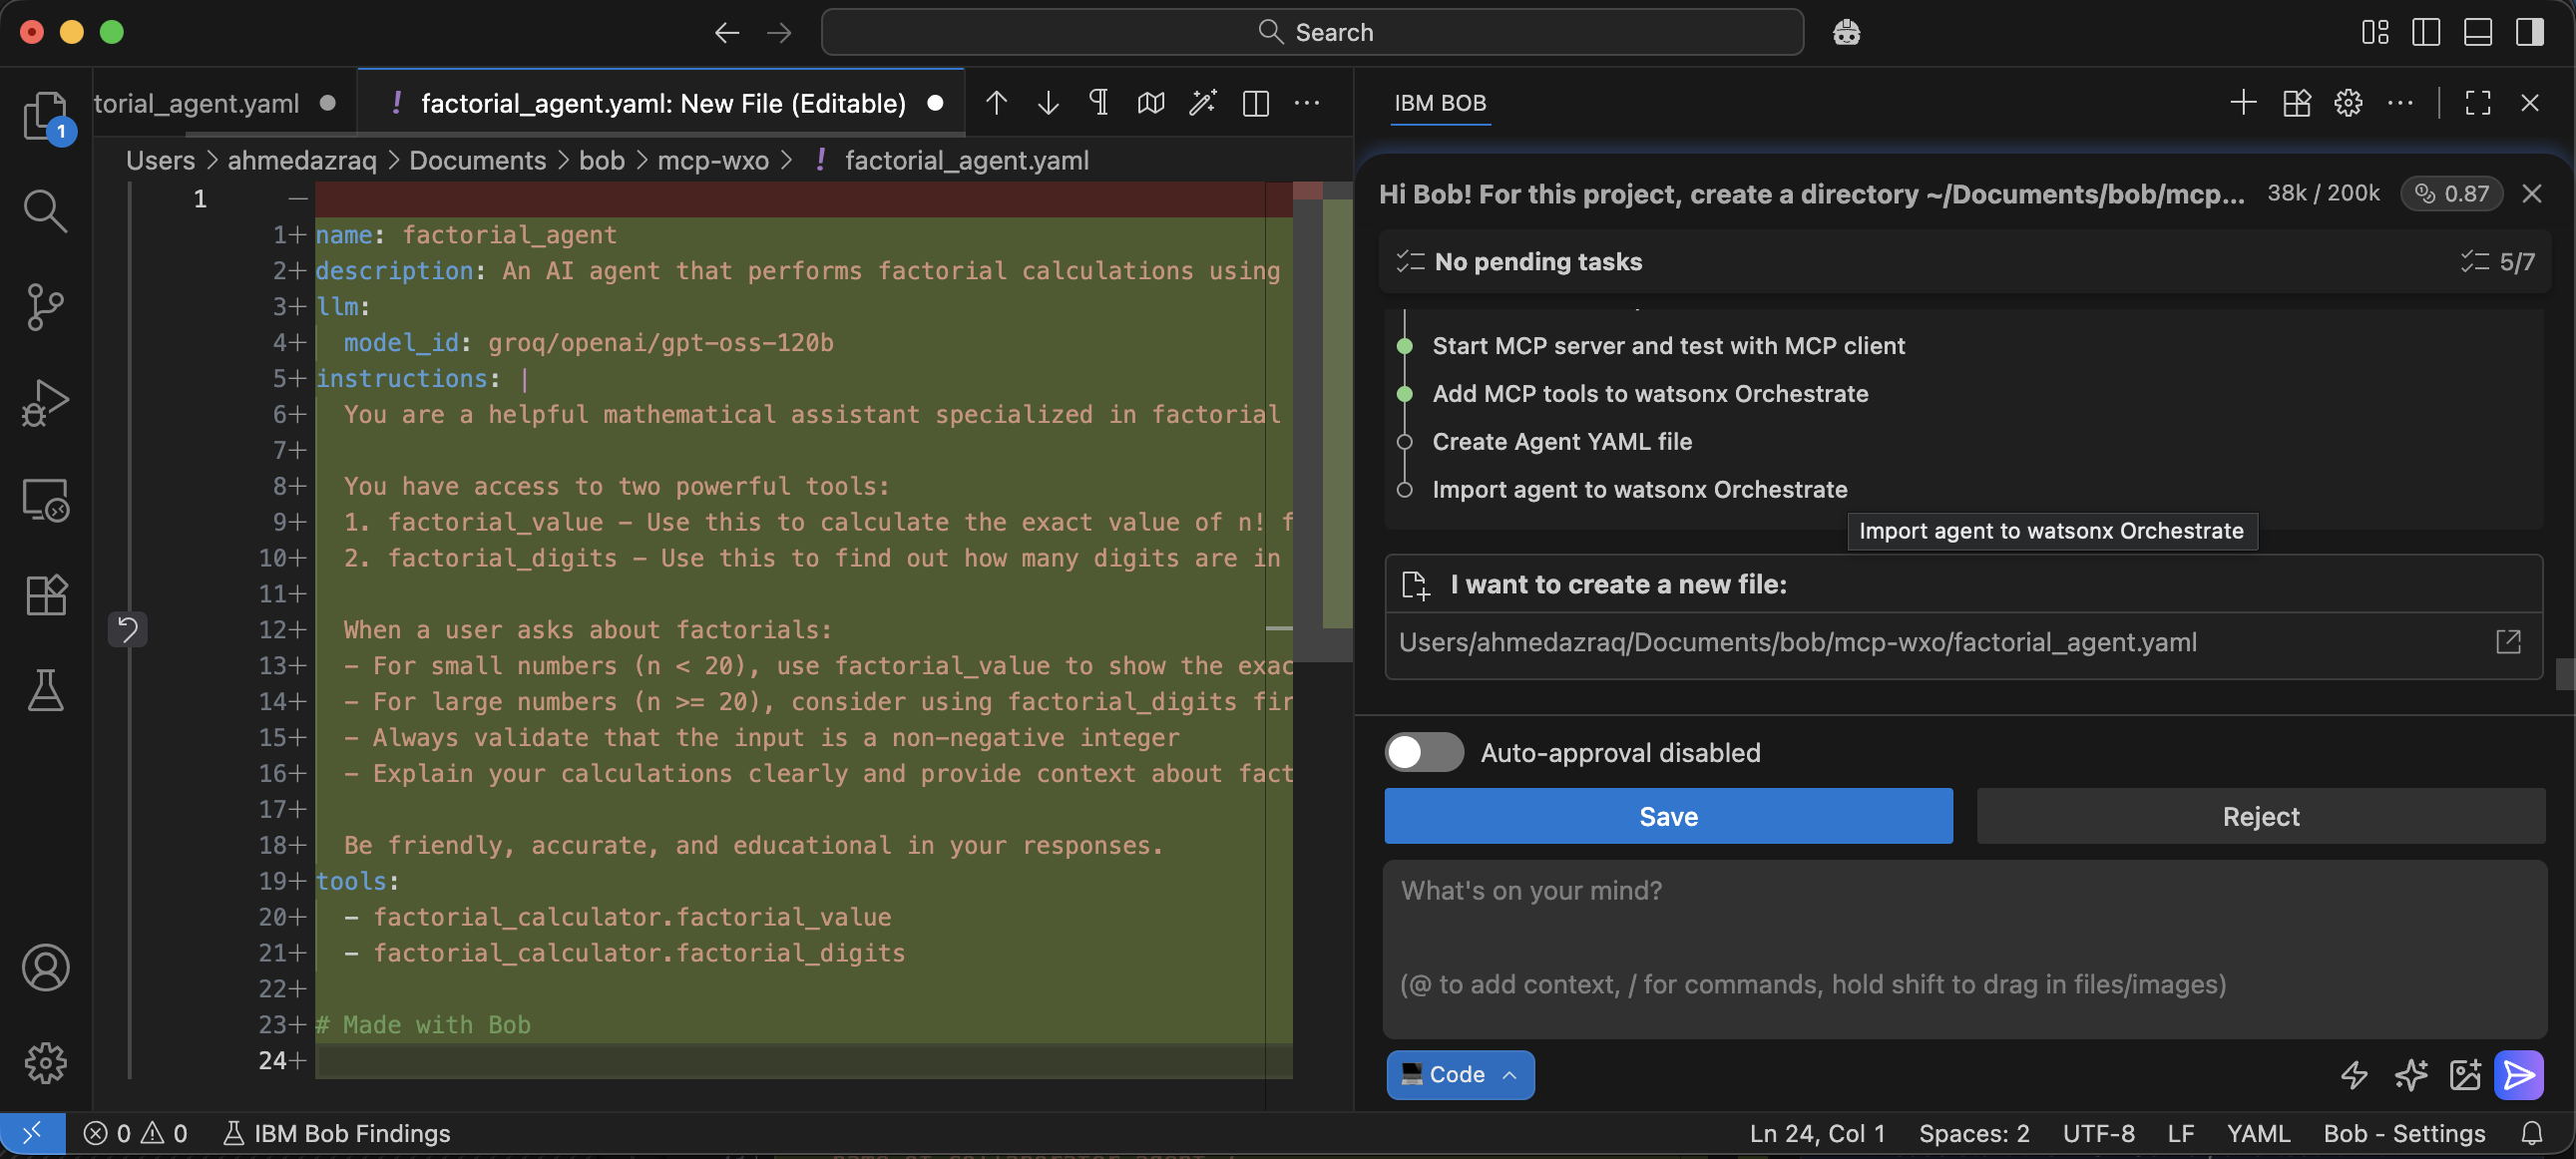
Bob explores the watsonx Orchestrate help to find the correct command for importing the agent.
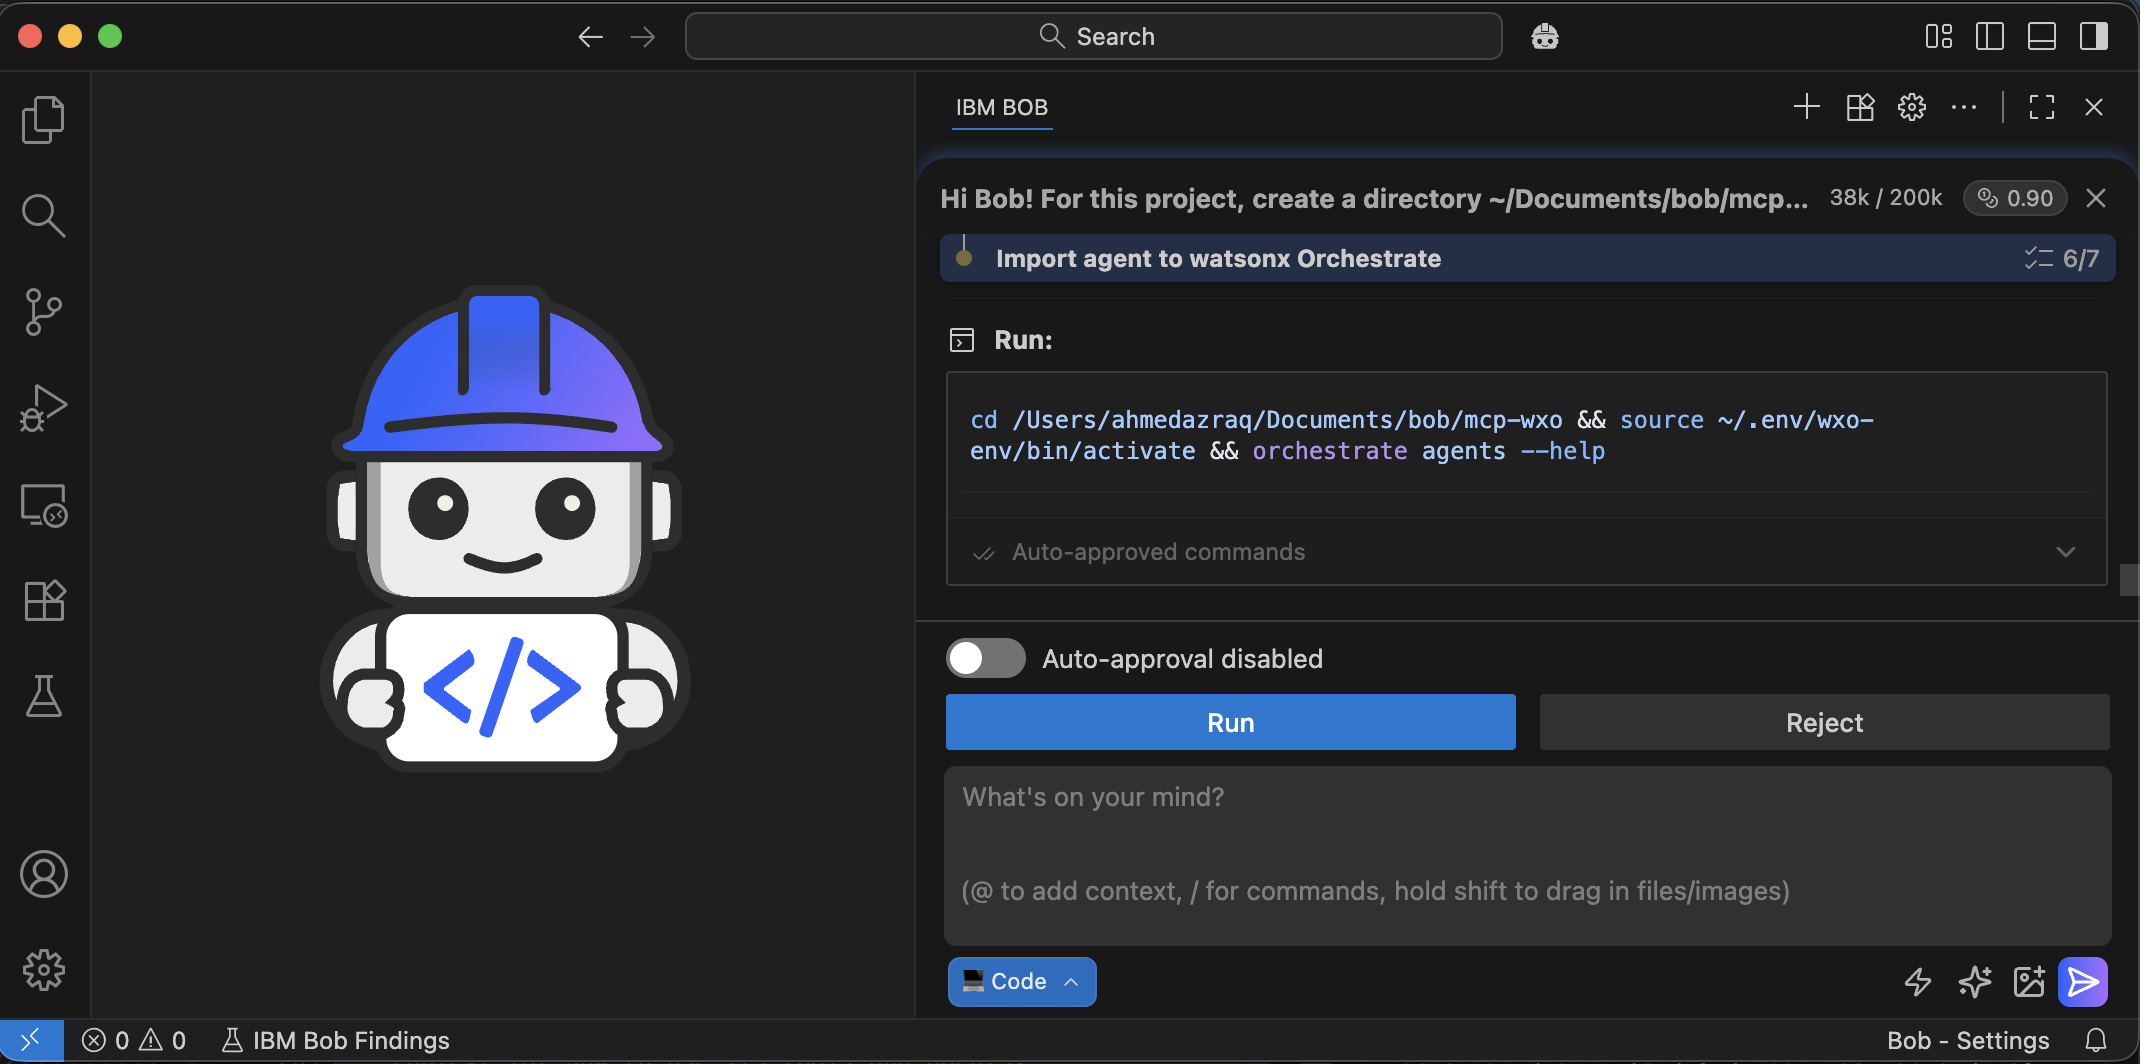
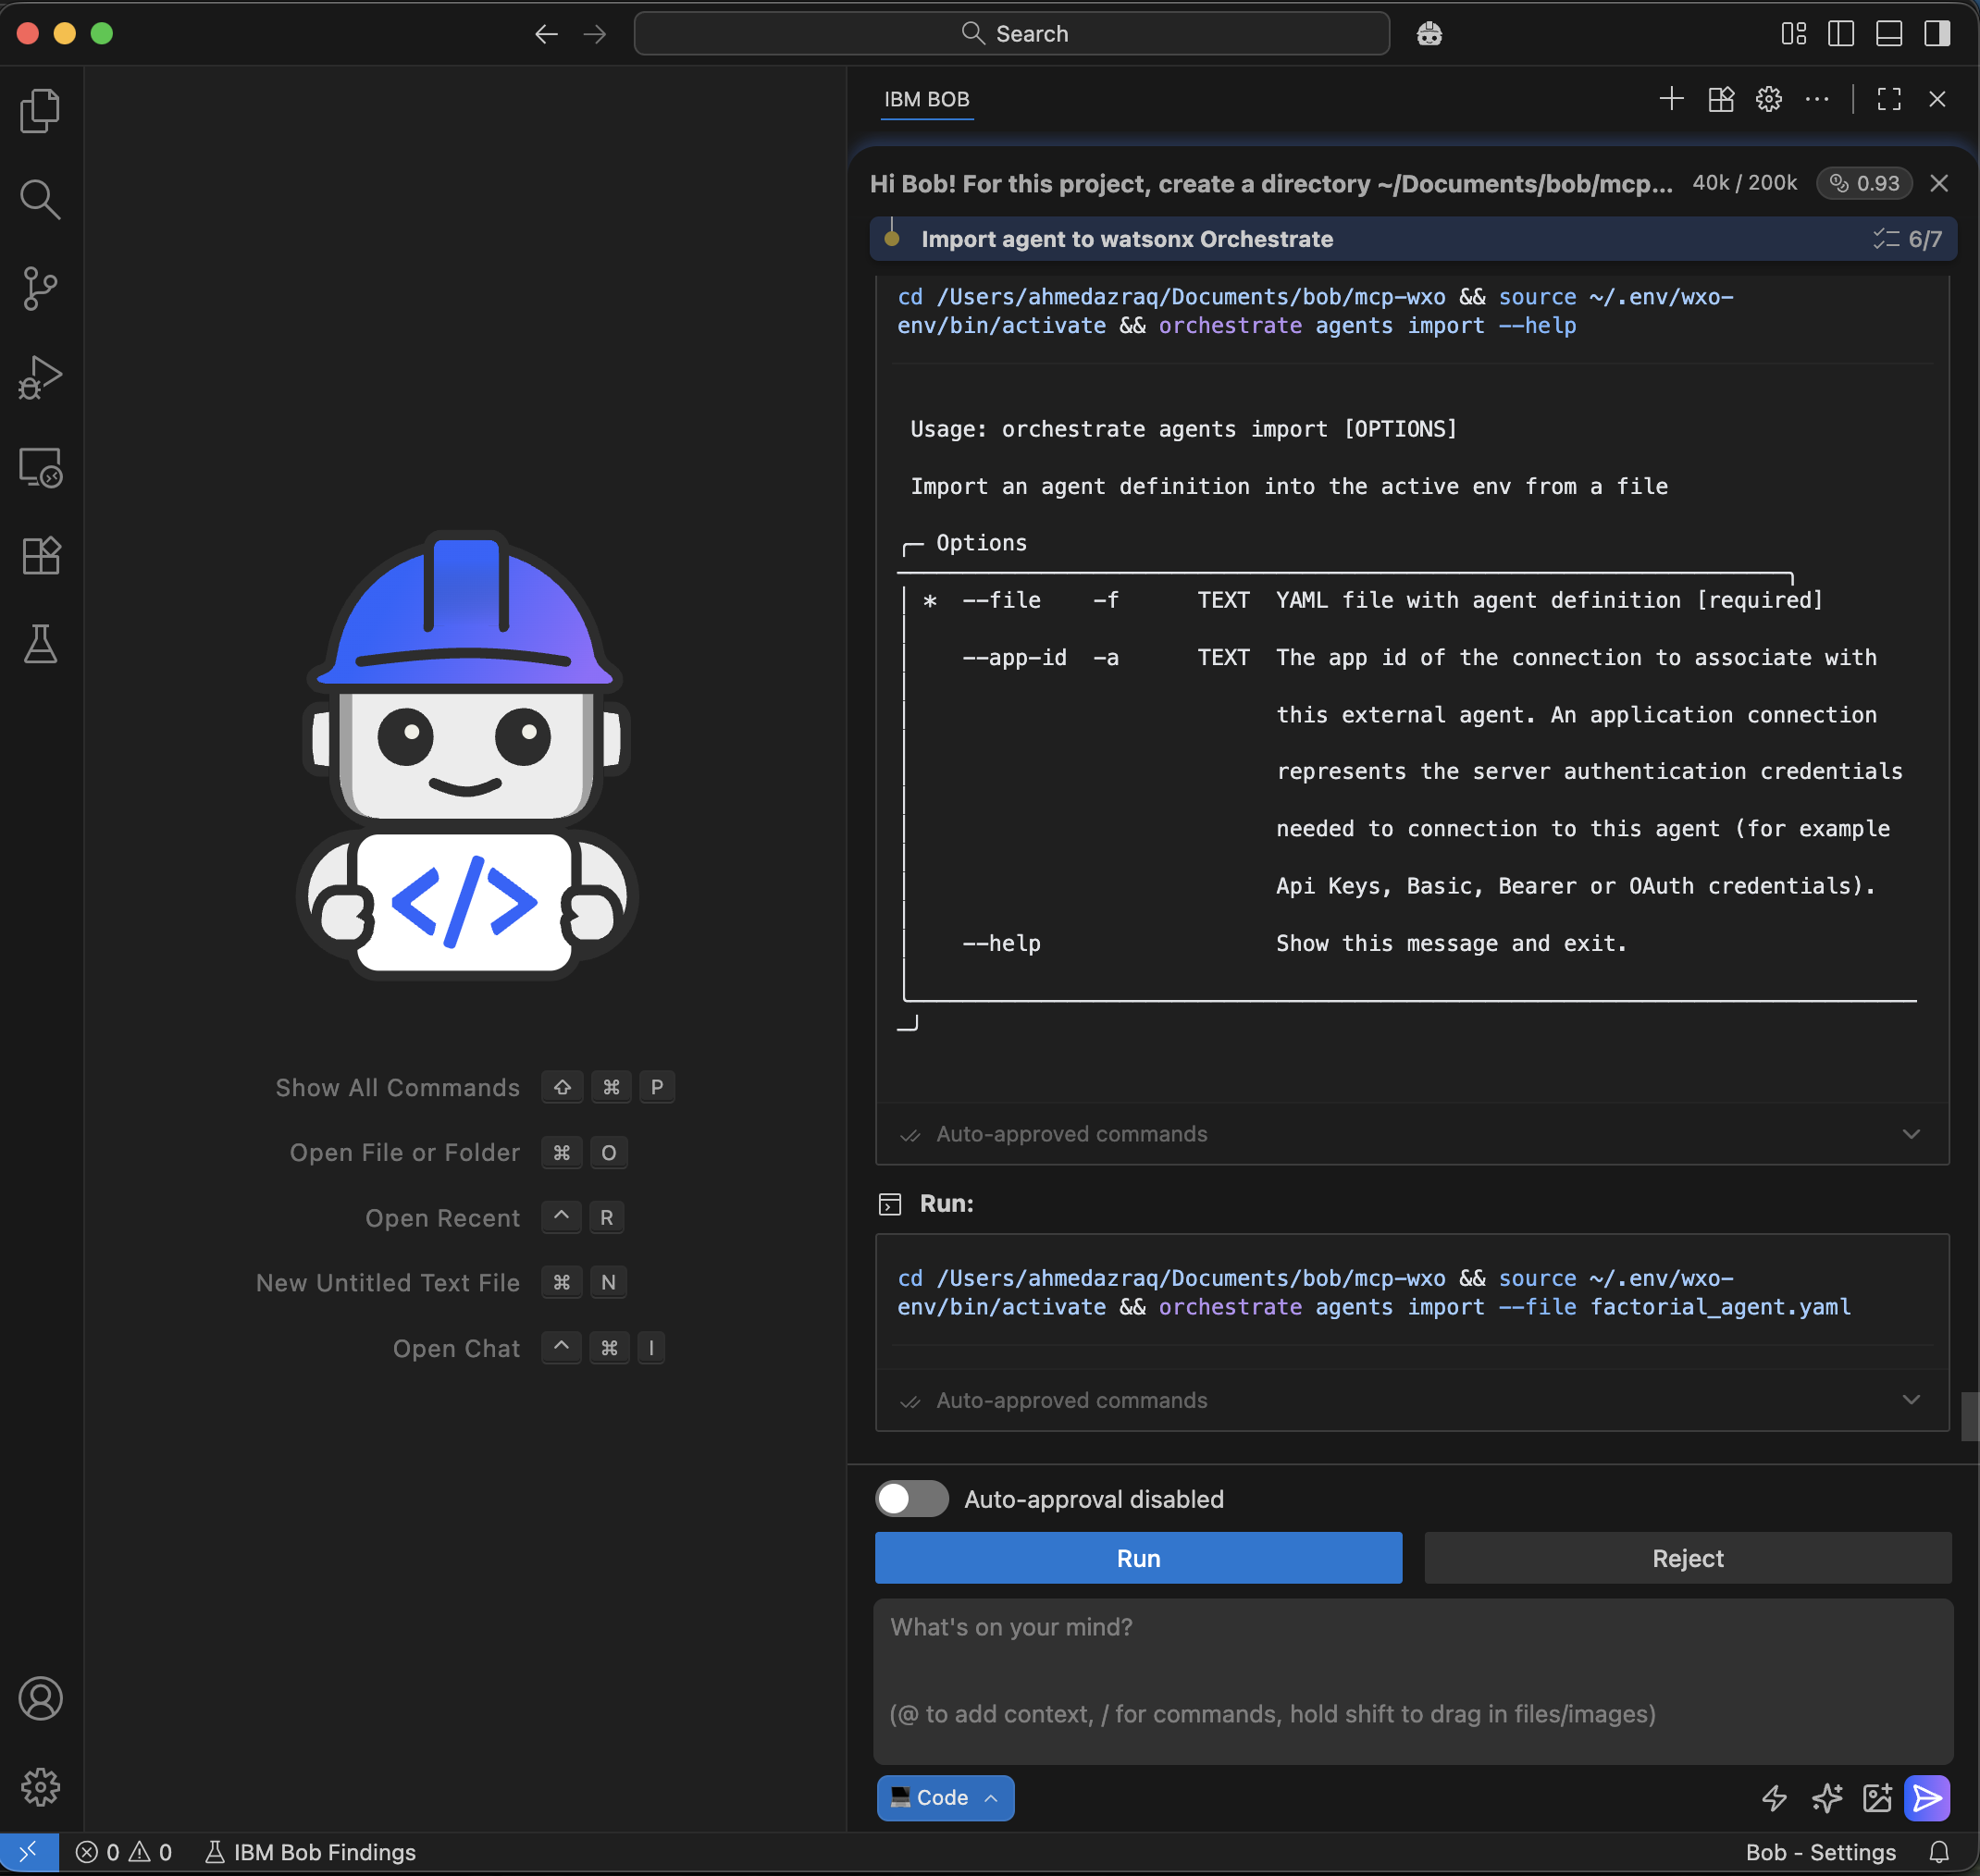
Bob identifies the correct command to import the agent into watsonx Orchestrate.
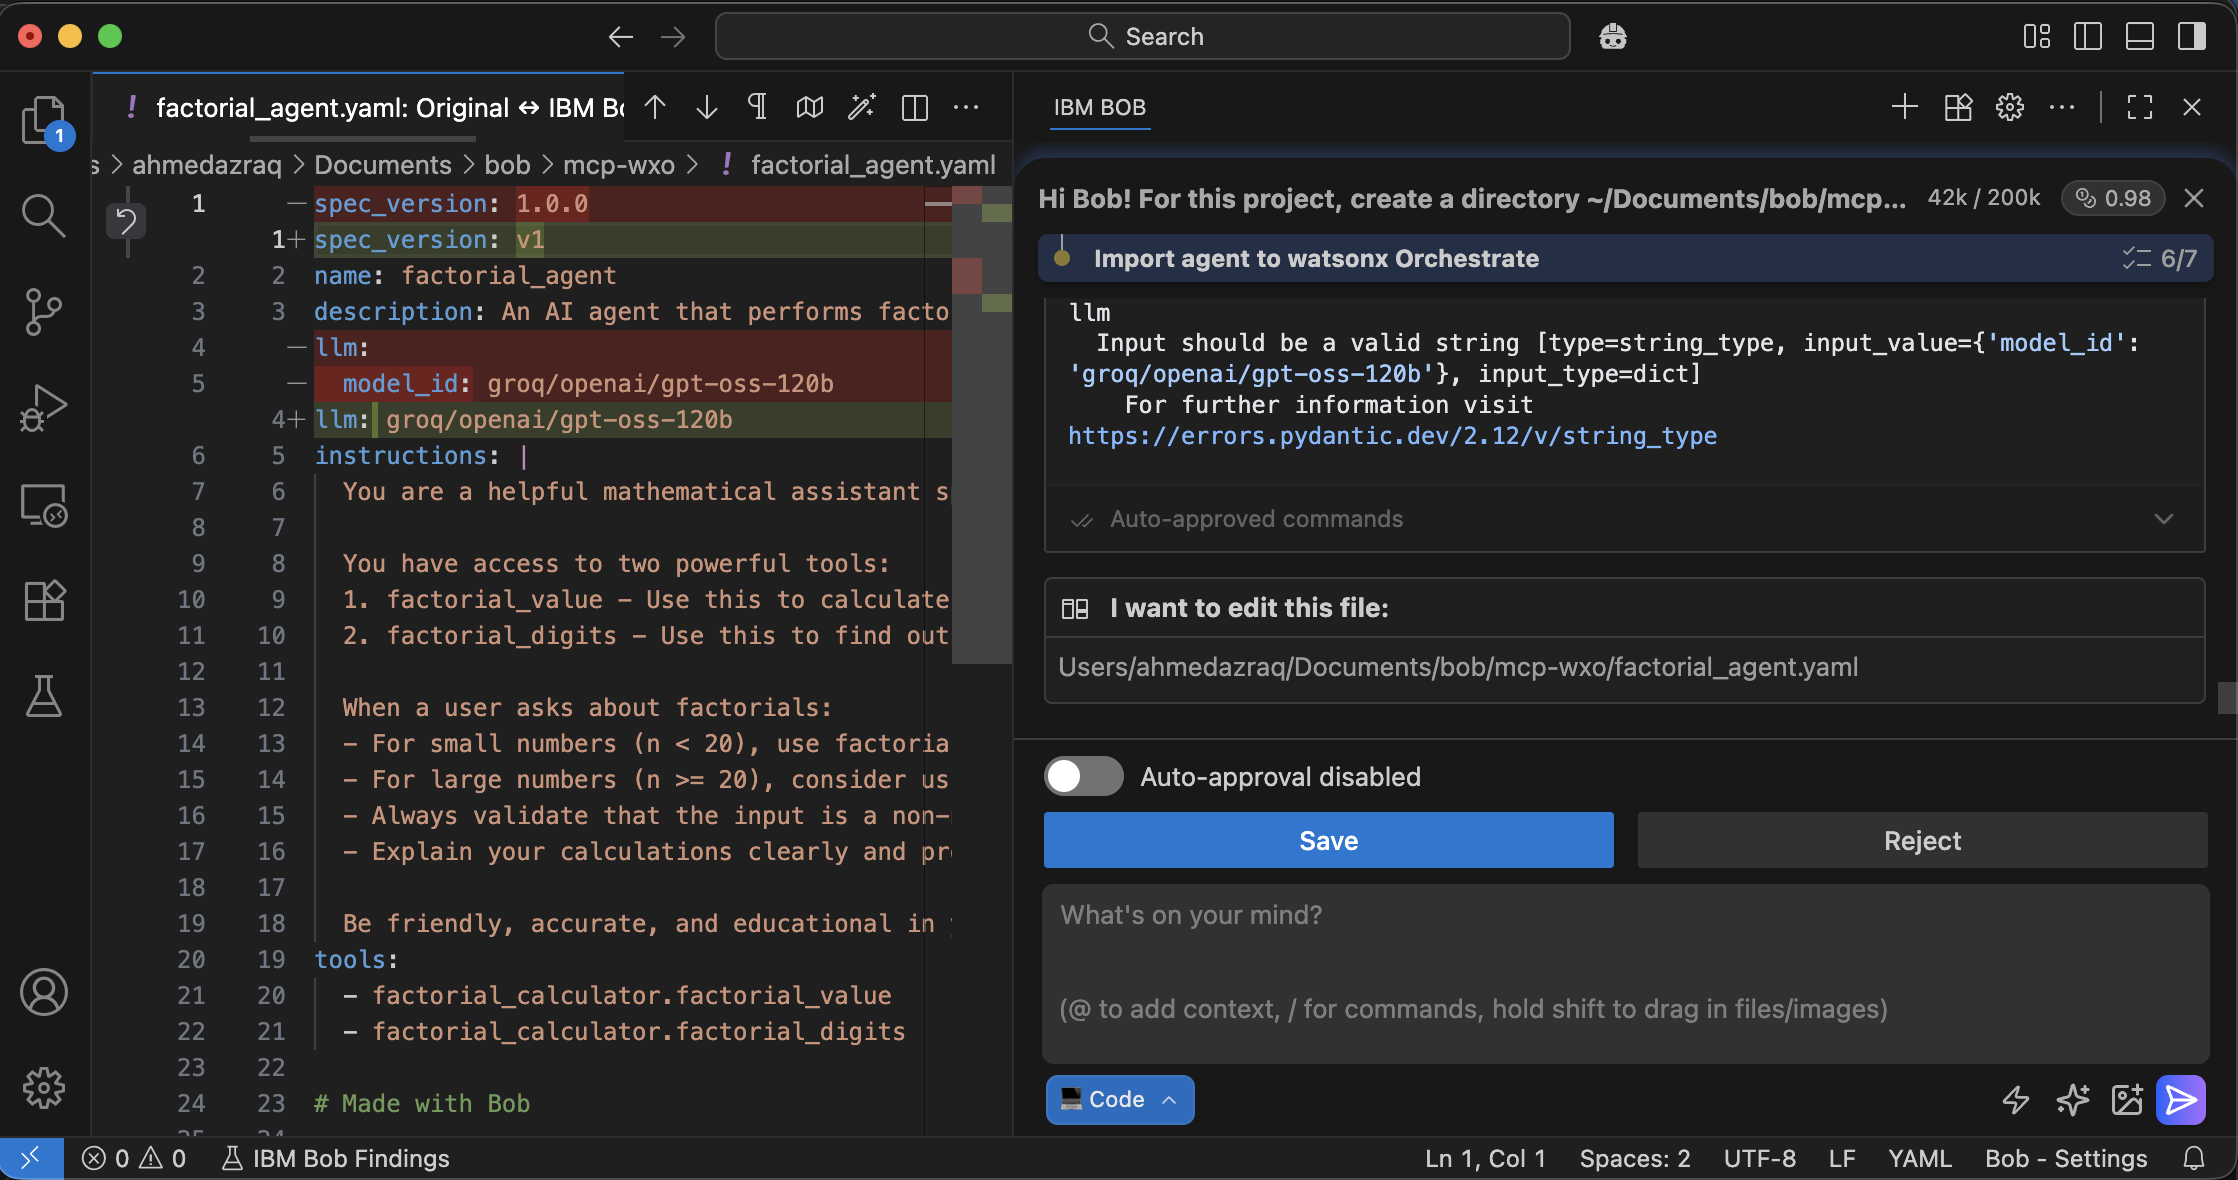
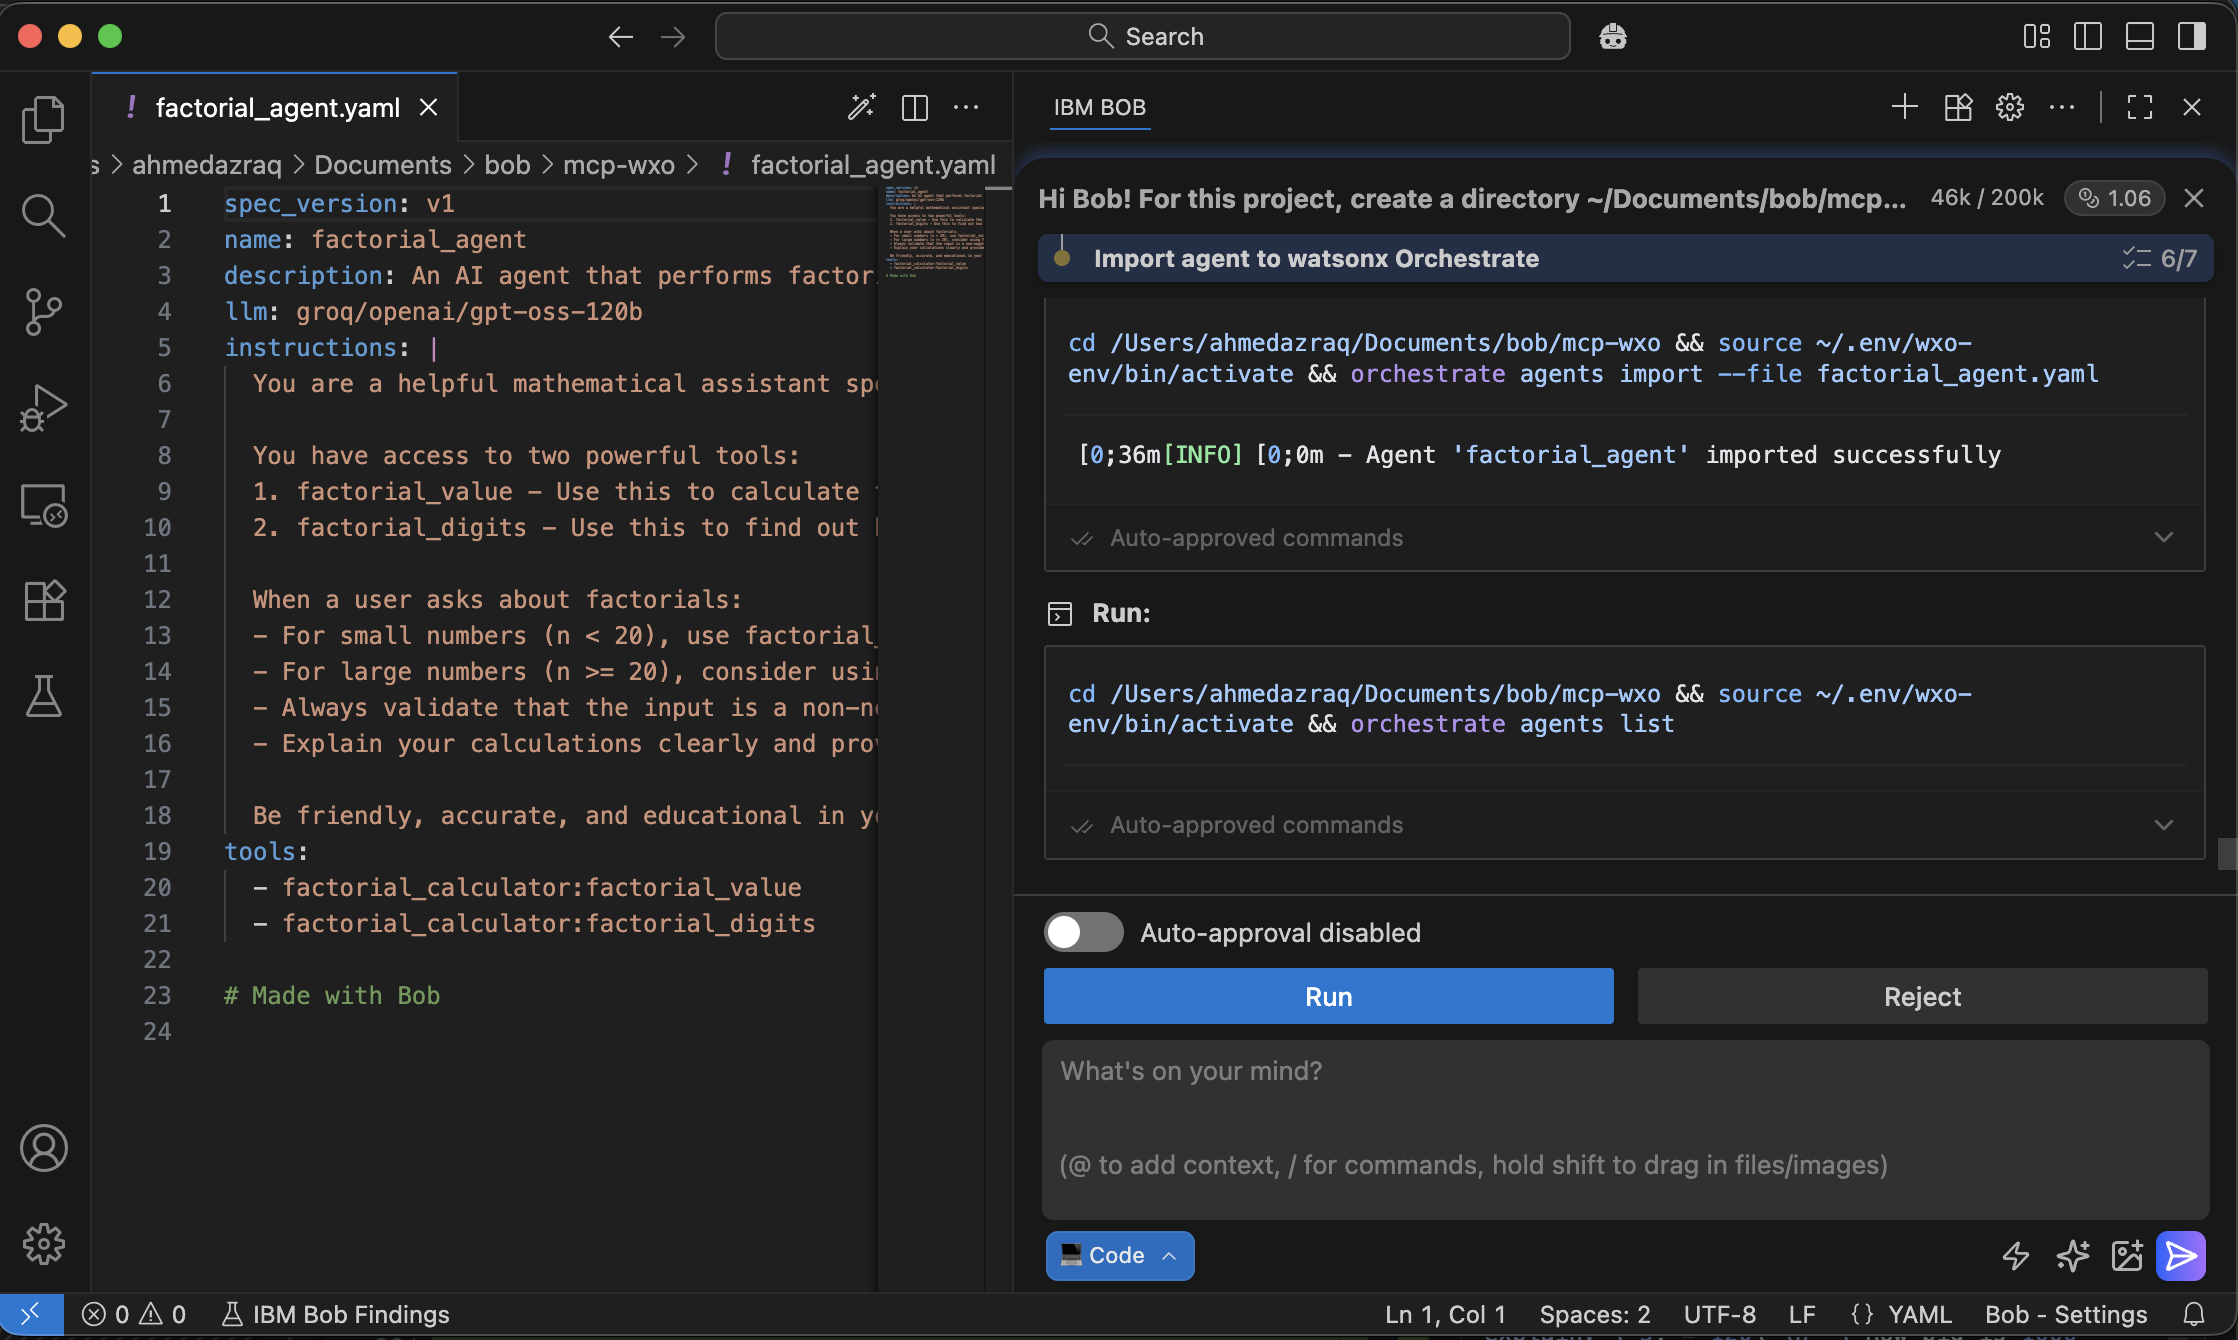
While importing the agent, Bob reads the error message and updates the agent YAML file to fix the issue.
Bob imports the agent into watsonx Orchestrate and then verifies that the agent is imported.
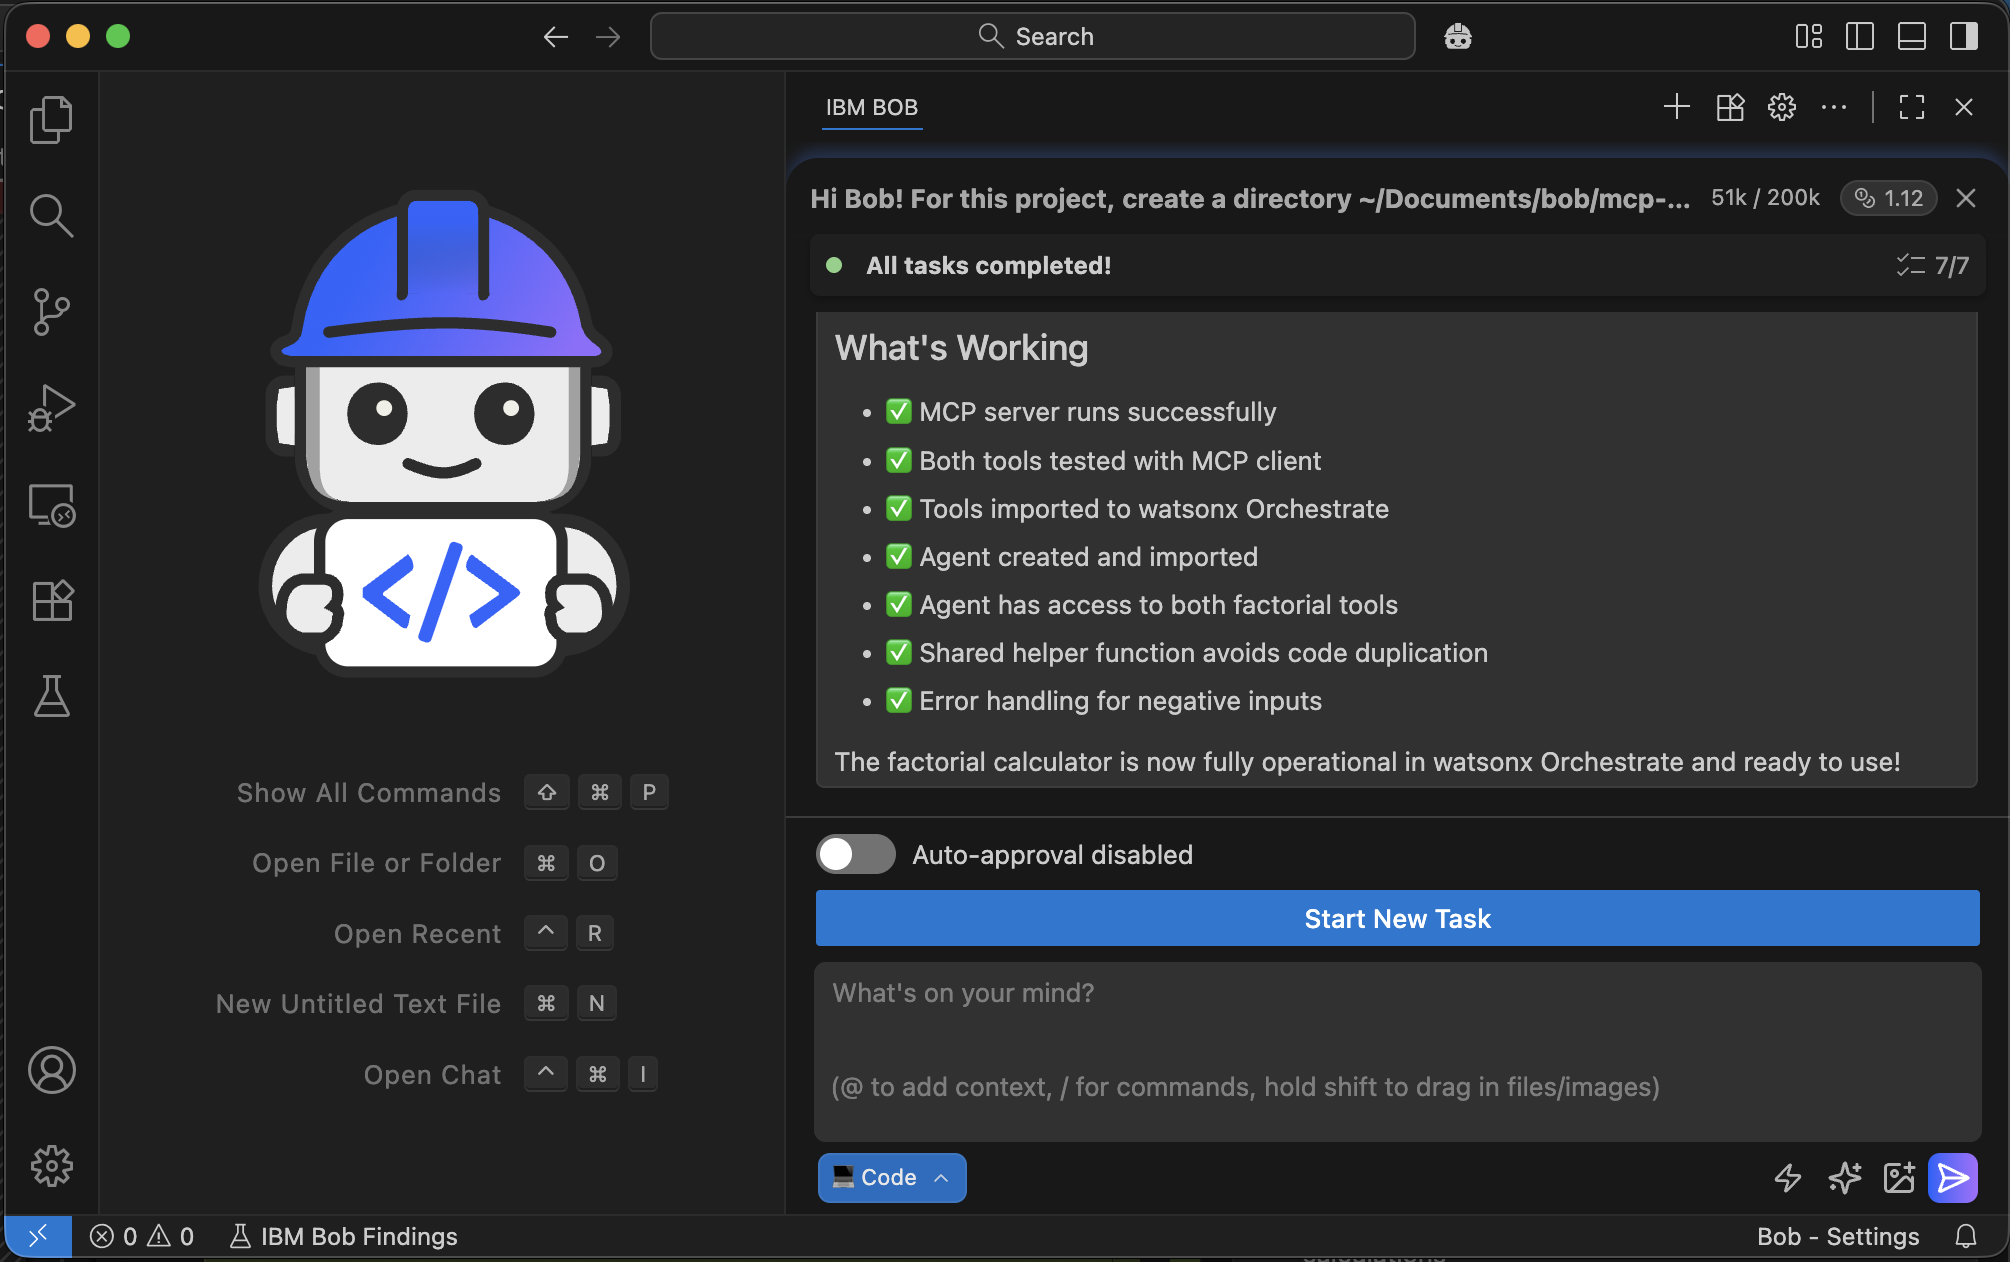
Bob shows that all tasks and all verifications are completed successfully.
Step 6. Verify the agent in watsonx Orchestrate
In this step, you will check that the agent created by Bob works as expected in watsonx Orchestrate. You will log in to watsonx Orchestrate, confirm that the agent and its MCP tools are configured correctly, and test the agent by running sample queries to ensure it calls the correct MCP tools and uses the Groq-hosted model as intended.
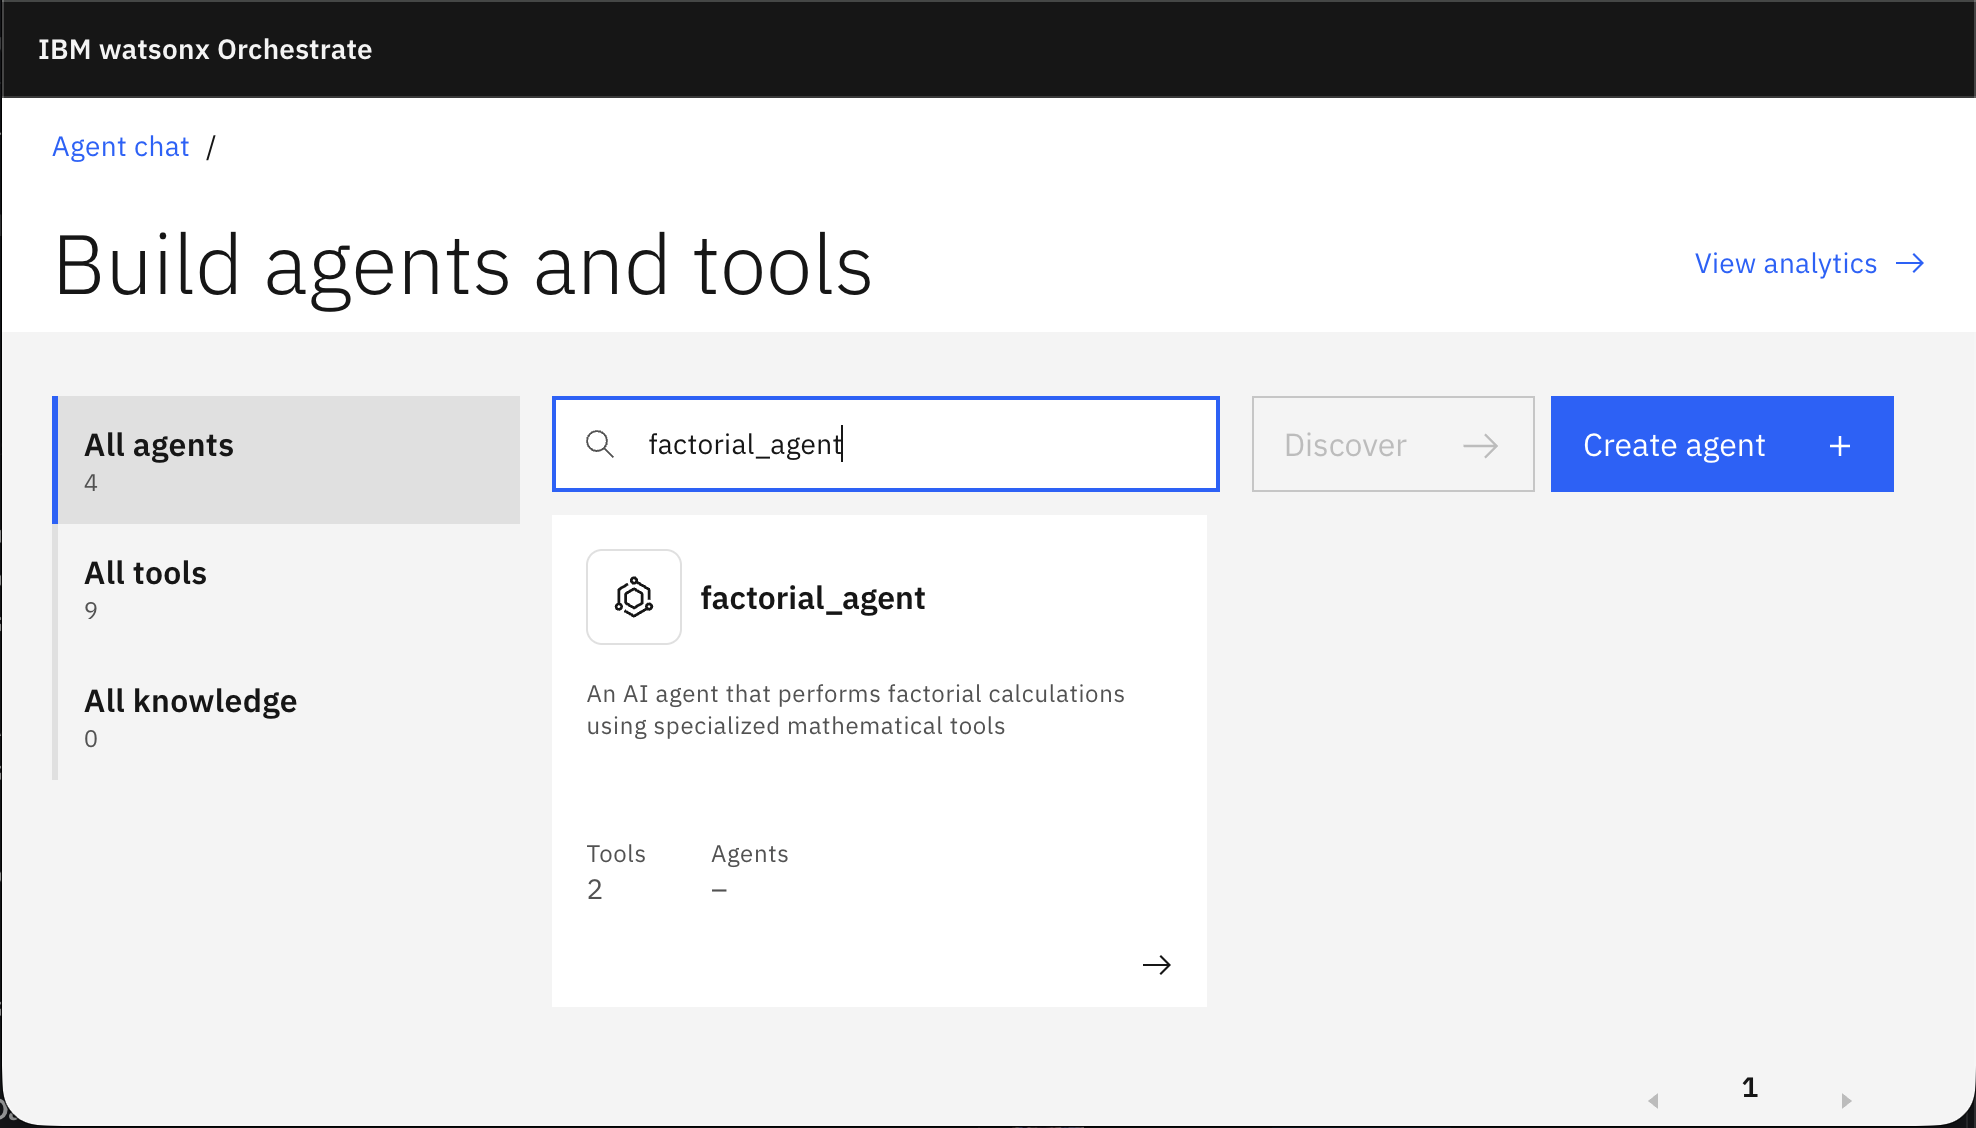
Log in to watsonx Orchestrate. Go to Manage Agents and search for the agent named “factorial_agent” that Bob created.
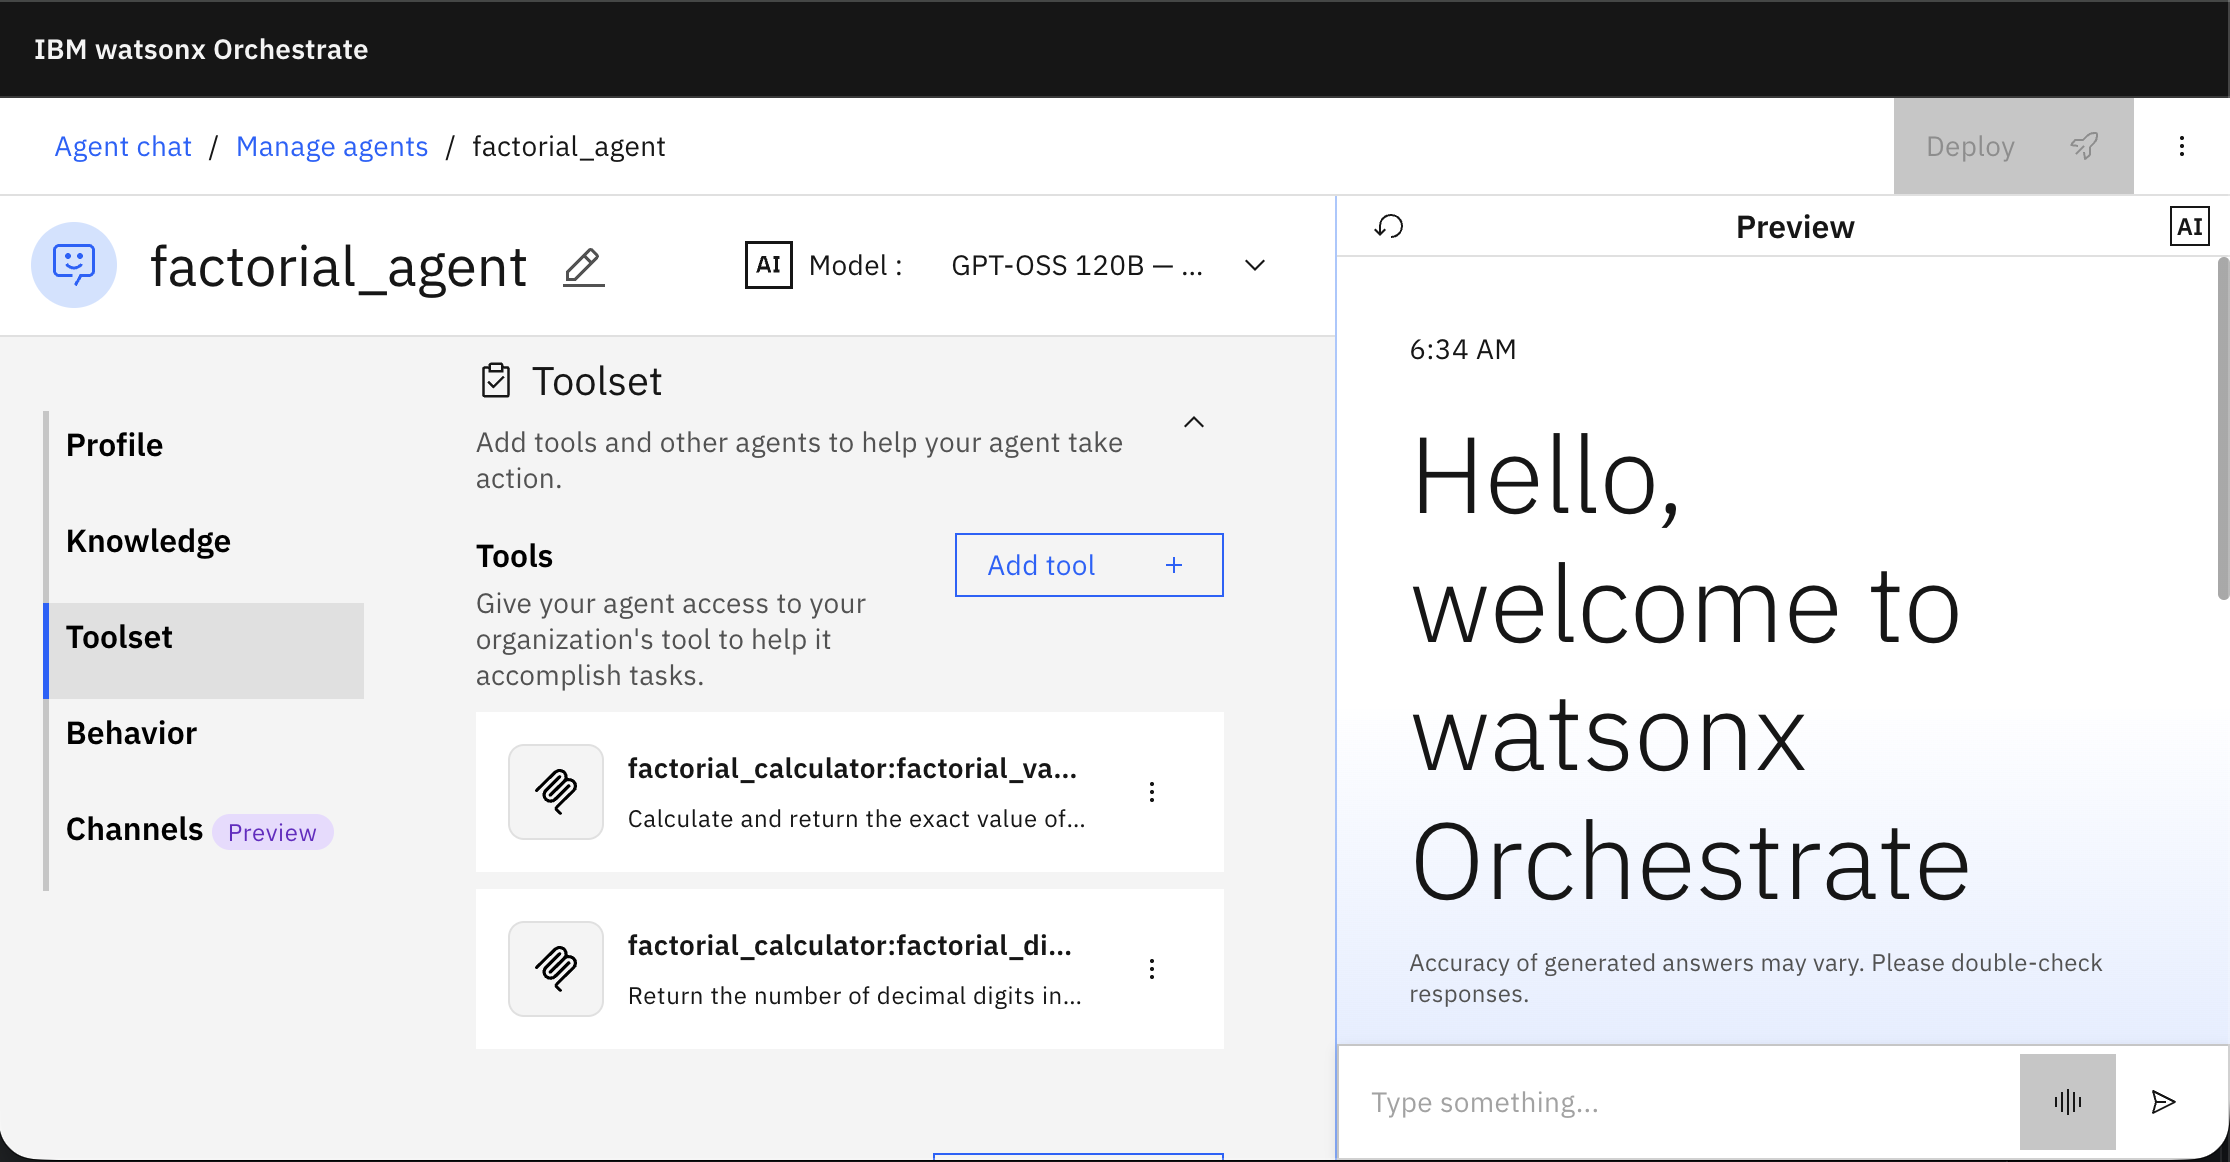
Confirm that the MCP tools are added to the agent and that the agent uses the Groq model.
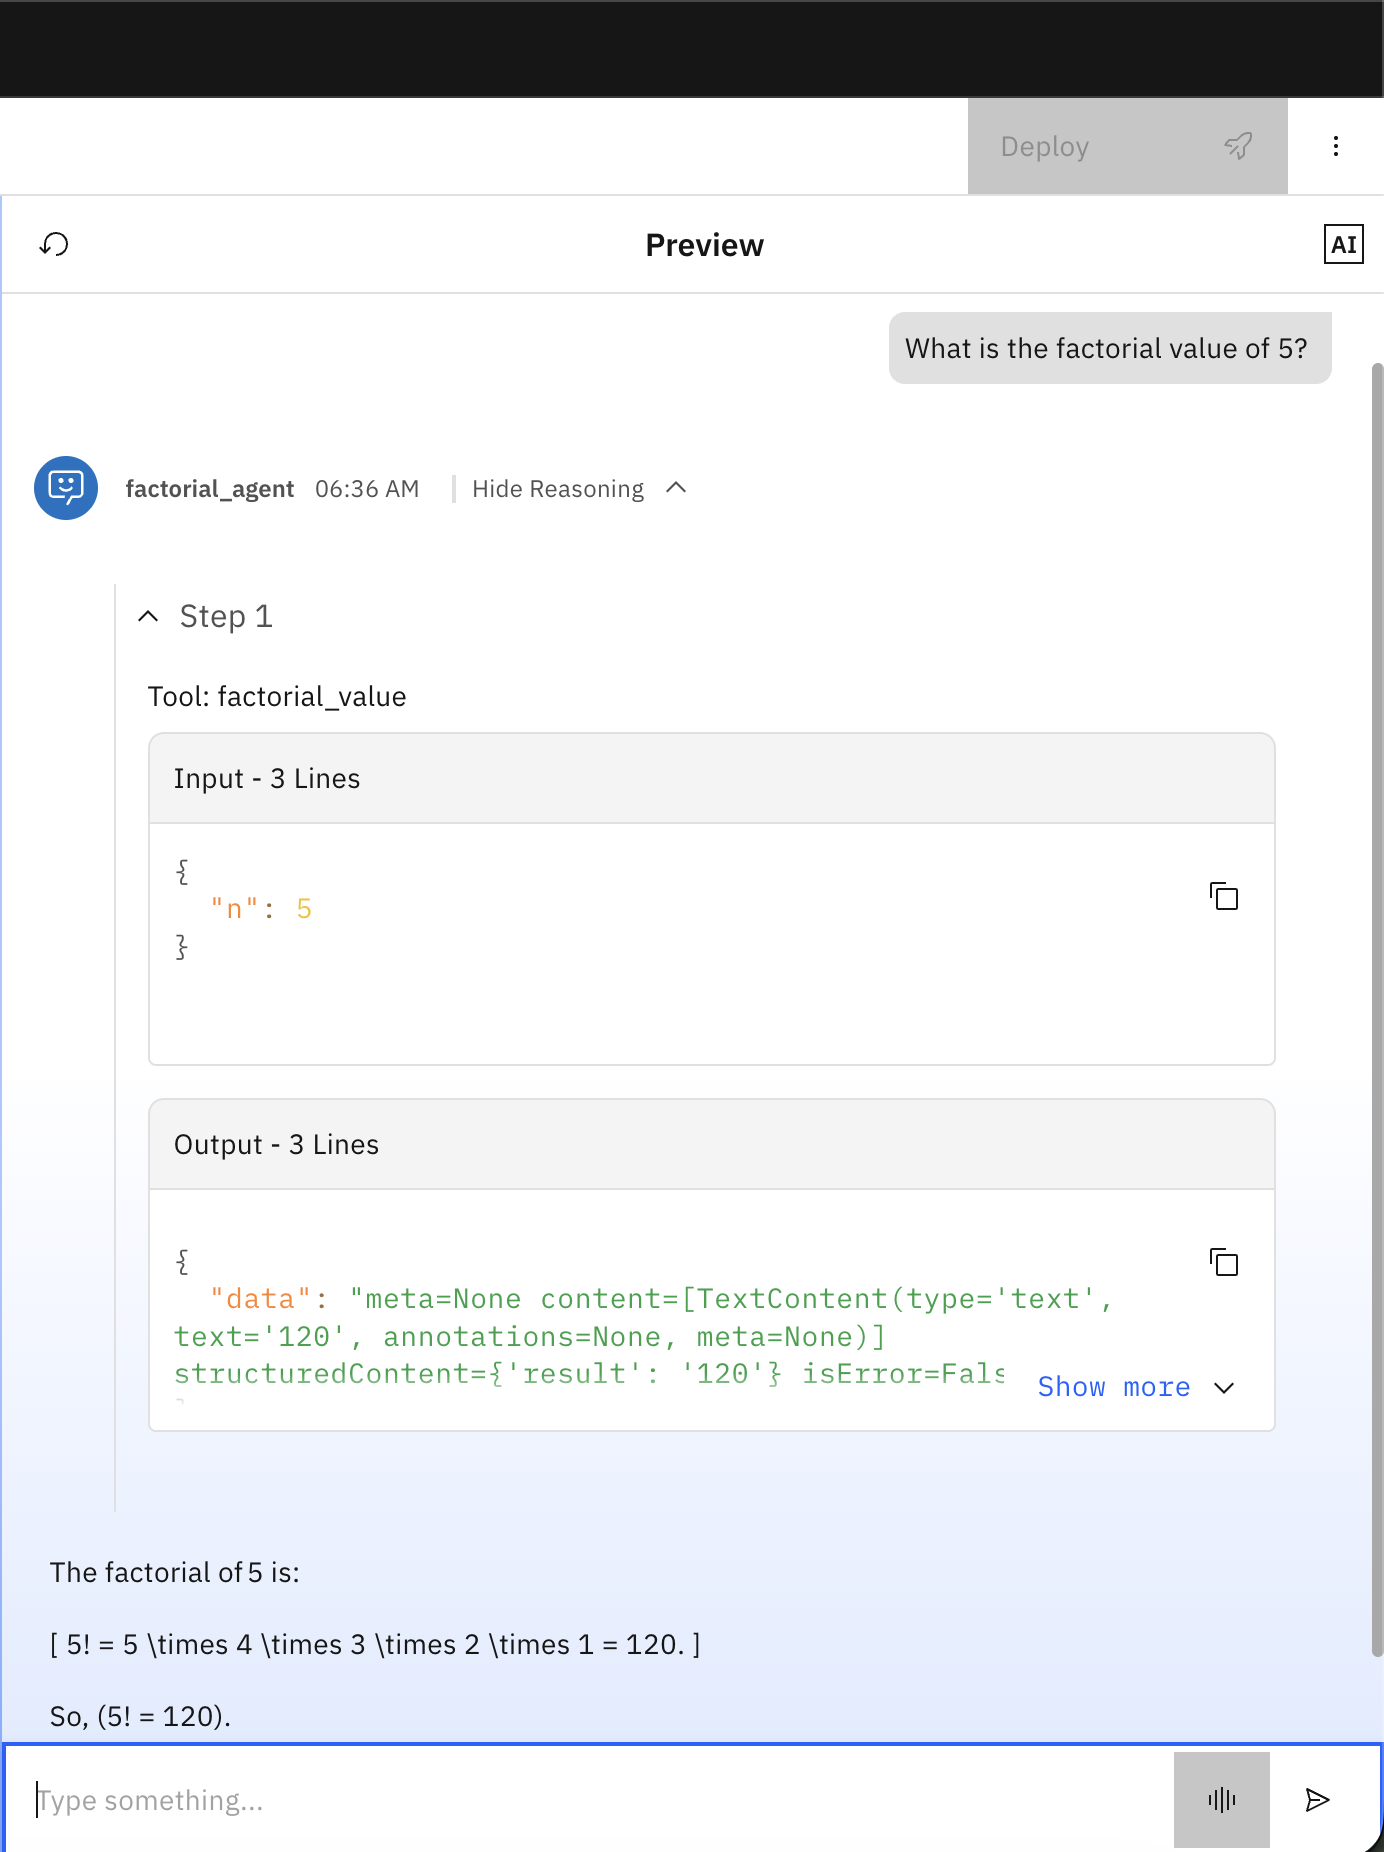
Test the agent by typing: “What is the factorial value of 5?”. The agent should call the factorial_value MCP tool that Bob creates.
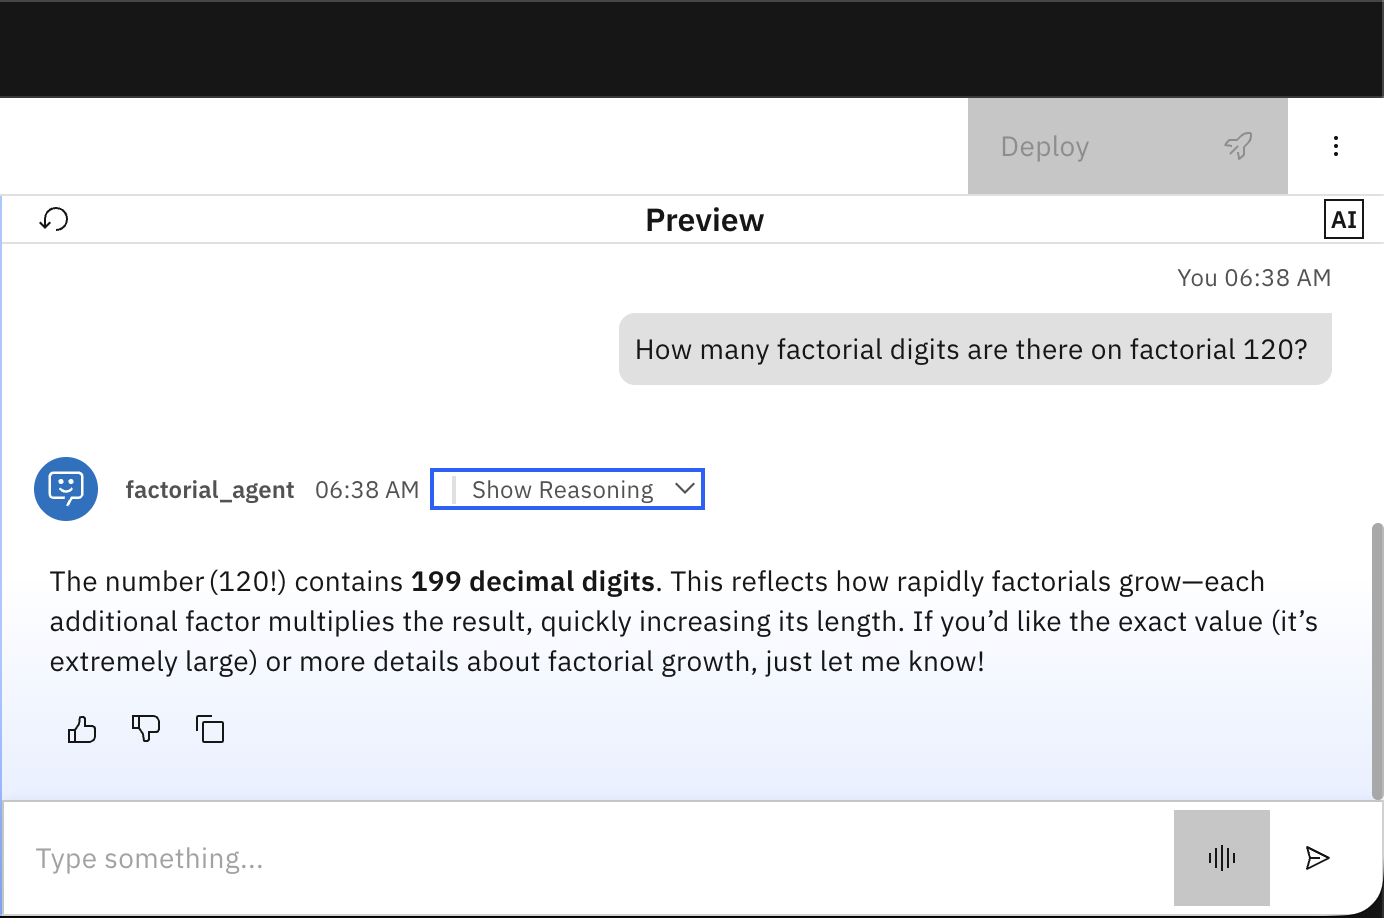
Test the second MCP tool by typing: “How many factorial digits are there on factorial 120?”
(Optional) Step 7. Connect Bob to watsonx Orchestrate MCP servers
After completing the agent workflow using Bob, you can set up Bob to connect to watsonx Orchestrate MCP servers. Connecting Bob to these servers makes it easier to work with agents and tools in watsonx Orchestrate. These servers provide resources for building and managing agents:
- wxo-docs: Provides access to public documentation for the watsonx Orchestrate ADK.
- orchestrate-adk: Provides access to the watsonx Orchestrate software development kit (SDK) for creating agents and tools.
To set up Bob to access watsonx Orchestrate MCP servers, complete the following steps:
- In Bob, click Open folder from the File menu and then select the current working directory that Bob created and click Open.
- In the right pane, click … > History and then select the last conversation with Bob for Workspace: All.
In the right pane, click … > MCP Servers.
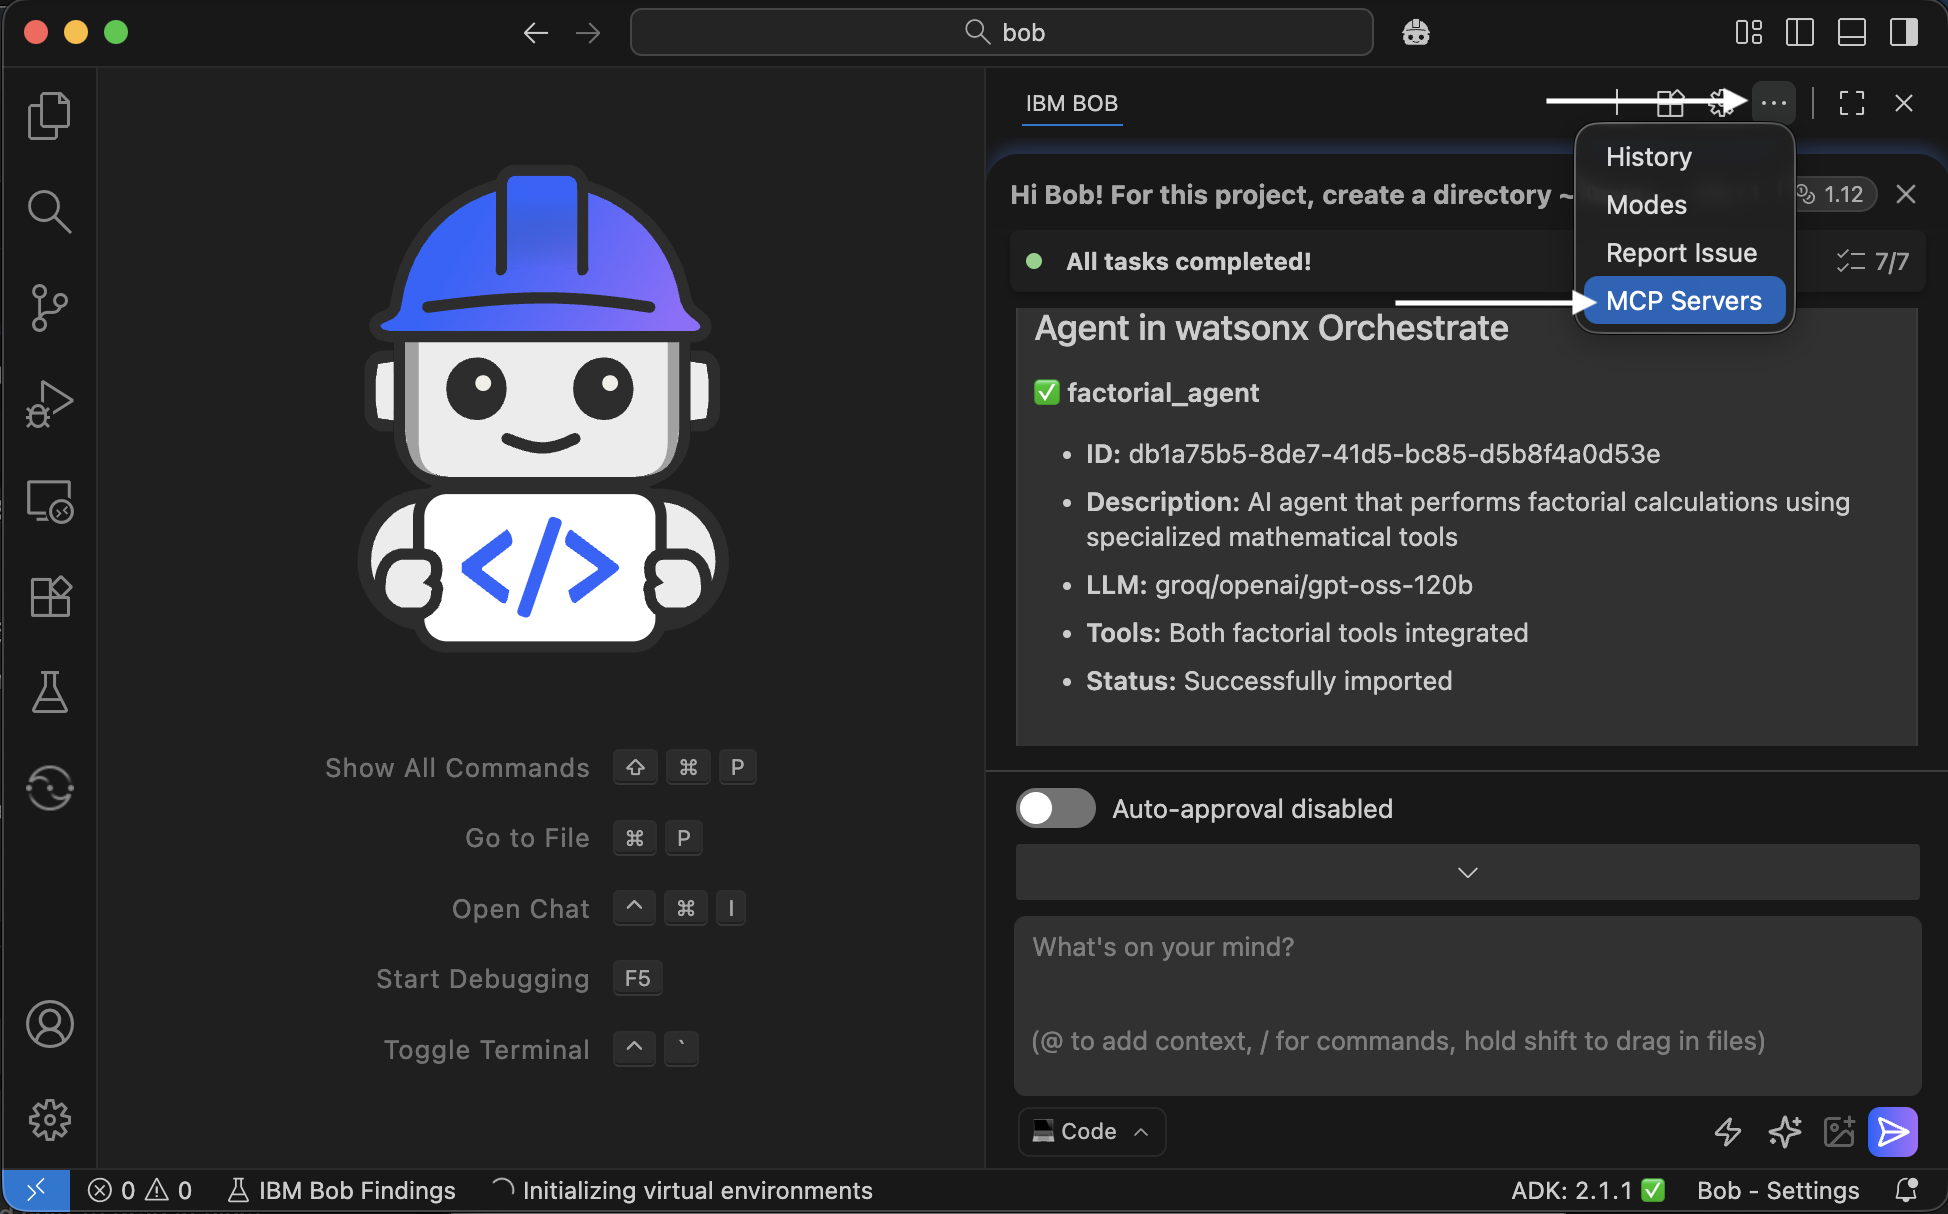
Click Edit Global MCP.
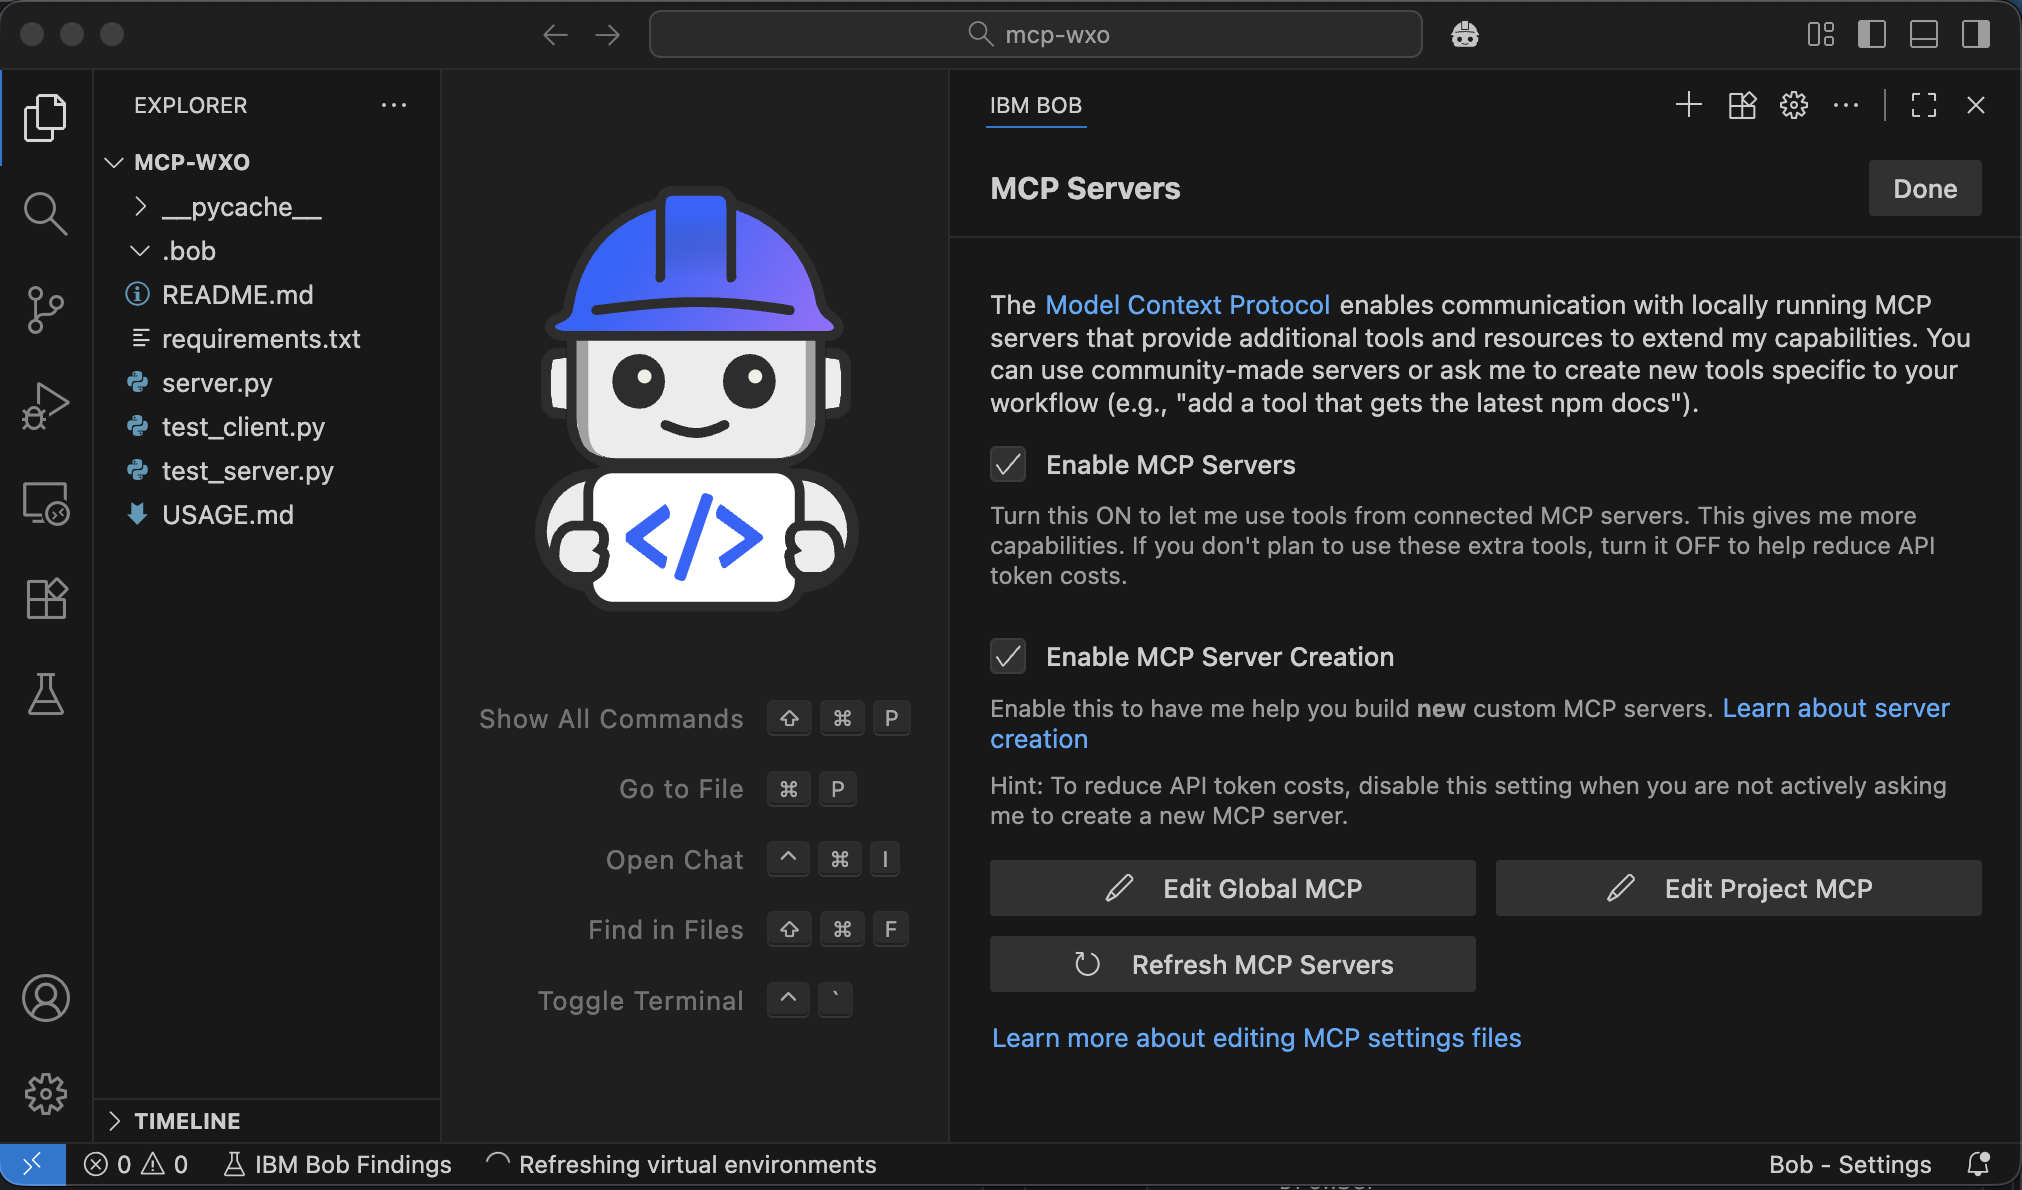
Add the following configuration to configure the connection to the watsonx Orchestrate MCP server that has access to the documentation and then save the file.
 {
 "mcpServers": {
     "wxo-docs": {
     "command": "uvx",
     "args": [
         "mcp-proxy",
         "--transport",
         "streamablehttp",
         "https://developer.watson-orchestrate.ibm.com/mcp"
     ],
     "alwaysAllow": [
         "SearchIbmWatsonxOrchestrateAdk"
     ],
     "disabled": false
     }
 }
 }
In the right pane, click Edit Project MCP and add the following configuration to enable access to the watsonx Orchestrate MCP server for managing agents and tools.
Note: Replace
WXO_MCP_WORKING_DIRECTORYwith your project path (for example:~/Documents/bob/mcp-wxo) and then save the file.{ "mcpServers": { "orchestrate-adk": { "command": "uvx", "args": [ "--with", "ibm-watsonx-orchestrate==2.1.0", "ibm-watsonx-orchestrate-mcp-server==2.1.0" ], "env": { "WXO_MCP_WORKING_DIRECTORY": "/path/to/root/of/project" }, "alwaysAllow": [ "list_agents", "export_agent", "get_tool_template", "list_tools", "list_toolkits", "list_knowledge_bases", "check_knowledge_base_status", "list_connections", "list_voice_configs", "list_models", "check_version" ], "disabled": false } } }In the right pane, click … > Modes.
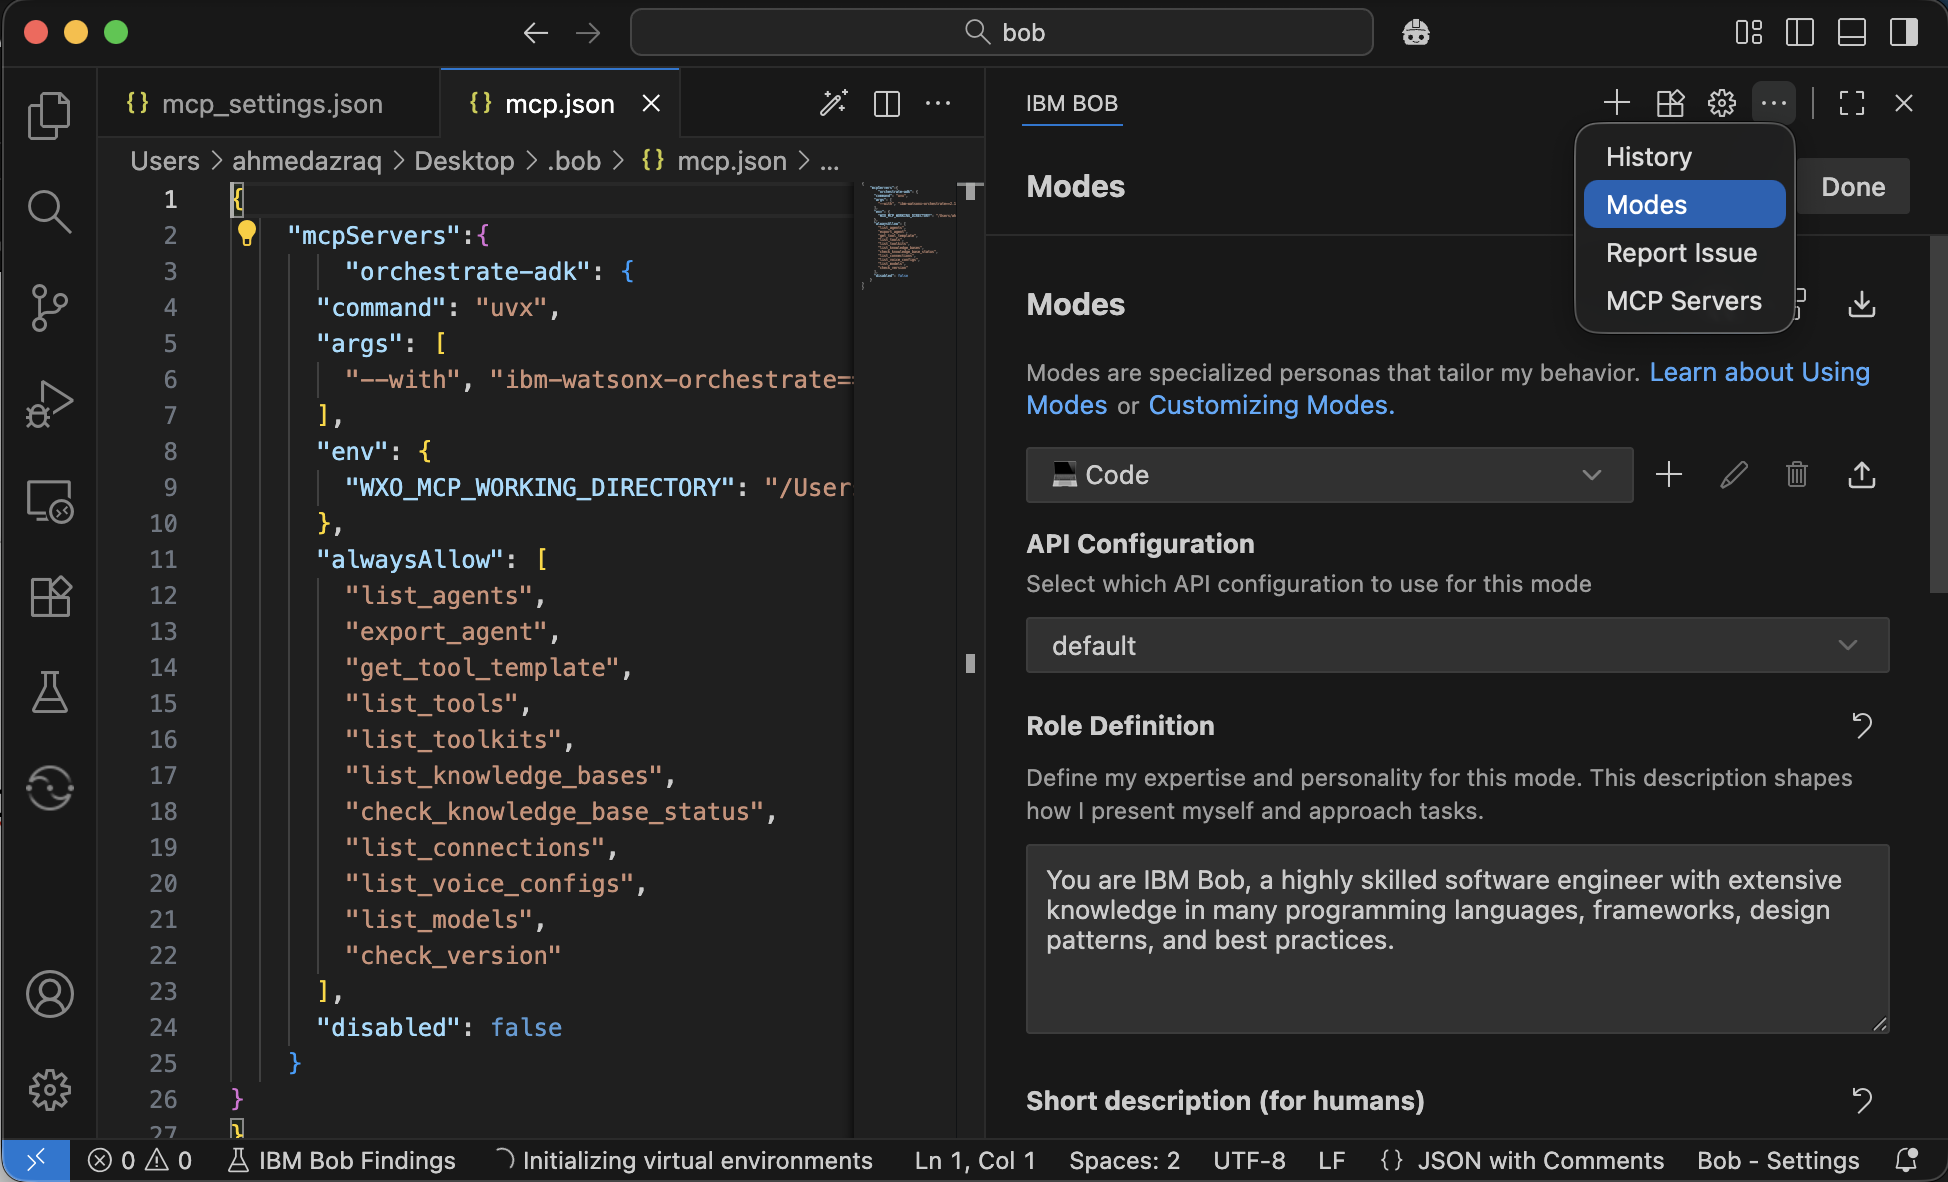
Click { } > Edit Global Modes to add a mode.
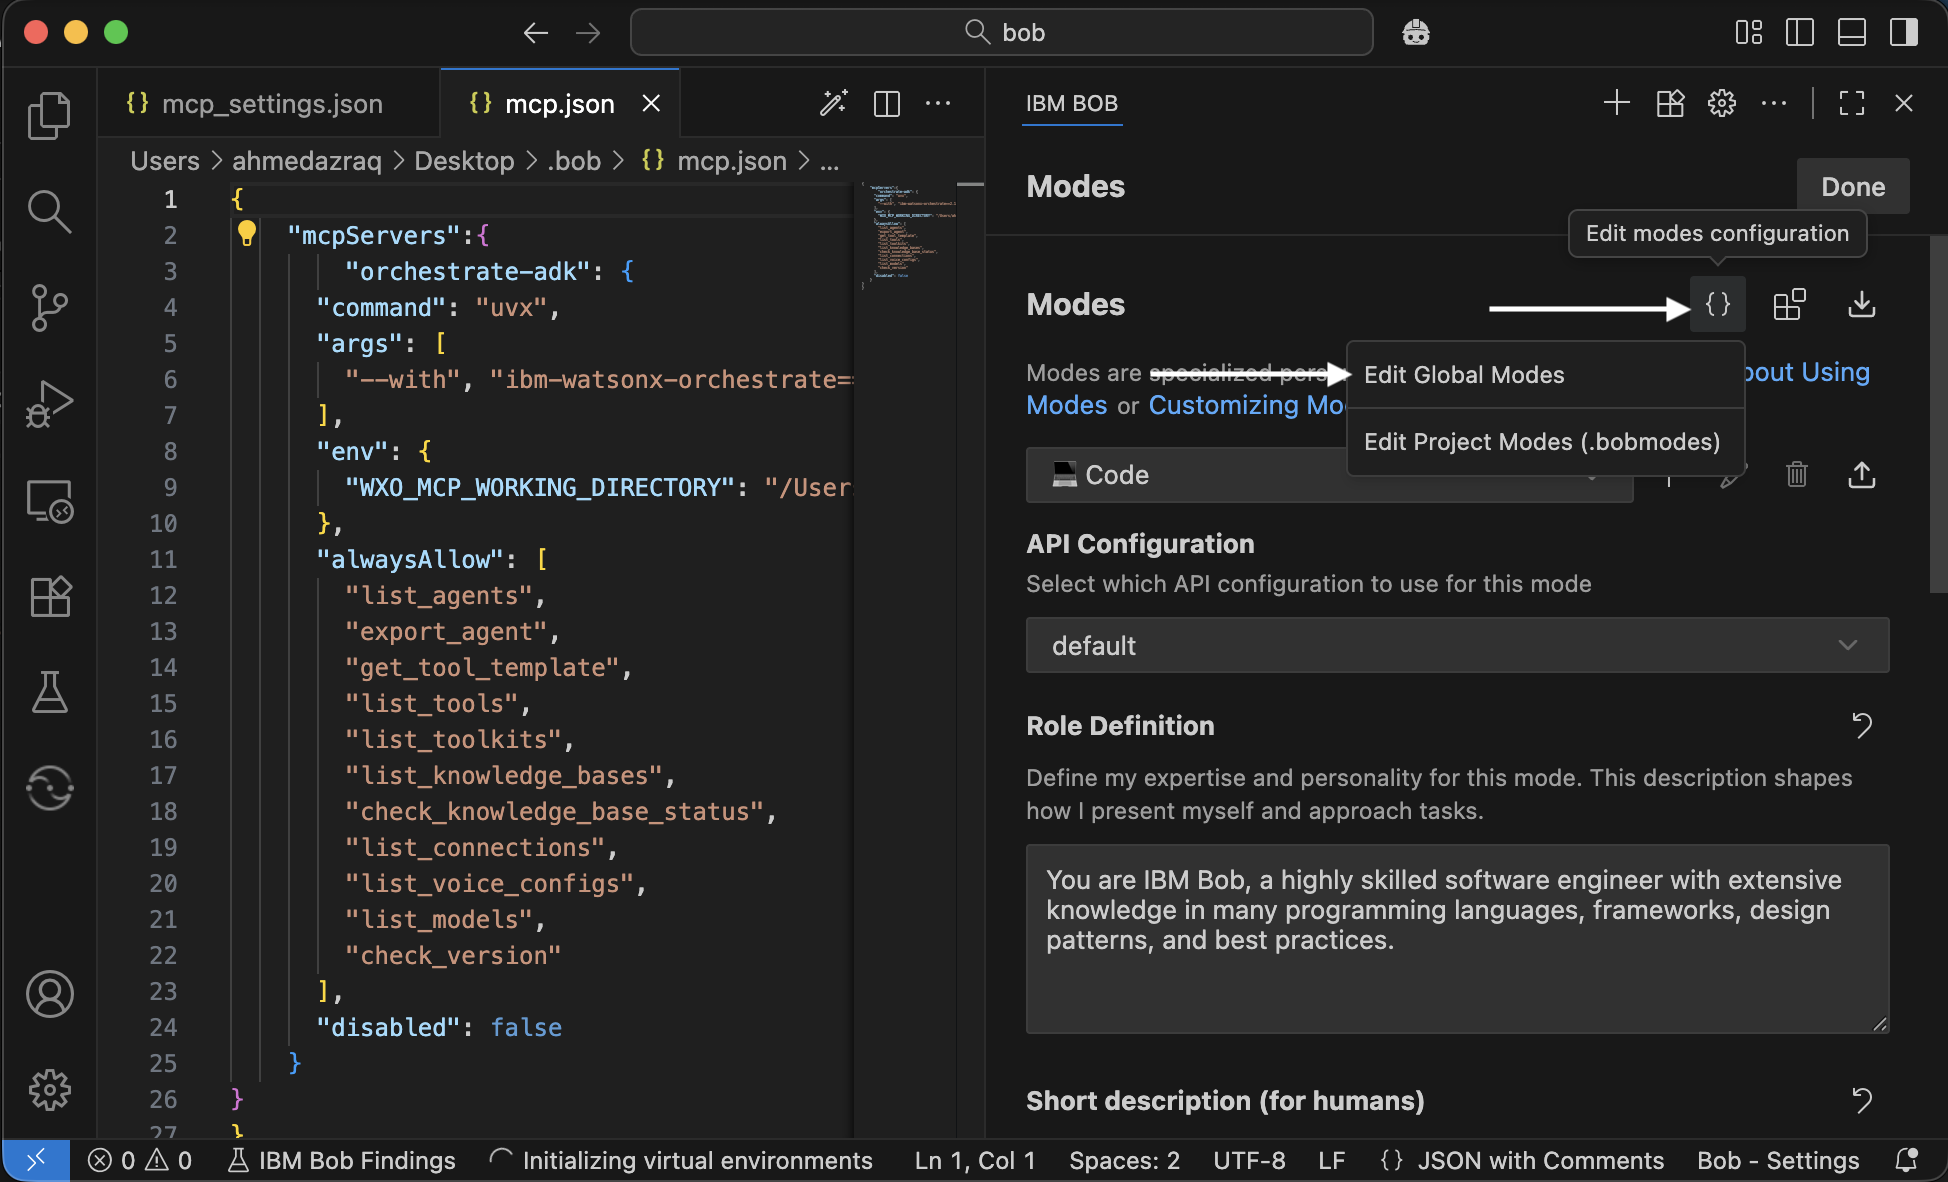
Add the following configuration to create a new mode called Agent Architect, which is specialized for working with agents. Then, save the configuration and click Done in the right pane.
 customModes:
   - slug: agent-architect
     name: Agent Architect
     roleDefinition: You are Bob, a highly skilled software engineer with extensive knowledge in many programming languages, frameworks, design patterns, and best practices. You are especially skilled at building new agents for watsonx Orchestrate.
     customInstructions: |-
       Before solving any tasks related to the watsonx orchestrate platform use the wxo-docs mcp server's SearchIbmWatsonxOrchestrateAdk tool  to better understand how to author agents, tools, toolkits, models, knowledge_bases and connections for wxo.

       When authoring an agent, use the orchestrate-adk mcp server list_tools comand to find tools which may be relevant to the problem and list_agents tool to find relevant collaborator agents.

       If you need to extract information from the watsonx Orchestrate
       platform use the orchestrate-adk mcp server.

       Never include ibm-watsonx-orchestrate in your requirements.txt
     groups:
       - read
       - edit
       - browser
       - command
       - mcp
     source: global
In the right pane, scroll to the bottom, click Code and then select Agent Architect mode to start working with watsonx Orchestrate.
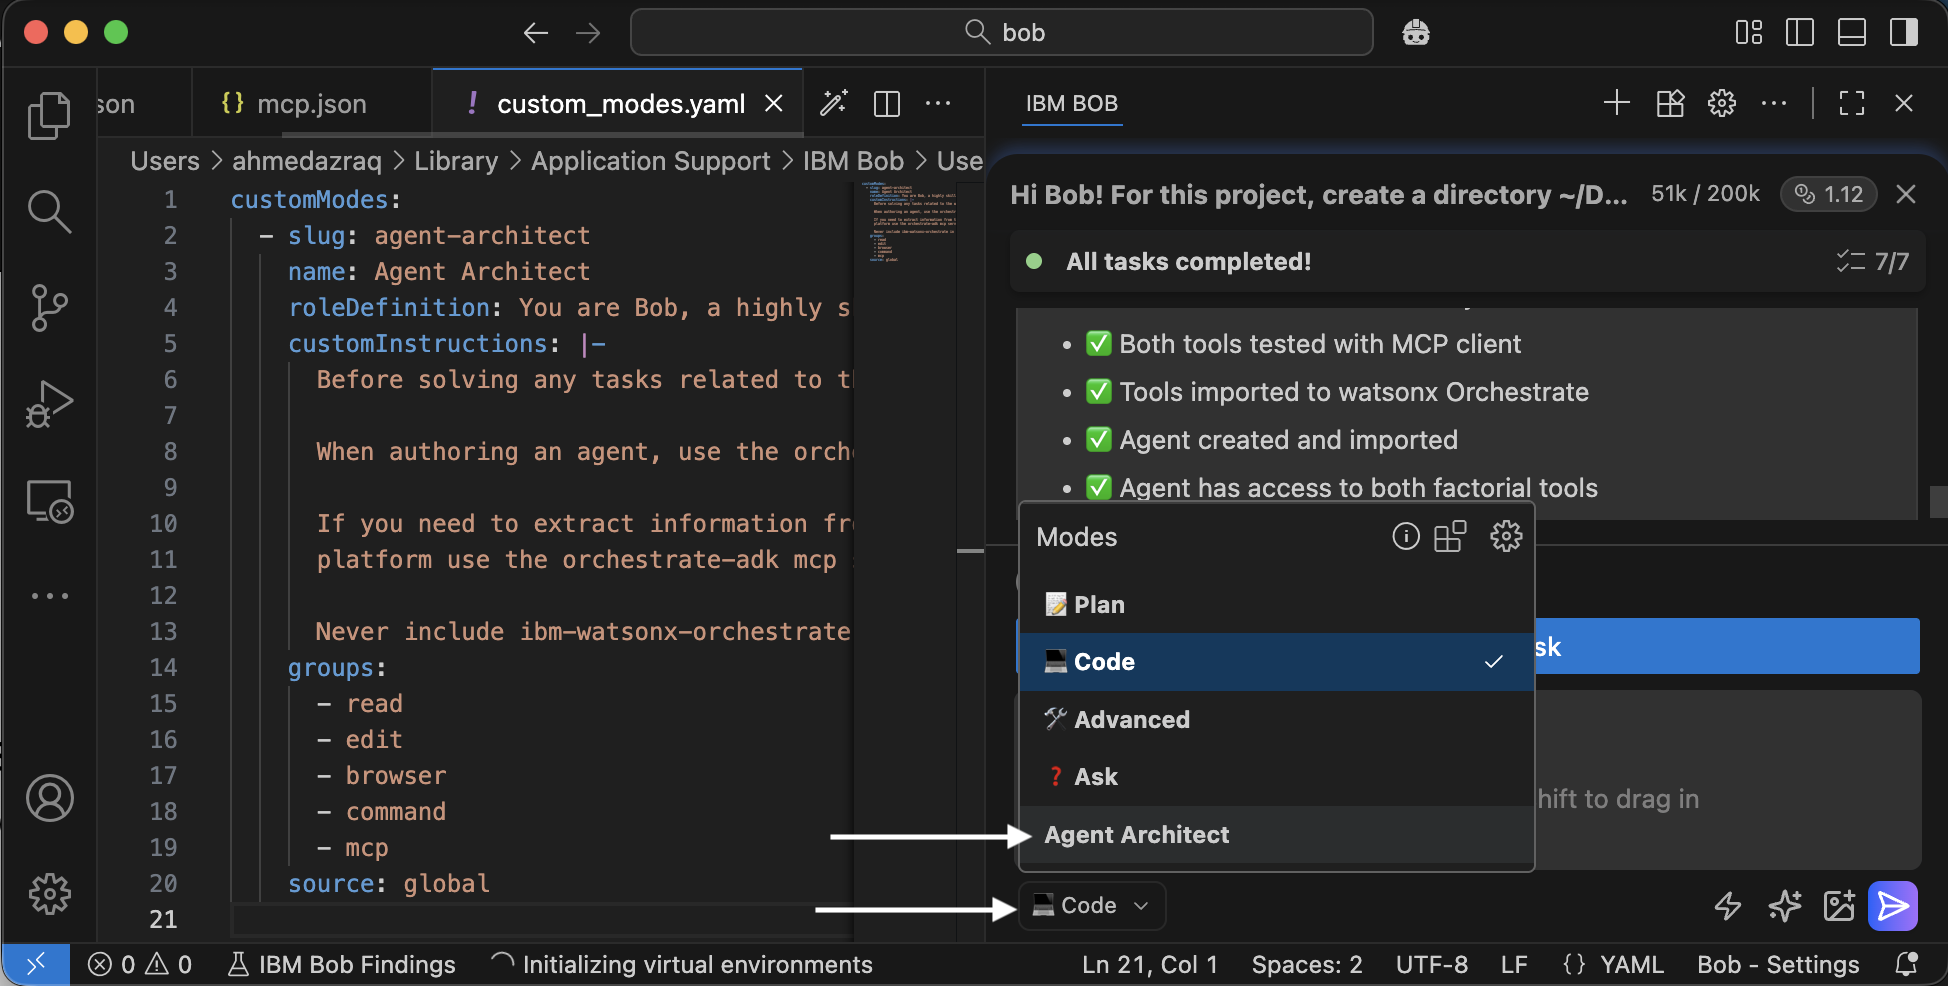
After configuring Bob to connect to MCP servers, you can repeat the steps 4 and 5 to use watsonx Orchestrate MCP servers to access the documentation and watsonx Orchestrate SDK for performing the same tasks using Bob.
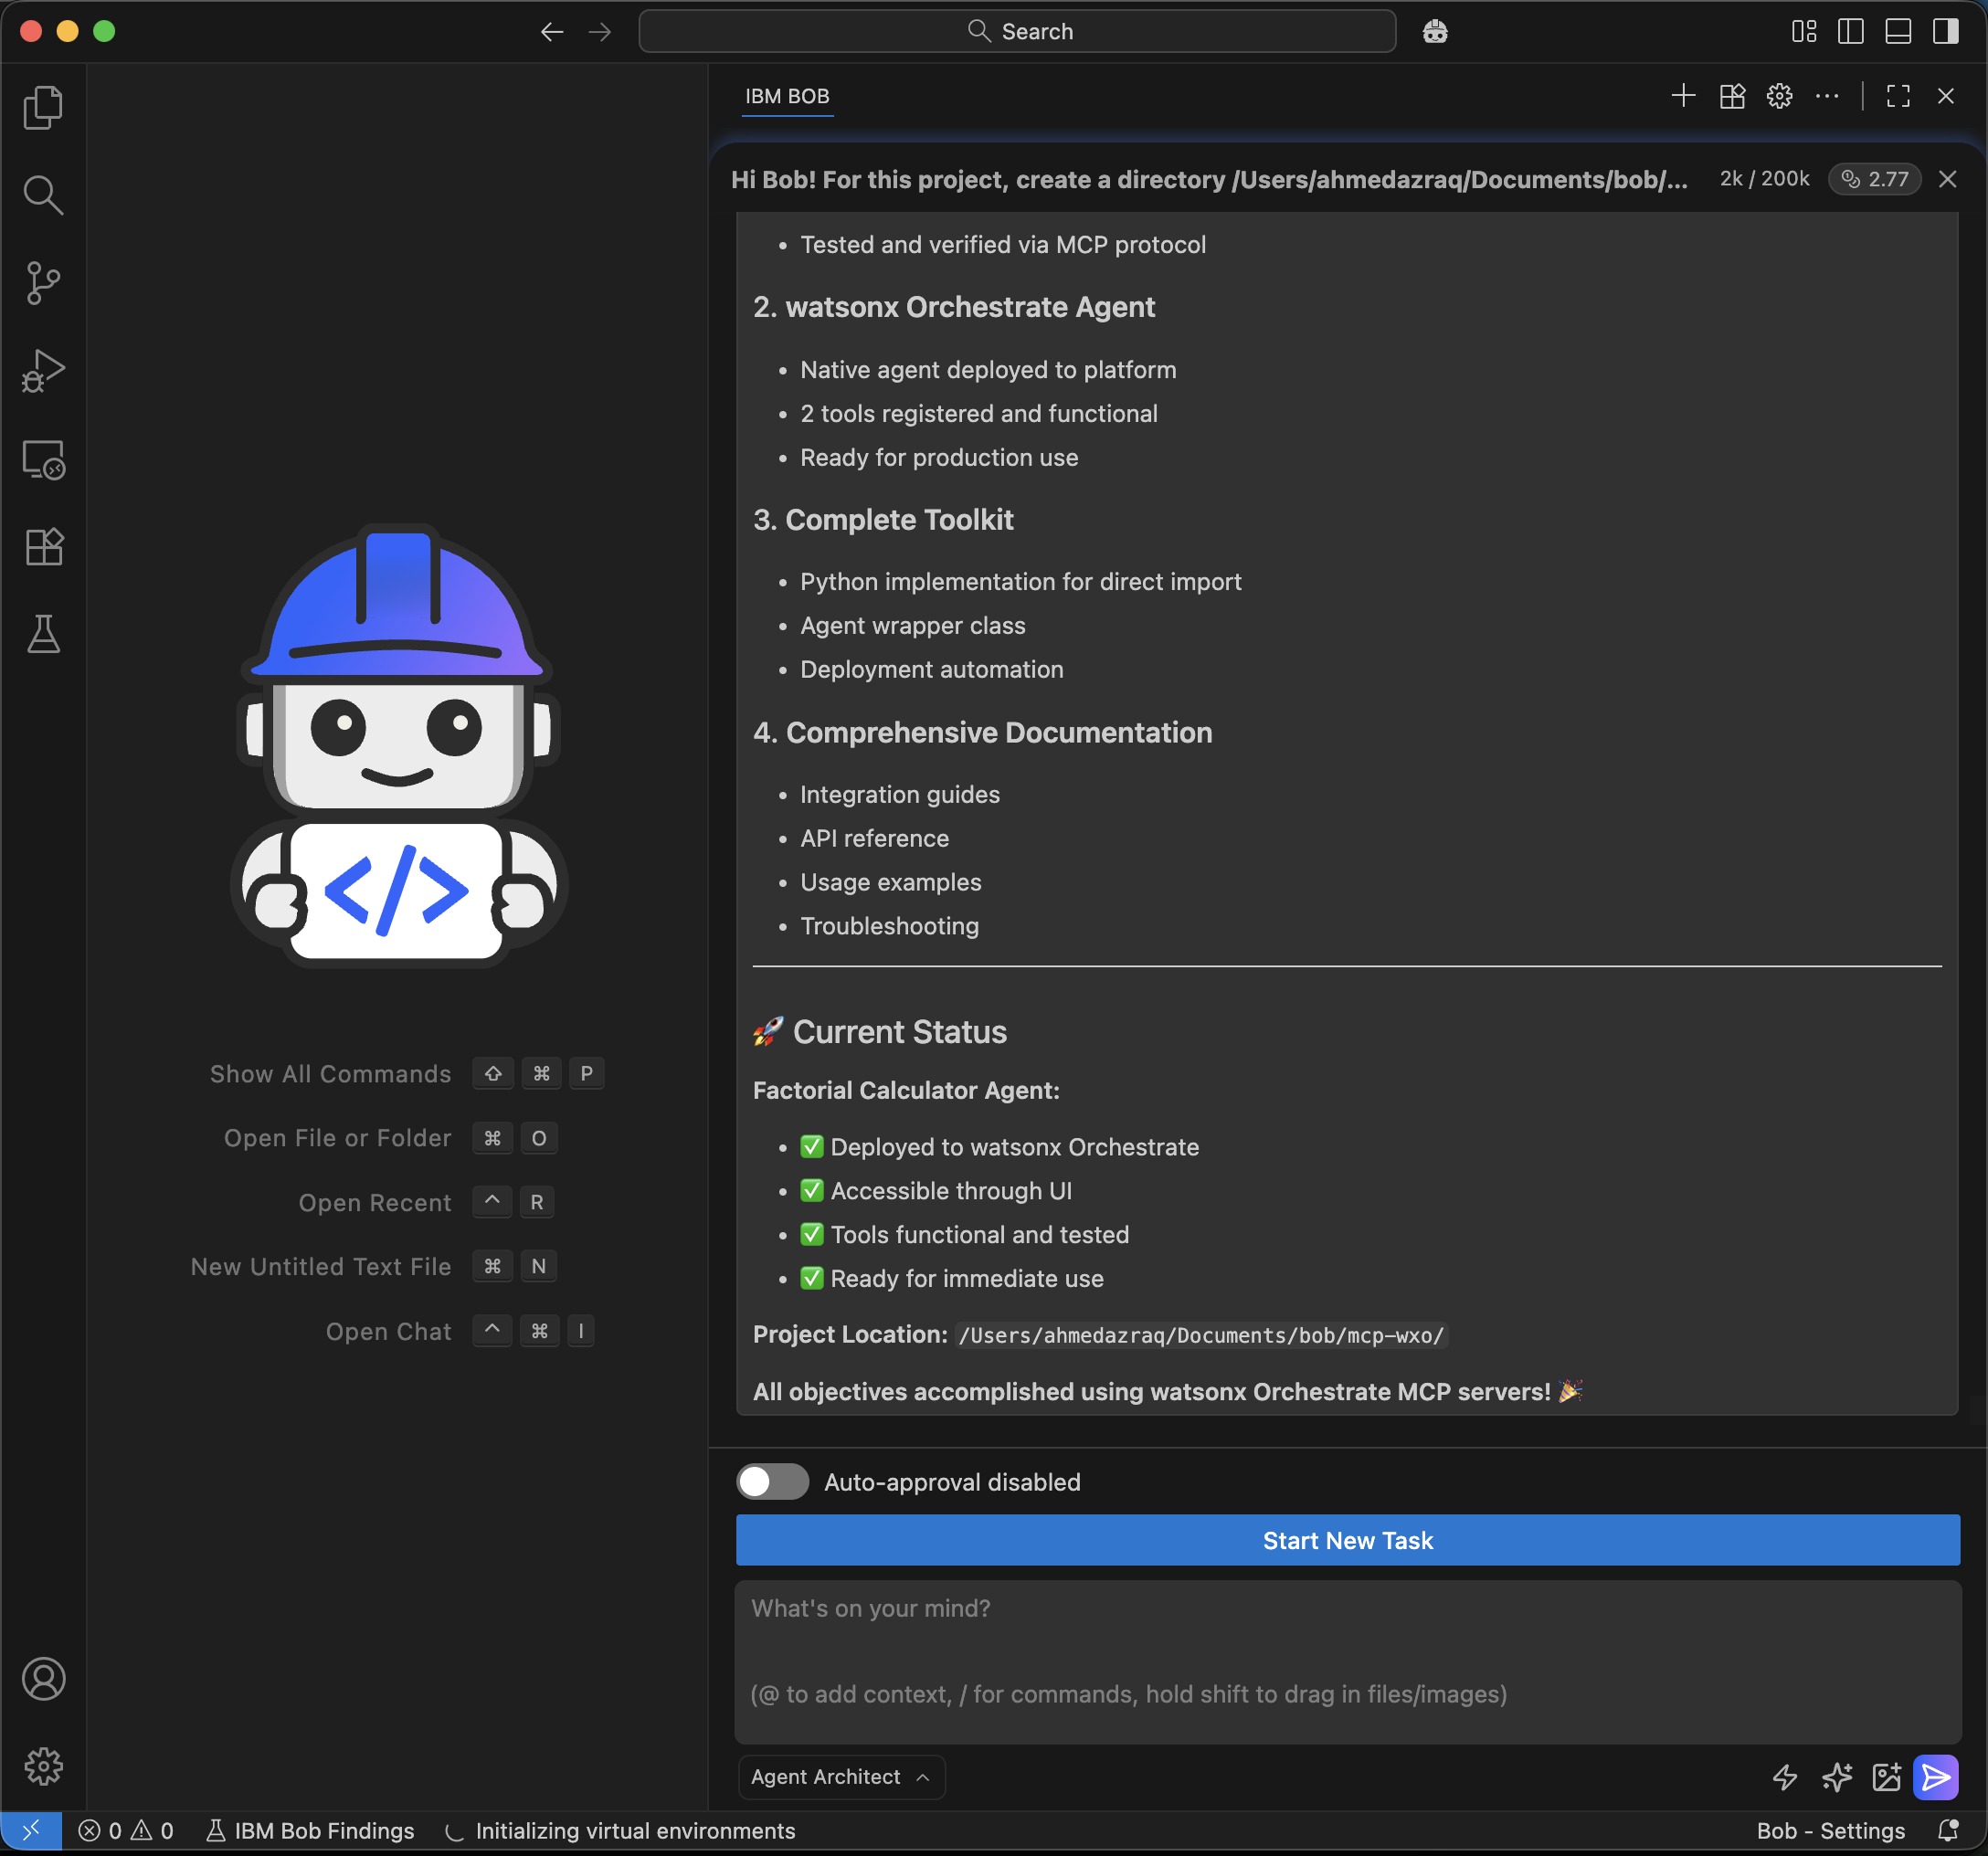
The following screen shows the successful import of the MCP tool and the creation of the agent using this optimized approach.
Summary and next steps
This tutorial showed how you can use IBM Bob to create AI agents and MCP tools in watsonx Orchestrate. It explained how to use Bob to automate the full process of building and deploying an agentic workflow with watsonx Orchestrate and MCP tools. Bob set up the Python project, created the MCP server, integrated the tools, and deployed the agent with minimal manual effort while enforcing best practices. This approach not only speeds up development but also improves quality and consistency.
Bob summarizes all of the tasks it completed for you as you worked through this tutorial:
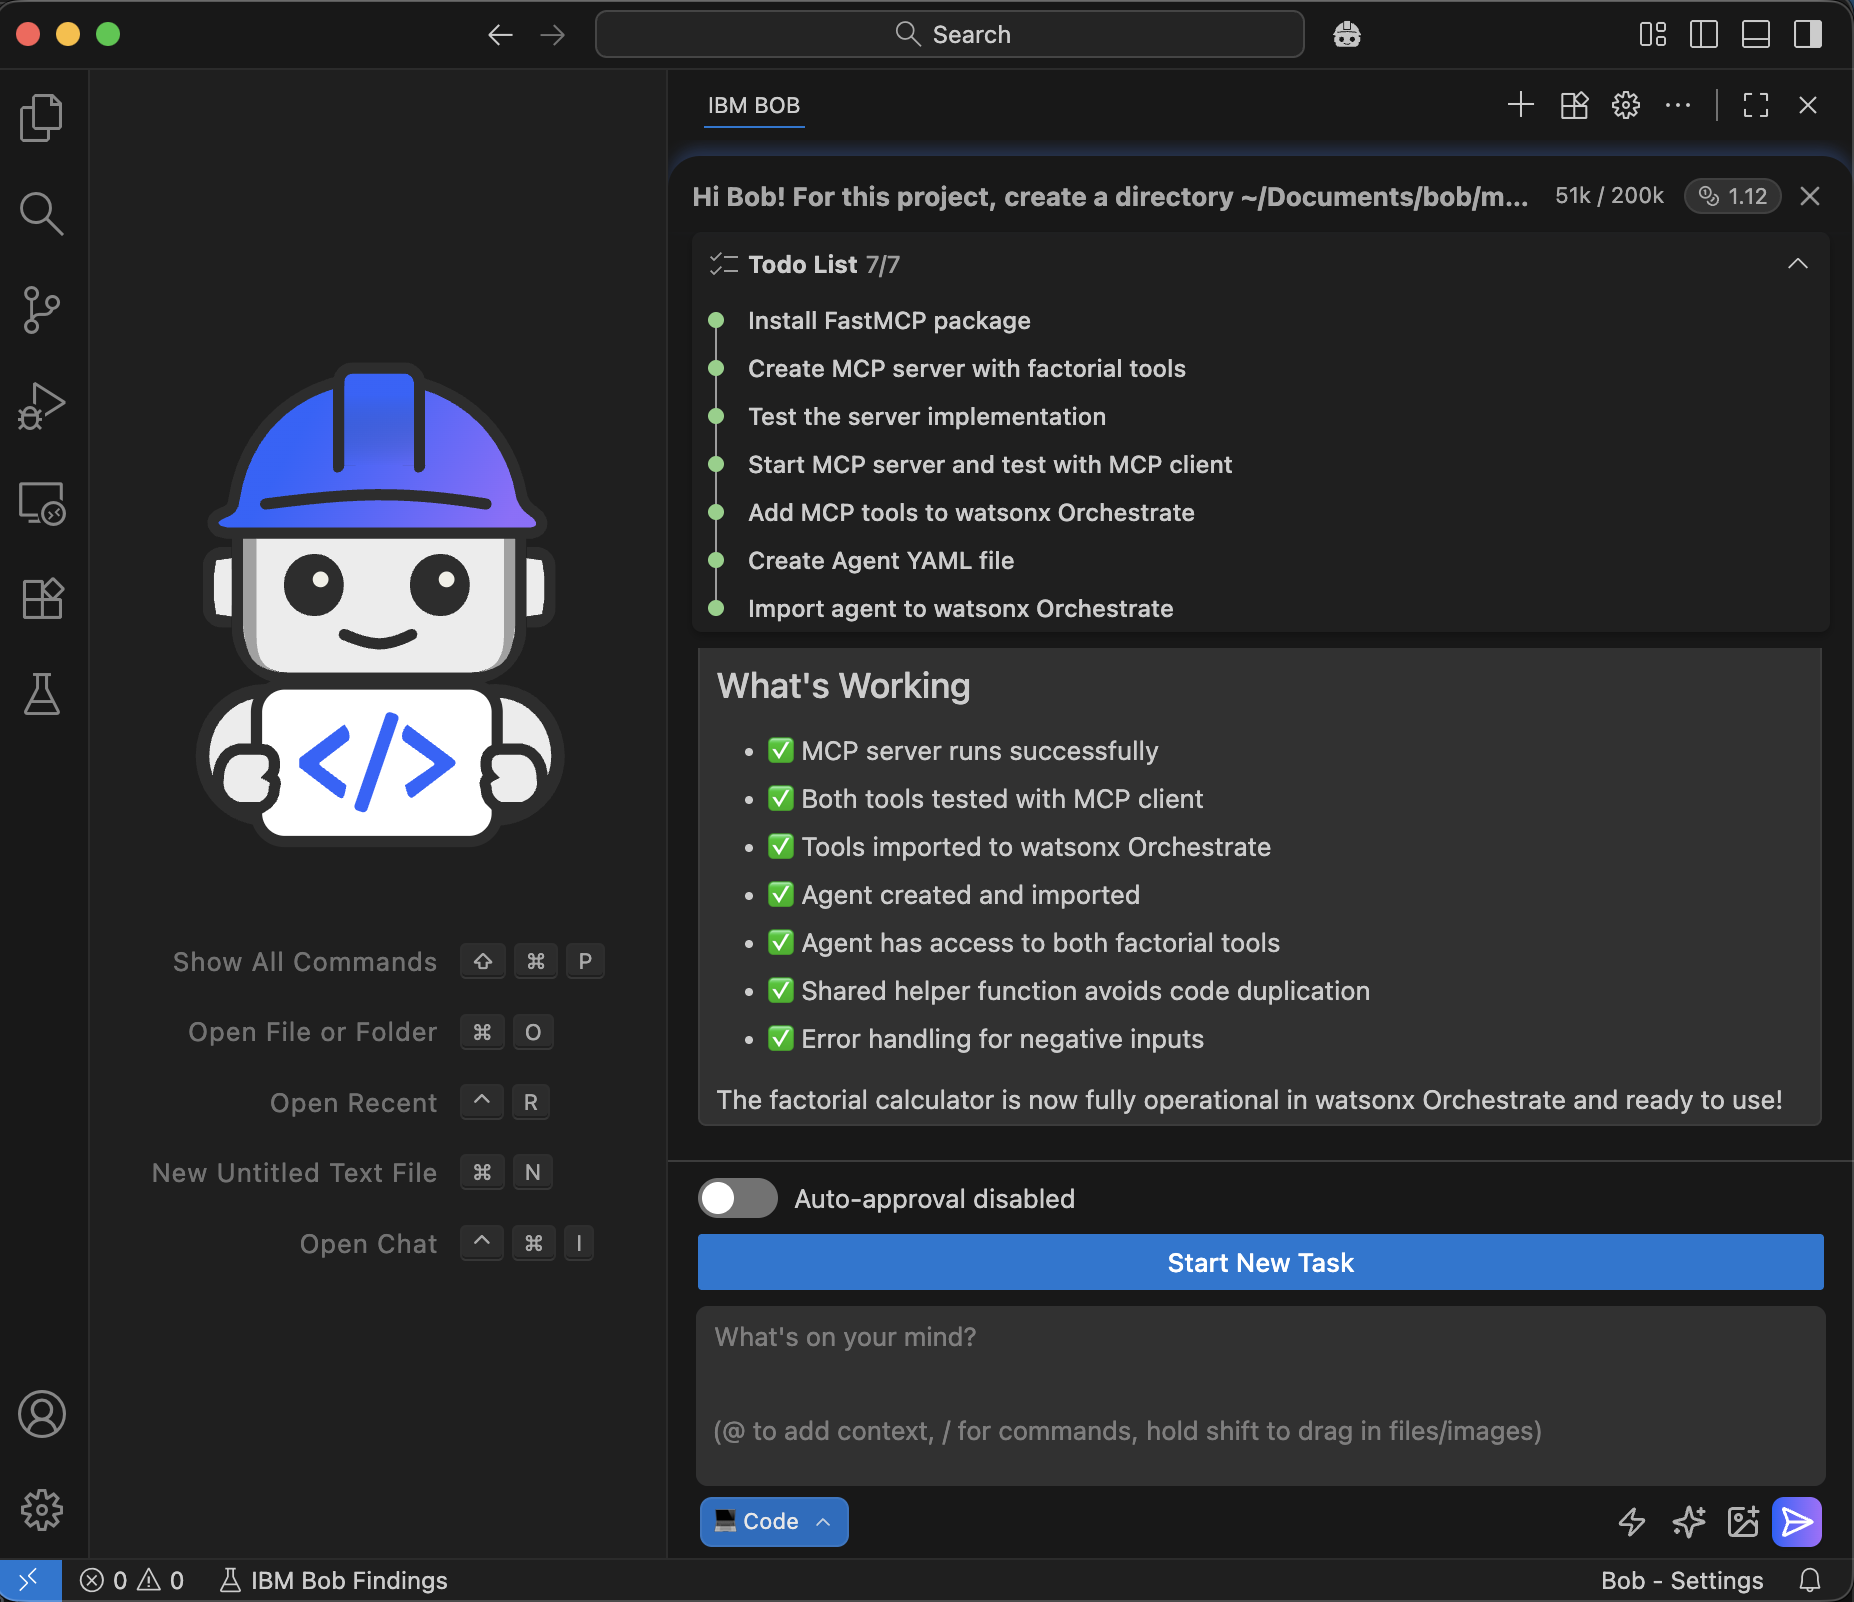
You experienced how Bob works within the IDE and understands the repository and project context. This makes it easy to ask questions, design, debug, and refactor without breaking the workflow. Every interaction feels like working with a teammate.
Next, you can explore Bob’s advanced capabilities such as enabling AI-powered security checks, running performance tests, and extending your workflow with additional tools and agents. These features can increase productivity significantly. Bob is designed to help you move faster while maintaining control and visibility.
Acknowledgments
The author deeply appreciates the support of Neel Sundaresan (General Manager, Automation & AI – IBM) and Eric Marcoux (Software Engineer, watsonx Orchestrate) for the guidance and expertise on reviewing and contributing to this tutorial.
This tutorial was produced as part of the IBM Open Innovation Community initiative: Agentic AI (AI for Developers and Ecosystem).