Tutorial
Using context variables in watsonx Orchestrate tools
Retrieve user-specific data automatically without repeated prompts using JWT-based context variablesIn this tutorial, you learn how to configure and use context variables in watsonx Orchestrate tools to retrieve user-specific data from backend systems without repeatedly asking for identifiers.
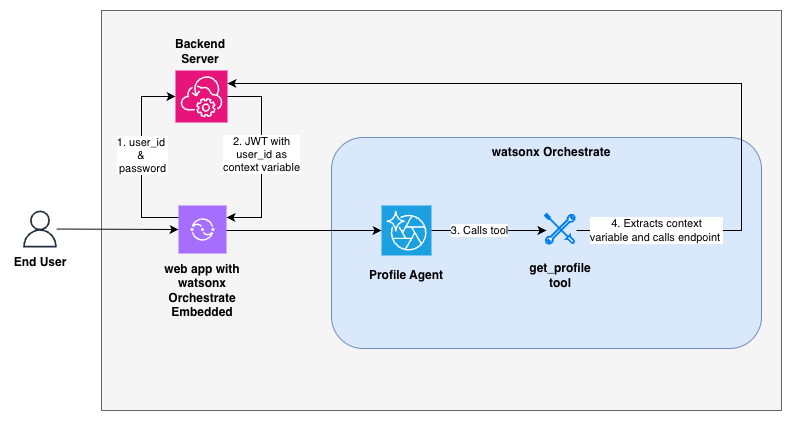
Context variables are reusable placeholders that watsonx Orchestrate automatically populates at runtime from user profile attributes (such as email, firstName, or userId) or session state. These variables are passed to watsonx Orchestrate tools using JWTs (JSON Web Tokens).
Architecture
Prerequisites
- An active watsonx Orchestrate instance.
- A running local environment of the watsonx Agent Development Kit (ADK) to configure tools and agents using the CLI. If you do not have an active ADK instance, review the getting started with ADK tutorial. This tutorial has been tested and validated with ADK version 2.2.0.
- API Key to authenticate the watsonx Orchestrate instance.
- An API endpoint (mock or real) that accepts an identifier (e.g.,
userid) and returns structured user data.
Steps
Step 1. Clone the source code
First, clone the source code for the sample app.
git clone https://github.com/IBM/oic-i-agentic-ai-tutorials
cd wxo-context-variables-in-tools
Step 2. Configure JWT-based security in watsonx Orchestrate
By default, security is enabled but not configured for the embedded chat in watsonx Orchestrate. The embedded chat does not function until you fully configure security. You must configure both the IBM key pair and the client key pair. (If you want to allow anonymous access, you can disable security, but for the purpose of this tutorial you need to configure security.)
To authenticate a user, watsonx Orchestrate uses JWT-based authorization. You must include context variables as claims inside the JWT. When you embed the web chat on a web page, you need to set the JWT in the web page.
Follow the steps in the Configuring security for embedded chat documentation to enable security.
Step 3. Generate a JWT
After completing the above steps, you will have both public.pem and private.pem keys. Copy these keys into the secrets directory at the specified path below.
wxo-context-variables-in-tools/app/secrets
You will use public and private keys to create JWT.
The following code snippet shows how to generate a JWT with the context variable user_id. It creates a JWT using the keys that you created when configuring security.
The jwt_content object contains context along with user_payload. The context contains user_id as a context variable which you can access in watsonx Orchestrate tools.
You can also set other variables such as email or employee_id as context variables based on your requirements.
You need to use the private and public keys generated in Step 2 above.
    # In below, user_id is context variable, which will be extracted by watsonx Orchestrate tool during runtime.
    context = {
        "user_id": user_id
    }

    sub = context["user_id"]

    user_payload = {
        "custom_message": "Here is the custom message",
        "name": "John",
    }

    data_bytes = json.dumps(user_payload).encode("utf-8")

    with open("./secrets/public_key.pem", "rb") as f:
      PUBLIC_KEY = serialization.load_pem_public_key(f.read())


    with open('./secrets/private_key.pem', 'r') as f:
      PRIVATE_KEY = f.read()


    encrypted_payload = PUBLIC_KEY.encrypt(
        data_bytes,
        padding.OAEP(
            mgf=padding.MGF1(algorithm=hashes.SHA256()),
            algorithm=hashes.SHA256(),
            label=None
        )
    )

    jwt_content = {
        "sub": sub,
        "user_payload": encrypted_payload.hex(),
        "context": context,
        "exp": datetime.now() + timedelta(minutes=60),
    }

    token = jwt.encode(
        jwt_content,
        PRIVATE_KEY,
        algorithm="RS256"
    )

    return token
Step 4. Set the JWT token in the embedded chat
Open the home.html file. You’ll see an implementation that collects a userid and password, which are then used to generate a JWT by calling the backend /token API. For the purpose of this tutorial, the backend does not perform real authentication, so you can enter any values for the userid and password.
Below is a code snippet that demonstrates how the generated JWT is set in watsonx Orchestrate.
    function initializeWatsonxOrchestrate(_token) {
        window.wxOConfiguration.token = _token;
        const script = document.createElement("script");
        script.src = `${window.wxOConfiguration.hostURL}/wxochat/wxoLoader.js?embed=true`;
        script.addEventListener("load", function () {
            wxoLoader.init();
        });
        document.head.appendChild(script);
    }
Let's walk through what the previous code, which implements a watsonx Orchestrate web chat integration with JWT authentication:
User authentication/Login Page: Retrieves
userIdandpasswordfrom the user input form, and sends a request to the backend endpoint/tokento obtain a JWT.Configuration setup: Configures the watsonx Orchestrate web chat widget with orchestration ID, host URL, agent details, and fullscreen overlay layout settings.
Dynamic loading: On page load, it first obtains the identity token, and then dynamically injects the watsonx Orchestrate loader script from the configured host URL.
Chat instance management: Captures the chat instance on the
chatLoadevent and stores it globally aswindow.wxoChatInstancefor programmatic control.
Step 5. Accessing a context variable in a watsonx Orchestrate tool
Now, create a watsonx Orchestrate tool called profile.py which can retrieve or access the context variable user_id and fetch the user-specific details from the backend system.
import json
import os
import requests

from ibm_watsonx_orchestrate.agent_builder.tools import ToolPermission, tool
from ibm_watsonx_orchestrate.run import connections
from ibm_watsonx_orchestrate.client.connections import ConnectionType
from ibm_watsonx_orchestrate.run.context import AgentRun


@tool(
    name="my_profile",
    permission=ToolPermission.READ_WRITE
)
def get_invoice_details(context: AgentRun) -> dict:
    """
    Get profile details

    Args:
        context: context of Agent run

    Returns:
        Dictionary with user profile details
    """

    # Extract runtime context variables from the agent run, such as user_id.
    req_context = context.request_context
    user_id = str(req_context.get('user_id'))

    if not user_id or not user_id.strip():
        return {"error": "User ID is required"}

    # Calling  endpoint
    try:

        ## update profile_url with your endpoint URL before importing tool in watsonx Orchestrate
        profile_url = f"https://test-function.21gqgfig993a.us-south.codeengine.appdomain.cloud/data?user_id={user_id}"

        response = requests.get(profile_url)
        response.raise_for_status()
        return response.json()

    except Exception as e:
        error_message = f"Unexpected error: {str(e)}"
        return {"error": error_message}
Import the tool into watsonx Orchestrate. Follow the steps in the Authoring Python-based tools documentation to import tools using the Agent Development Kit (ADK).
In the above code, user_id = str(req_context.get('user_id')) will retrieve the context variable user_id which we have set in the JWT and passed to watsonx Orchestrate via web chat embedding.
Step 6. Create an agent and enable context variables
Lastly, create an agent in watsonx Orchestrate and enable context variables in the agent definition. To do this, set the following parameters in the agent definition file.
context_access_enabled: true
context_variables:
- user_id
Create an agent definition file profile.yaml and copy the following YAML content into it.
kind: native
name: profile_agent
display_name: profile_agent
description: This agent retrieves user's information
context_access_enabled: true
context_variables:
- user_id
restrictions: editable
supported_apps: []
llm: groq/openai/gpt-oss-120b
style: default
hide_reasoning: false
instructions: |-
  You are responsible to getting details related to user.

  Your user Id is {user_id}.

  If you are asked to get details about you, invoke my_profile tool to get the details.
guidelines: []
collaborators: []
tools:
- profile
welcome_content:
  welcome_message: Hello, welcome to watsonx Orchestrate
  description: Accuracy of generated answers may vary. Please double-check responses.
  is_default_message: false
spec_version: v1
Follow the steps in the Importing and deploying agents ADK documentation.
Test the agent by running your frontend application and accessing the page where the agent is embedded. For example, depending on your frontend framework:
- If you are using React/Angular/Vue, start the development server (
npm start,ng serve, or equivalent) and open the local URL (such ashttp://localhost:3000) in a browser. - If it is a static HTML page, open the file directly in a browser. Once the page loads, use the embedded agent UI in the browser to validate its behavior.
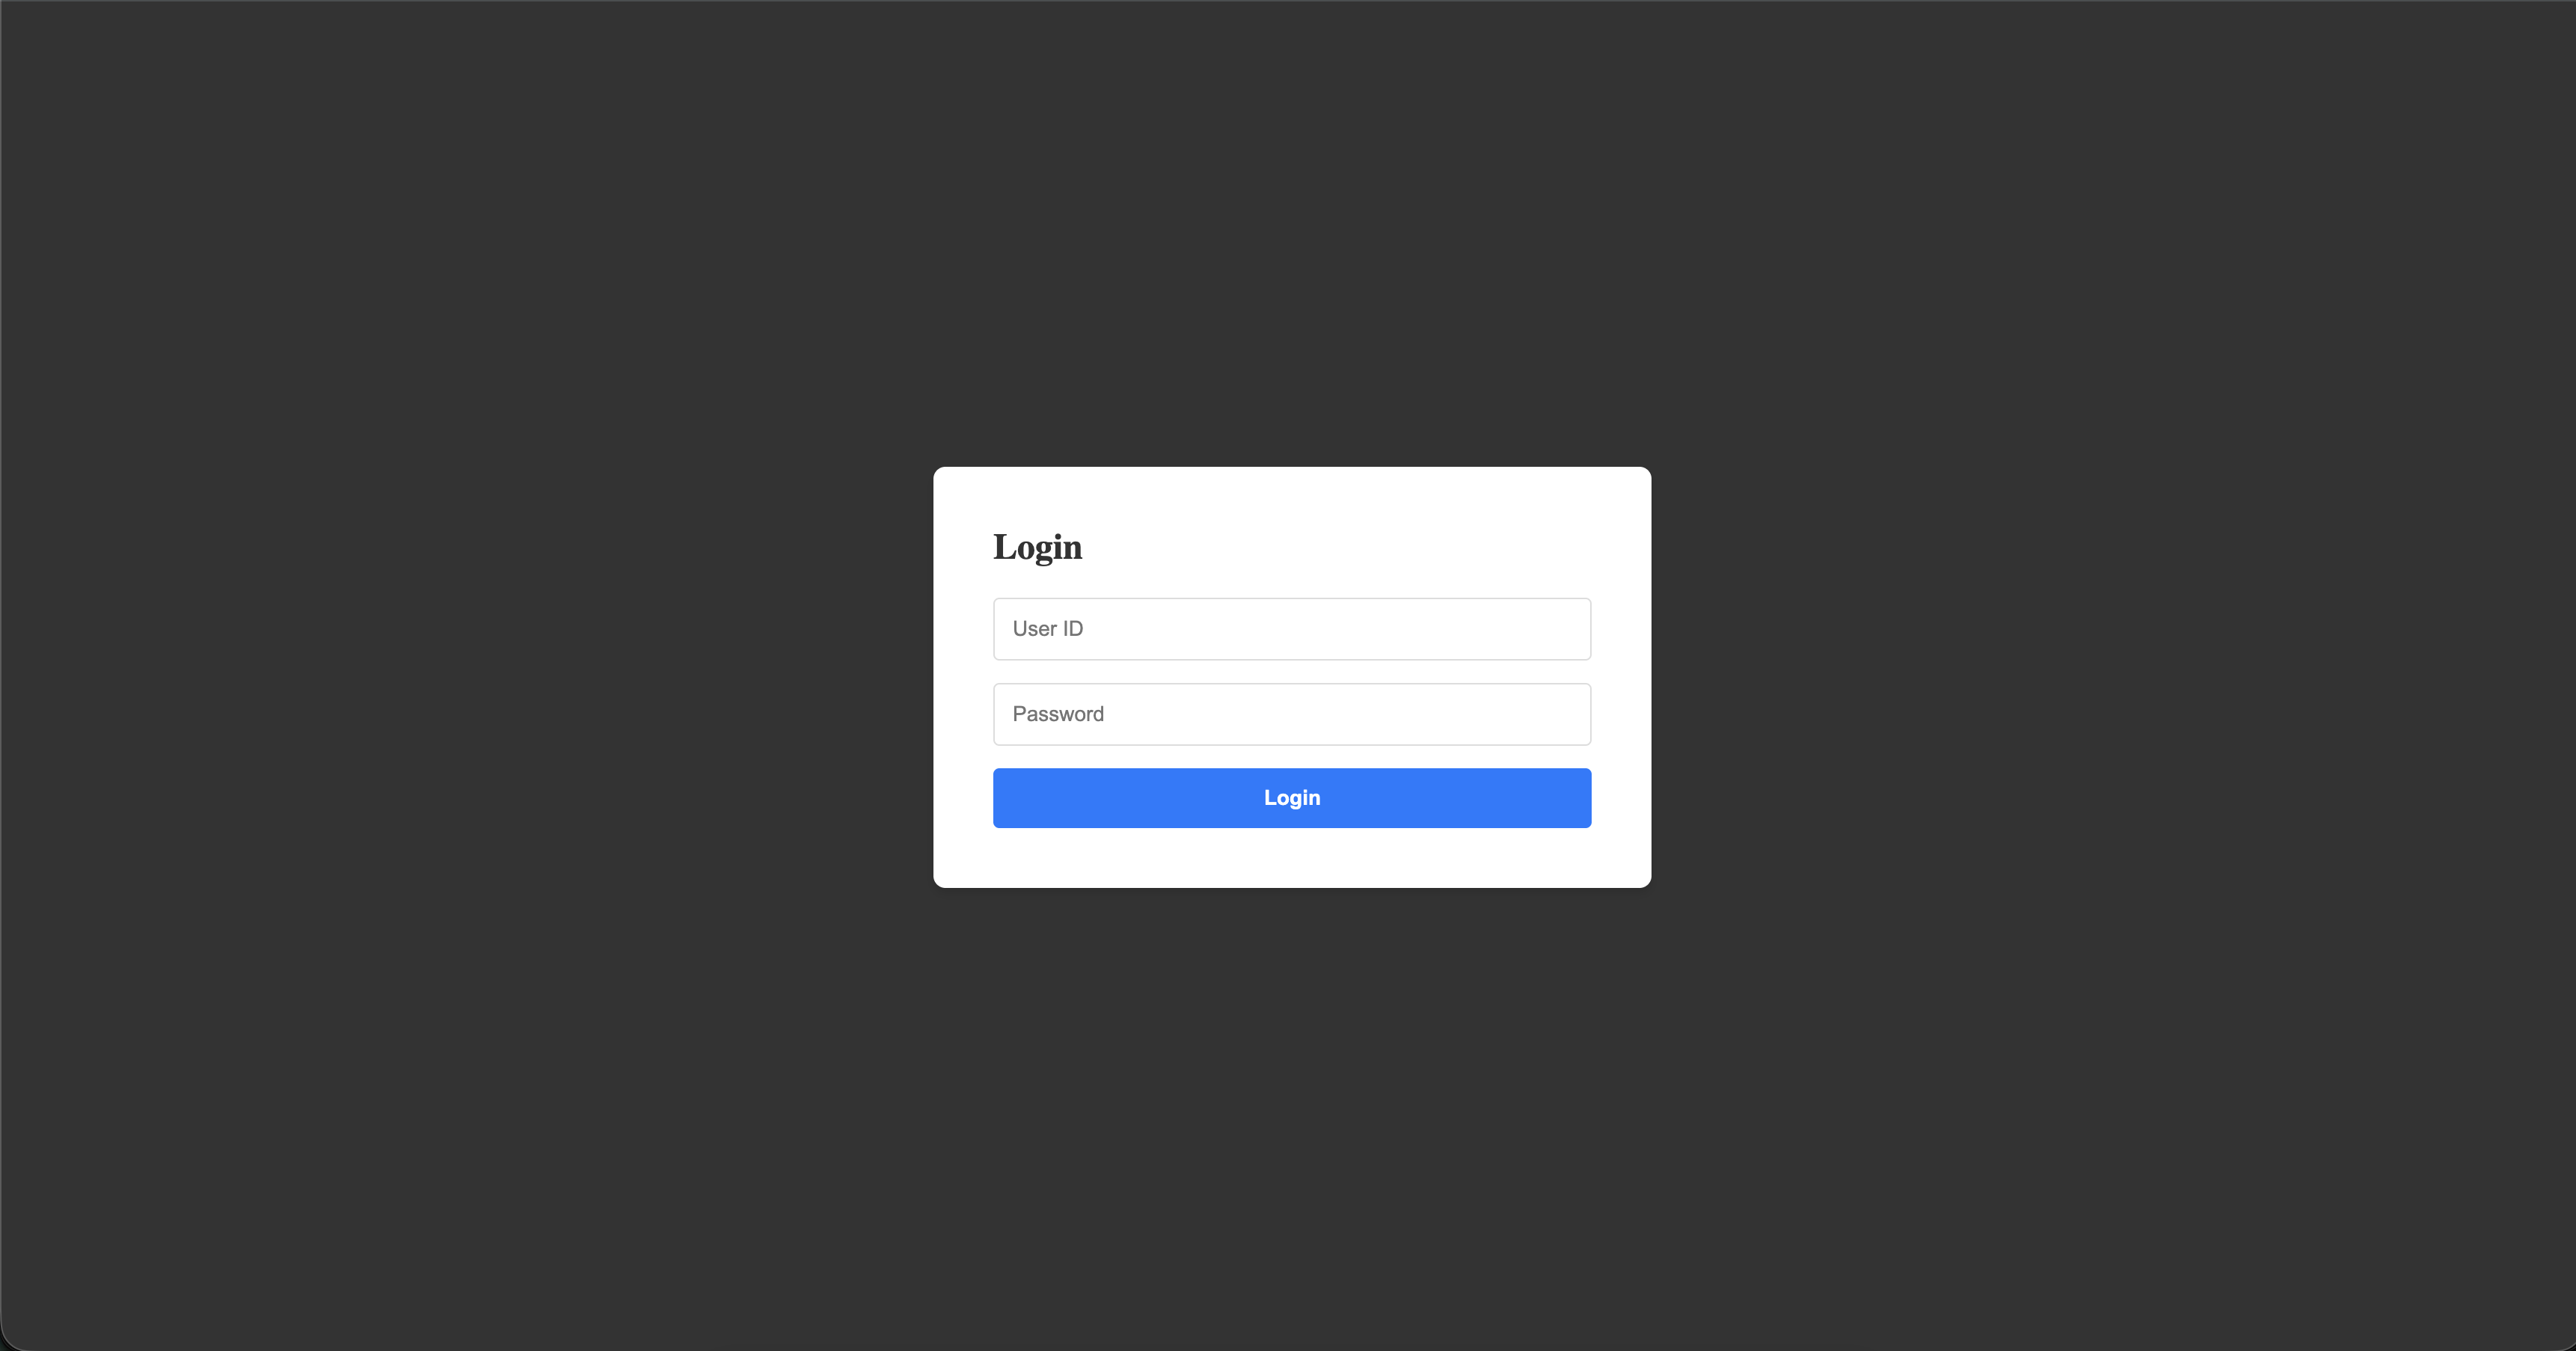
After running an application, open the browser, and you will see the login screen displayed, as shown in the following screen capture.
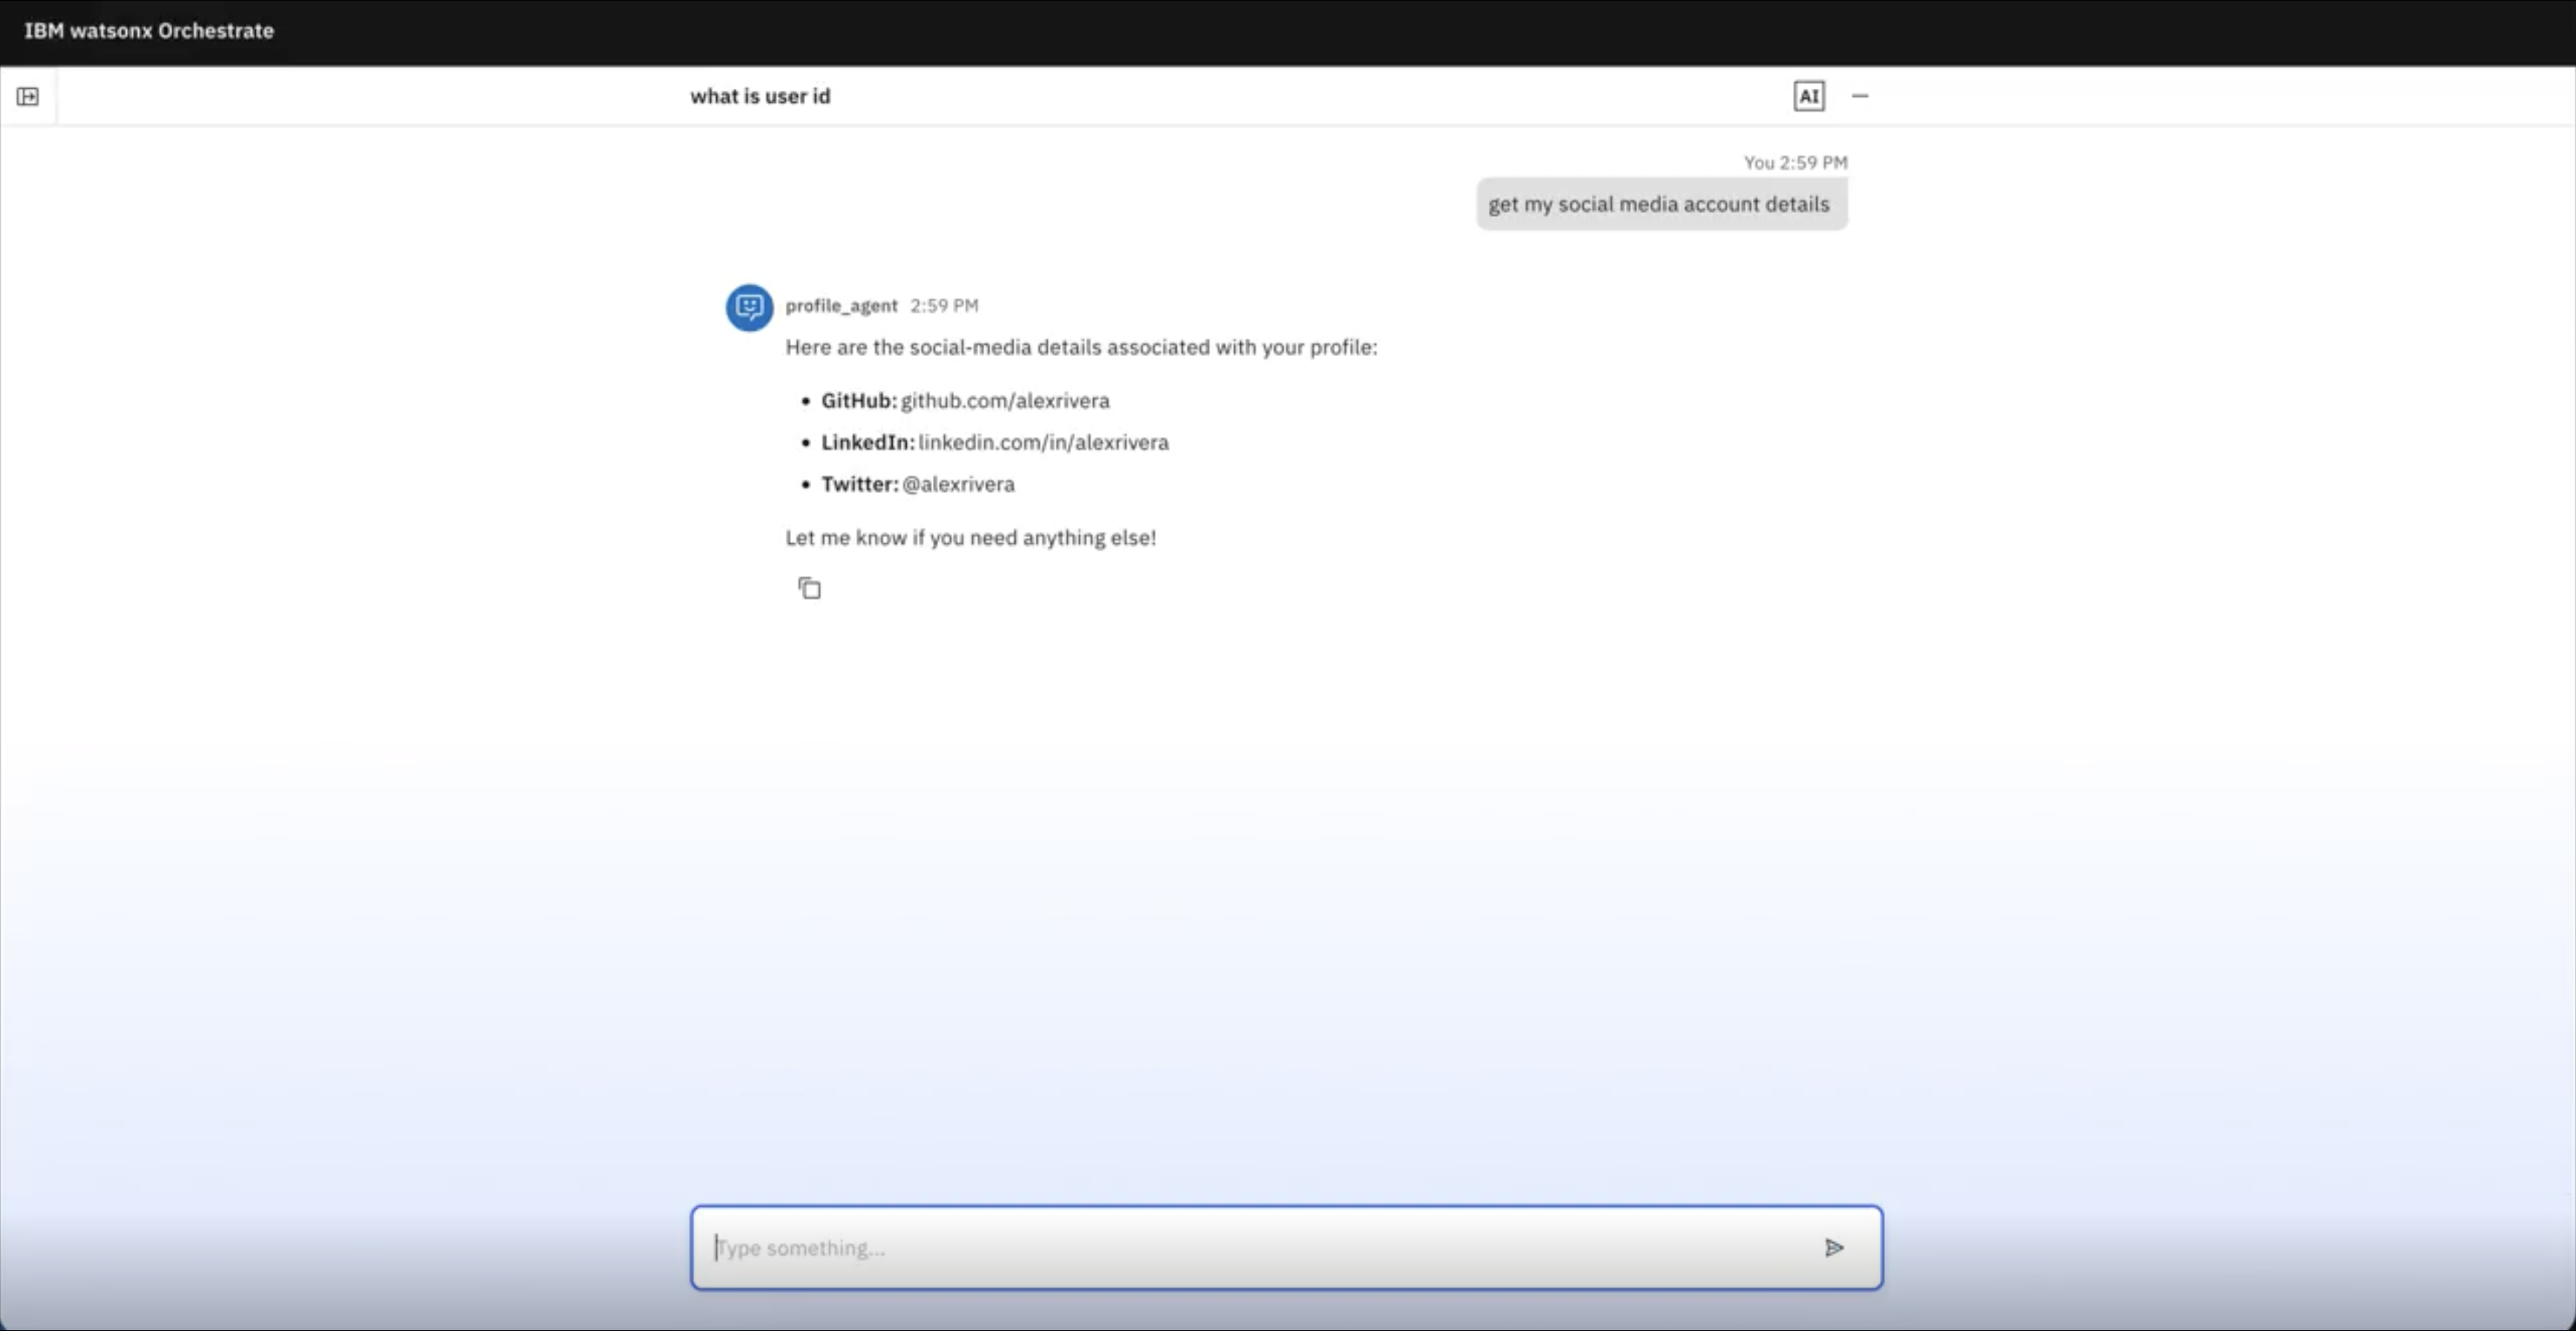
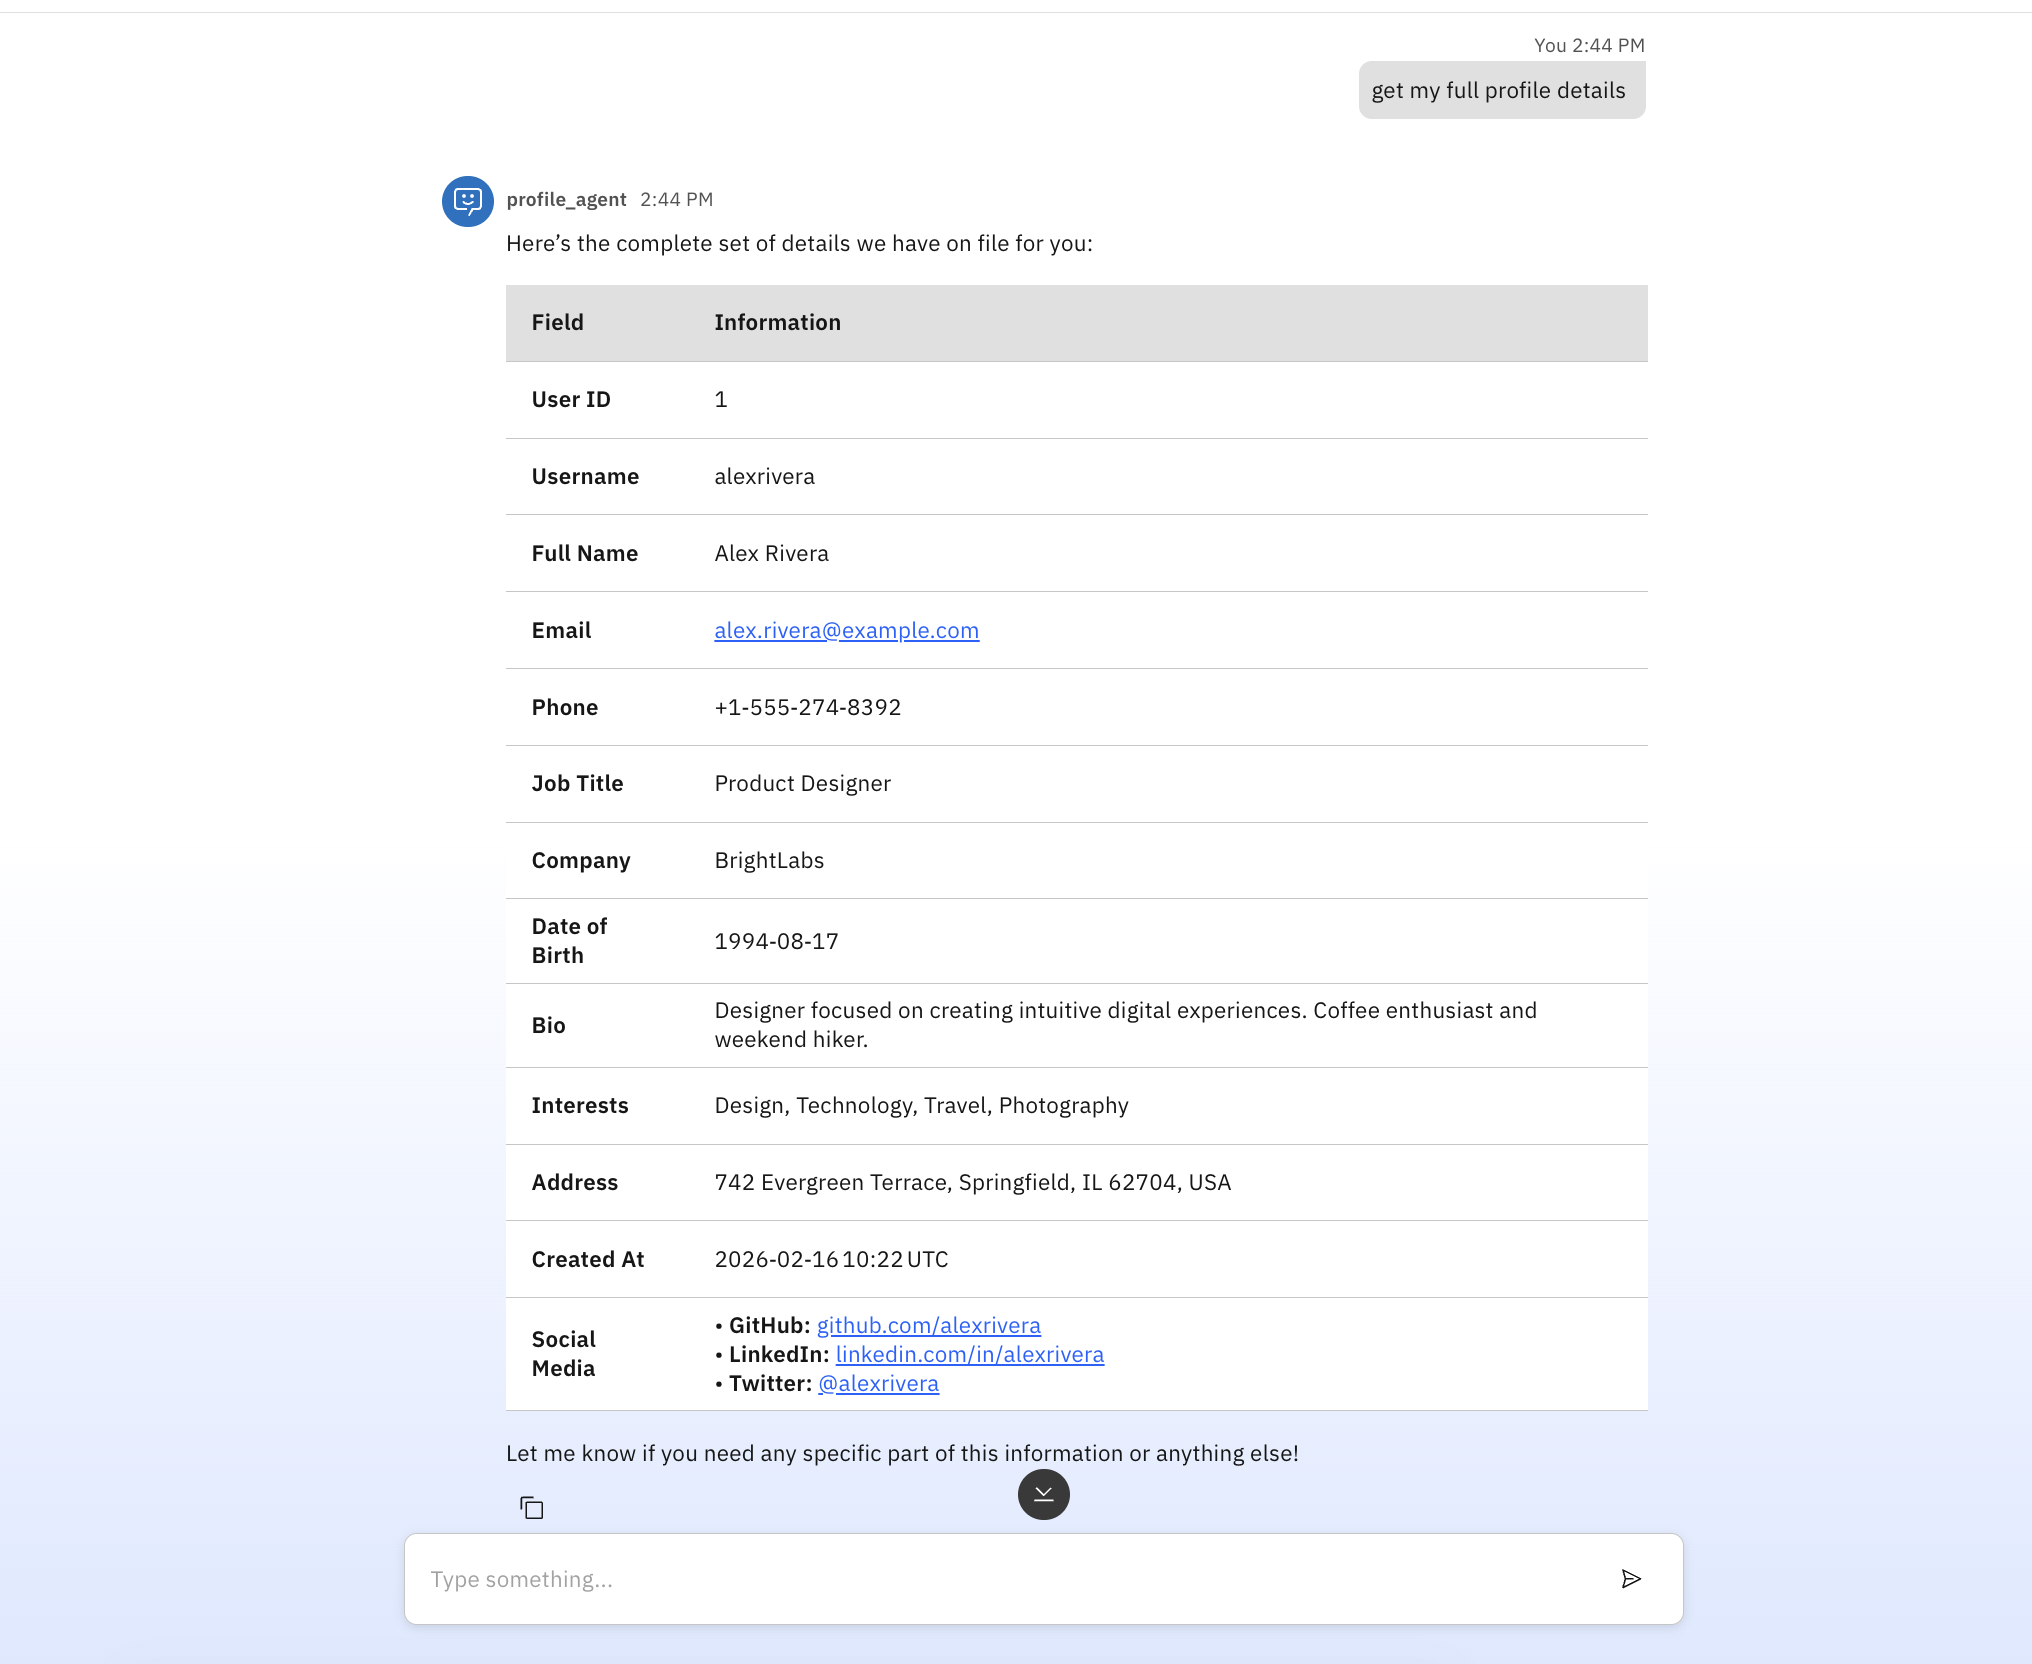
Click the watsonx Orchestrate icon to open the chat interface. Then, enter these prompts in the chat interface:
- "Get my social media account details."
- "Get my profile details"
How context variables work in watsonx Orchestrate
When a user logs in by providing a user ID and password, a backend call is made to generate a JWT. The backend system creates this JWT and includes a context variable named user_id.
In the embedded chat, this JWT is then set within the watsonx Orchestrate instance. When the user asks a question like “get my profile details,” watsonx Orchestrate invokes a tool called profile. This tool extracts the user_id value from the JWT context and uses it to make an HTTP call to the server to retrieve the user’s profile information.
Summary
In this tutorial, you learned how to configure and use context variables in watsonx Orchestrate. You can use context variables to retrieve user profile details, to personalize greetings or provide context-aware responses, or to pass user profile details on API calls without manual input.
To learn more about using context variables to enable secure, role-aware agent access to MCP tools, check out this tutorial, "Implement secure RBAC for MCP server access using context variables."
Acknowledgements
This tutorial was produced as part of the IBM Open Innovation Community initiative: Agentic AI (AI for Developers and Ecosystem).
The author deeply appreciates the support of Ahmed Azraq, Ela Dixit, and Mithun Katti to make this part of IBM Open Innovation Community initiative. The author also extends their sincere thanks to Michele Corbin for her editorial guidance and support, which significantly enhanced the clarity and quality of this tutorial.