Tutorial
Use Red Hat OpenShift Source-to-Image to deploy applications from Dockerfiles
Set up GitHub webhooks to trigger new pod deploymentsThe Red Hat OpenShift Source-to-Image (S2I) framework eases your ability to create reproducible Docker container images from application source code. A Dockerfile is a recipe (or blueprint) for building Docker images. In this tutorial, you learn how to use OpenShift S2I to build a Docker image from a Dockerfile hosted in GitHub and deploy a container pod by using the image. You also learn how to set up a GitHub webhook to notify OpenShift of new code push and commit events so it automatically rebuilds and redeploys pods by using the latest changes to your code and the Dockerfile within your GitHub repo.
Prerequisites
For this tutorial, you must have a Red Hat OpenShift on IBM Cloud cluster (4.3 or higher) and a GitHub account.
Estimated time
This tutorial takes 30 minutes to complete.
Steps
- Fork the GitHub repo and host a Dockerfile
- Create a project
- Create a pod deployment using the Dockerfile from your GitHub repo
- Verify the container process matches the command specified in the Dockerfile
- Set up a GitHub Webhook
- Make changes to your GitHub repository
1. Fork the GitHub repo and host a Dockerfile
To fork the GitHub repository for this tutorial, click the Fork button that is located on the main repo page. Within the repo is a Dockerfile that contains the following lines of code.
# simple dockerfile to test OCP s2i using Dockerfile

FROM ubuntu:18.04
CMD ["/bin/bash", "-c", "sleep infinity"]
# CMD ["/bin/bash", "-c", "--", "while true; do sleep 30; done;"]
During a later step of this tutorial, you make changes in the Dockerfile to trigger new pod deployments.
2. Create a project
- From the Administrator perspective of OpenShift, go to Projects and click Create Project.
- Name the project
s2i-projectand click Create. After the project is created, you are redirected to the Overview tab of the Project Details page.
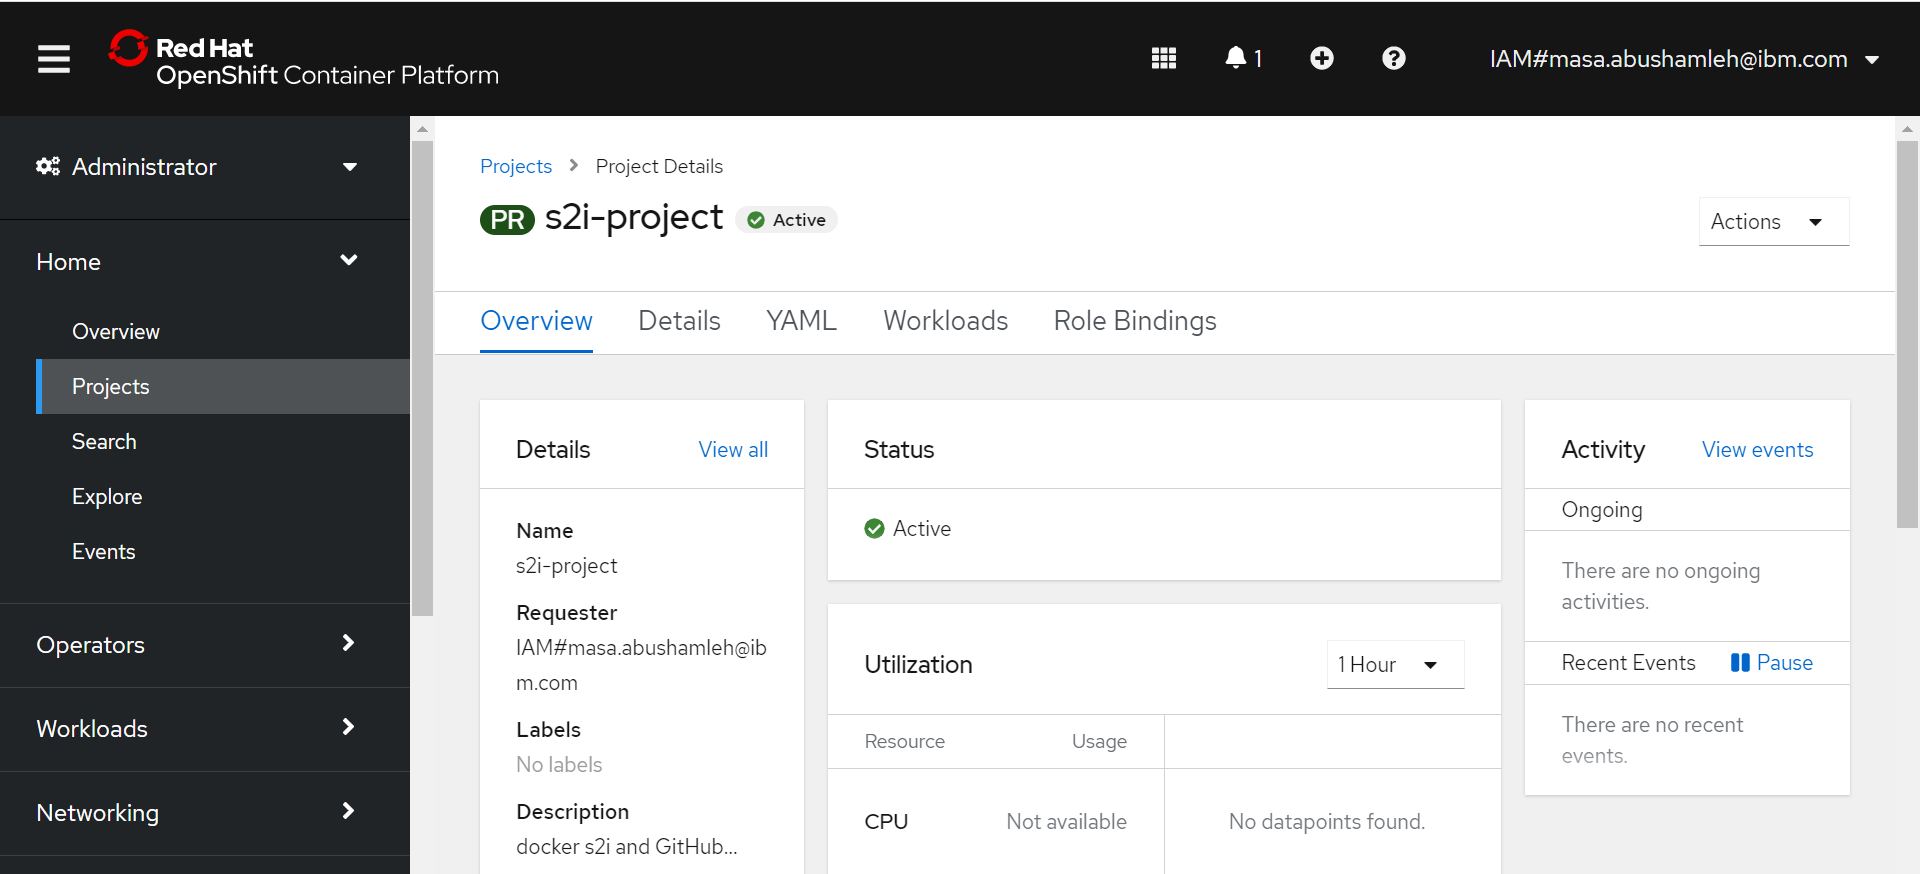
3. Create a pod deployment using the Dockerfile from your GitHub repo
In the OpenShift web console, switch from the Administrator perspective to the Developer perspective.
Select Topology from the navigation panel.
To create an application, select the From Dockerfile option.
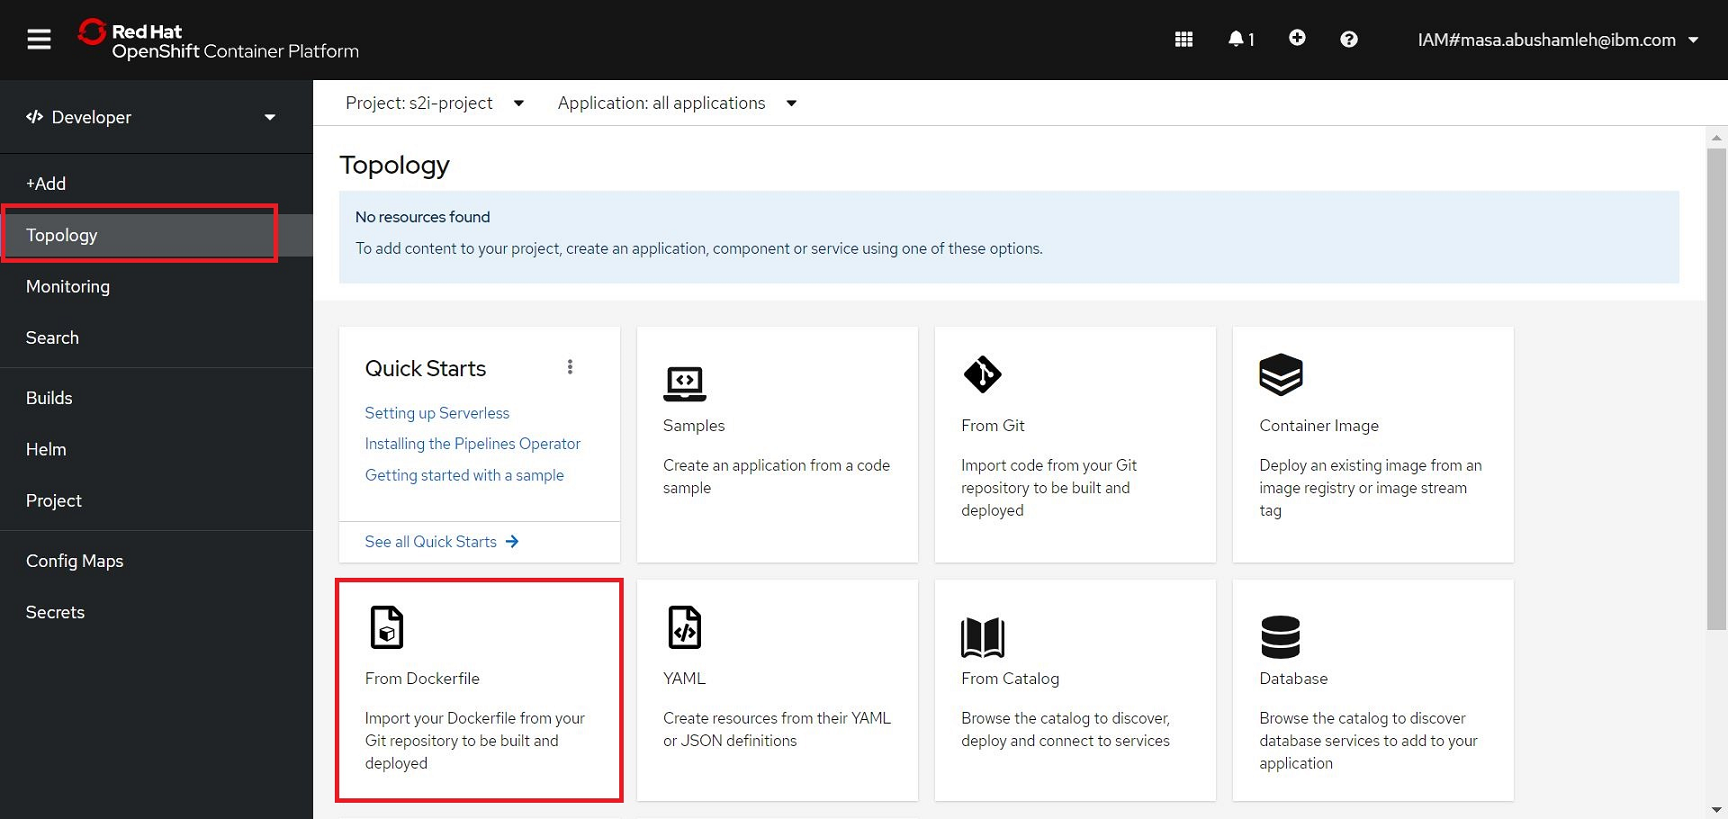
Copy the URL of your GitHub repo, which should be
https://github.com/<GITHUB-USERNAME>/oc-docker-s2i. Ensure that the URL includes your GitHub username and not the<GITHUB-USERNAME>placeholder.Paste the URL of your GitHub repository in the Git Repo URL field.
In the Context Dir field, type
/ubuntu, which is where the Dockerfile is located.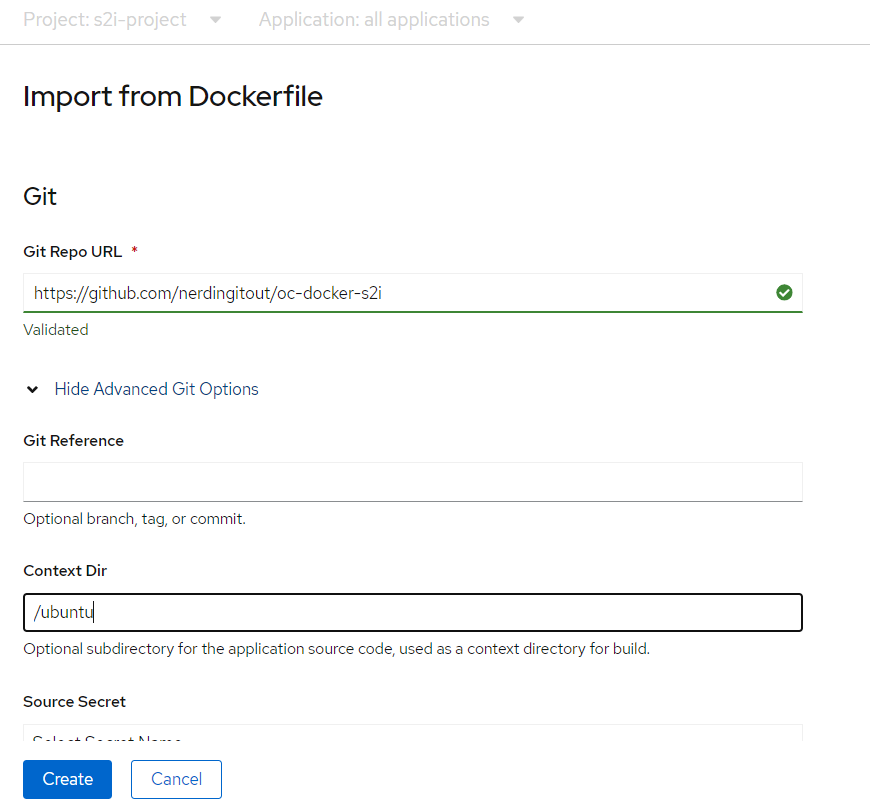
In the Resources section, select
Deployment Configand keep the Create a route to the application option selected.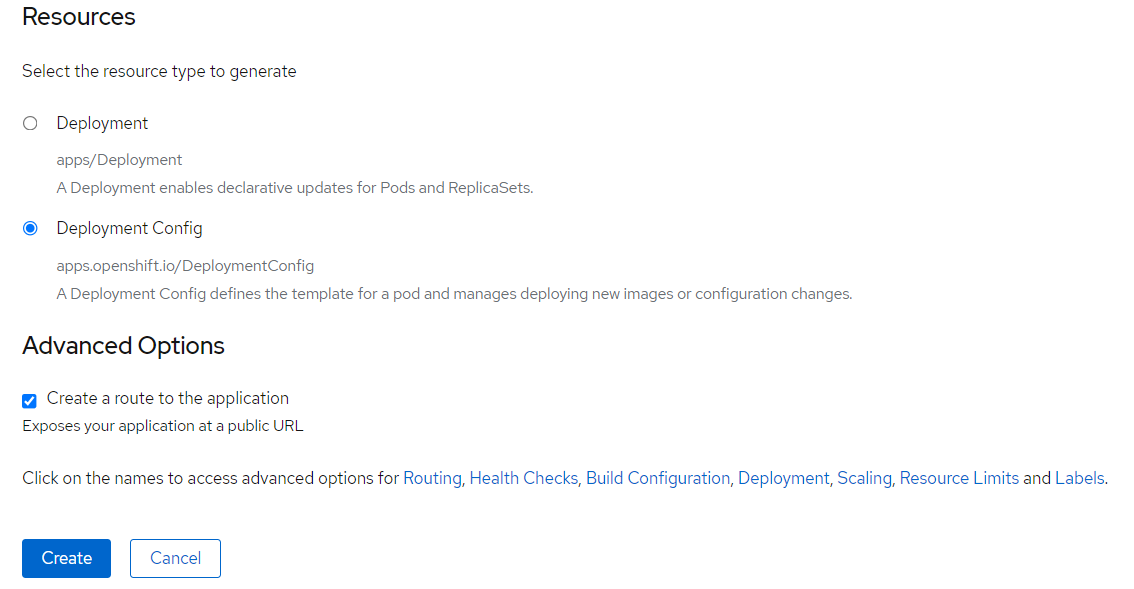
Click Create.
You are redirected to the Topology view, which lists the created pods.
If you click on your application, you open the Deployment Config (DC) view, where you can review the Details, Resources, and Monitoring logs. What happens is that OpenShift builds the Docker image by using the Dockerfile from your GitHub repo, creates a Docker image, uploads the image into the OpenShift internal image registry, and creates a pod by using that Docker image.
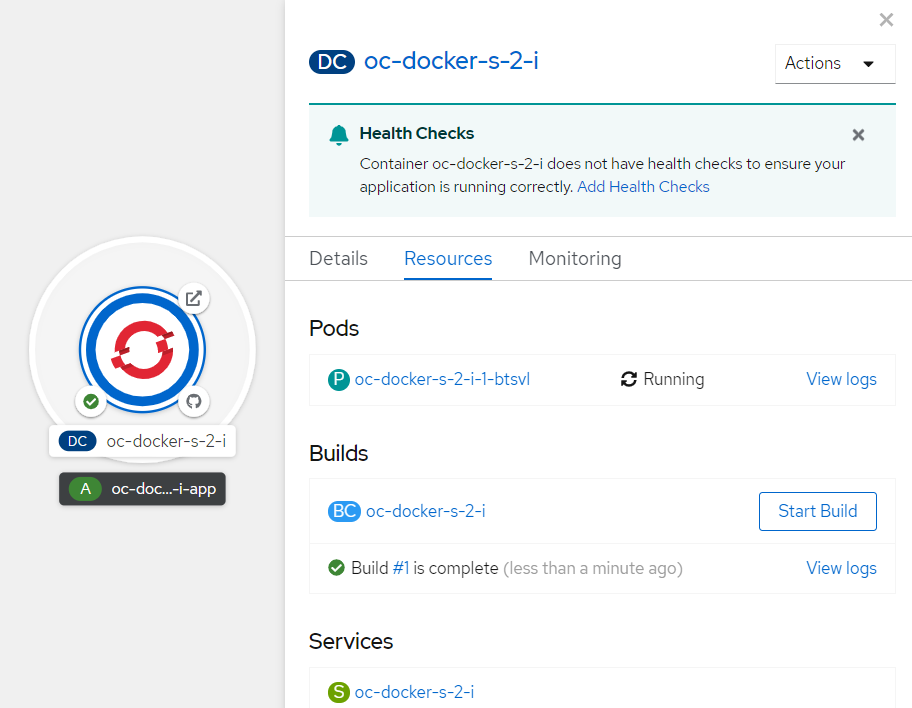
4. Verify the container process matches the command specified in the Dockerfile
From the Topology view, click the
DeploymentConfigicon for your application to open the Deployment Config Details page.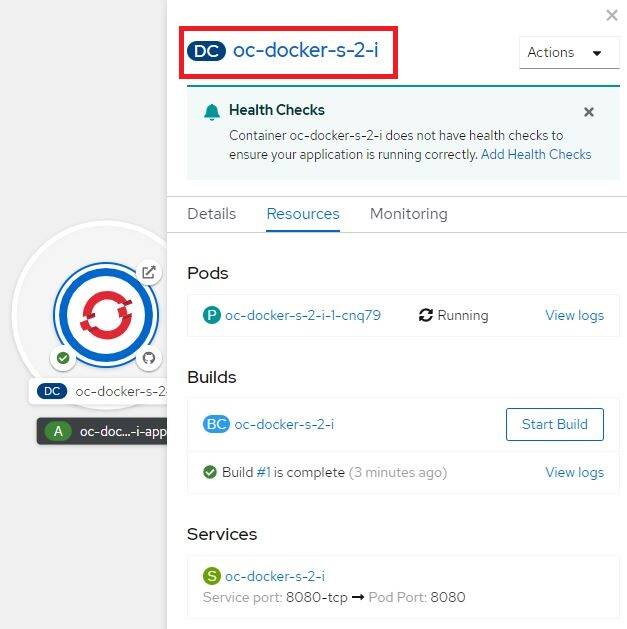
Select the Pods tab on the Deployment Config Details page to list the running pod.
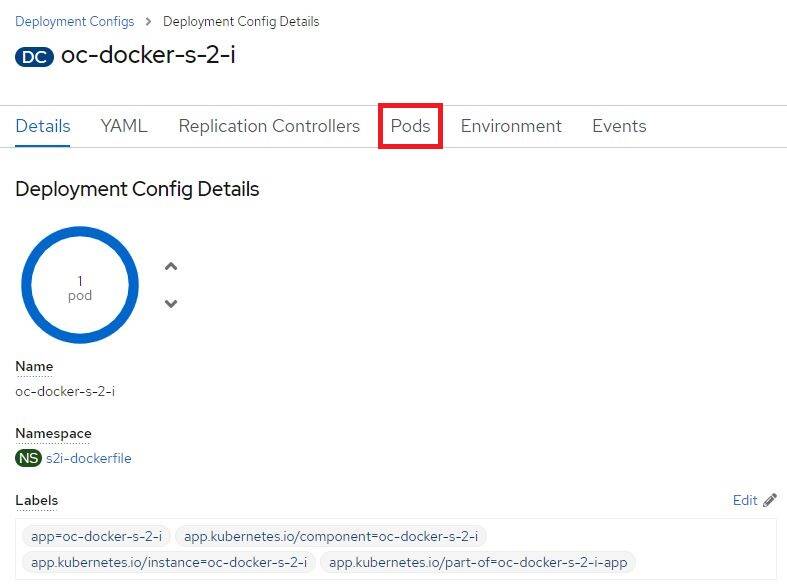
Select the running pod to open the Pod Details view.
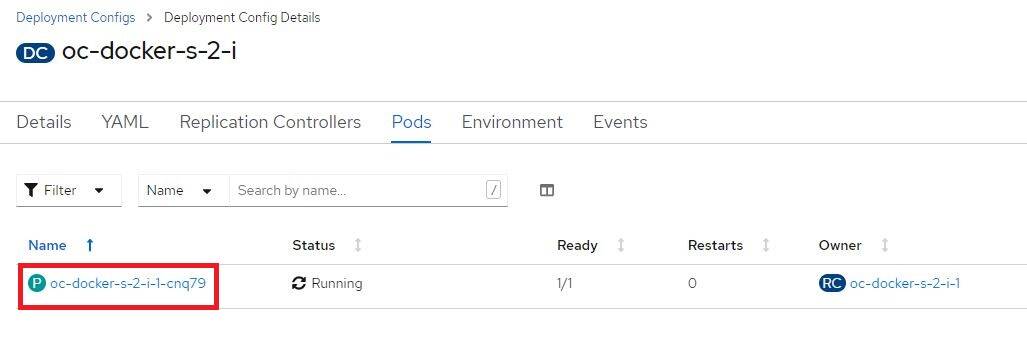
Select Terminal, which brings up a terminal (shell) inside your running Ubuntu container.

Verify that the pod is running the
sleep infinityprocess, as specified in the Dockerfile, by typing the following command in the terminal:ps aux | grep sleep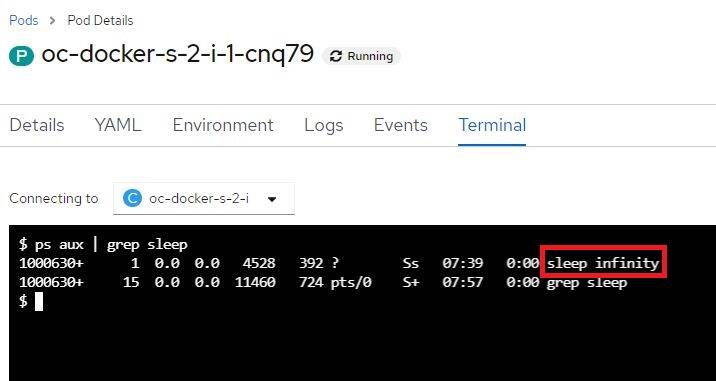
5. Set up a GitHub webhook
GitHub webhooks allow external services to be notified when certain events happen. To automatically deploy a new pod when updates to the GitHub Dockerfile occur, you must configure your GitHub repo with the webhook that OpenShift provides as part of the BuildConfig. This is best achieved by using the OpenShift web console.
From the menu, select Builds.
On the Build Configs page, select the build configuration of your application.
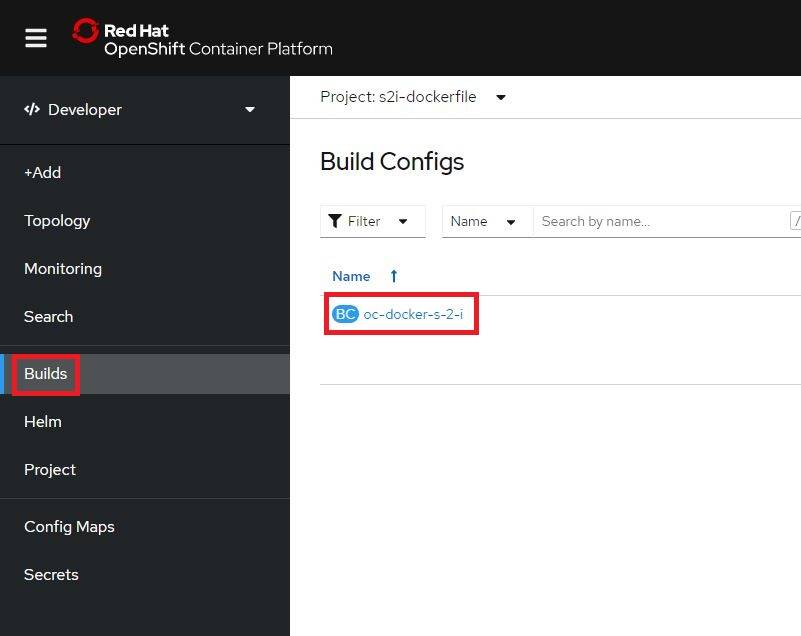
You are redirected to the detailed view of the build config. Go to the Webhooks section and click Copy URL with Secret for the
Genericwebhook type.
Open your GitHub repo and navigate to Settings.
Select Webhooks from the Options menu and click Add Webhook.
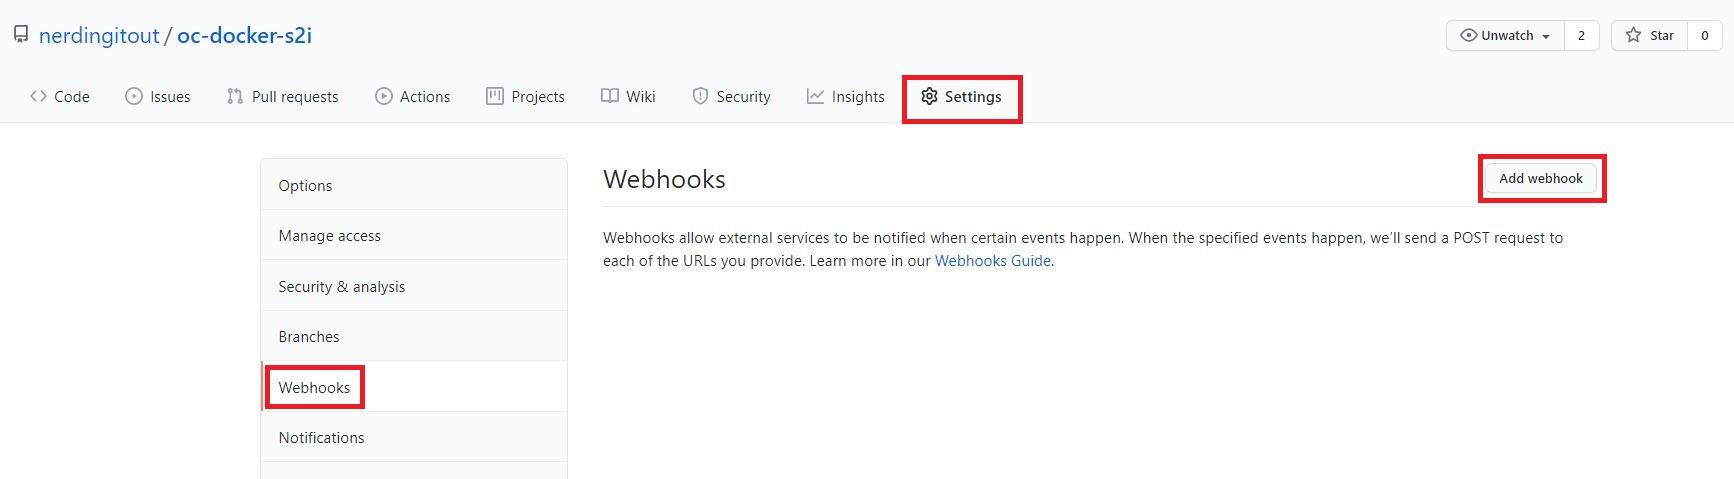
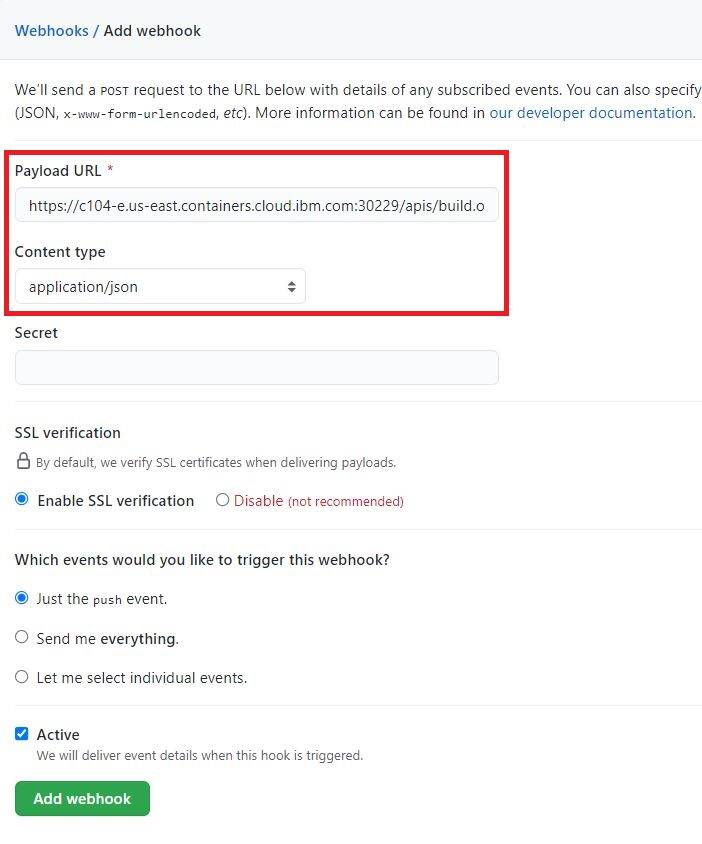
On the Add webhook page, paste the URL that you copied earlier into the Payload URL field.
In the Content type field, select the
application/jsonoption.Click Add webhook.
Select your newly added webhook to see its details. The Recent Deliveries section displays an entry for a ping test that is prefixed with a tick mark, which indicates that the ping test was successful.

Click the entry to view more details about the REST API call and the associated response for the ping test. A successful ping test indicates that GitHub is able to connect with your OpenShift cluster.
6. Make changes to your GitHub repository
In this step, you make a small change to the Dockerfile, change the CMD that is used to keep the container alive, and commit the change. This triggers a push event from GitHub to the OpenShift cluster, which causes OpenShift to rebuild the Docker image and redeploy the pod by using the newly built Docker image.
Go to the Dockerfile in GitHub, edit the file by adding a comment to the first command and removing the comment from the second command, as shown in the following screen capture image.

Commit your changes.
Go back to the OpenShift web console and open the Administrator view.
Click Builds. Notice that a new build is automatically initiated, as shown in the following screen capture image. After this build is done, a new pod is created by using the newly built Docker image.

Select the Pods view to see that the old pod is being terminated and new pod is being created.

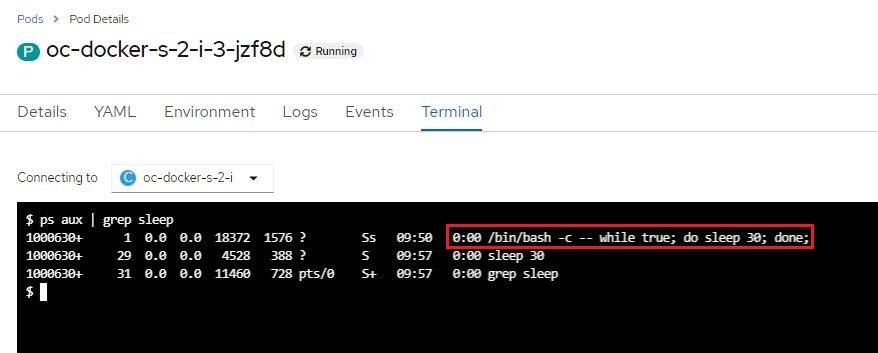
Select the new pod and go to the terminal to verify that the new container is running the new process that is specified in the Dockerfile. Use the following command in the terminal:
ps aux | grep sleepYou receive output similar to the one shown in the following screen capture image.
If you go to your GitHub webhooks view, you can see a new entry within the Recent Deliveries section. The entry maps to the recent notification delivered by GitHub to OpenShift in response to the new commit in the repo.

Summary
In this tutorial, you successfully demonstrated the OpenShift S2I capability by using a Dockerfile. You deployed a pod from a Dockerfile hosted in GitHub, set up the connection between OpenShift and GitHub by using a webhook, and tested that new code changes within the repository resulted in a new pod deployment within your OpenShift cluster.