Tutorial
Deploy Guardium Data Security Center on a single-node VMware vSphere cluster
Simple deployment provides effective protection for your dataIn today’s data-driven landscape, securing sensitive data across hybrid environments is a top priority. IBM Guardium Data Security Center helps organizations monitor, audit, and protect structured and unstructured data in real time. This tutorial walks you through the steps to install and configure Guardium Data Security Center’s Guardium Query Service on a single-node OpenShift cluster running on VMware vSphere. These steps are deal for learning how to set up proof-of-concept, development, or light production use cases.
This tutorial is especially helpful for:
- Security engineers and architects evaluating Guardium’s capabilities
- DevSecOps teams integrating security into CI/CD pipelines
- Administrators tasked with standing up compliant environments quickly
Unlike traditional product documentation, this hands-on tutorial offers a real-world walkthrough that includes:
- Manual configuration of networking, DNS, and storage in a vSphere environment
- Insights into OpenShift’s single-node deployment for constrained or isolated environments
- Custom Resource creation and operator-based installation of Guardium components
Prerequisites
Before completing this tutorial, be sure that you have:
- Familiarity with the Red Hat OpenShift Container Platform installation and update processes
- Familiarity with the different cluster installation methods available
- An environment suitable for cluster installation
- All necessary hardware and software requirements for Red Hat OpenShift and IBM Guardium Data Security Center
In this tutorial, we use:
- Red Hat OpenShift Container Platform, version 4.16
- IBM Guardium Data Security Center – IBM Guardium Quantum Safe, version 3.6.2
Part 1. Install a single-node Red Hat OpenShift cluster manually
A single-node Red Hat OpenShift cluster can be deployed using standard installation methods. This setup is particularly suitable for lightweight application deployment workloads.
Note: A single-node cluster does not provide high availability (HA), which means it is vulnerable to failures that could impact availability.
To ensure a successful installation, review the following resources:
- Networking requirements for user-provisioned infrastructure
- User-provisioned DNS requirements
- Configuring DHCP or static IP addresses
Step 1: Install required tools on the installer node
- Log in to the Red Hat OpenShift environment:
oc login <OCP endpoint>. You can download the Red Hat OpenShift Container Platform from the Red Hat OpenShift mirror site. - Retrieve your installation pull secret from Red Hat OpenShift Cluster Manager.
- Install the Red Hat OpenShift CLI on a Linux system:
- Go to the Red Hat OpenShift Container Platform downloads page.
- Select the appropriate architecture and Red Hat OpenShift version.
- Download and extract the
ocCLI binary file.
Step 2: Configure DHCP and DNS for OpenShift
Correct DHCP and DNS configuration is essential to ensure proper cluster functionality.
- Configure your DHCP server to assign persistent IP addresses to nodes.
- Set up DNS resolution and reverse DNS resolution.
- Ensure the required DNS records are configured:
| Usage | Fully Qualified Domain Name | Description |
|---|---|---|
| Kubernetes API | api.[cluster_name].[base_domain] | DNS A/AAAA or CNAME record resolvable externally and internally |
| Internal API | int.[cluster_name].[base_domain] | DNS A/AAAA or CNAME record resolvable internally |
| Ingress route | *.apps.[cluster_name].[base_domain] | Wildcard DNS A/AAAA or CNAME record targeting the node |
Step 3: Create the installation configuration file manually
Note: To create the installation configuration file, you will need:
- An SSH public key for accessing the cluster nodes
- The OpenShift installation program and the pull secret that you obtained previously
To create the installation configuration file:
- Create an installation directory:
mkdir <installation_directory> - Generate and customize the
install-config.yamlfile within the directory. - Save and back up the file for future installations.
Example install-config.yaml for VMware vSphere
Example install-config.yaml for VMware vSphere
additionalTrustBundlePolicy: Proxyonly
apiVersion: v1
baseDomain: example.com
compute:
- architecture: amd64
  hyperthreading: Enabled
  name: worker
  platform: {}
  replicas: 0
controlPlane:
  architecture: amd64
  hyperthreading: Enabled
  name: master
  replicas: 1
  platform:
    vsphere:
      cpus: 24
      coresPerSocket: 2
      memoryMB: 307200
      osDisk:
        diskSizeGB: 500
metadata:
  creationTimestamp: null
  name: ocptest
networking:
  clusterNetwork:
  - cidr: 10.128.0.0/14
    hostPrefix: 23
  machineNetwork:
  - cidr: 10.0.0.0/16
  networkType: OVNKubernetes
  serviceNetwork:
  - 172.30.0.0/16
platform:
  vsphere:
    failureDomains:
    - name: generated-failure-domain
      region: generated-region
      server: <vpshere server ip or FQDN>
      topology:
        computeCluster: </Datacenter/host/NewCluster>
        datacenter: <Datacenter>
        datastore: </Datacenter/datastore/datastore1>
        networks:
        - <LAN>
        resourcePool: </Datacenter/host/NewCluster//Resources>
        folder: </Datacenter/vm/ocp-infra>
      zone: generated-zone
    vcenters:
    - datacenters:
      - Datacenter
      password: <"password">
      port: 443
      server: <vsphere server ip or FQDN>
      user: <vsphere user name>
    diskType: thin
fips: false
pullSecret: ''
sshKey: ''
Step 4. Deploy the OpenShift cluster
Generate the Kubernetes manifests. For
installation_directory, specify the installation directory that contains theinstall-config.yamlfile you created../openshift-install create manifests --dir <installation_directory>Create the required Ignition configuration files:
./openshift-install create ignition-configs --dir <installation_directory>Note: Ignition config files are created for the bootstrap, control plane, and compute nodes in the installation directory. The
kubeadmin-passwordandkubeconfigfiles are created in the./<installation_directory>/auth directory:├── auth │ ├── kubeadmin-password │ └── kubeconfig ├── bootstrap.ign ├── master.ign ├── metadata.json └── worker.ignDeploy the cluster using the installation program. For
installation_directory, specify the directory name to store the files that the installation program creates../openshift-install create cluster --dir <installation_directory> --log-level=infoNote: To view different installation details, specify
warn,debug, orerrorinstead ofinfo.
Step 5: Verify the OpenShift cluster deployment
When the cluster deployment completes successfully, the terminal displays directions for accessing your cluster, including a link to the web console and credentials for the kubeadmin user.
Credential information also outputs to the installation log. To check the installation log:
cat <installation_directory>/openshift_install.log
Example output
+------------------------------------------------------------------------------------------+
| time="2025-02-03T10:54:00-06:00" level=debug                                           |
| msg="OpenShift console route is admitted"                                              |
+------------------------------------------------------------------------------------------+
| time="2025-02-03T10:54:00-06:00" level=info                                            |
| msg="Install complete!"                                                                 |
+------------------------------------------------------------------------------------------+
| time="2025-02-03T10:54:00-06:00" level=info                                            |
| msg="To access the cluster as the system:admin user when using 'oc', run               |
| 'export KUBECONFIG=/root/tamil/igni/auth/kubeconfig'"                                 |
+------------------------------------------------------------------------------------------+
| time="2025-02-03T10:54:00-06:00" level=info                                            |
| msg="Access the OpenShift web-console here:                                            |
| https://console-openshift-console.apps.tamil.example.com"                               |
+------------------------------------------------------------------------------------------+
| time="2025-02-03T10:54:00-06:00" level=info                                            |
| msg="Login to the console with user: \"kubeadmin\", and password:                     |
| \"rtmvN-KV4bN-HcZse-Up34rg\""                                                           |
+------------------------------------------------------------------------------------------+
| time="2025-02-03T10:54:00-06:00" level=debug                                           |
| msg="Time elapsed per stage:"                                                          |
+------------------------------------------------------------------------------------------+
| time="2025-02-03T10:54:00-06:00" level=debug                                           |
| msg="    Infrastructure Pre-provisioning: 54s"                                         |
+------------------------------------------------------------------------------------------+
| time="2025-02-03T10:54:00-06:00" level=debug                                           |
| msg="Network-infrastructure Provisioning: 23s"                                        |
+------------------------------------------------------------------------------------------+
| time="2025-02-03T10:54:00-06:00" level=debug                                           |
| msg="               Machine Provisioning: 6m0s"                                        |
+------------------------------------------------------------------------------------------+
| time="2025-02-03T10:54:00-06:00" level=debug                                           |
| msg="                 Bootstrap Complete: 20m41s"                                      |
+------------------------------------------------------------------------------------------+
| time="2025-02-03T10:54:00-06:00" level=debug                                           |
| msg="                  Bootstrap Destroy: 37s"                                        |
+------------------------------------------------------------------------------------------+
| time="2025-02-03T10:54:00-06:00" level=debug                                           |
| msg="        Cluster Operators Available: 27m12s"                                      |
+------------------------------------------------------------------------------------------+
| time="2025-02-03T10:54:00-06:00" level=debug                                           |
| msg="           Cluster Operators Stable: 51s"                                         |
+------------------------------------------------------------------------------------------+
| time="2025-02-03T10:54:00-06:00" level=info                                            |
| msg="Time elapsed: 56m46s"                                                             |
+------------------------------------------------------------------------------------------+
Step 6: Log in to the cluster using the CLI
You can log in to your cluster as a default system user by exporting the cluster kubeconfig file. The kubeconfig file contains information about the cluster that is used by the CLI to connect a client to the correct cluster and API server. The file is specific to a cluster and is created during OpenShift Container Platform installation.
Note: To complete this step, you must have successfully deployed the OpenShift Container Platform and installed the oc CLI.
Export the
kubeadmincredentials:export KUBECONFIG=<installation_directory>/auth/kubeconfigFor
installation_directory, specify the path to the directory where you stored the installation files.Confirm that the cluster recognizes the machines:
 [root@localhost tamil]# oc get node
 NAME                                  STATUS   ROLES                                   AGE     VERSION
 tamil-mxpv5-master-0   Ready      control-plane,master,worker   6d14h   v1.29.10+67d3387
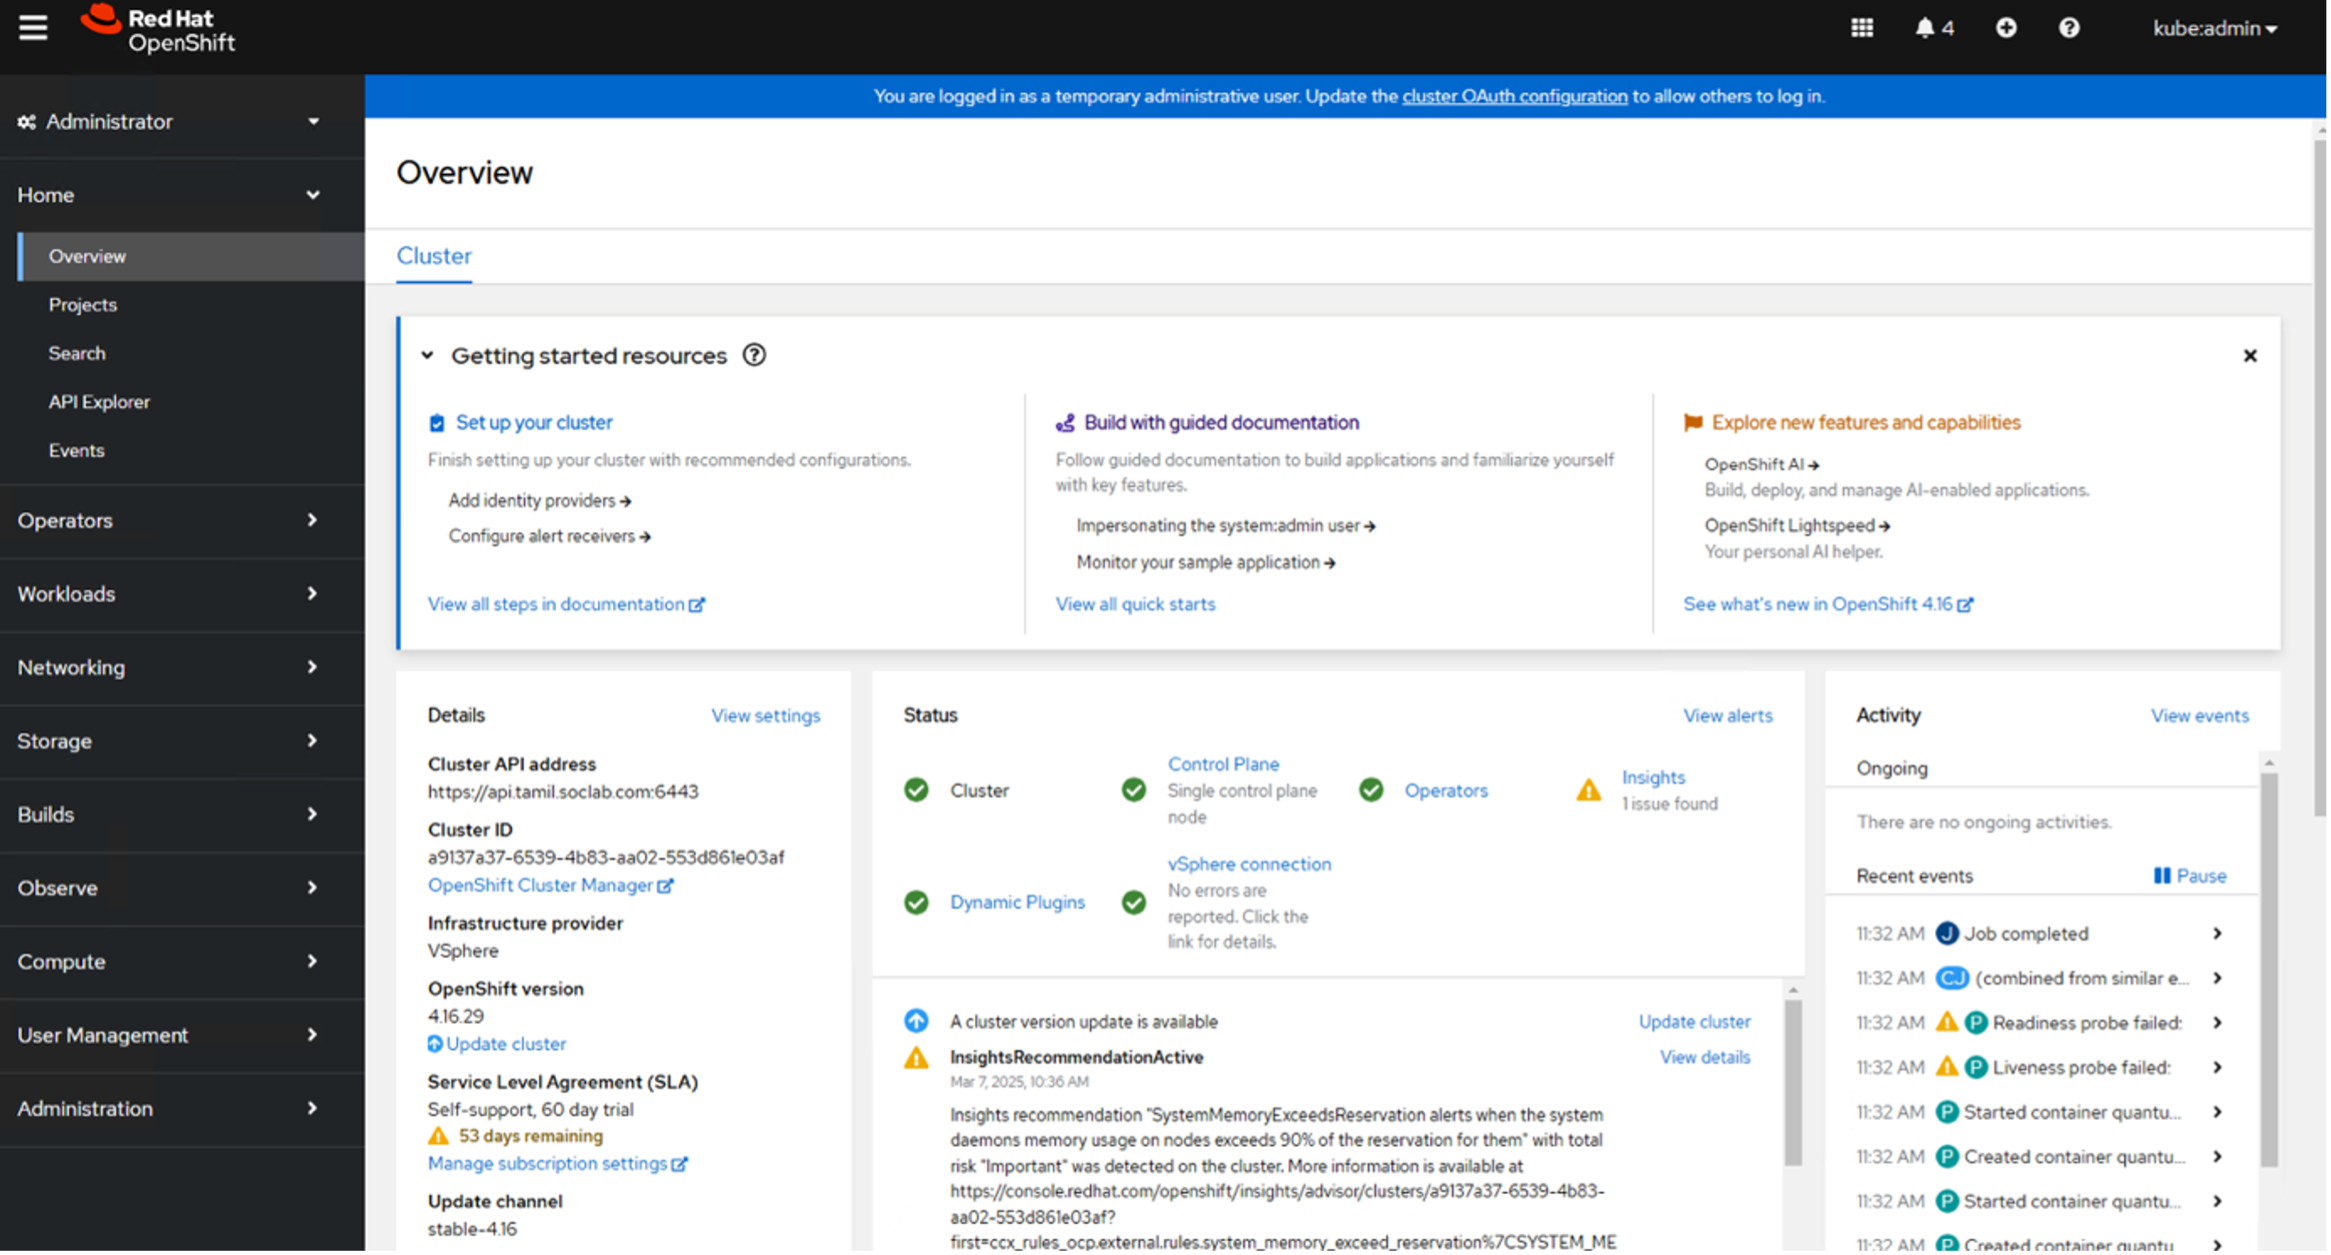
Step 7: Review the OpenShift dashboard
Review the Red Hat OpenShift dashboard, confirming your cluster details:
Step 8: Configure the image registry storage
The image registry operator is not initially available for platforms that do not provide default storage. After installation, you must configure your registry to use storage so that the registry operator is made available.
After installation, you must edit the image registry operator configuration to switch the managementState from Removed to Managed. When this is complete, you must configure storage.
To allow the image registry to use block storage types such as vSphere Virtual Machine Disk (VMDK) during upgrades as a cluster administrator, you can use the Recreate rollout strategy.
Note: Block storage volumes are supported but not recommended for use with the image registry on production clusters. An installation where the registry is configured on block storage is not highly available because the registry cannot have more than one replica.
Enter the following command to set the image registry storage as a block storage type, patch the registry so that it uses the Recreate rollout strategy, and runs with only 1 replica:
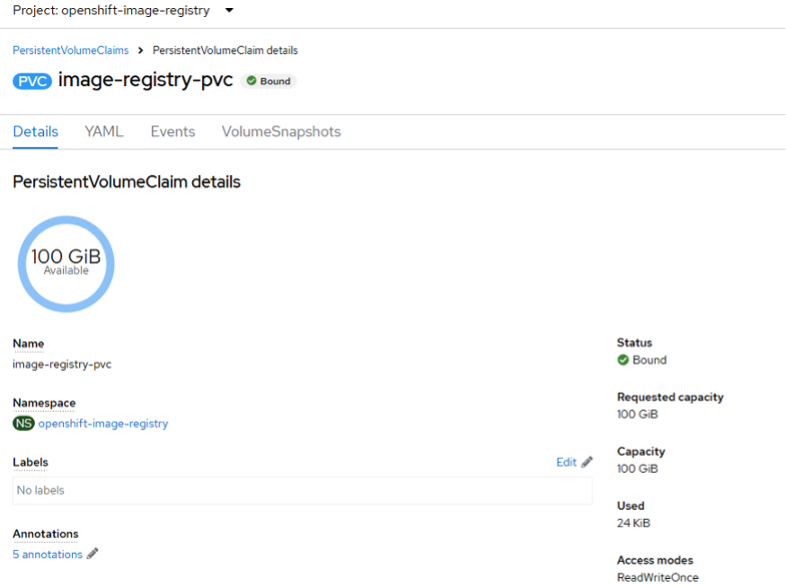
oc patch config.imageregistry.operator.openshift.io/cluster --type=merge -p '{"spec":{"rolloutStrategy":"Recreate","replicas":1}}'Create a Persistent Volume Claim for storage:
 kind: PersistentVolumeClaim
 apiVersion: v1
 metadata:
 name: image-registry-storage
 namespace: openshift-image-registry
 spec:
 accessModes:
 - ReadWriteOnce
 resources:
     requests:
     storage: 100Gi
 oc create -f pvc.yaml -n openshift-image-registry
Modify the registry configuration to use the new storage:
oc edit config.imageregistry.operator.openshift.io -o yaml
Example output
storage:
  pvc:
    claim: 1
Example image registry PVC
Part 2. Deploy IBM Guardium Data Security Center
The deployment described in this tutorial includes the installation of IBM Guardium Quantum Safe, which consists of three components. The detailed deployment process for Guardium Quantum Safe is similar to the Guardium Data Security Center deployment. You can find more details in the link below.
Be sure to review the Guardium Data Security Center system requirements and prerequisites.
Step 1: Download the Guardium Data Security Center CASE File
For instructions on downloading the CASE file, see Downloading the Guardium Data Security Center CASE file and set up your environment for dependencies in the Guardium Data Security Center documentation.
Step 2: Install Guardium Data Security Center online
To install Data Security Center online, see Manually installing Guardium Data Security Center online with an embedded Db2u in the documentation.
Step 3: Create a Guardium Data Security Center instance using a custom resource
For reference, see this Guardium Data Security Center Cookbook custom resource YAML file.
- Apply the example custom resource YAML file to create the Guardium Data Security Center instance:
oc apply -f <guardium-data-security-center-custom-resource-example.yaml>
Example output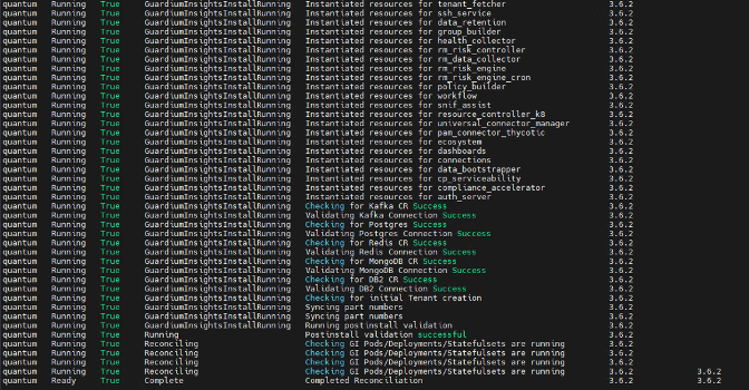
- Verify the status of the deployed instance:
oc get guardiumdatasecuritycenter
Example
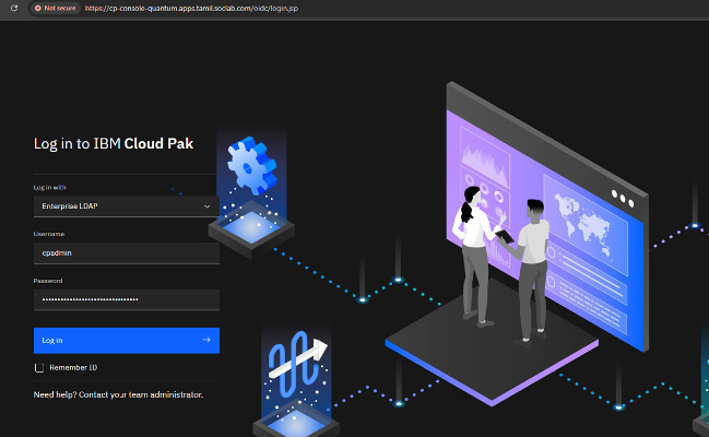
Guardium Data Security Center login page
You can now navigate to the exposed route for the Guardium Data Security Center UI. You should see the following login screen:
Step 4: Configure LDAP authentication
To configure LDAP authentication, see this guide to setting up LDAP authentication in Guardium Data Security Center.
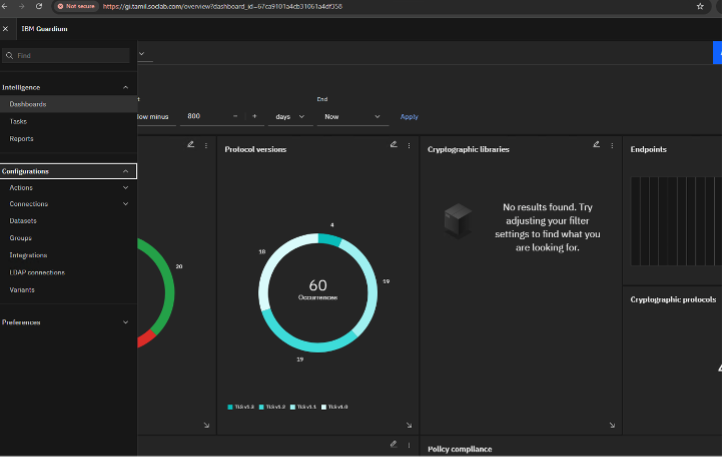
Guardium Data Security Center Dashboard
When you have successfully logged in to Guardium Data Security Center, you’ll see the main dashboard. This is your control center for data activity monitoring, policy management, and compliance reporting
Summary and next steps
In this tutorial, you have:
- Deployed a Red Hat OpenShift 4.16 single-node cluster on VMware vSphere
- Installed necessary tools including the OpenShift CLI and created install configs
- Configured DHCP, DNS, and storage (including image registry PVC)
- Deployed and verified the IBM Guardium Data Security Center v3.6.2 components using Operator Lifecycle Manager and custom resources
- Optionally integrated LDAP authentication for centralized access control
Your environment is now ready to begin data security operations using Guardium. You can use the Guardium Data Security Center dashboard to:
- Monitor data access and behavior
- Define policies for sensitive data protection
- Trigger alerts and generate compliance reports
To continue to expand your knowledge and skills, check out these additional IBM Developer resources: