Tutorial
Use MongoDB with Node.js
Get started with MongoDB's document-oriented paradigm in Node.jsSo far in this Start coding with Node.js learning path we've used SQLite3, a relational database, as the datastore for the example application. In this tutorial, we convert the application to use MongoDB, one of the most popular NoSQL databases for Node.js applications.
NoSQL refers to a type of database that is an alternative to the relational database. The three types of NoSQL databases are as follows:
- Key/value store: Popular examples include Apache Cassandra and Redis.
- Document-oriented: Popular examples include MongoDB and Cloudant.
- Graph databases: A popular example is Apache Giraph.
MongoDB is a document-oriented database that uses a binary JSON format (called BSON) for data storage. Like other NoSQL databases, MongoDB has been popularized by the demand for big data.
In this tutorial, you'll set up MongoDB as the database for the Shopping List application, then perform a series of common database operations using MongoDB. You'll see how these operations compare between SQLite 3 and MongoDB. You'll also get a quick introduction to Mongoose, a Node package that is often used in tandem with MongoDB.
When you've completed this tutorial, you'll be prepared to use the example application as a springboard to learn more about MongoDB and Mongoose.
Get the code
The code you need to follow along with the examples in this tutorial is in my GitHub repo.
About this tutorial
For this tutorial, I converted the Shopping List application from "Create your first Node.js application" and "Using Express.js for Node applications" to use MongoDB. The code is in the GitHub repo for the tutorial.
I recommend reading through the material first, pulling up the code examples in your editor. Once you've got an overview, you will be ready to set up MongoDB. If you're planning to use MongoDB locally (as I have for this tutorial) you might need to install it. If you already have a remote MongoDB installation, just change the appSettings.mongodb_url property in ./config/app-settings.js to point to your remote server.
Next, fire up the application from a terminal window or command prompt:
- Open a terminal window and navigate to the
Unit-12directory in the course's GitHub repo. - Run
npm installto install the necessary packages from the npm registry. - If you're running MongoDB locally, start the MongoDB daemon:
npm run start-mongodin its own dedicated terminal window. - Open a second terminal window, navigate to the
Unit-12directory, and load the data into MongoDB:npm run load-db(this takes several minutes to run). - Start the application:
npm start. - Point your browser to
http://localhost:3000and play around with the application.
Now you can begin working through the material in the tutorial, using the source code and running application as a reference. As you play with the application, see if you can match the screens in the UI with the modules, pages, and other source artifacts in use, so you can learn how they work.
MongoDB documentation for Node
At first, MongoDB's documentation can be confusing for Node users. The API reference docs for any particular API function are geared toward how that API function is used in the MongoDB shell, not how you will use it in your Node applications.
Read the MongoDB docs for overall concepts, but see the MongoDB Node driver docs for API-specific information.
Also note that just about every API function takes an argument that allows you to specify a callback when the asynchronous method finishes, or if the function returns a promise. If you're reading what you think are the Node API docs and there is no mention of the callback or returned promise, you are not reading the right docs!
This is especially true when searching the web: many of the "solutions" you'll find are meant for the MongoDB shell, but won't work in your Node code. You will need to add the callback or a then() (to handle the promise) in order for these solutions to work in Node.
Set up MongoDB
For this tutorial, I recommend using a local, unsecured installation, because it's a simple and easy way to get your feet wet with MongoDB.
There are several ways to install MongoDB on your computer. Go to the MongoDB community downloads page and you'll see a screen that looks like Figure 1.
Figure 1. A screenshot of the MongoDB community downloads page
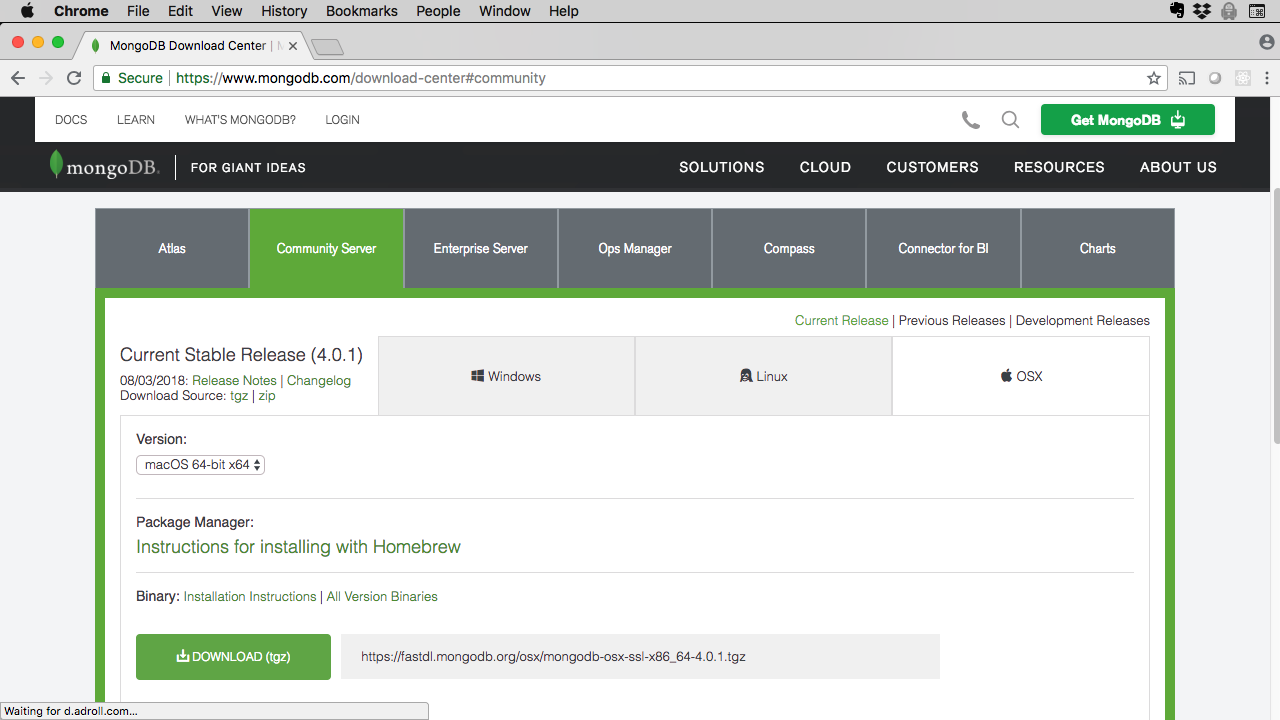
Select the tab that corresponds to your platform and follow the appropriate instructions below.
MacOS
For MacOS you have two choices:
- Use a tarball (which will be called something like
mongodb-osx-ssl-x86_64-4.0.1.tgz) - Use Homebrew (recommended)
If you choose the tarball route, click on the DOWNLOAD (tgz) button to start the download.
If you choose to use Homebrew (which I recommend), go to a terminal window and enter brew install mongodb, then sit back and watch the installation. If you need to install Homebrew, go to the Homebrew website for installation instructions.
You will have to complete some additional steps to get your MongoDB installation set up properly. See the MongoDB MacOS installation tutorial for those instructions.
Windows
Select the Windows tab, and click the DOWNLOAD (msi) to start the download.
You will have to complete some additional steps to get your MongoDB installation setup properly. See the MongoDB Windows installation tutorial for those instructions.
Linux
Select the Linux tab, and click the DOWNLOAD (tgz) button to start the download.
You will have to complete some additional steps to get your MongoDB installation setup properly. See the MongoDB Linux installation tutorial for those instructions.
The Shopping List application
I've converted the Shopping List example application to use MongoDB, and we'll go through those changes together. The implementation is pretty simple, and you'll find most of the changes in the application's data access object (DAO) implementations:
lists-dao-mongodb.jsis the MongoDB-specific DAO implementation for thelistscollection.items-dao-mongodb.jsis the MongoDB-specific DAO implementation for theitemscollection.
In the next sections, we'll go over what's changed in these two modules. Before we do that, let's take a minute to consider the shift from a relational paradigm to a document-oriented one.
Tables versus collections
The atomic unit of persistence when using an SQL database is the row. In MongoDB, a document-oriented database, this concept maps to a document. Most developers are accustomed to thinking of persistence atoms in our applications as records, so mapping from a row to a document is not much of a stretch.
Things can get more dicey when it comes to tables. In an SQL database, records are stored as rows of data in tables, and tables relate to one another. In a document-oriented storage system like MongoDB, those records become documents in a collection. Although they can relate to each other, collections are more independent than tables, and often contain embedded documents.
Naming is probably one of the first changes you'll notice in the Shopping List application:
- The
itemtable becomes theitemscollection. - The
brandtable becomes thebrandscollection. - The
shopping_listtable becomes theshoppingListscollection.
Also note that we no longer need a join table between a shopping_list and its items. Each of MongoDB's shoppingLists documents contains an array of the shopping list items and their document IDs (references are to the ObjectID of the items, of course, not copies of the items).
That's the big picture. Now let's look at some code.
Connecting to MongoDB
The MongoDB daemon (called mongod) has to be running before you can connect to it.
Once MongoDB is running, it's fairly simple to connect. First, you call mongodb.MongoClient.connect() passing the URL to the MongoDB instance. The call is asynchronous. If the function call succeeds, you are passed a reference to the MongoClient, which you can use to retrieve a reference to the database you want to use. Like most database management systems, MongoDB supports multiple databases running at the same time.
The code for connecting to MongoDB is almost boilerplate, so I wrote it once in ./utils/utils.js. Any data access object (DAO) that needs this code will call a method that returns a promise. When resolved, that promise will return a reference to the database.
Listing 1 shows the dbConnect() function used to connect to MongoDB.
Listing 1. dbConnect() from ./utils/utils.js
const mongodb = require('mongodb');
.
.
let mongodbClient;
let db;
.
.
function dbConnect() {
    return new Promise((resolve, reject) => {
        if (db) {
            resolve(db);
        } else {
            mongodb.MongoClient.connect(appSettings.mongodb_url, function(err, client) {
                if (err) {
                    logger.error('Error connecting to the MongoDB URL: ' + appSettings.mongodb_url);
                    reject(err);
                }
                mongodbClient = client;
                db = mongodbClient.db(appSettings.mongodb_db_name);
                // Make sure connection closes when Node exits
                process.on('exit', (code) => {
                    dbClose();
                })
                resolve(db);
            });
        }
    });
}
Once the connection is made, the promise that was returned to the caller will be resolved with a reference to the database.
Also note that:
- The
dbConnect()function stores a reference to theMongoClientobject, so it can be used later to close any open database connections. - A
process.on('exit')handler is installed to close the MongoDB connection when the Node process exits.
To close the database connection, call utils.dbClose(), as shown in Listing 2.
Listing 2.dbClose() from ./utils/utils.js
function dbClose() {
    if (mongodbClient && mongodbClient.isConnected()) {
        mongodbClient.close();
    }
}
Both of the MongoDB DAO implementations use an Immediately Invokable Function Expression IIFE. These functions initialize a connection to MongoDB when they are loaded, thus avoiding the latency of connecting and disconnecting for each request (see: MongoDB recommendation).
In Listing 3, an IIFE is used to connect to MongoDB as soon as the module is loaded.
Listing 3. An IIFE from lists-dao-mongodb.js
// MongoDB reference
let db;

// Get a DB connection when this module is loaded
(function getDbConnection() {
    utils.dbConnect().then((database) => {
        db = database;
    }).catch((err) => {
        logger.error('Error while initializing DB: ' + err.message, 'lists-dao-mongogb.getDbConnection()');
    });
})();
The database reference is stored for easy use by other methods in lists-dao-mongodb.
Querying MongoDB collections
In MongoDB, records are called documents. Documents are stored in collections, which are similar to SQL tables.
There are a few ways to select data from a collection.
The first, and easiest, is to simply select all documents in the collection. To do that, you obtain a reference to the collection you want to select from, then use the find() function with an empty query object, which tells MongoDB what to select.
Listing 4 shows the fetchAll() function from the lists-dao-mongodb module.
Listing 4. The fetchAll() function selects all shopping list documents in the database
 01 function fetchAll() {
 02     return new Promise((resolve, reject) => {
 03         let lists = db.collection('shoppingLists');
 04         lists.find({}).toArray((err, documents) => {
 05             if (err) {
 06                 logger.error('Error occurred: ' + err.message, 'fetchAll()');
 07                 reject(err);
 08             } else {
 09                 logger.debug('Raw data: ' + JSON.stringify(documents), 'fetchAll()');
 10                 resolve({ data: JSON.stringify(documents), statusCode: (documents.length > 0) ? 200 : 404 });
 11             }
 12         });
 13     });
 14 }
Note that you first obtain a reference to the shoppingLists collection (line 3), then call the find() function on that reference (line 4).
The query parameter passed to find() is an empty JSON object ({}), which tells MongoDB to "select everything" (or if you prefer, "filter nothing"). MongoDB returns a Cursor. Calling toArray() on the Cursor converts it to an array. If that is successful, the resulting documents reference (the second argument to the callback in line 4) contains a JSON object of all the shopping lists in the database.
The remainder of the code should look familiar from "Create your first Node.js application" and "Using Express.js for Node applications": the JSON documents are stringified (usingstringify()) and returned to the caller, along with a status code reflecting the results of the query.
MongoDB's find() with query
Selecting all documents is easy enough, but what if you want to apply some kind of filter? Let's say you're looking for all Items that have a specific set of words in their itemDescription property. Listing 5 shows how to search using the find() function again, but this time with a query.
Listing 5. The findByDescription() function from the items-dao-mongodb module
 01 function findByDescription(partialDescription) {
 02     return new Promise((resolve, reject) => {
 03         let items = db.collection('items');
 04         let search = `.*${partialDescription}.*`;
 05         items.find({ itemDescription: { $regex: search, $options: 'i' } }).toArray((err, documents) => {
 06             if (err) {
 07                 reject(err);
 08             } else {
 09                 resolve({ data: JSON.stringify(documents), statusCode: (documents.length > 0) ? 200 : 404 });
 10             }
 11         });
 12     });
 13 }
In this example, you first obtain a reference to the collection (line 3), then call the find() function (line 5) passing the query, which looks like this:
{ itemDescription: { $regex: search, $options: 'i' } }
The query is a JSON object that says, "do a case-insensitive regular expression match of the itemDescription property with the search string .*${partialDescription}.*".
Assuming there is no error, the Cursor containing documents that match the query will be converted to an array. The stringified JSON object will then be returned to the caller.
The findOne() function
If you wanted a single document from a query, you could use MongoDB's findOne() function, as shown in Listing 6.
Listing 6. The findById() function in the items-dao-mongodb module
function findById(id) {
    return new Promise((resolve, reject) => {
        let items = db.collection('items');
        items.findOne({ _id: new mongodb.ObjectID(id) }).then((document) => {
            if (document) {
                resolve({ data: JSON.stringify(document), statusCode: 200});
            } else {
                let message = 'No document matching id: ' + id + ' could be found!';
                logger.error(message, 'findById()');
                reject(message);
            }
        }).catch((err) => {
            logger.error('Error occurred: ' + err.message, 'findById()');
            reject(err);
        });
    });
}
The findOne() function used in Listing 6 returns a promise. When resolved, the promise returns zero or one matching documents. In this case, if no match is found, the promise returned by findById() is rejected. If the call succeeds and the document is located, it is stringified and returned to the caller, along with HTTP status code 200.
Creating and updating in MongoDB
The Shopping List application provides functions for creating and updating shopping lists and shopping list items, so our conversion to MongoDB has to provide all of these capabilities. In the next sections you'll see how MongoDB performs key database operations in the Shopping List application.
Creating a new collection element
The Shopping List application provides the capability to create new shopping lists. In MongoDB, this capability is provided by the create() function in the lists-dao-mongodb module. In Listing 7,create() is used to create a new element in the shoppingLists collection.
Listing 7. The create() function in the lists-dao-mongodb module
  01 function create(description) {
  02     return new Promise((resolve, reject) => {
  03         let lists = db.collection('shoppingLists');
  04         let listId = mongodb.ObjectId();
  05         let whenCreated = Date.now();
  06         let item = {
  07             _id: listId,
  08             id: listId,
  09             description: description,
  10             whenCreated: whenCreated,
  11             whenUpdated: null
  12         };
  13         lists.insertOne(item, (err, result) => {
  14             if (err) {
  15                 logger.error('Error occurred: ' + err.message, 'create()');
  16                 reject(err);
  17             } else {
  18                 resolve({ data: { createdId: result.insertedId }, statusCode: 201 });
  19             }
  20         });
  21     });
  22 }
After getting a reference to the shoppingLists collection (line 3) and creating a new MongoDB ObjectId (line 4), the JSON object representing the new shopping list document is created (lines 6 through 12). Then the insertOne() function is called on the collection to insert a single record (line 13). If it succeeds, the promise is resolved and the data is returned to the caller (line 18).
MongoDB's $lookup (like a join)
At times you will need to reference one collection from another.
In "Using Express.js for Node applications", the Shopping List application uses a shopping_list_item table to facilitate the relationship between shopping_list and item.
In the converted application shown here, a document in the shoppingLists collection contains the items that belong to it in an array.
Below is a raw shopping list document containing two items (in the items array that contains the ObjectIds of the contained items):
{
  "_id": "5b69be197f7eac7bb476b41d",
  "id": "5b69be197f7eac7bb476b41d",
  "description": "My Shopping List",
  "whenCreated": 1533656601372,
  "whenUpdated": null,
  "items": [
    "5b68c8201131e61640f07f5a",
    "5b68c8291131e61640f0831f"
  ]
}
In order to join this document to the items collection where the items are stored, MongoDB provides a collection function called aggregate(). This function lets you create an aggregation pipeline for processing the data in stages. During each stage, the document is transformed further.
The Shopping List application uses the findByIdWithAllItems() function to perform this join, resolving the ObjectIds from the shopping list document to retrieve detail data for the referenced items.
Listing 8. The findByIdWithAllItems() function
 01 function findByIdWithAllItems(id) {
 02     return new Promise((resolve, reject) => {
 03         let lists = db.collection('shoppingLists');
 04         lists.aggregate([
 05             { $unwind: '$items' },
 06             { $match: { _id: new mongodb.ObjectID(id) } },
 07             { $lookup: { from: 'items', localField: 'items', foreignField: '_id', as: 'items'} }
 08         ], (err, cursor) => {
 09             if (err) {
 10                 logger.error('Error occurred: ' + err.message, 'findById()');
 11                 reject(err);
 12             } else {
 13                 cursor.toArray((err, results) => {
 14                     if (err) {
 15                         reject(err);
 16                     } else {
 17                         logger.debug('Raw response: ' + JSON.stringify(results), 'findByIdWithAllItems()');
 18                         resolve({ data: JSON.stringify(results), statusCode: (results) ? 200 : 404  });
 19                     }
 20                 });
 21             }
 22         });
 23     });
 24 }
The call to aggregate() (line 4) takes two parameters:
- An array of aggregation pipeline stages (lines 5-7).
- A callback function (line 8) that is passed a
Cursor, which you can use to process the data.
The pipeline stages are as follows:
- First, the
$unwindstage is used to pair each element in theitemsarray with the properties of the shopping list document the array belongs to (essentially, de-normalizing the data). - Next, the
$matchstage filters out documents from theshoppingListcollection, keeping only those whoseObjectIdmatches theidpassed to thefindByIdWithAllItems()function (that is, the shopping list'sObjectId). - Finally, the $lookup stage joins the
itemscollection (specified by thefromproperty) to each element in theitemsarray (localField) on the_id(foreignField) field.
After converting the Cursor to an array, the result is a deconstructed array that looks like this:
[
  {
    "_id": "5b69be197f7eac7bb476b41d",
    "id": "5b69be197f7eac7bb476b41d",
    "description": "My Shopping List",
    "whenCreated": 1533656601372,
    "whenUpdated": null,
    "items": [
      {
        "_id": "5b68c8201131e61640f07f5a",
        "id": "5b68c8201131e61640f07f5a",
        "upc": "084253240499",
        "itemDescription": "Imagine Broth Free Range Chicken Organic",
        "brandId": "5b68c7e01131e61640f04e41"
      }
    ]
  },
  {
    "_id": "5b69be197f7eac7bb476b41d",
    "id": "5b69be197f7eac7bb476b41d",
    "description": "My Shopping List",
    "whenCreated": 1533656601372,
    "whenUpdated": null,
    "items": [
      {
        "_id": "5b68c8291131e61640f0831f",
        "id": "5b68c8291131e61640f0831f",
        "upc": "858328204491",
        "itemDescription": "Wolfgang Puck Organic Free Range Chicken Soup",
        "brandId": "5b68c7e01131e61640f05476"
      }
    ]
  }
]
Now the caller has an array of items, each with a description, upc and so forth, ready for display in the UI.
Updating a collection element
The Shopping List application provides the ability to edit a shopping list, so the system must provide the capability to update a shopping list document. MongoDB's update() function in the lists-dao-mongodb module does just that.
Listing 9. The update() function in the lists-dao-mongodb module
01 function update(id, description) {
02     return new Promise((resolve, reject) => {
03         let lists = db.collection('shoppingLists');
04         lists.updateOne({ _id: new mongodb.ObjectID(id) },
05             { $set: { description: description, whenModified: Date.now() } },
06             (err, result) => {
07                 if (err) {
08                     logger.error('Error occurred: ' + err.message, 'update()');
09                     reject(err);
10                 } else {
11                     resolve({ data: { rowsAffected: result.modifiedCount }, statusCode: 200 });
12                 }
13             }
14         );
15     });
16 }
This method uses the updateOne() function (line 4), which takes three parameters:
- A filter used to determine which document gets updated. In this case, it's the one whose
_idmatches theidparameter toupdate(). - The update operator (line 5) to apply. In this case the
$setoperator which tells MongoDB which fields to update, just likeSETdoes in an SQLUPDATEstatement. - A callback function (line 6) to process the results,
If an error occurs, the err object will be logged and the promise rejected.
If the update is successful, the result is an updateWriteOpResult object, whose modifiedCount property contains the number of records that were updated. (Note this this object is returned as the rowsAffected attribute for backward compatibility with the controller layer of the Shopping List's architecture.)
Additional operations
The DAO modules perform quite a few more operations, which I'll leave for you to study and learn about on your own. One such example is the addItem() function in lists-dao-mongodb.js.
Listing 10. The addItem() function in the lists-dao-mongodb module
function addItem(listId, itemId) {
    return new Promise((resolve, reject) => {
        let lists = db.collection('shoppingLists');
        lists.updateOne({ _id: new mongodb.ObjectID(listId) },
            { $push: { items: new mongodb.ObjectID(itemId) }},
            (err, document) => {
                if (err) {
                    logger.error('Error occurred: ' + err.message, 'findById()');
                    reject(err);
                } else {
                    resolve({ data: JSON.stringify(document), statusCode: (document) ? 200 : 404 });
                }
            }
        );
    });
}
This function uses the $push update array operator to add an item's itemId (its ObjectId) to the items array in the shopping list document specified by listId.
I encourage you to study the source code and familiarize yourself with it. Your time studying these operations will be well spent!
Mongoose
Before closing out this tutorial, I want to quickly introduce you to Mongoose, a Node package frequently used in tandem with MongoDB.
Mongoose is an object data modeling (ODM) library that provides a layer of abstraction above the core MongoDB API. Simply put, Mongoose makes it easier to work with MongoDB by allowing you to think in terms of objects rather than documents.
If you checked out the example application's models directory earlier, you may have noticed a few files that seemed out of place:
brand-schema.jsis the Mongoose schema definition forbranddocuments.item-schema.jsis the Mongoose schema definition foritemdocuments.items-dao-mongoose.jsis the Mongoose-specific DAO implementation for working with theitemscollection.
Mongoose schema definitions (especially simple ones like these) are remarkably readable. Consider the brand schema definition:
Listing 11. The brand Mongoose schema definition
const mongoose = require('mongoose');

let Schema = mongoose.Schema;

let brandSchema = new Schema({
    _id: { type: ObjectId, required: true },
    id: { type: ObjectId, required: true },
    description: { type: String, required: true },
    manufacturer: { type: String, required: false },
    address: { type: String, required: false },
    website: { type: String, required: false }
});

module.exports = mongoose.model('Brand', brandSchema);
And here's the item schema:
Listing 12. The item Mongoose schema definition
const mongoose = require('mongoose');

let Schema = mongoose.Schema;

let itemSchema = new Schema({
    _id: { type: Schema.ObjectId, required: true },
    id: { type: Schema.ObjectId, required: true },
    itemDescription: { type: String, required: true },
    upc: { type: String, required: true },
    brandId: { type: Schema.ObjectId, ref: 'Brand', required: true }
});

module.exports = mongoose.model('Item', itemSchema);
See the Mongoose schema documentation if you're interested in learning more about Mongoose schema definitions.
I've also created a Mongoose-specific DAO implementation of the item-dao "interface" that you can plug into the application with one line of code in item-dao.js. (I'm leaving that as an exercise to complete on your own, if you so choose.)
If you like what you see with Mongoose and want to go a little further, you could build on the item examples I've provided, replacing the native MongoDB lists DAO implementations with Mongoose implementations instead.
In any case, you should definitely check out Mongoose. It makes working with MongoDB much easier.
Conclusion
This tutorial offered:
- A brief overview of MongoDB.
- Instructions for installing MongoDB locally for your platform.
- A quick introduction to MongoDB operations in the Shopping List application.
- A brief introduction to Mongoose, including code examples to encourage further exploration.
Be sure to play around with the Shopping List application for this tutorial, and watch the video below to see more of the MongoDB API in action. I've introduced some key operations with MongoDB, but there's a lot more to learn.
Video
In the following video I'll show you how to use MongoDB and how I modified the Shopping List application to use it.
