Tutorial
Secure app secrets and certificates using shift-left security practices with HashiCorp Vault and IBM Bob
Detect leaked credentials with Vault Radar, store secrets in Vault, and automate code refactoring using the Vault MCP Server in IBM BobBefore developers deploy applications to production, they must ensure credentials are not hardcoded and communications are secured with certificate authority (CA) infrastructure. Security audits often identify exposed passwords, API keys, and certificates in configuration files. By implementing shift-left security practices, Vault Radar detects these vulnerabilities and then IBM Bob remediates them automatically early in the development lifecycle.
In this tutorial, you learn how to:
Use HashiCorp Vault Radar to scan repositories and detect exposed credentials, API keys, and passwords.
Use IBM Bob with the Vault MCP Server to automate code refactoring, securely store secrets, and manage certificates.
Use a HashiCorp Vault Dedicated cluster to centrally manage secrets and certificates throughout the application lifecycle.
Architecture of code protection workflow with shift-left security
The following flowchart illustrates the security remediation process, showing how HashiCorp Vault Radar, IBM Bob, and HashiCorp Vault Dedicated work together to identify, remediate, and manage secrets and certificates throughout the application lifecycle to have secure code, ready for production deployment.
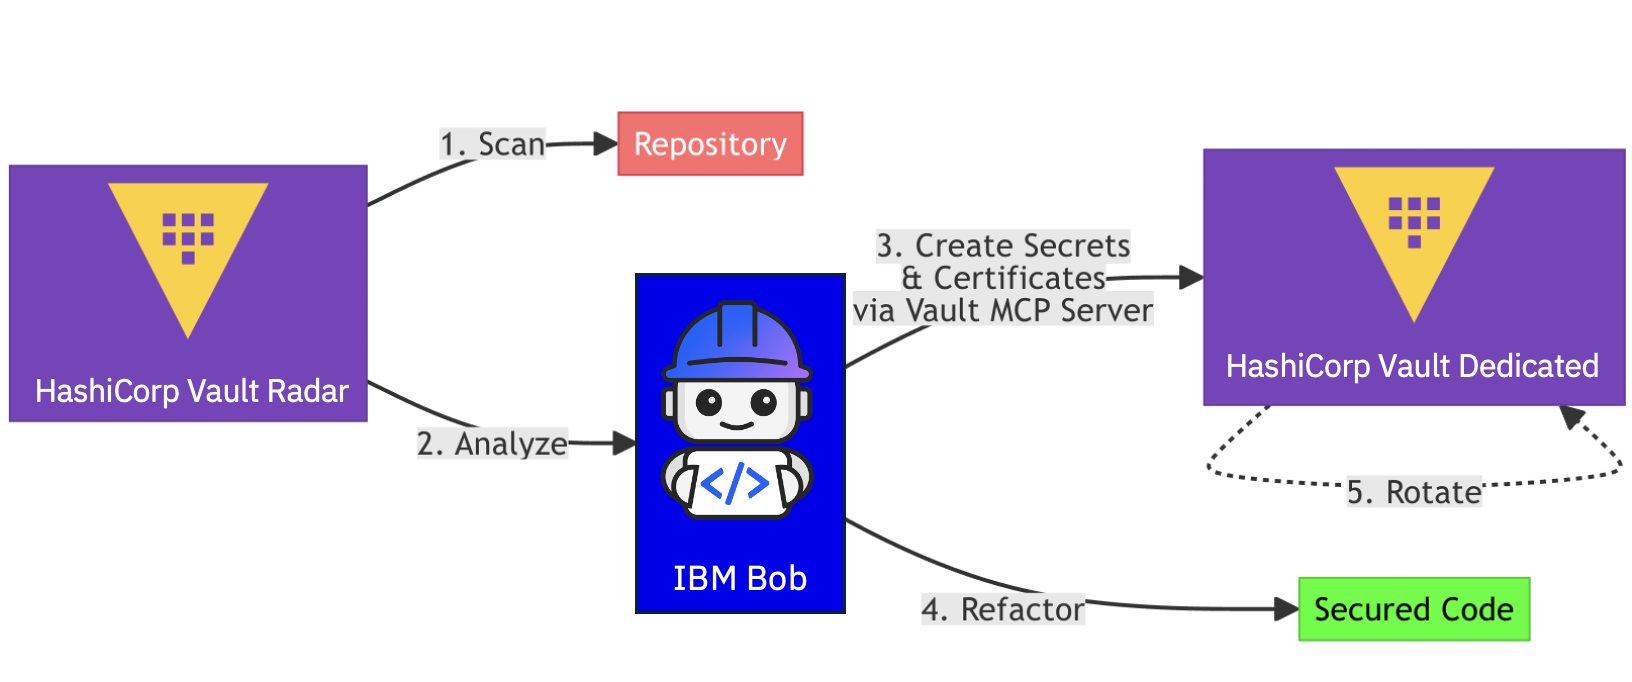
These are the key steps in the flowchart:
Scan repository: Vault Radar scans the repository to identify unmanaged and leaked credentials, personally identifiable information (PII), and non-inclusive language.
Analyze findings: Bob analyzes the scan results to understand the security issues that need remediation.
Store secrets and issue certificates: Bob uses Vault MCP Server to create secrets in Vault Dedicated, storing credentials, service URLs, and configuration values. Bob also issues and manages TLS certificates through the Vault Public Key Infrastructure (PKI) secrets engine.
Refactor code: Bob refactors the codebase to retrieve secrets and configuration from Vault at runtime, and implements HTTPS with Vault-issued certificates.
Rotate secrets: Vault Dedicated enables rotation and updates of secrets and certificates without requiring code changes.
Prerequisites
IBM Bob installed. Sign up for a free trial for IBM Bob.
HashiCorp Cloud Platform. Sign up for a free trial account for HashiCorp Cloud Platform.
GitHub account. Generate a new personal access (classic) token in the Developer Settings of your GitHub account.
- Select the following scopes:
repo*,read:org*,admin:repo_hook,admin:org_hook, andread:user.
- Select the following scopes:
Podman or Docker installed.
Step 1. Create a Vault Dedicated cluster
In this step, you create a Vault Dedicated cluster on HashiCorp Cloud Platform use it to store and control access to tokens, passwords, certificates, and encryption keys.
Sign in to your HashiCorp Cloud account.
If you do not have an organization, create an organization.
In the left navigation menu on the HashiCorp Cloud Platform home page, click Vault Dedicated, and then click Key-value secrets.
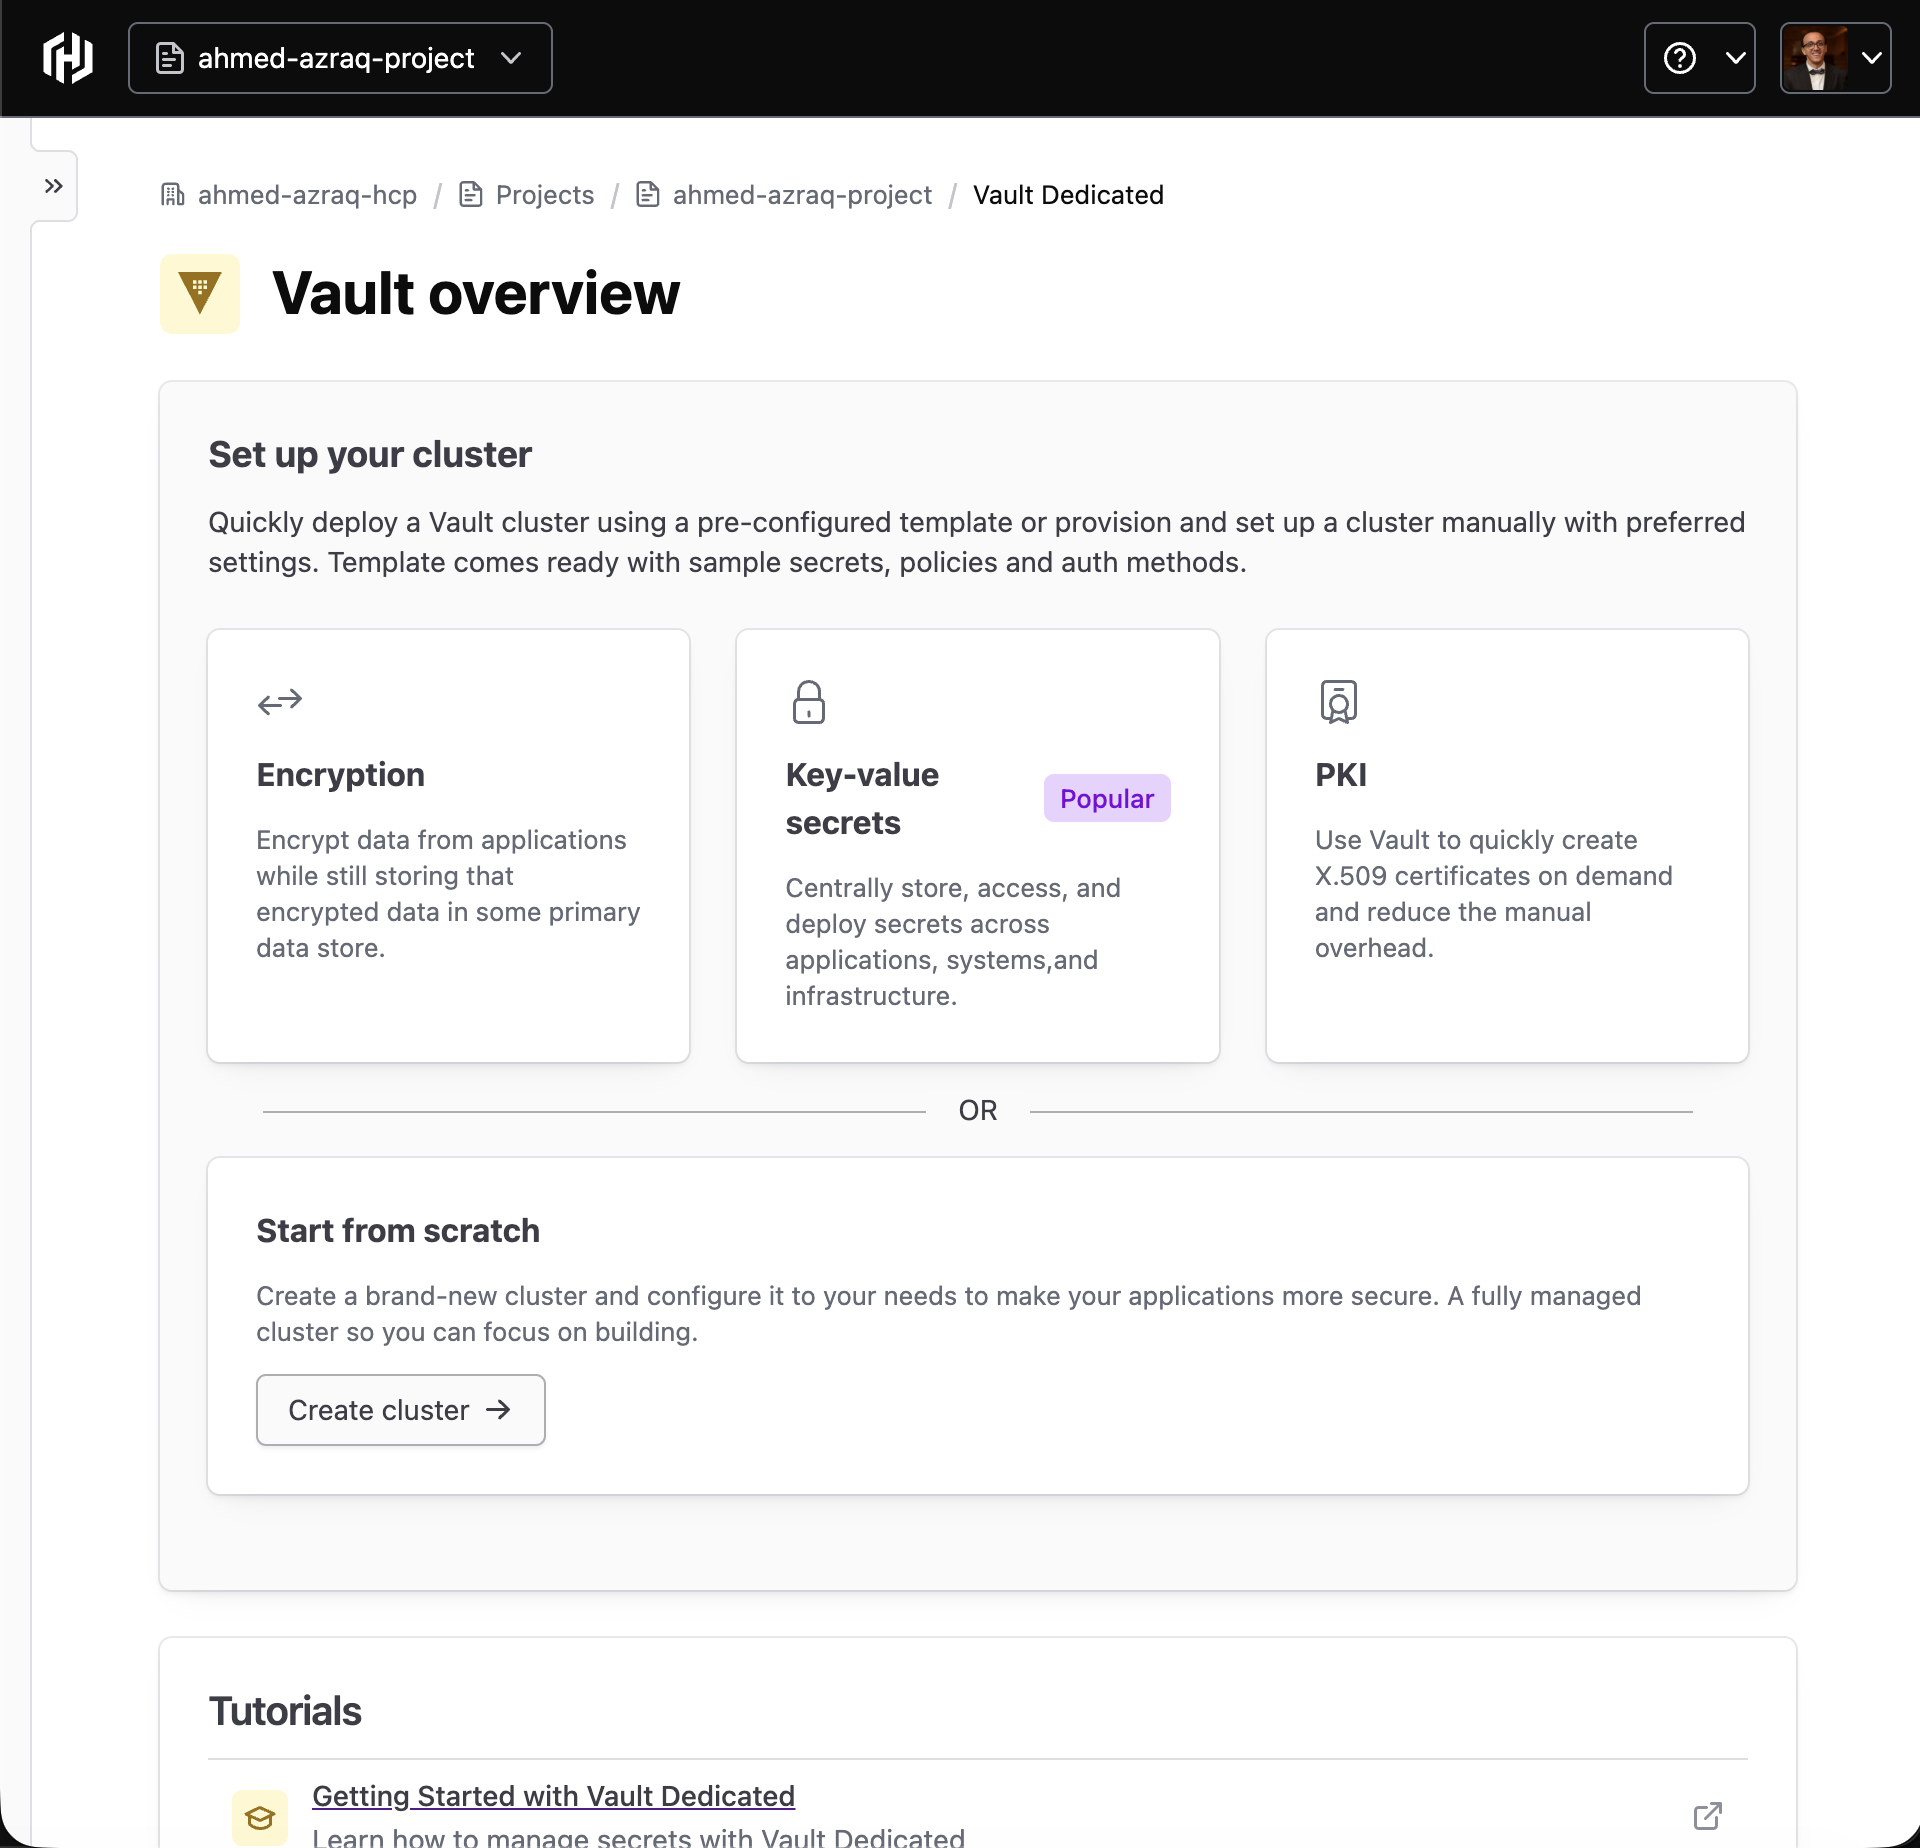
Configure the cluster settings, you can proceed with the default selection of Development / Extra Small cluster tier, and then click Create cluster. Cluster creation takes several minutes.
Note: At time of writing the tutorial, the free trial comes with a free credit.
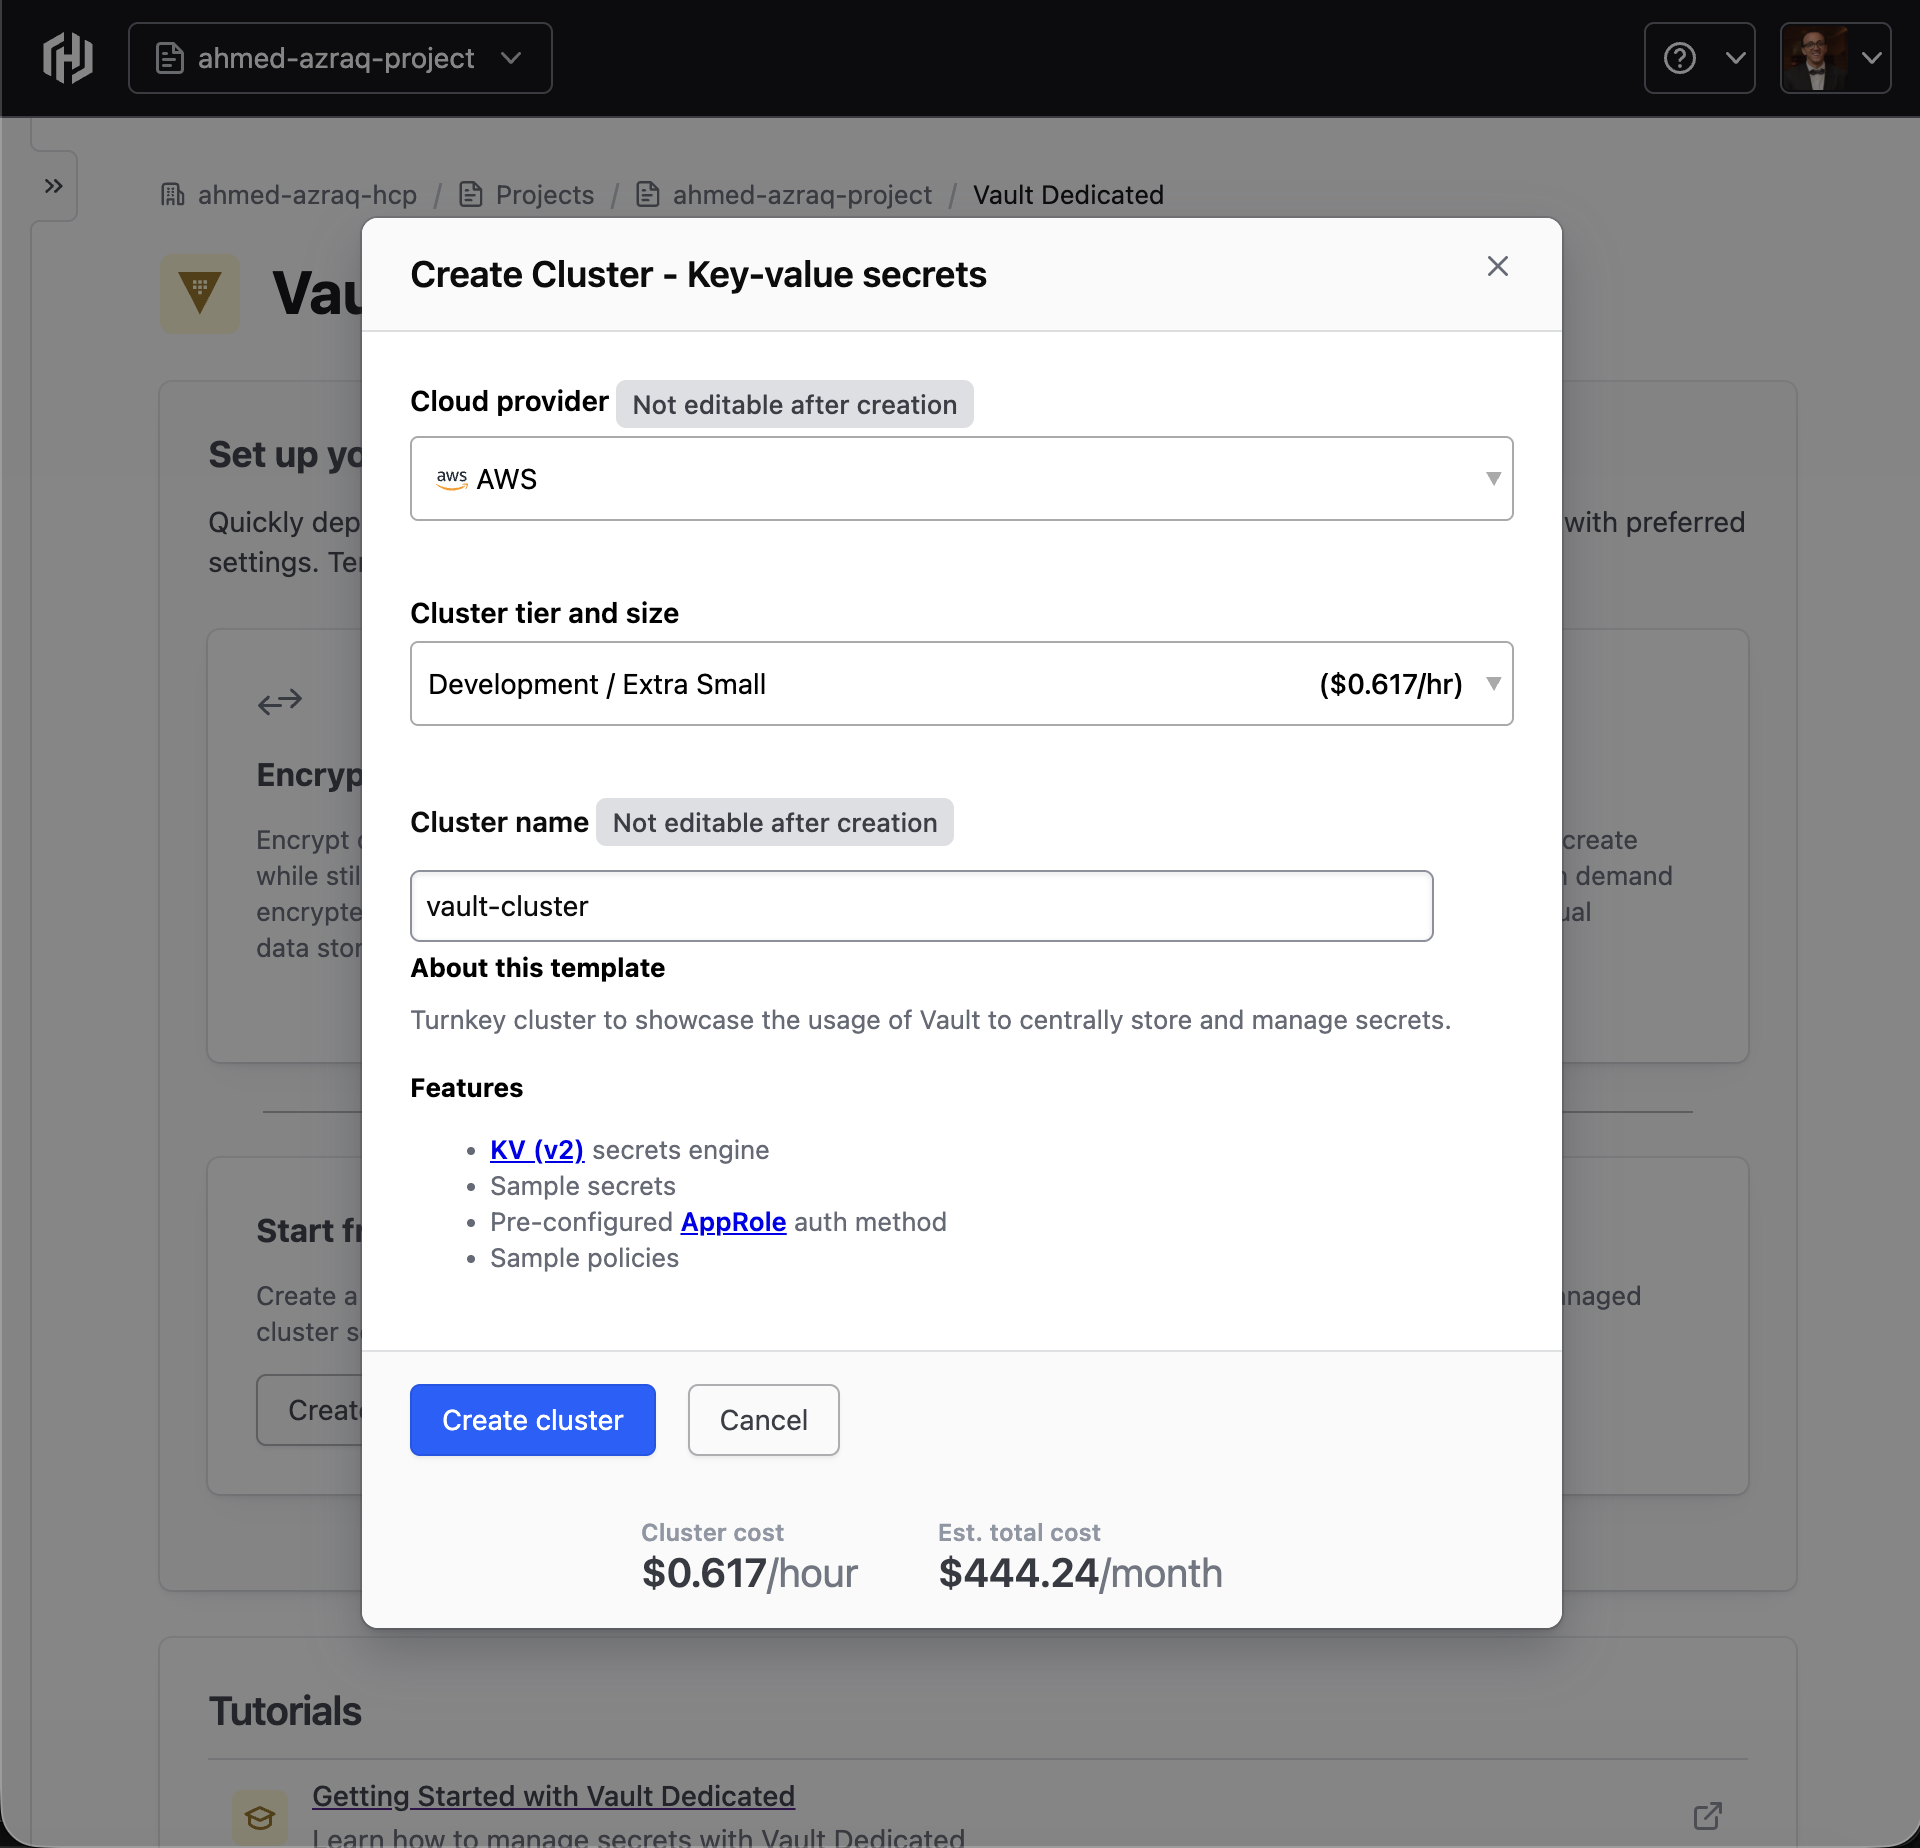
Cluster creation takes about 10 minutes. While the cluster is being created, complete Step 2, Step 3, Step 4 (1 - 5). Then, return to this step.

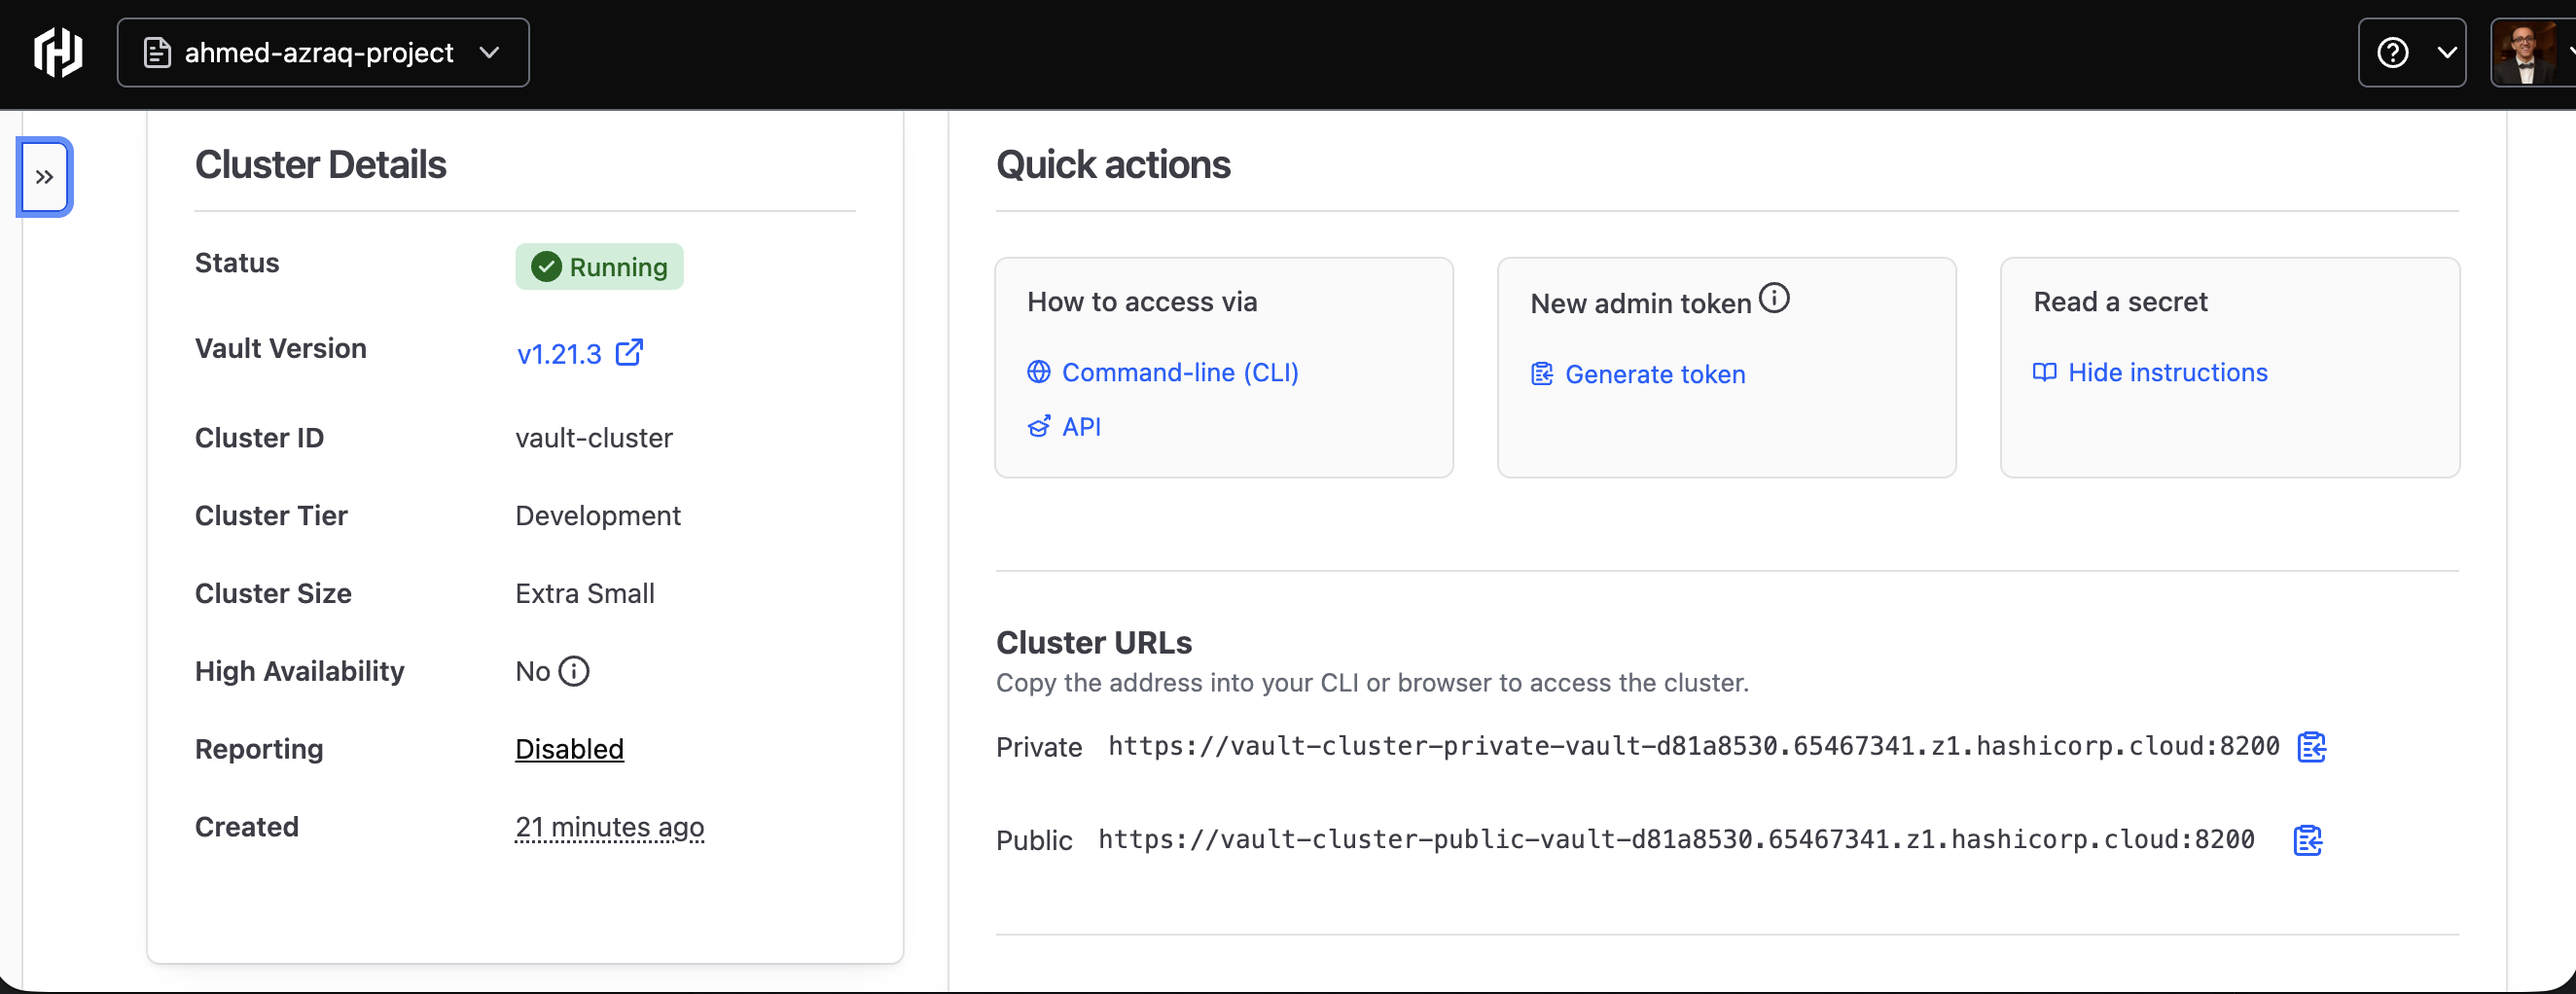
After the cluster is ready, copy the cluster address named
VAULT_ADDRand namespace namedVAULT_NAMESPACE, highlighted by the blue arrow in the following screen capture.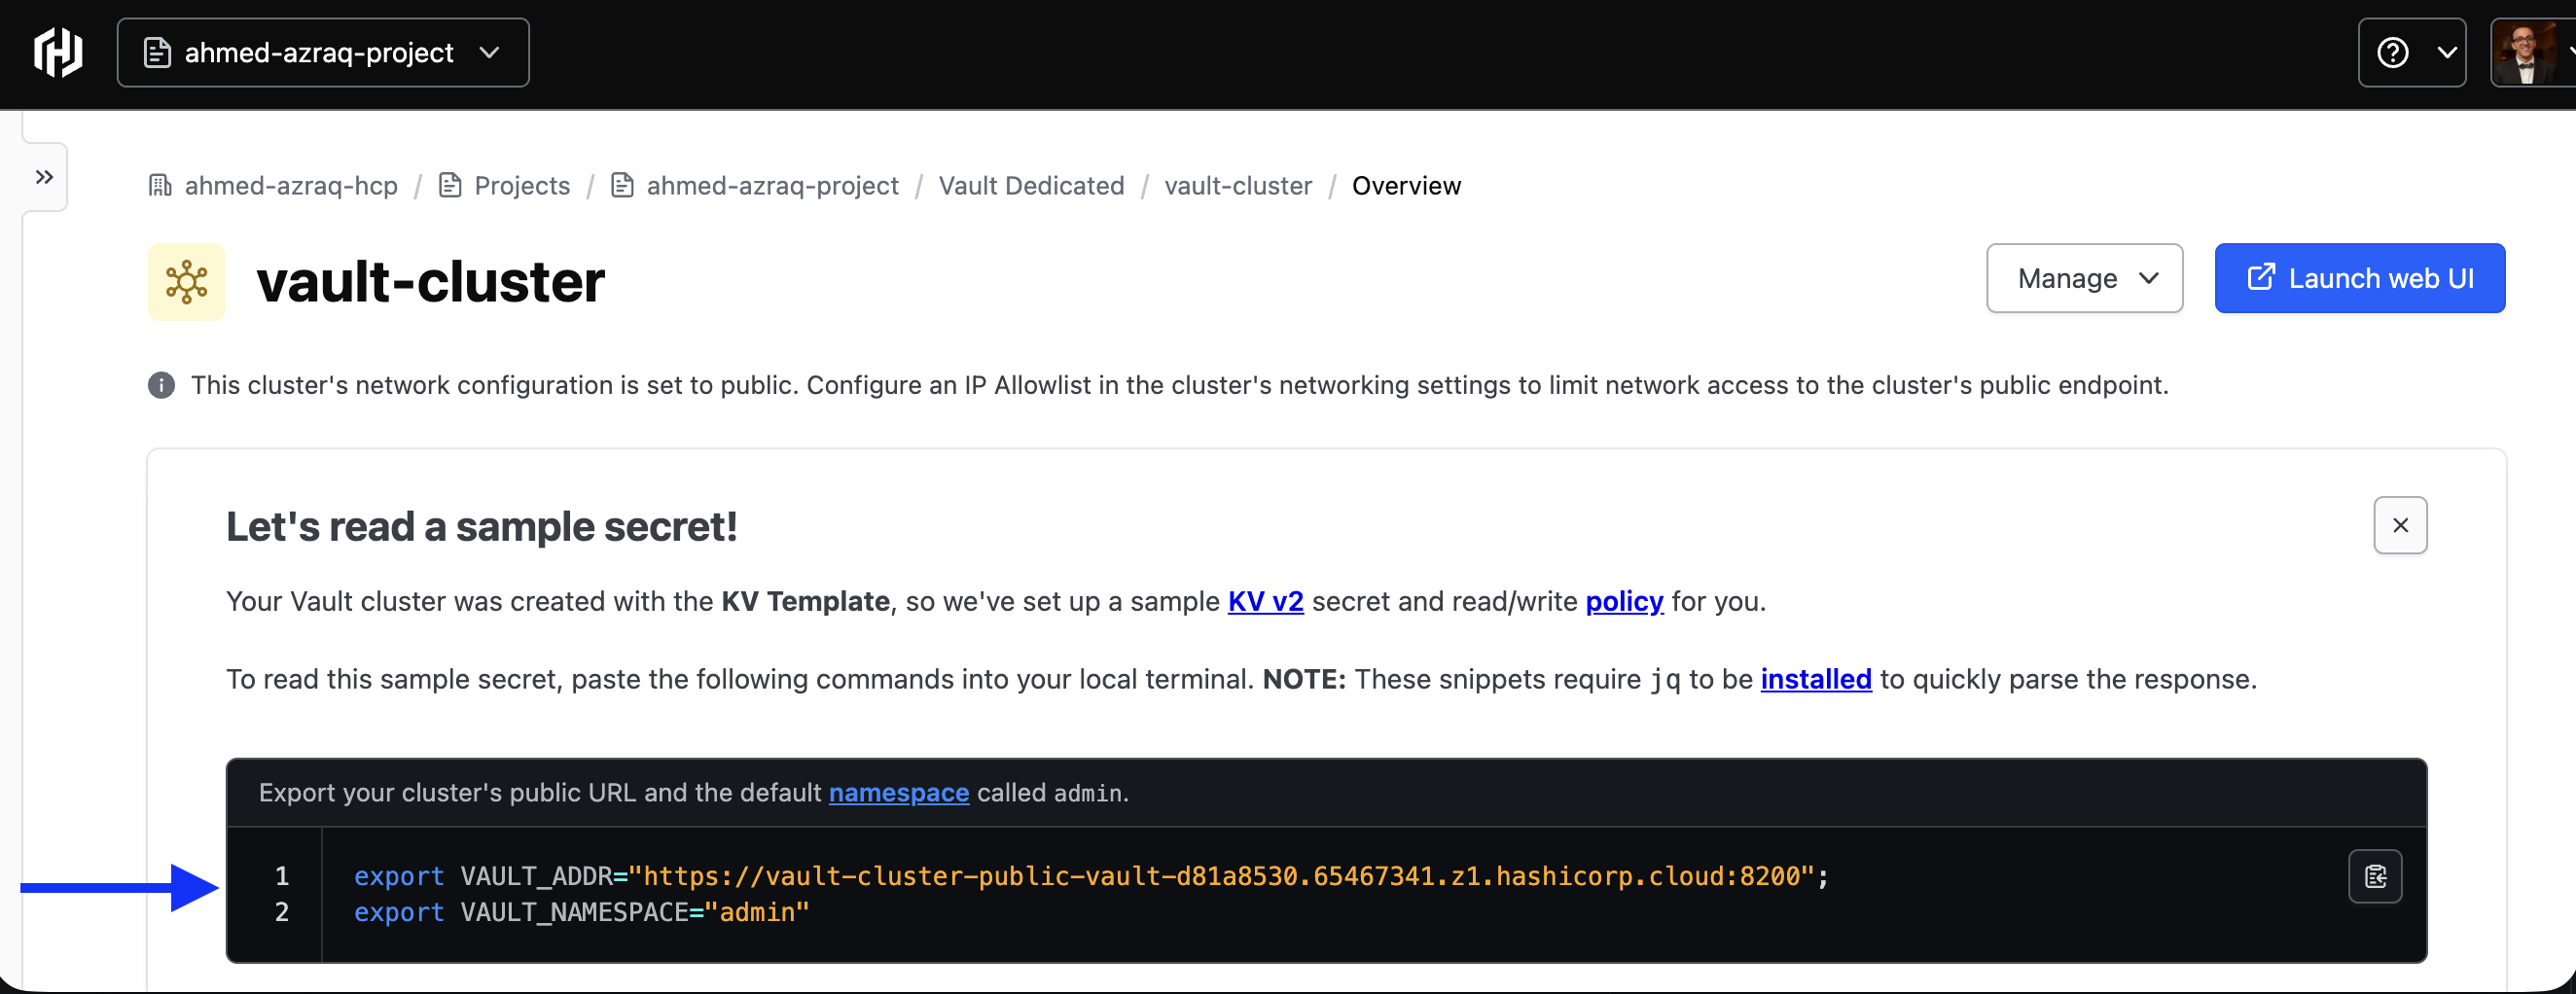
In Quick actions, click the Generate token link and copy the token. You will use the address, namespace, and token in the next step.
Step 2. Fork the GitHub repository
This tutorial uses sample code that contains credentials in this GitHub repository: https://github.com/hashicorp-education/hcp-vault-radar-foundations. In this step, you fork that GitHub repository.
Open the hcp-vault-radar-foundations GitHub repository and click Fork.
Keep the default settings and click Create fork.
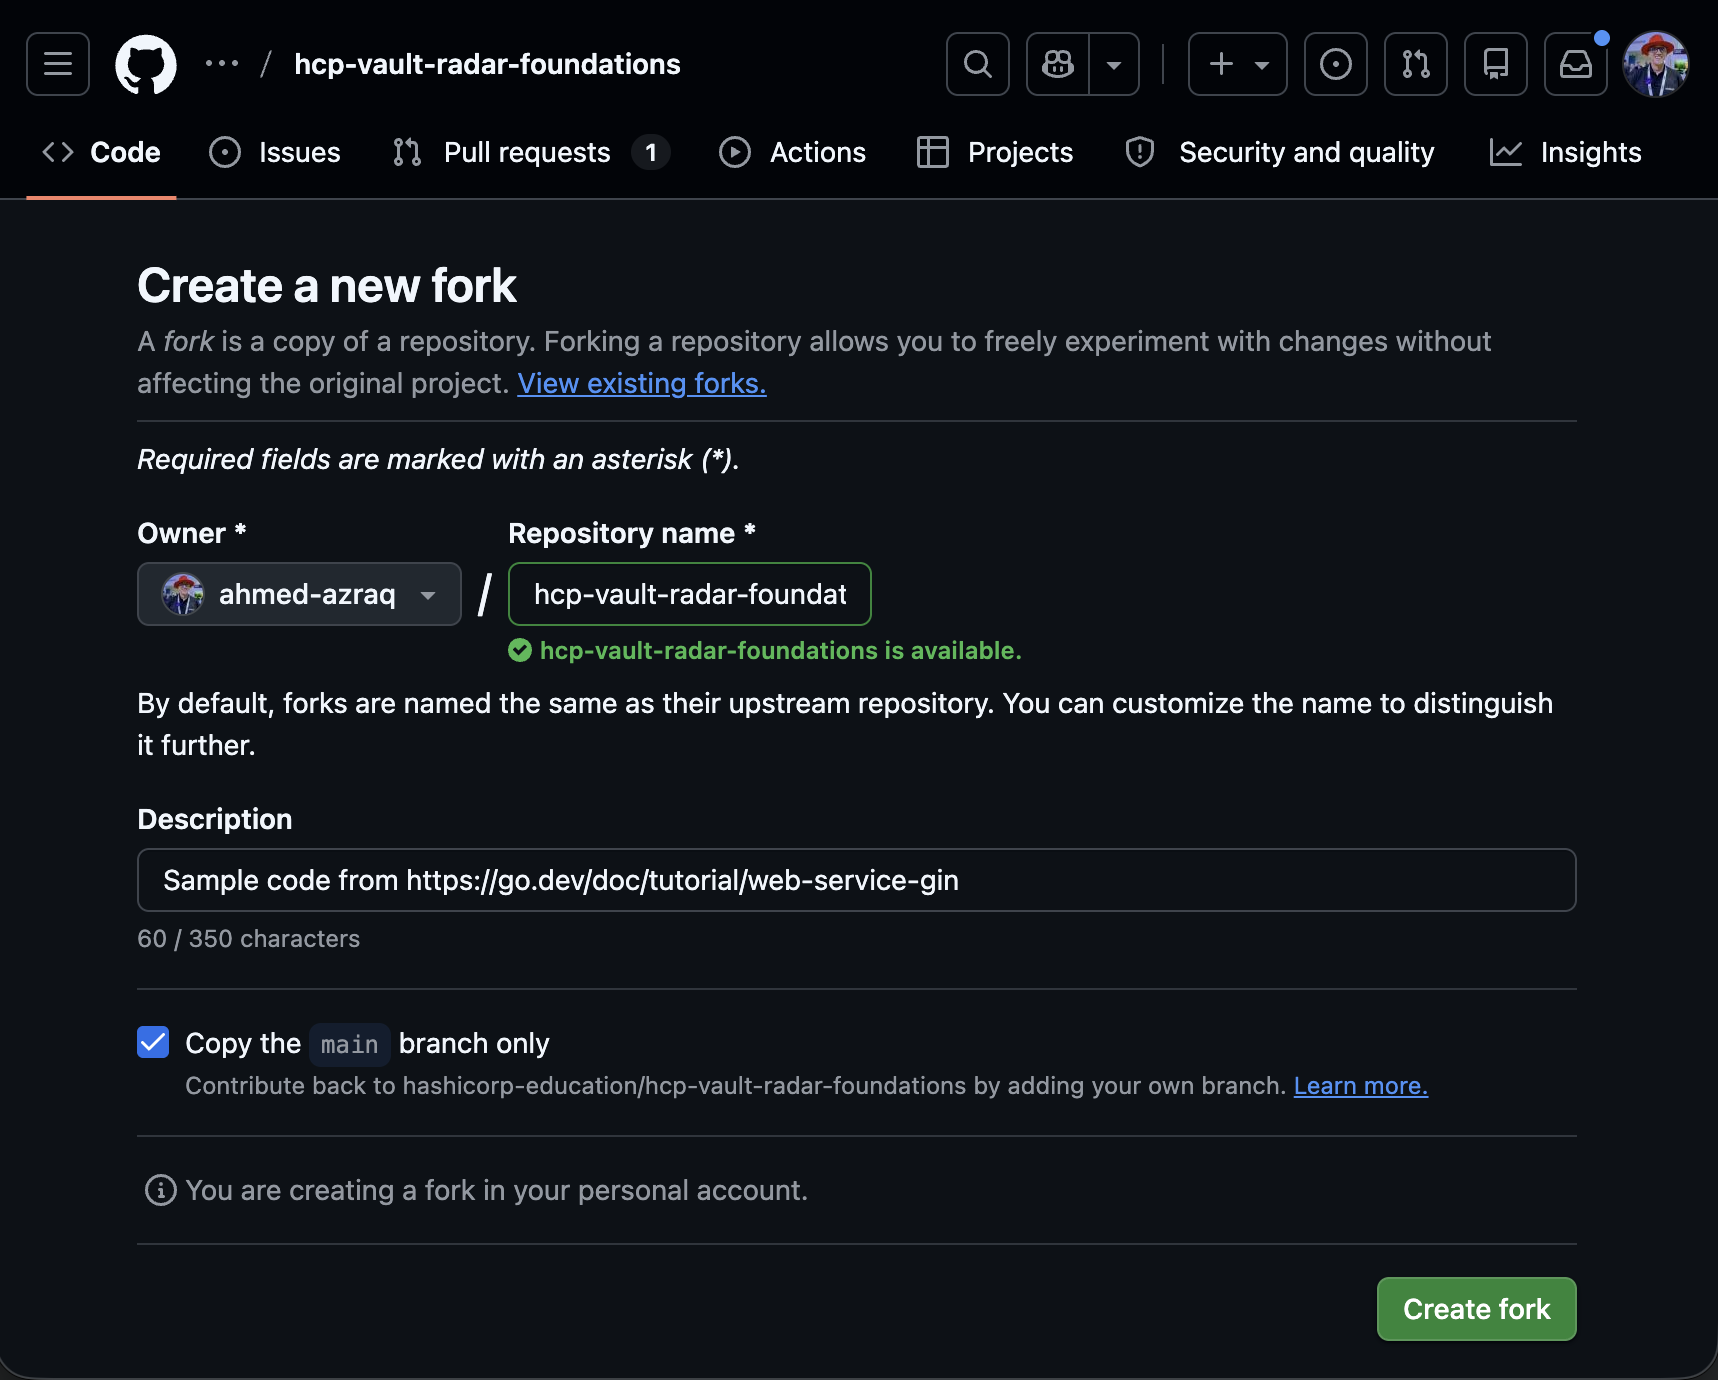
The forked repo now appears in your GitHub account:
https://github.com/<YOUR_USER_NAME>/hcp-vault-radar-foundations.
Step 3. Scan your repository with Vault Radar
In this step, you create a Vault Radar instance on HashiCorp Cloud Platform and scan the repository to detect API keys, passwords, and other secrets in real time.
Sign in to your HashiCorp Cloud Platform account.
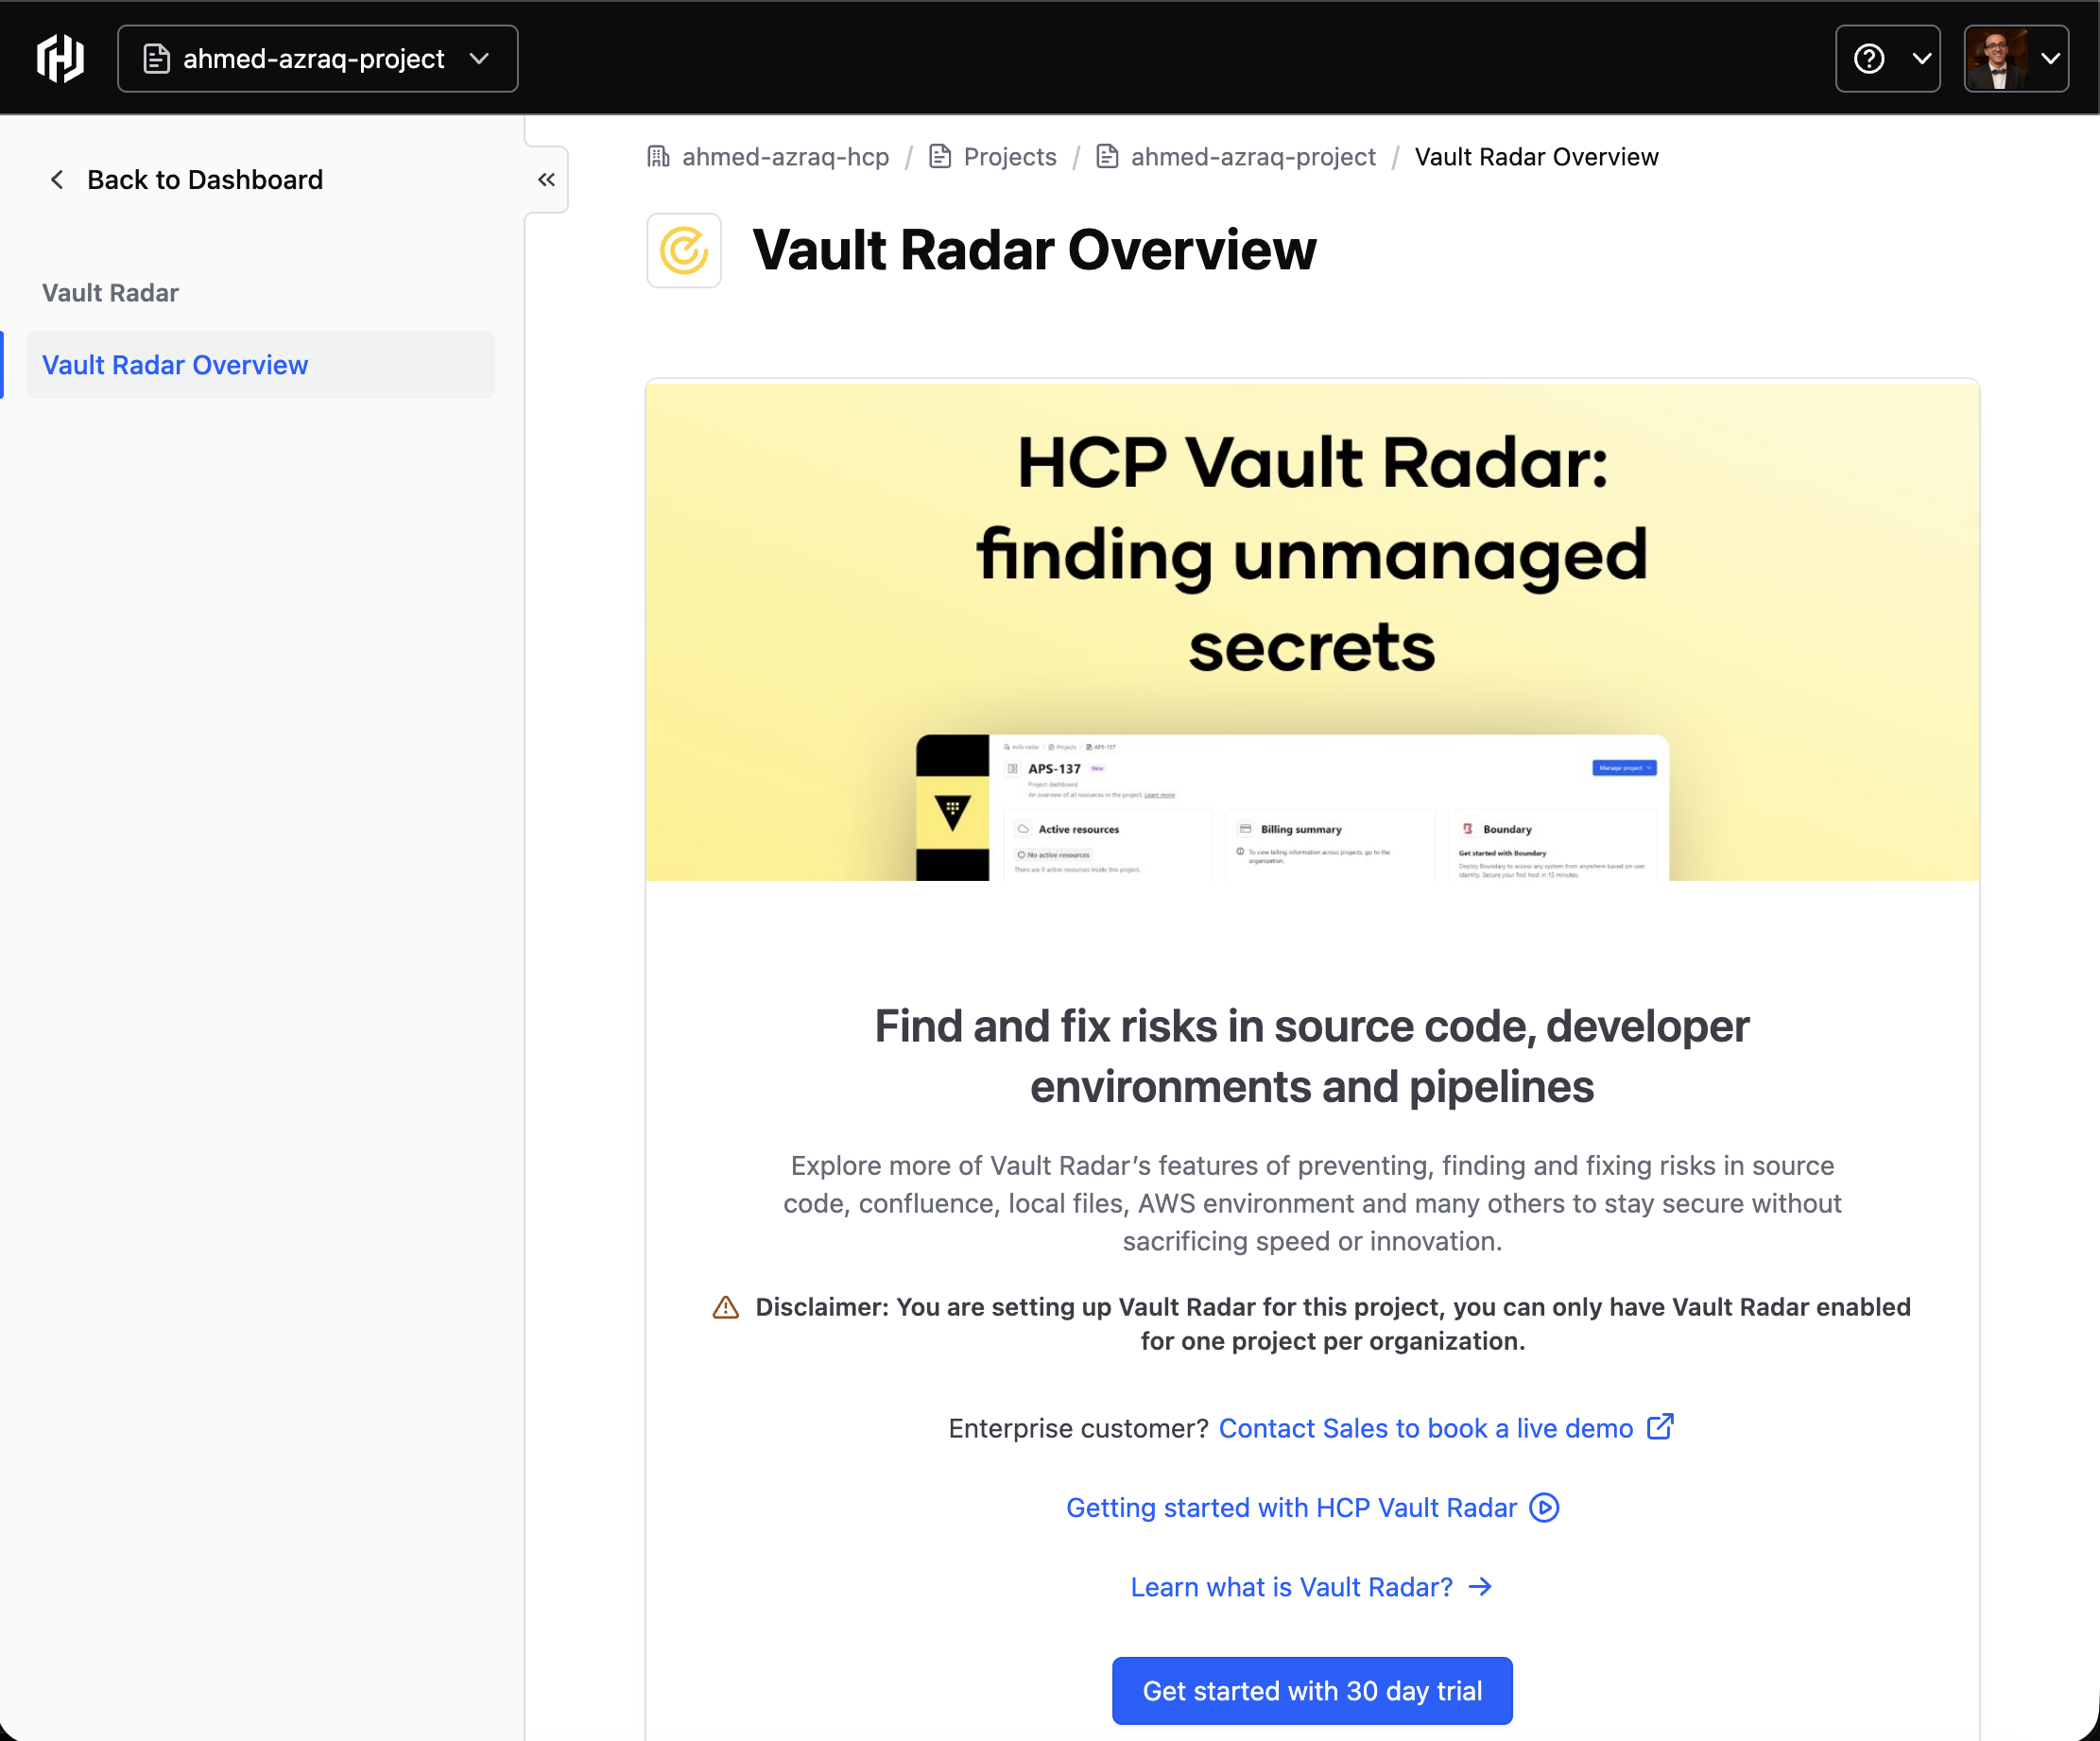
In the left navigation menu on the HashiCorp Cloud Platform home page, click Vault Radar, and then click Get started with 30 day trial.
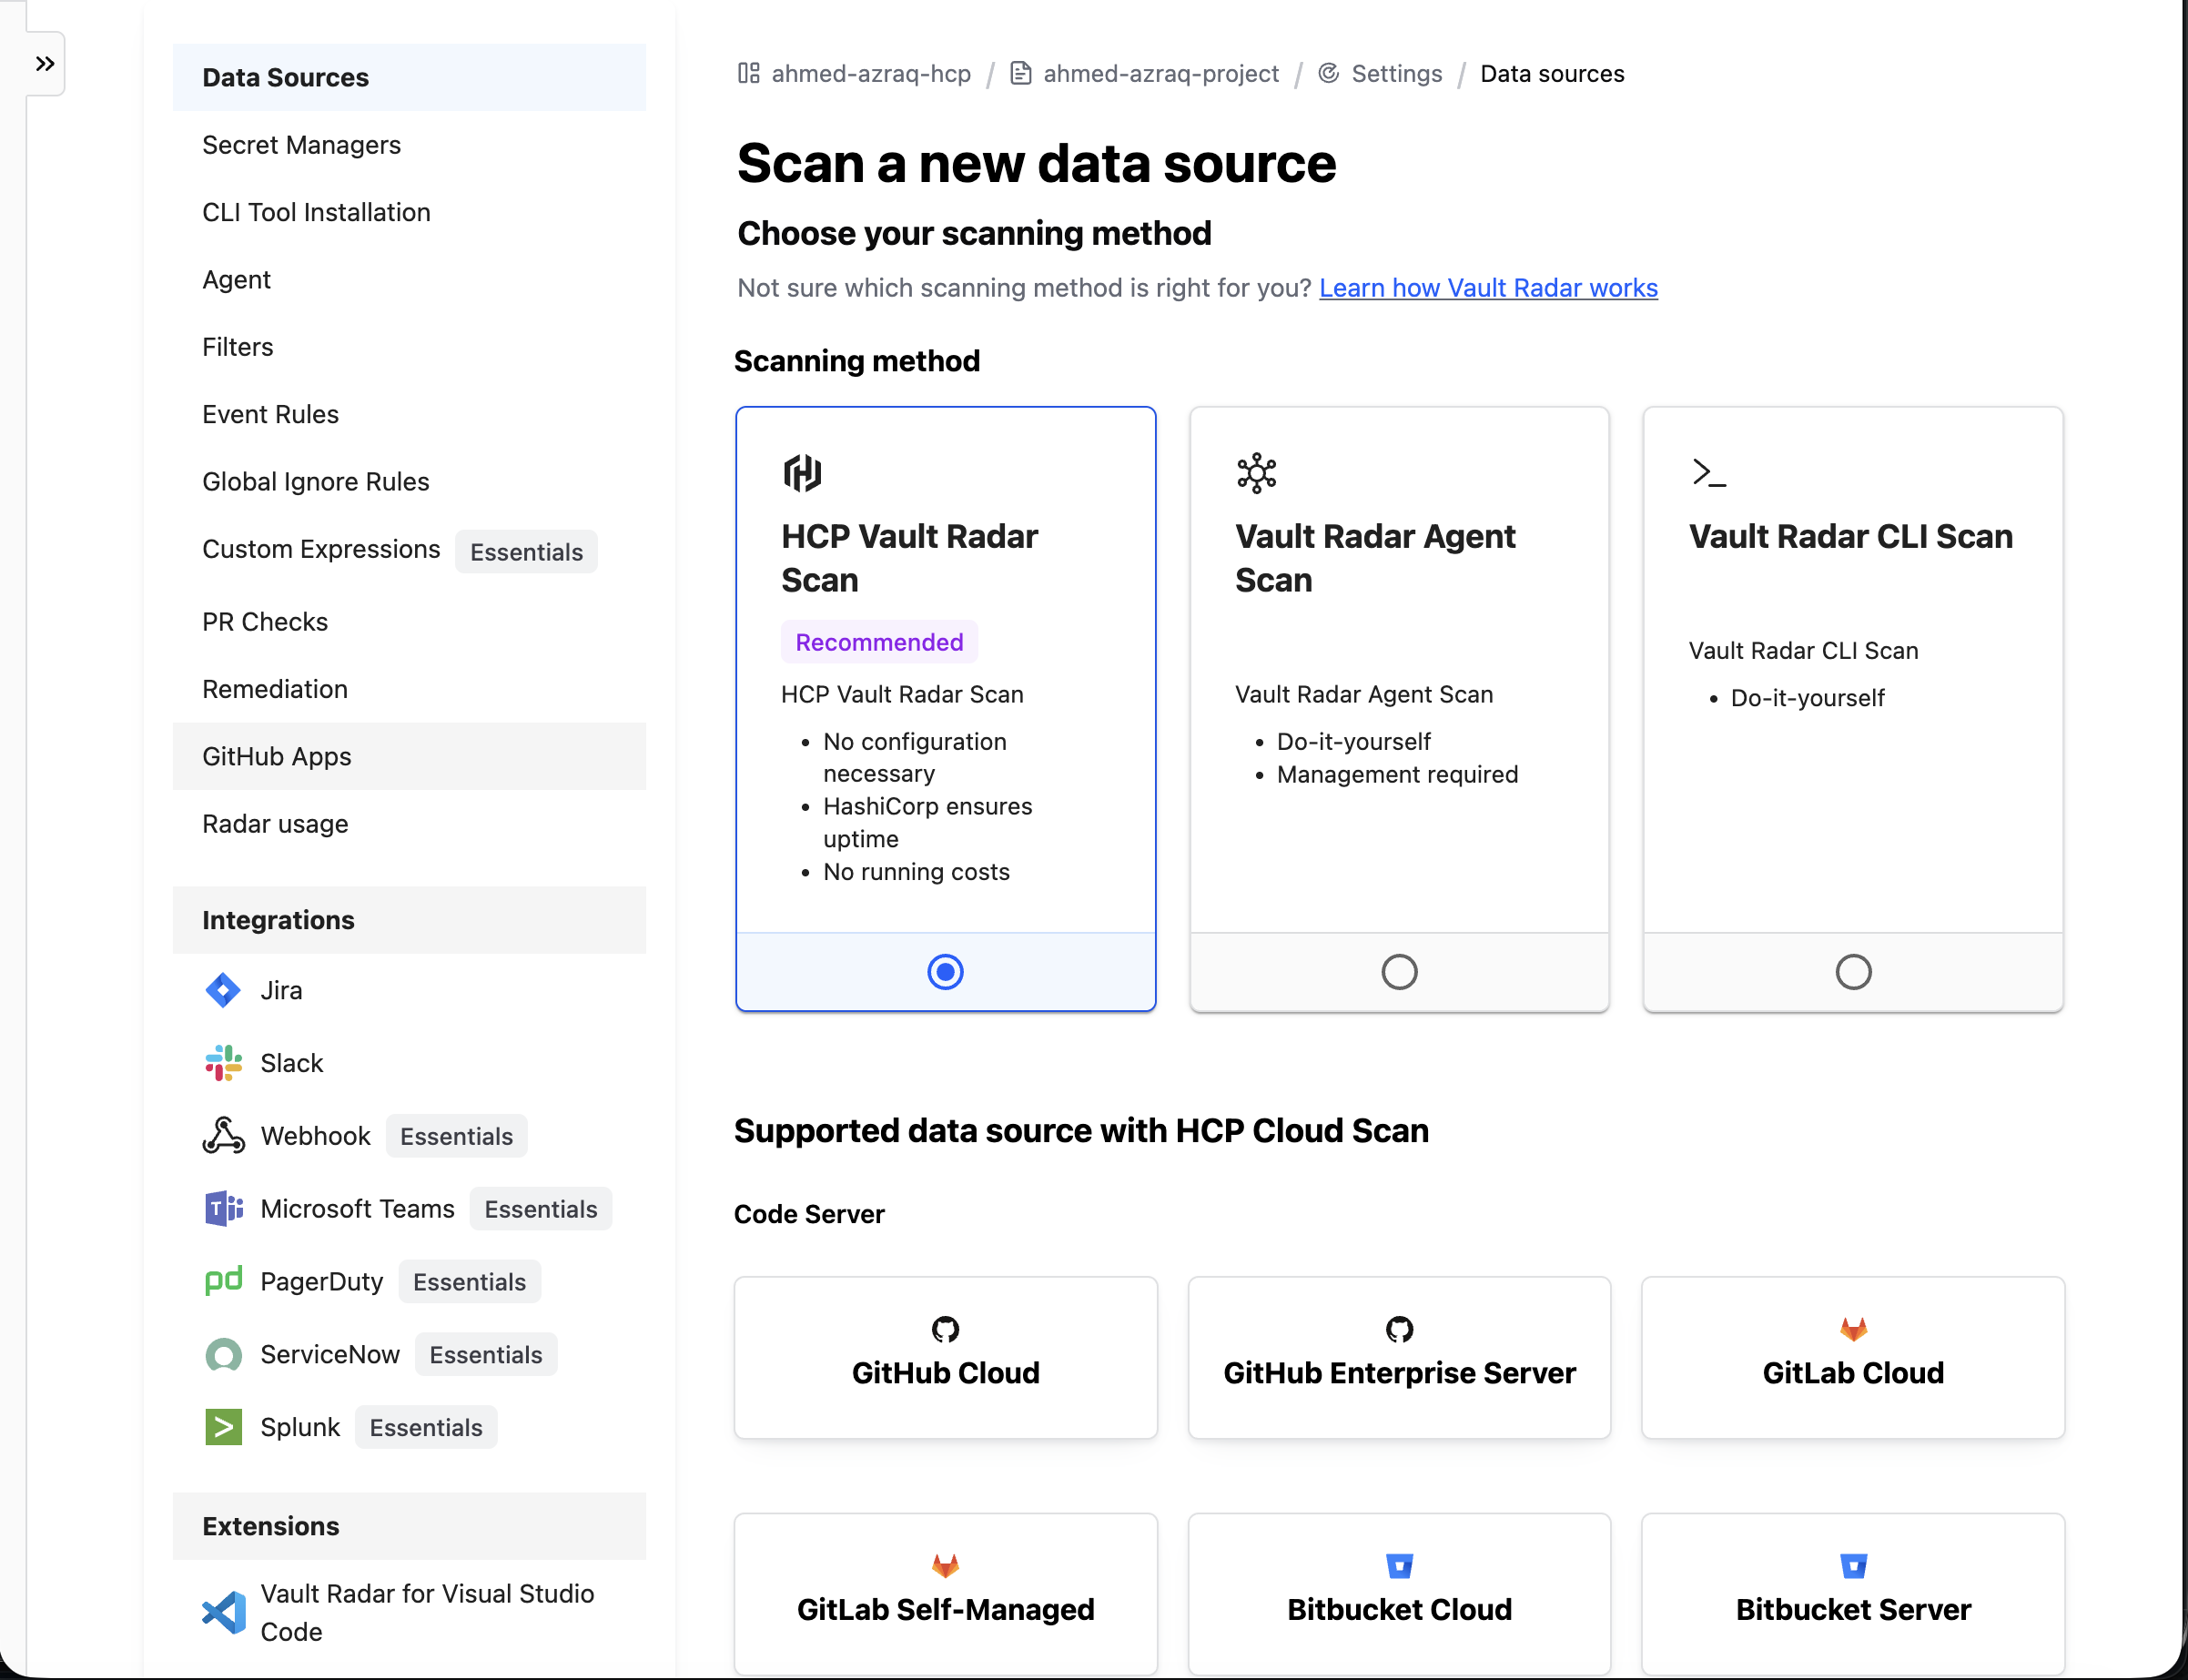
In the Supported data source with HCP Cloud Scan section, select GitHub Cloud as the data source.
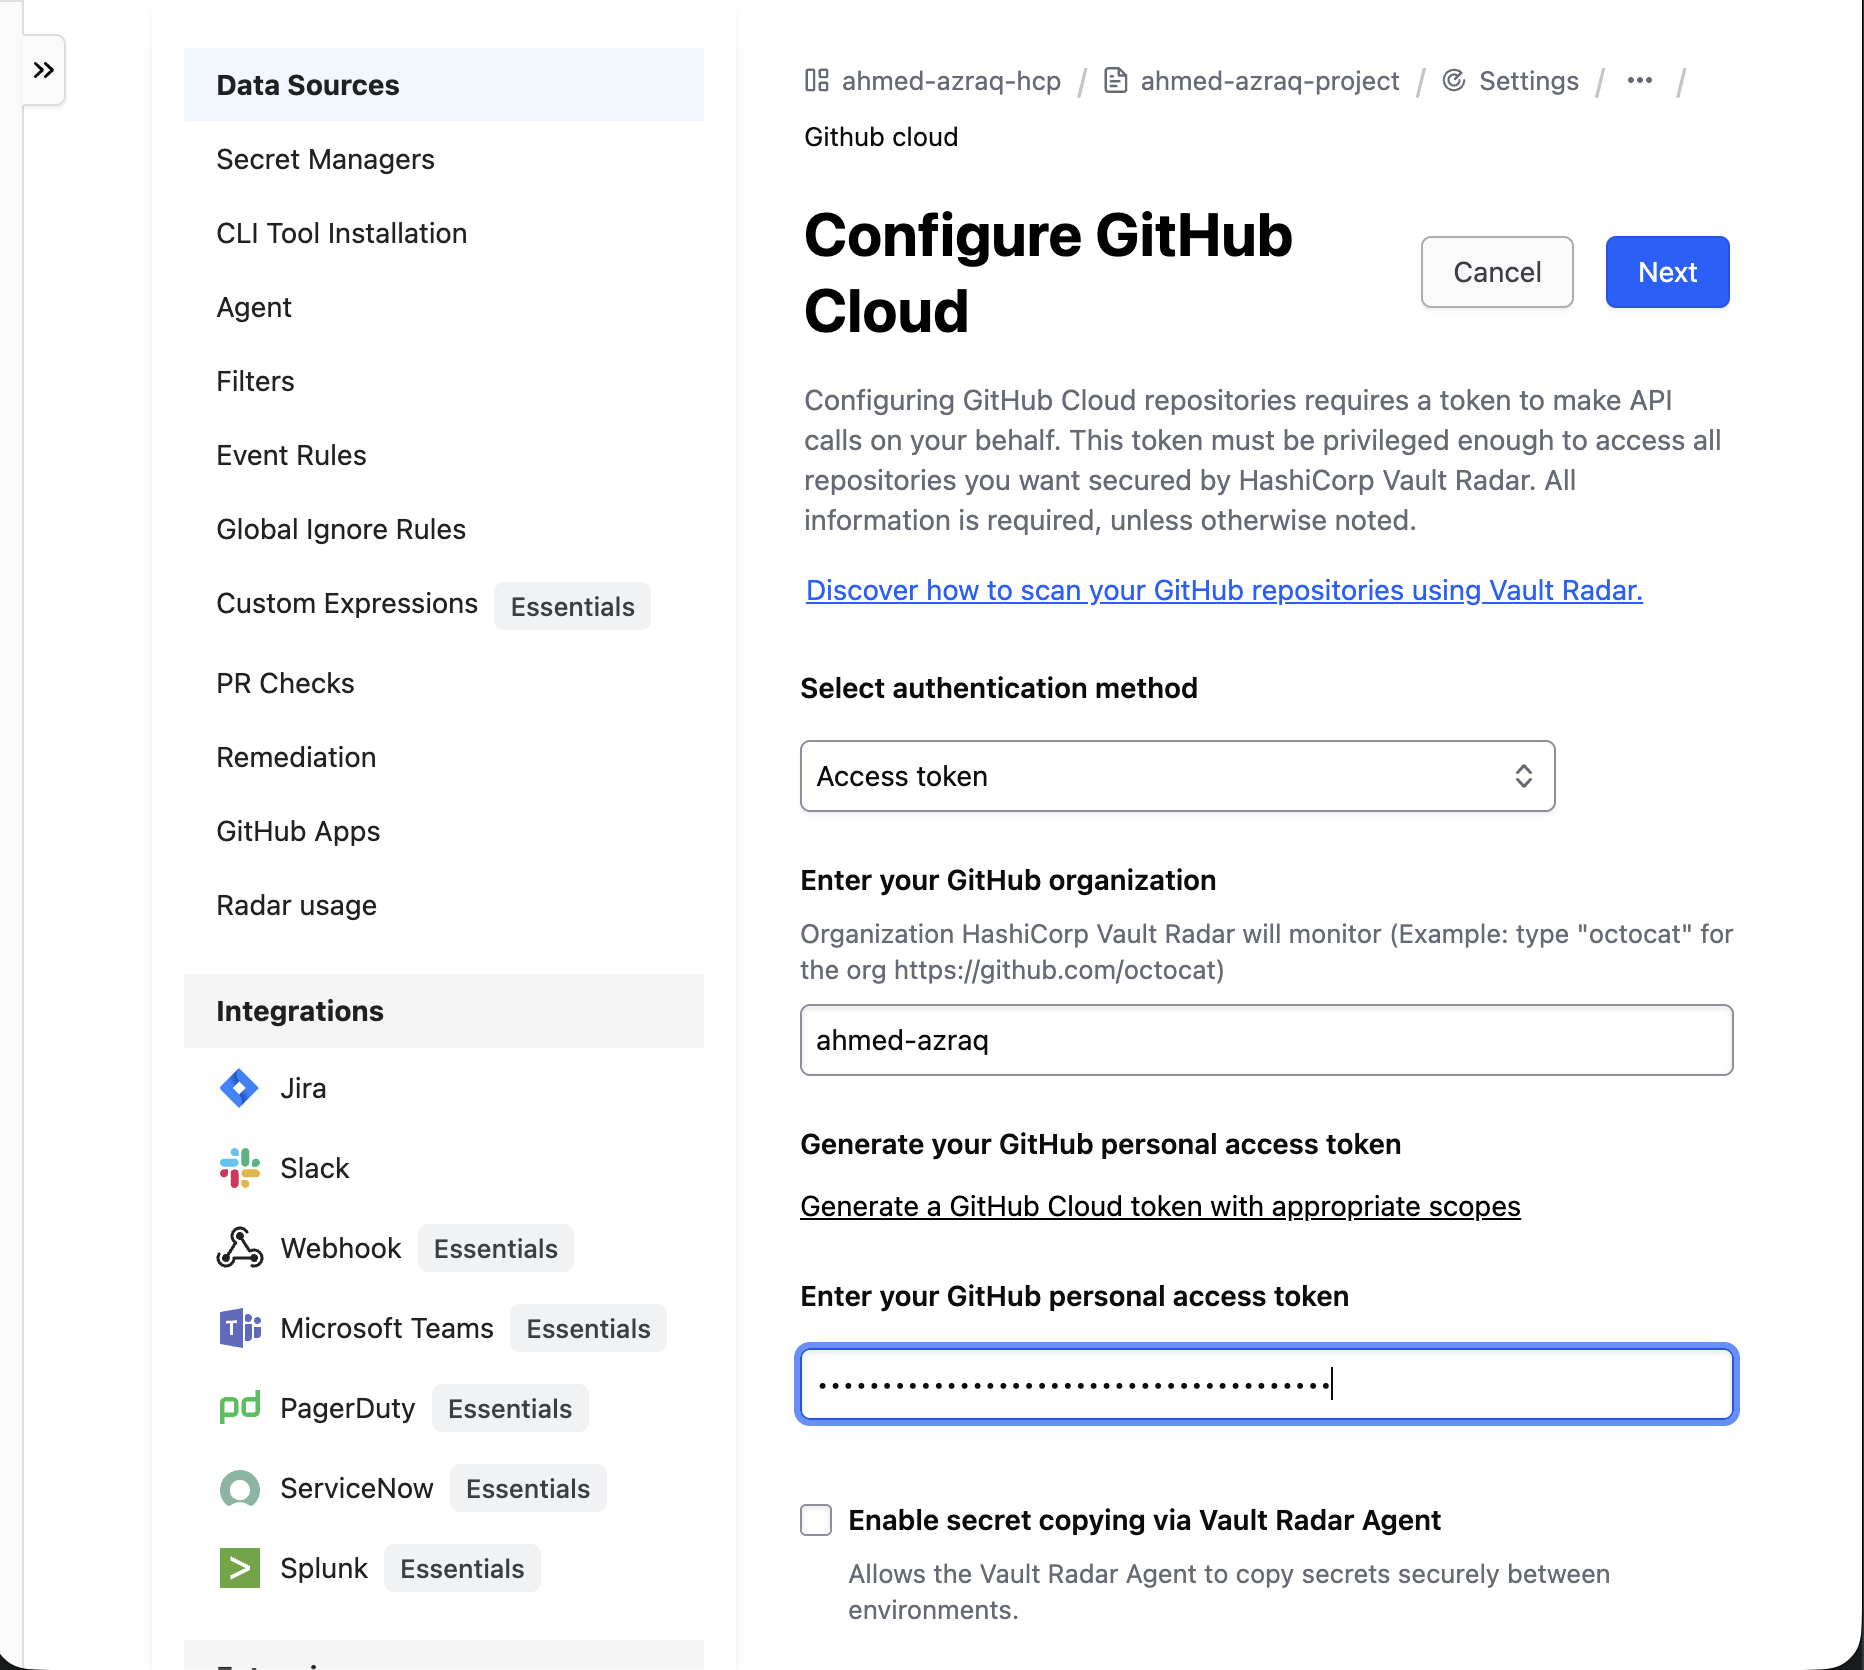
On the Configure GitHub Cloud page, select Access token as the authentication method, and then specify your GitHub organization (your user name) and your personal access token (that you generated in the prerequisites). Then, click Next.
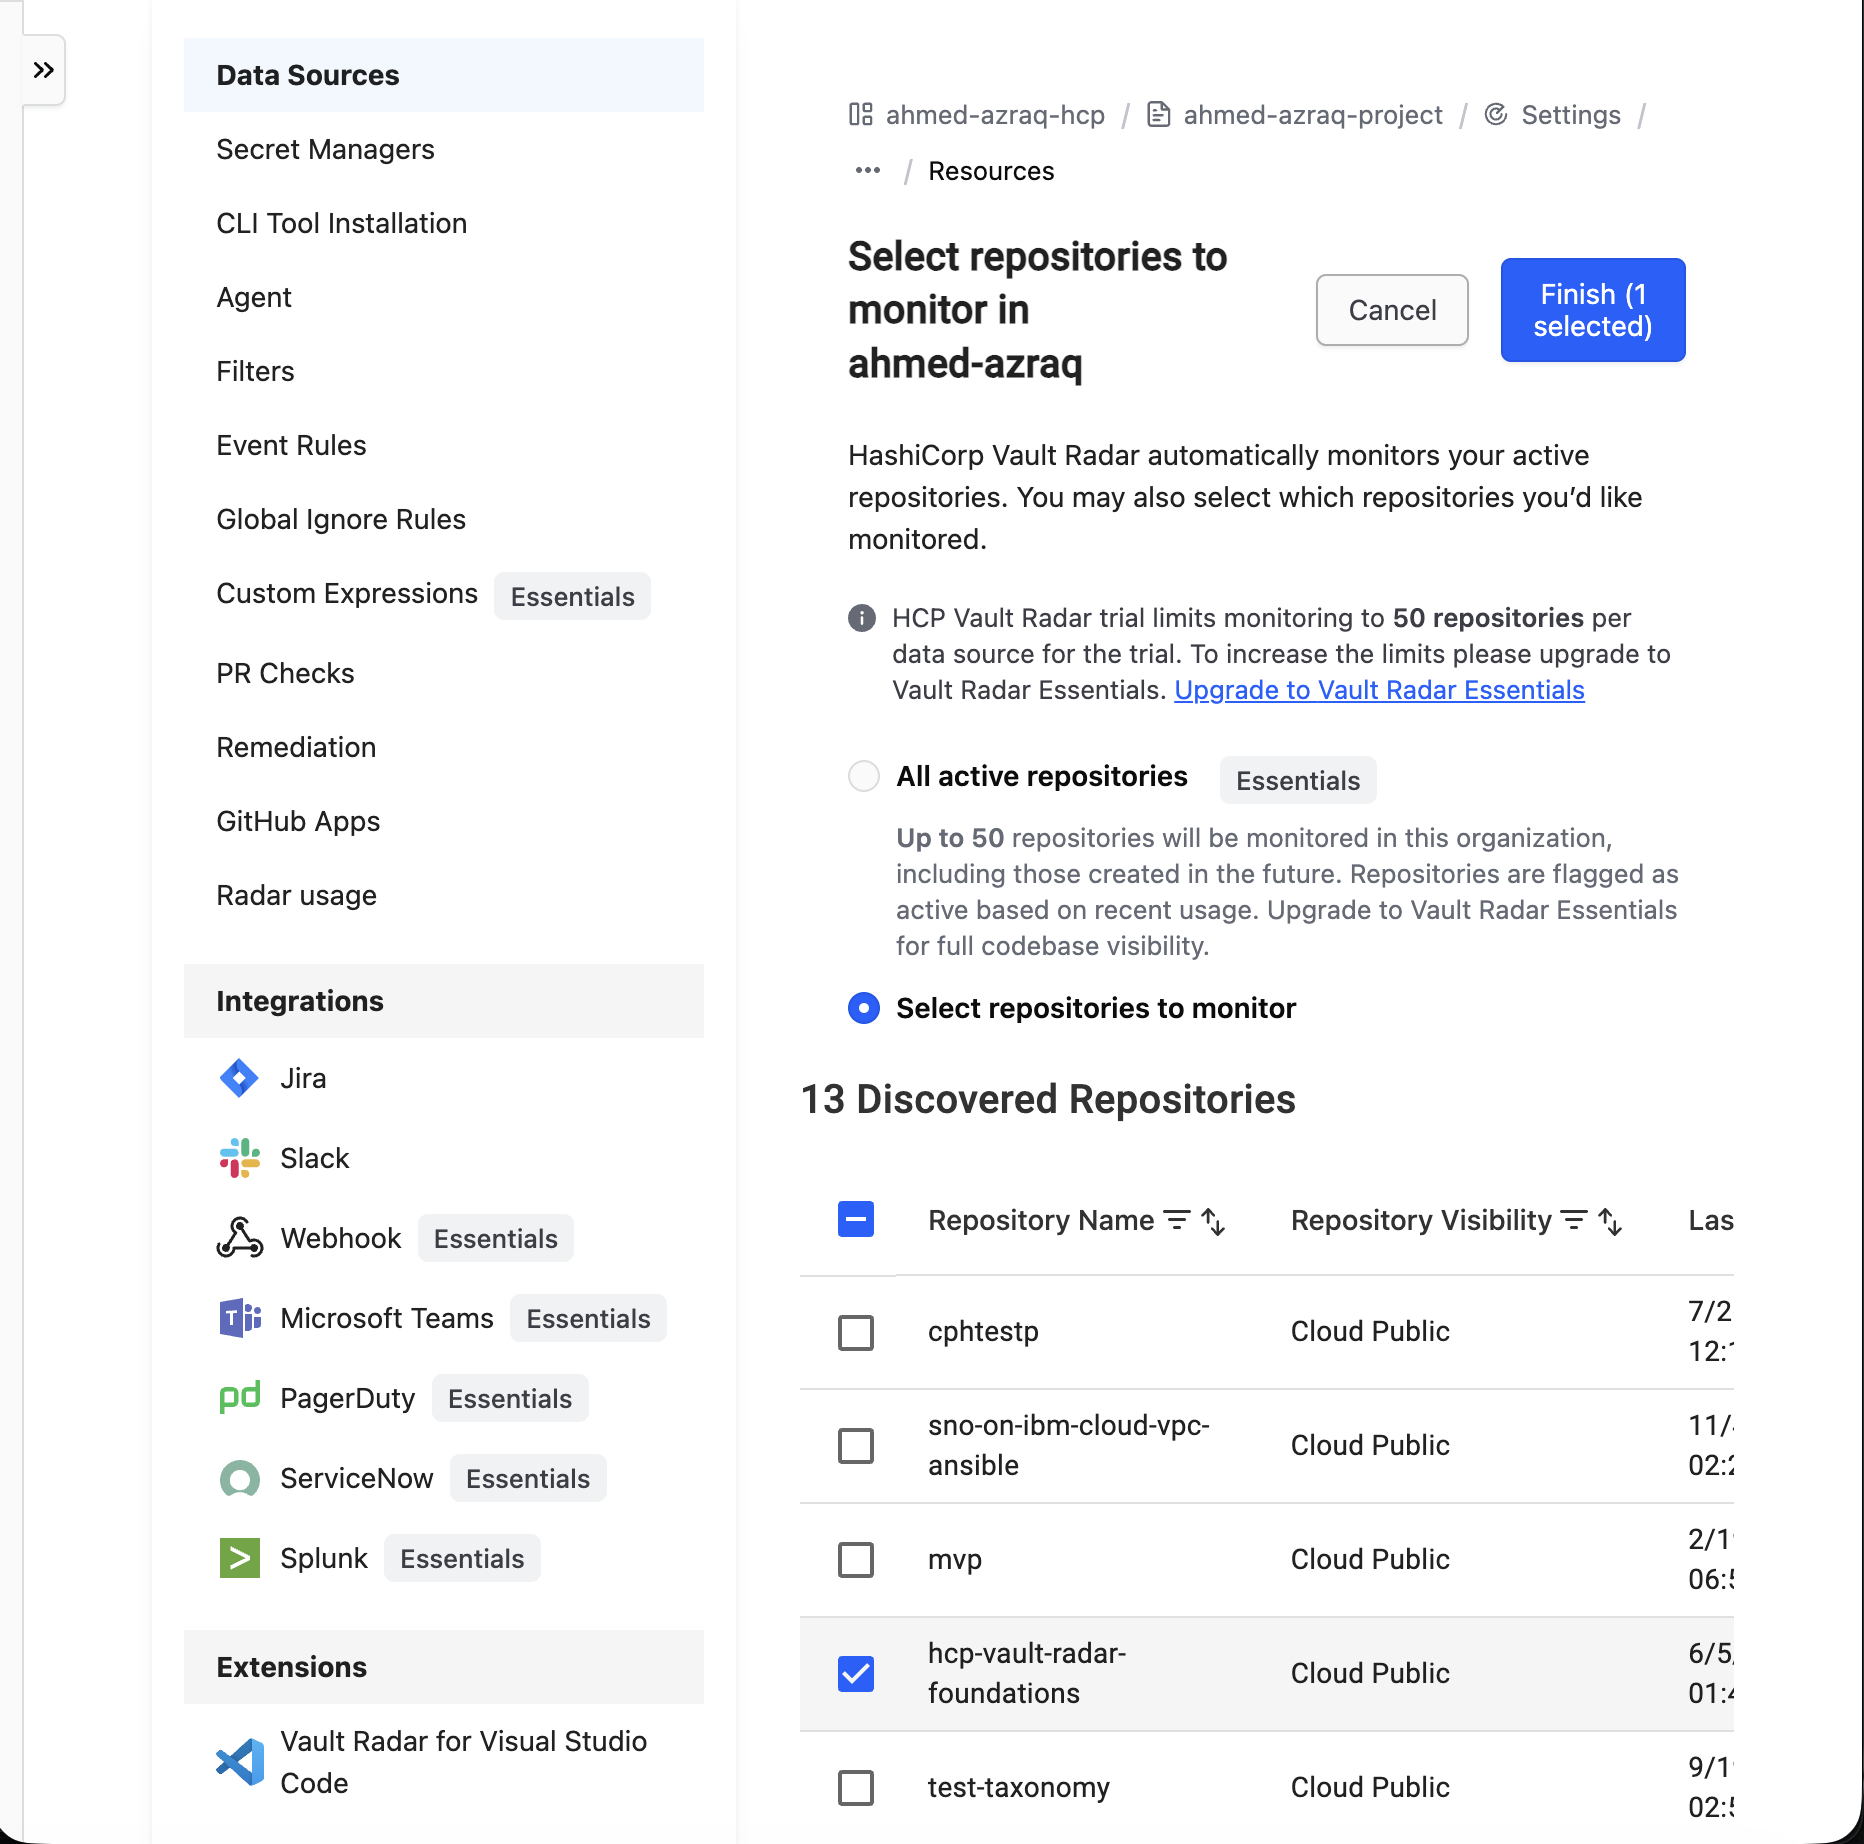
In the list of discovered repositories, select the hcp-vault-radar-foundations repository, and then click Finish.
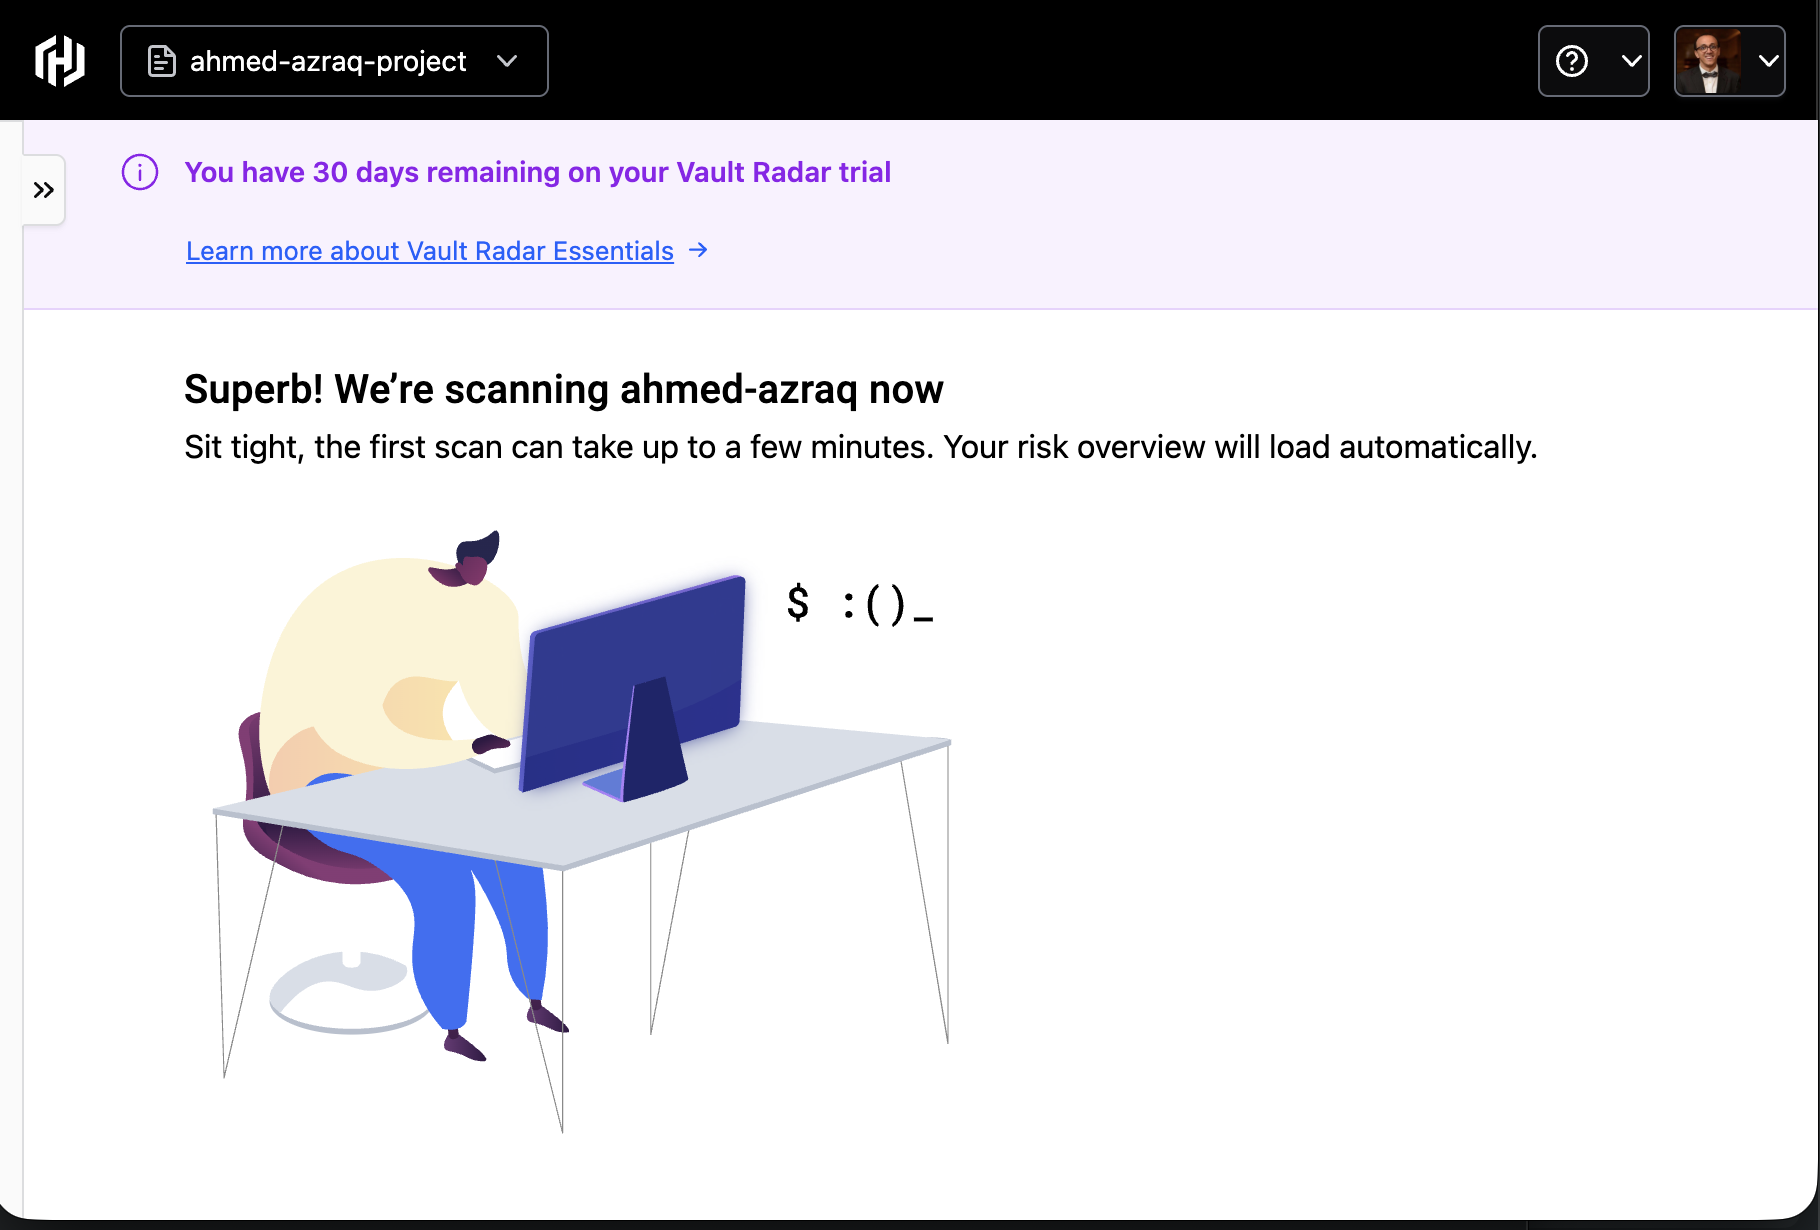
Vault Radar starts the repository scan. Wait for the scan to complete.
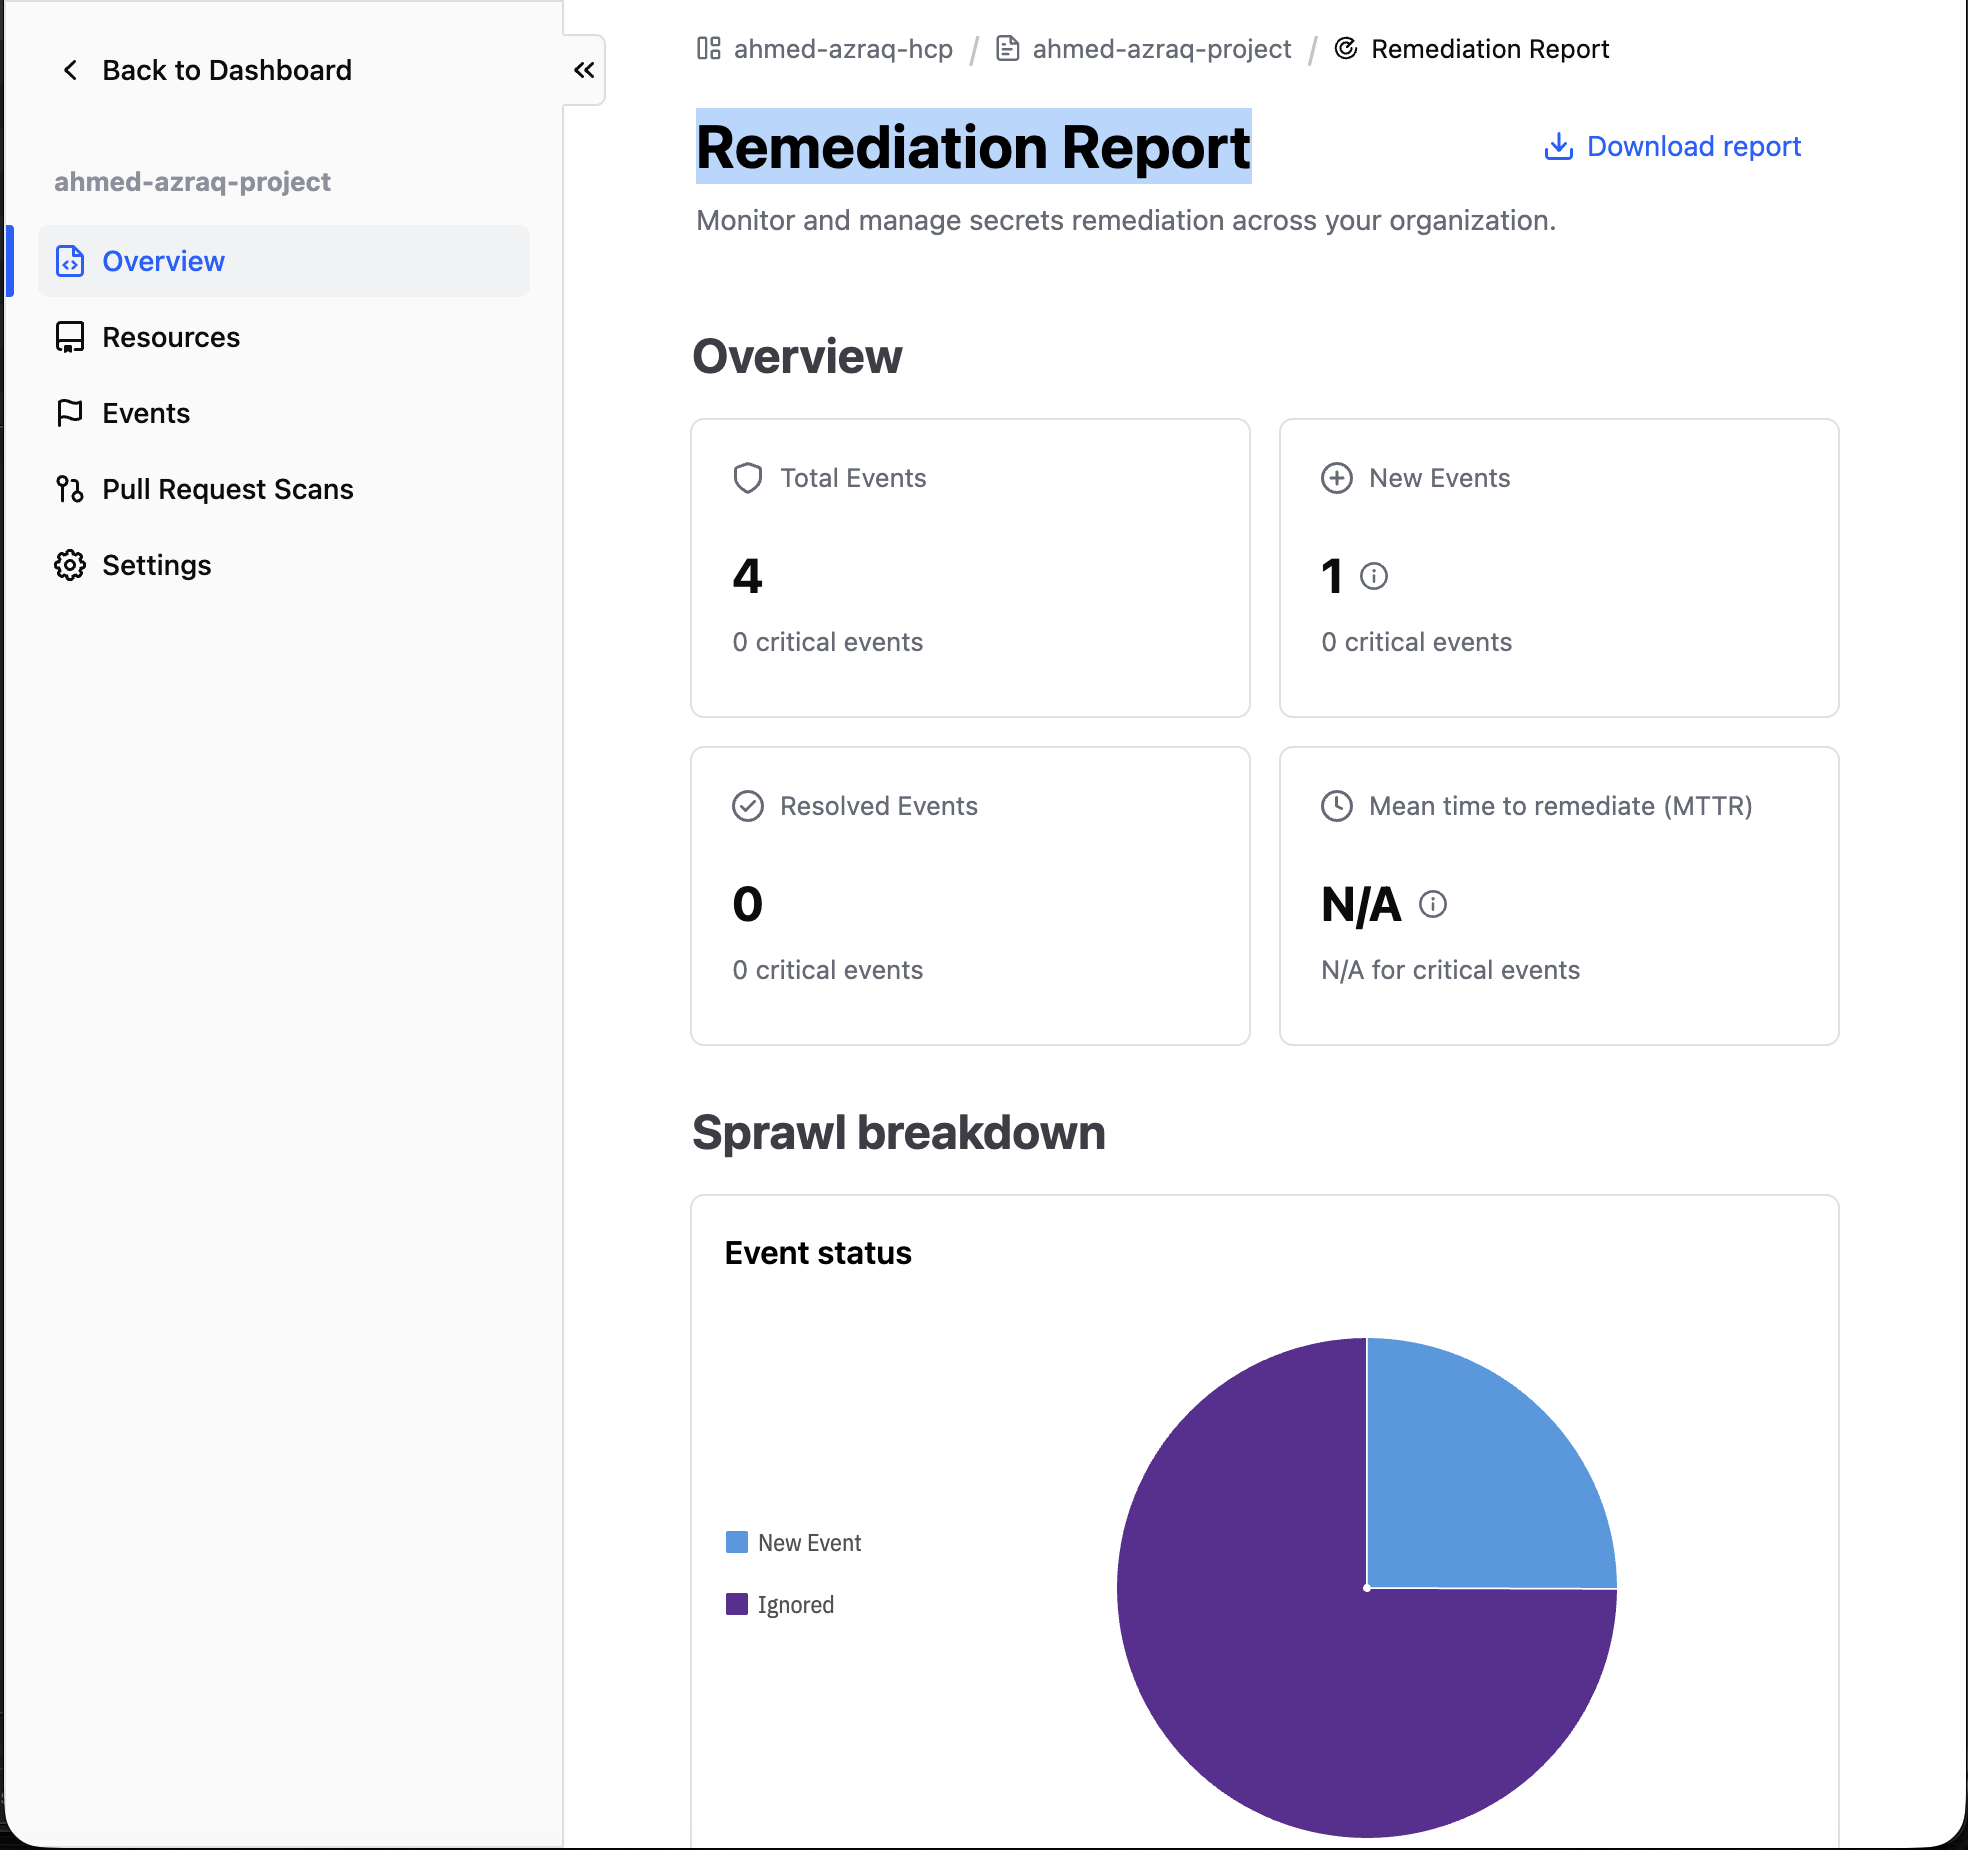
Vault Radar generates a remediation report with a high-level view of exposure risks.
In the left navigation menu, click Events. Review the events that show hardcoded passwords in the code.
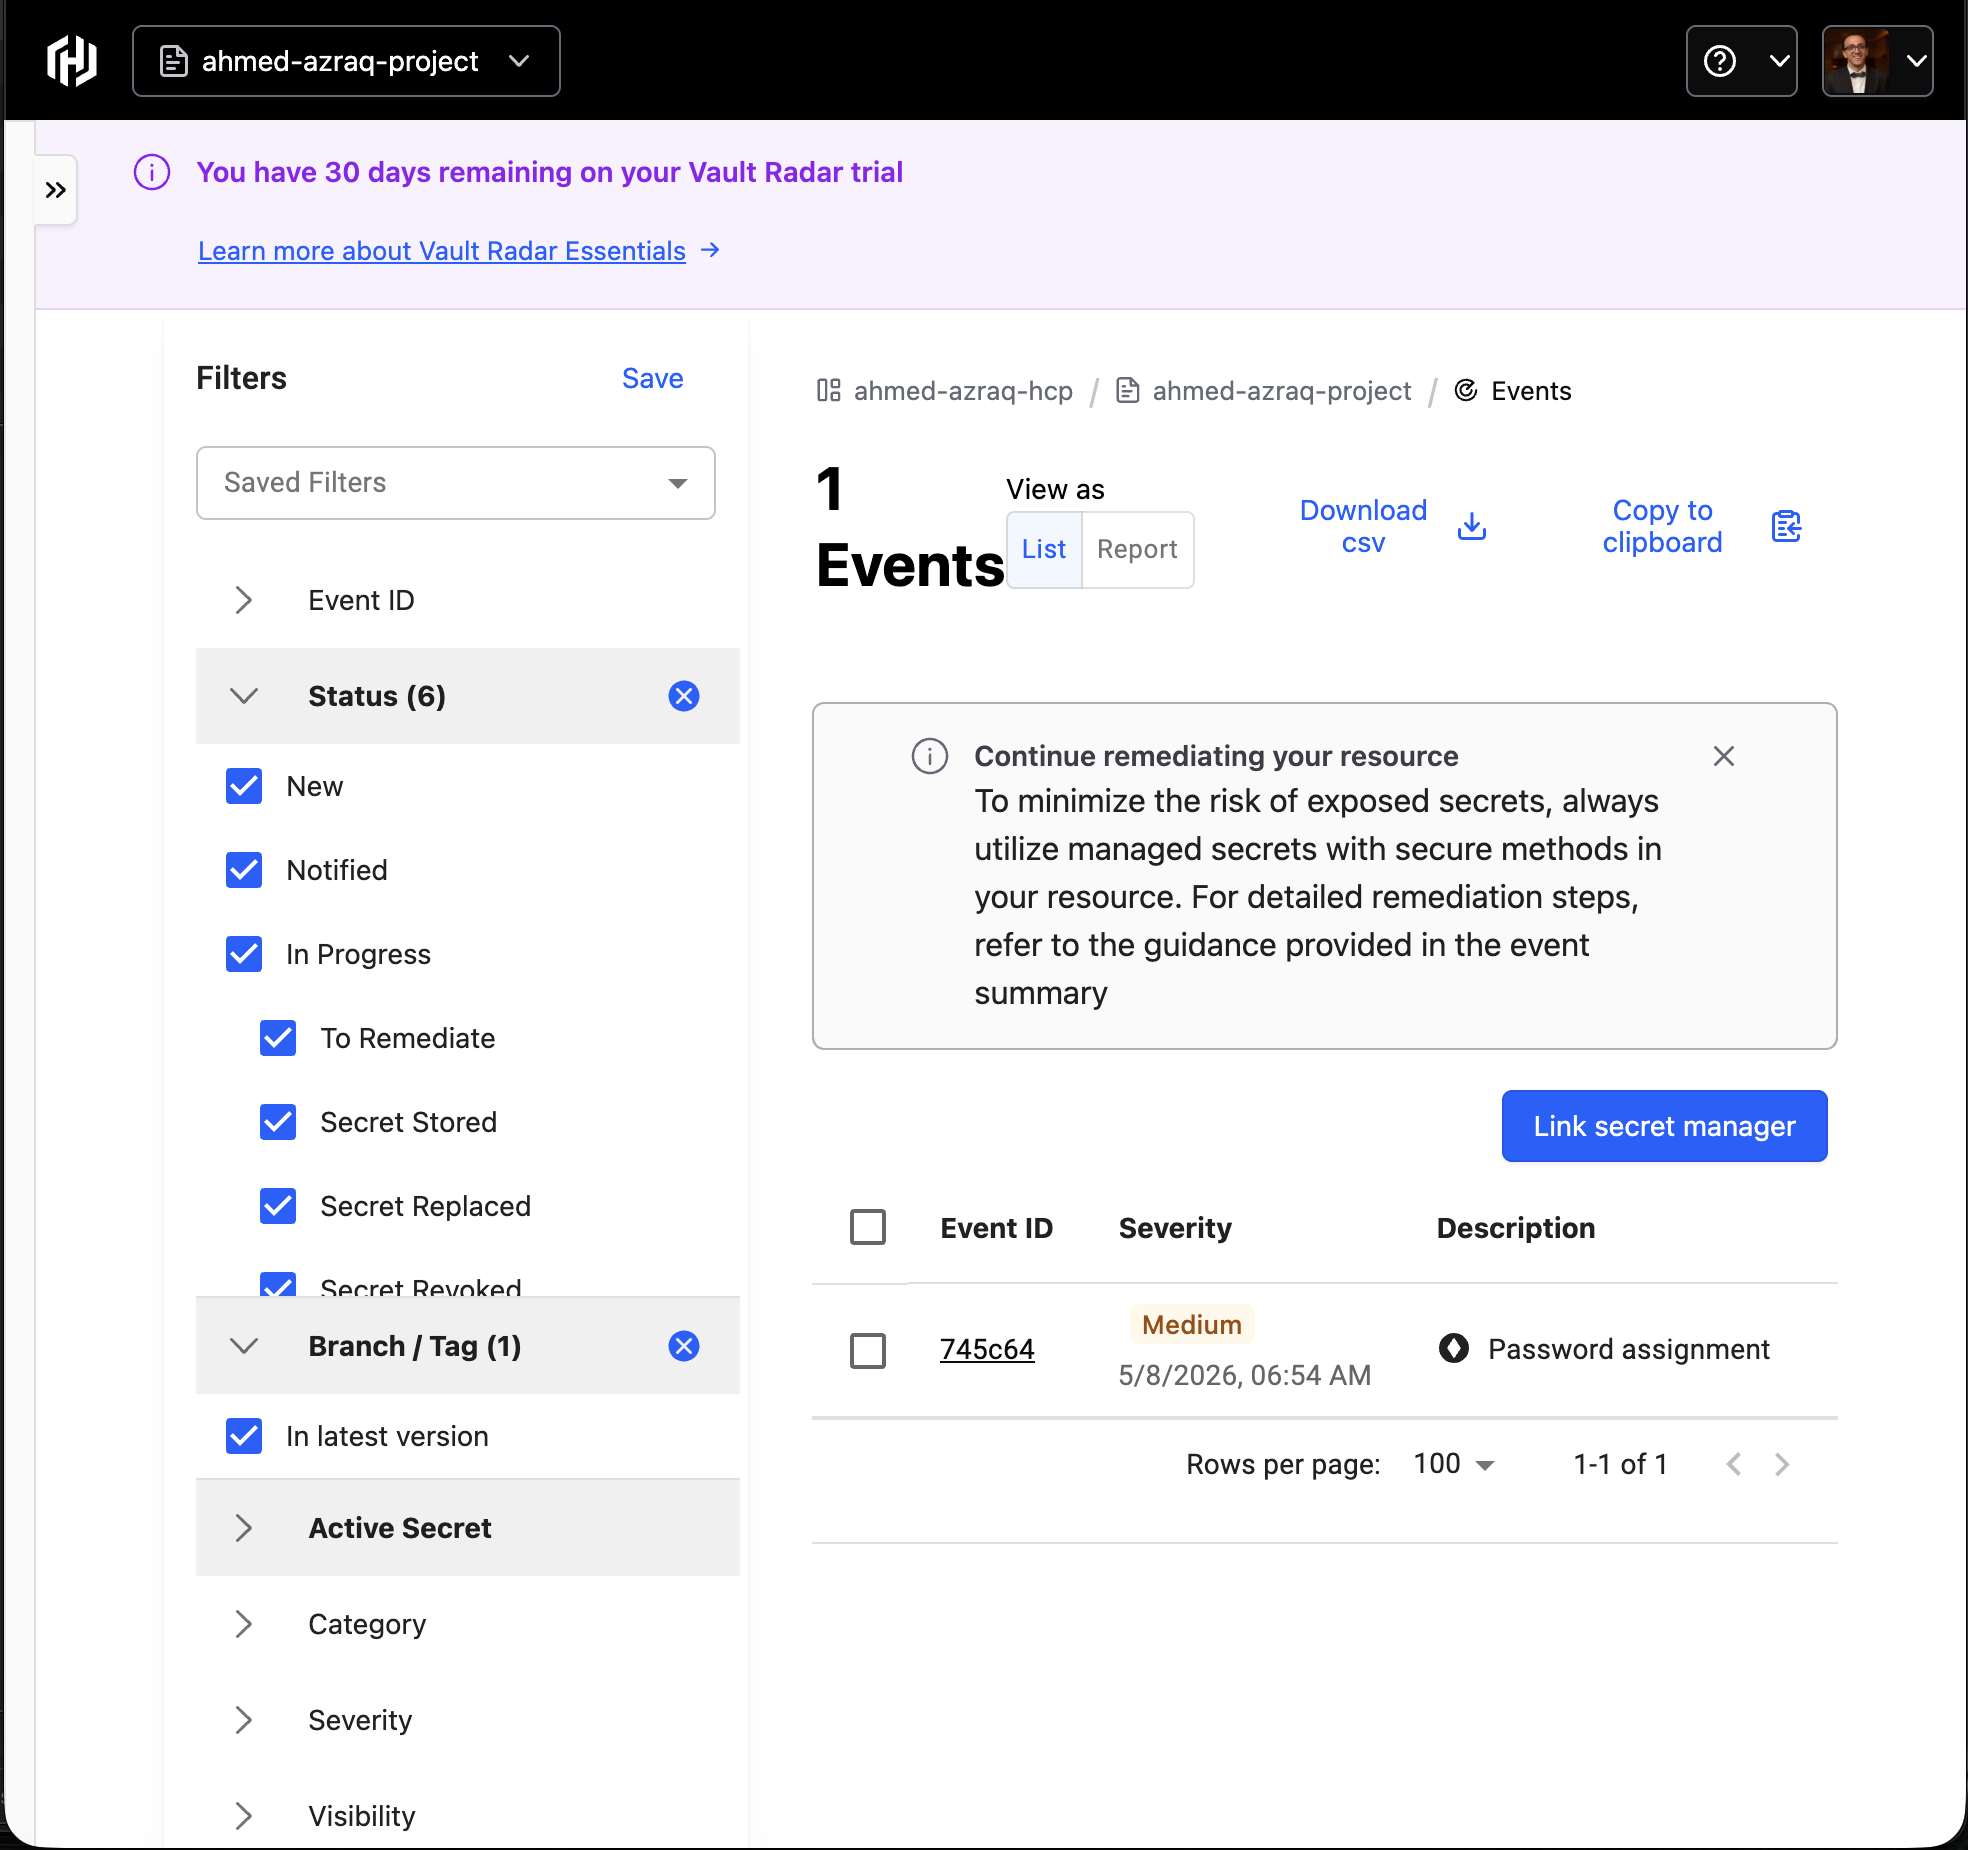
Click the Download CSV link to export all events to a CSV file. You will use this file in the next step.
Step 4. Set up and configure IBM Bob
In this step, you create a Bob workspace, clone the sample repository, and configure access to the Vault MCP server.
Open the Bob IDE.
Click File > Open Folder.
Click New Folder, name the folder “vault-bob”, and then click Open.
Click Terminal > New Terminal to open the terminal panel at the bottom of the window. Run the following command to clone the forked sample repository. Replace
with your actual GitHub user name. git clone https://github.com/<YOUR_USER_NAME>/hcp-vault-radar-foundations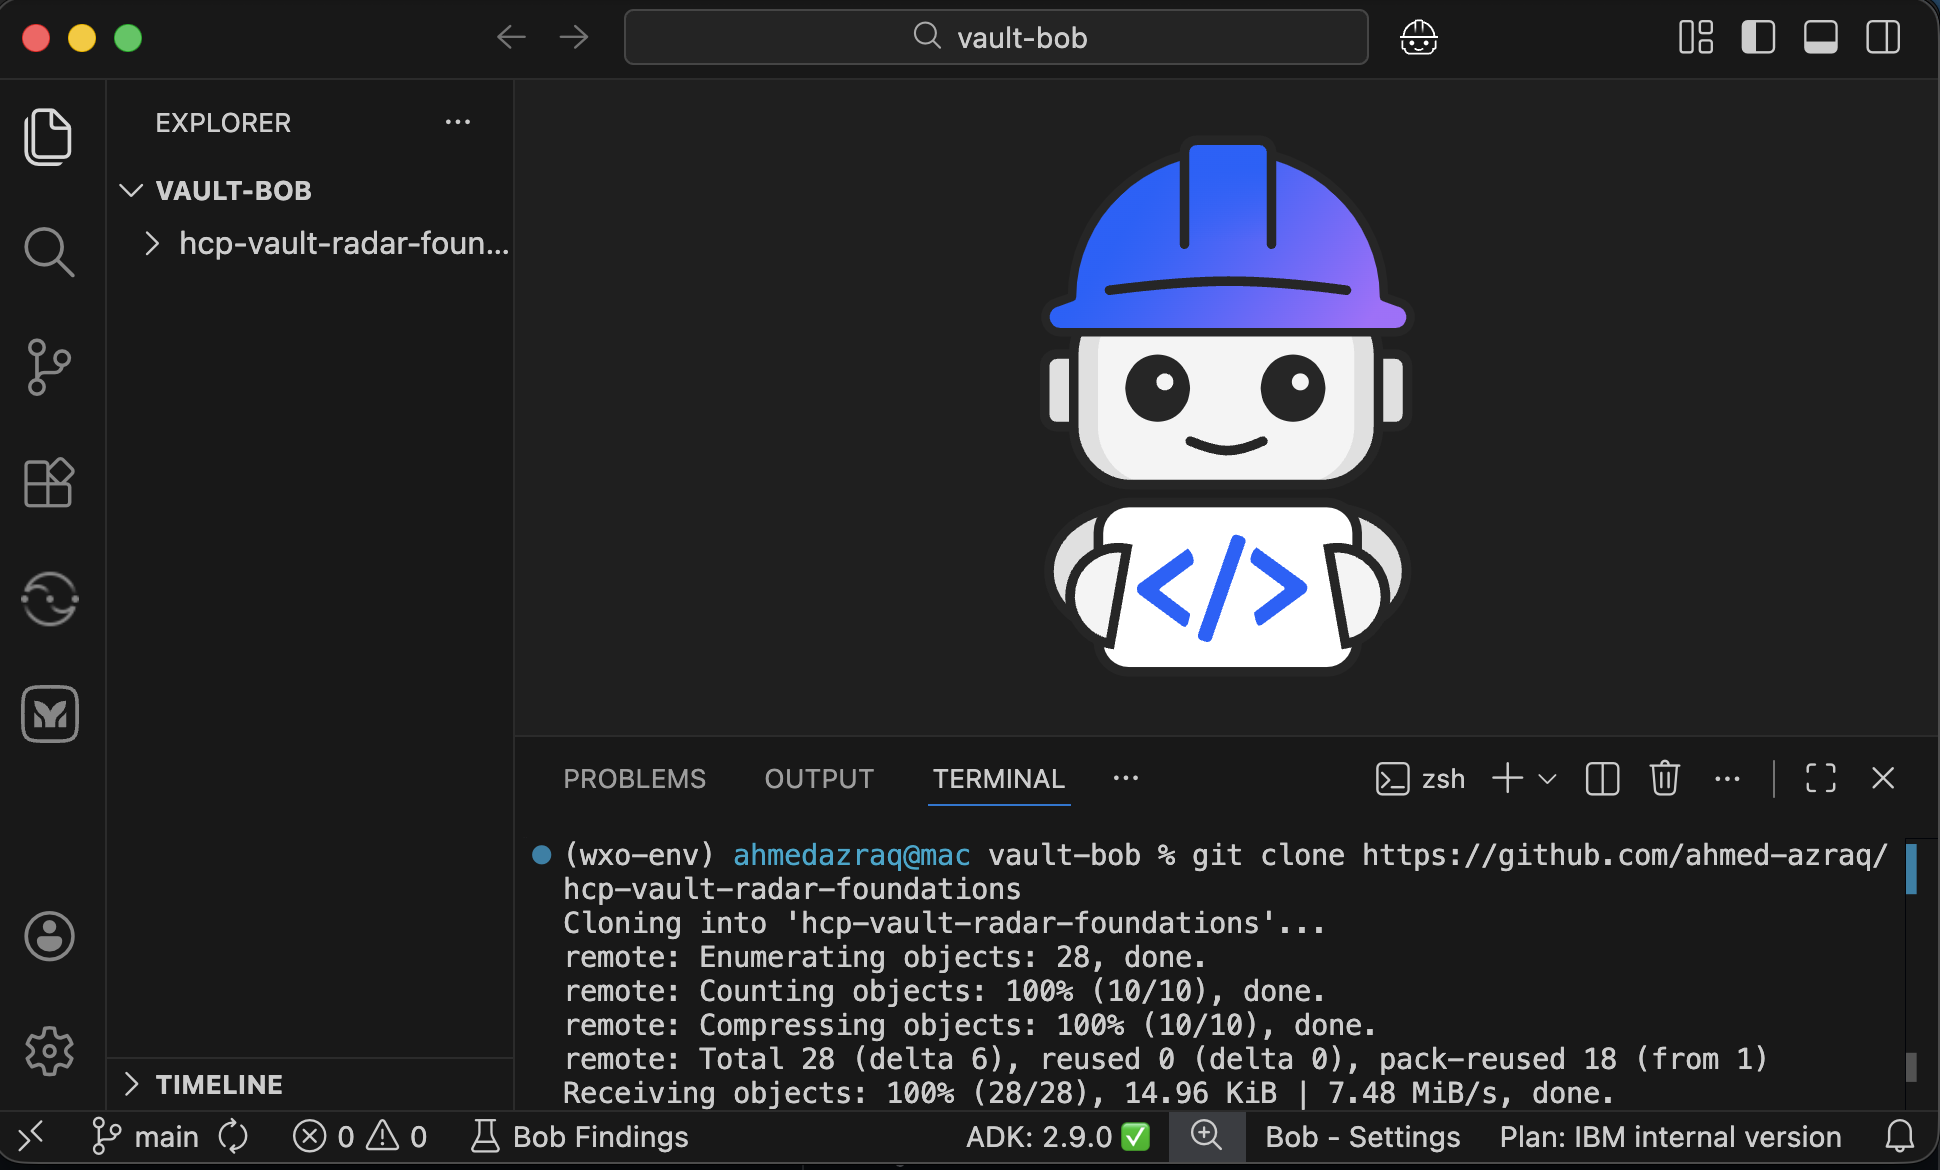
Create a new folder named
vault-radar-results. Copy the CSV from the Vault Radar scan into this folder.Create a new folder named
.bob. Use this folder to store Bob configuration files. Create new file namedmcp.json. Add the MCP server configuration to connect to the Vault MCP server. ReplaceVAULT_ENV_SERVER_ADDRESS,VAULT_ENV_AUTH_TOKEN, andVAULT_ENV_NAMESPACEwith the values from your Vault Dedicated cluster.{ "mcpServers": { "vault": { "command": "docker", "args": [ "run", "-i", "--rm", "-e", "VAULT_ADDR", "-e", "VAULT_TOKEN", "-e", "VAULT_NAMESPACE", "hashicorp/vault-mcp-server:0.2.0" ], "env": { "VAULT_ADDR": "VAULT_ENV_SERVER_ADDRESS", "VAULT_TOKEN": "VAULT_ENV_AUTH_TOKEN", "VAULT_NAMESPACE": "VAULT_ENV_NAMESPACE" } } } }
Step 5. Manage secrets, certificates, and refactor code
In this step, you instruct Bob to use the Vault MCP server to perform these tasks:
Create a Root CA (Certificate Authority) to issue certificates and generate a certificate for the sample application in the forked repository.
Store credentials, service URLs, and configuration values as secrets in Vault.
Then, Bob refactors the code to retrieve database credentials and service URLs from Vault.
In IBM Bob, select the
Agentmode to access MCP servers.Read the following prompt carefully. Then, copy and paste the following spec-driven-development-specific (SDD-specific) prompt into the Bob chat interface. This prompt uses natural language to instruct Bob clearly to follow five phases for having clean code.
 You are tasked with securing a codebase that has been scanned by Vault Radar for exposed secrets, with results stored in a CSV file within the current workspace.

 Your objectives are:

 1. Analyze the Vault Radar CSV results to identify all exposed secrets including API keys, passwords, tokens, and other sensitive credentials.

 2. Perform an additional scan of the code to identify:
 * All SSL/TLS certificates (existing certificates and identify where TLS should be implemented)
 * All service URLs including hardcoded URLs

 1. Use the Vault MCP Server to:
 * Securely store all identified credentials
 * Issue SSL/TLS certificates for secure communication and manage all certs

 1. Refactor the entire codebase to:
 * Integrate with Vault for retrieving secrets at runtime
 * Implement TLS/SSL for all network communications using Vault-issued certificates
 * Remove all hardcoded credentials and URLs

 1. Documentation requirements:
 * Do NOT create any documentation file and make sure that there is no example secrets, passwords, API keys, or certificates in documentation
 * The code and documentation must be 100% clean - use placeholders or references to Vault paths instead
Bob starts by analyzing the Vault Radar output and the codebase to identify hardcoded URLs and certificate usage. Review the action plan.

Bob connects to the Vault MCP server and checks for an existing secrets engine in Vault. The Vault Dedicated cluster uses the default mount, so the secrets engine is already available. Bob then stores the secrets in the secrets engine. Click Approve for task.

Bob sets up Public Key Infrastructure (PKI) in Vault. Bob creates a Root CA and an issuer for SSL/TLS certificates. Click Approve for task.

Bob stores credentials, service URLs, and configuration values as secrets, then issues an SSL/TLS certificate for the application. Click Approve for task.

Bob refactors the code to retrieve secrets from Vault. Review the code changes by clicking on the main.go file.
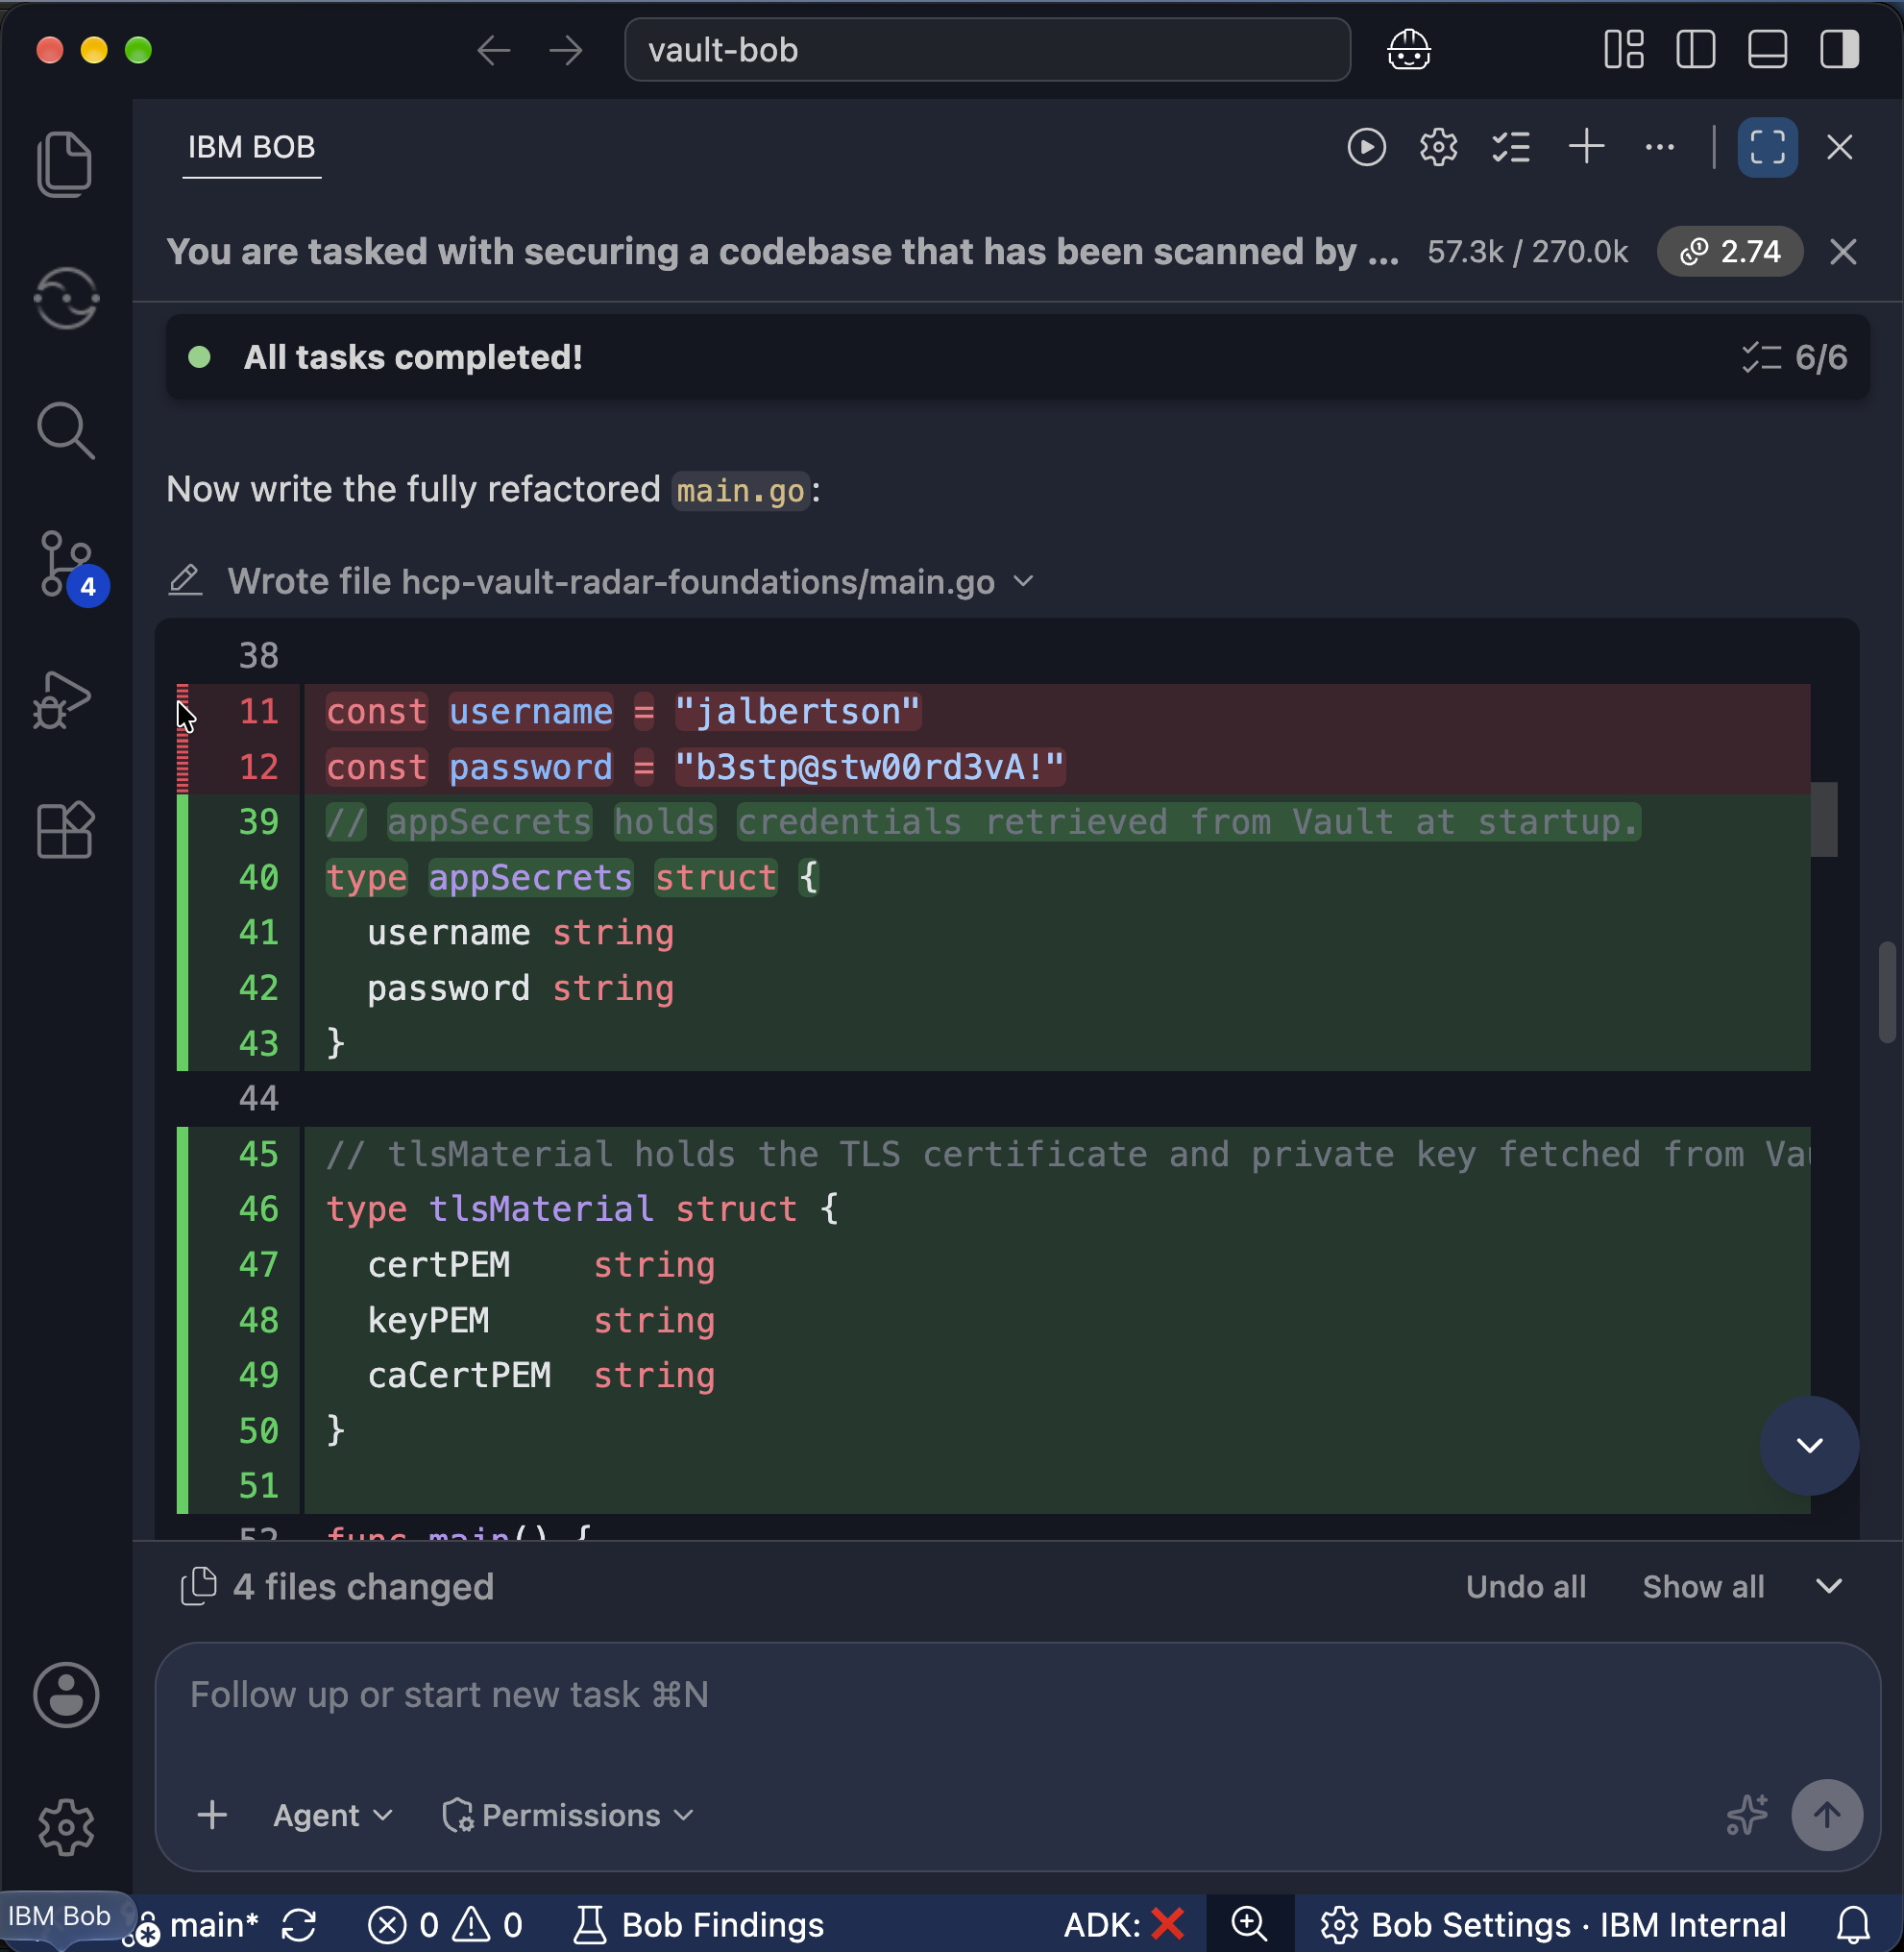
Step 6. Manage secrets and certificates in Vault
In this step, you verify the stored secrets and certificates in Vault and then update the password that had been exposed.
Sign in to your HashiCorp Cloud Platform account.
In the left navigation menu, click Vault Dedicated. Select your cluster, and then click Launch web UI.
Enter your Vault token, and then click Sign in.
In the left navigation menu, click *Secrets.

Review the Root CA, intermediate CA, secrets, and configuration values that Bob created through the Vault MCP server.
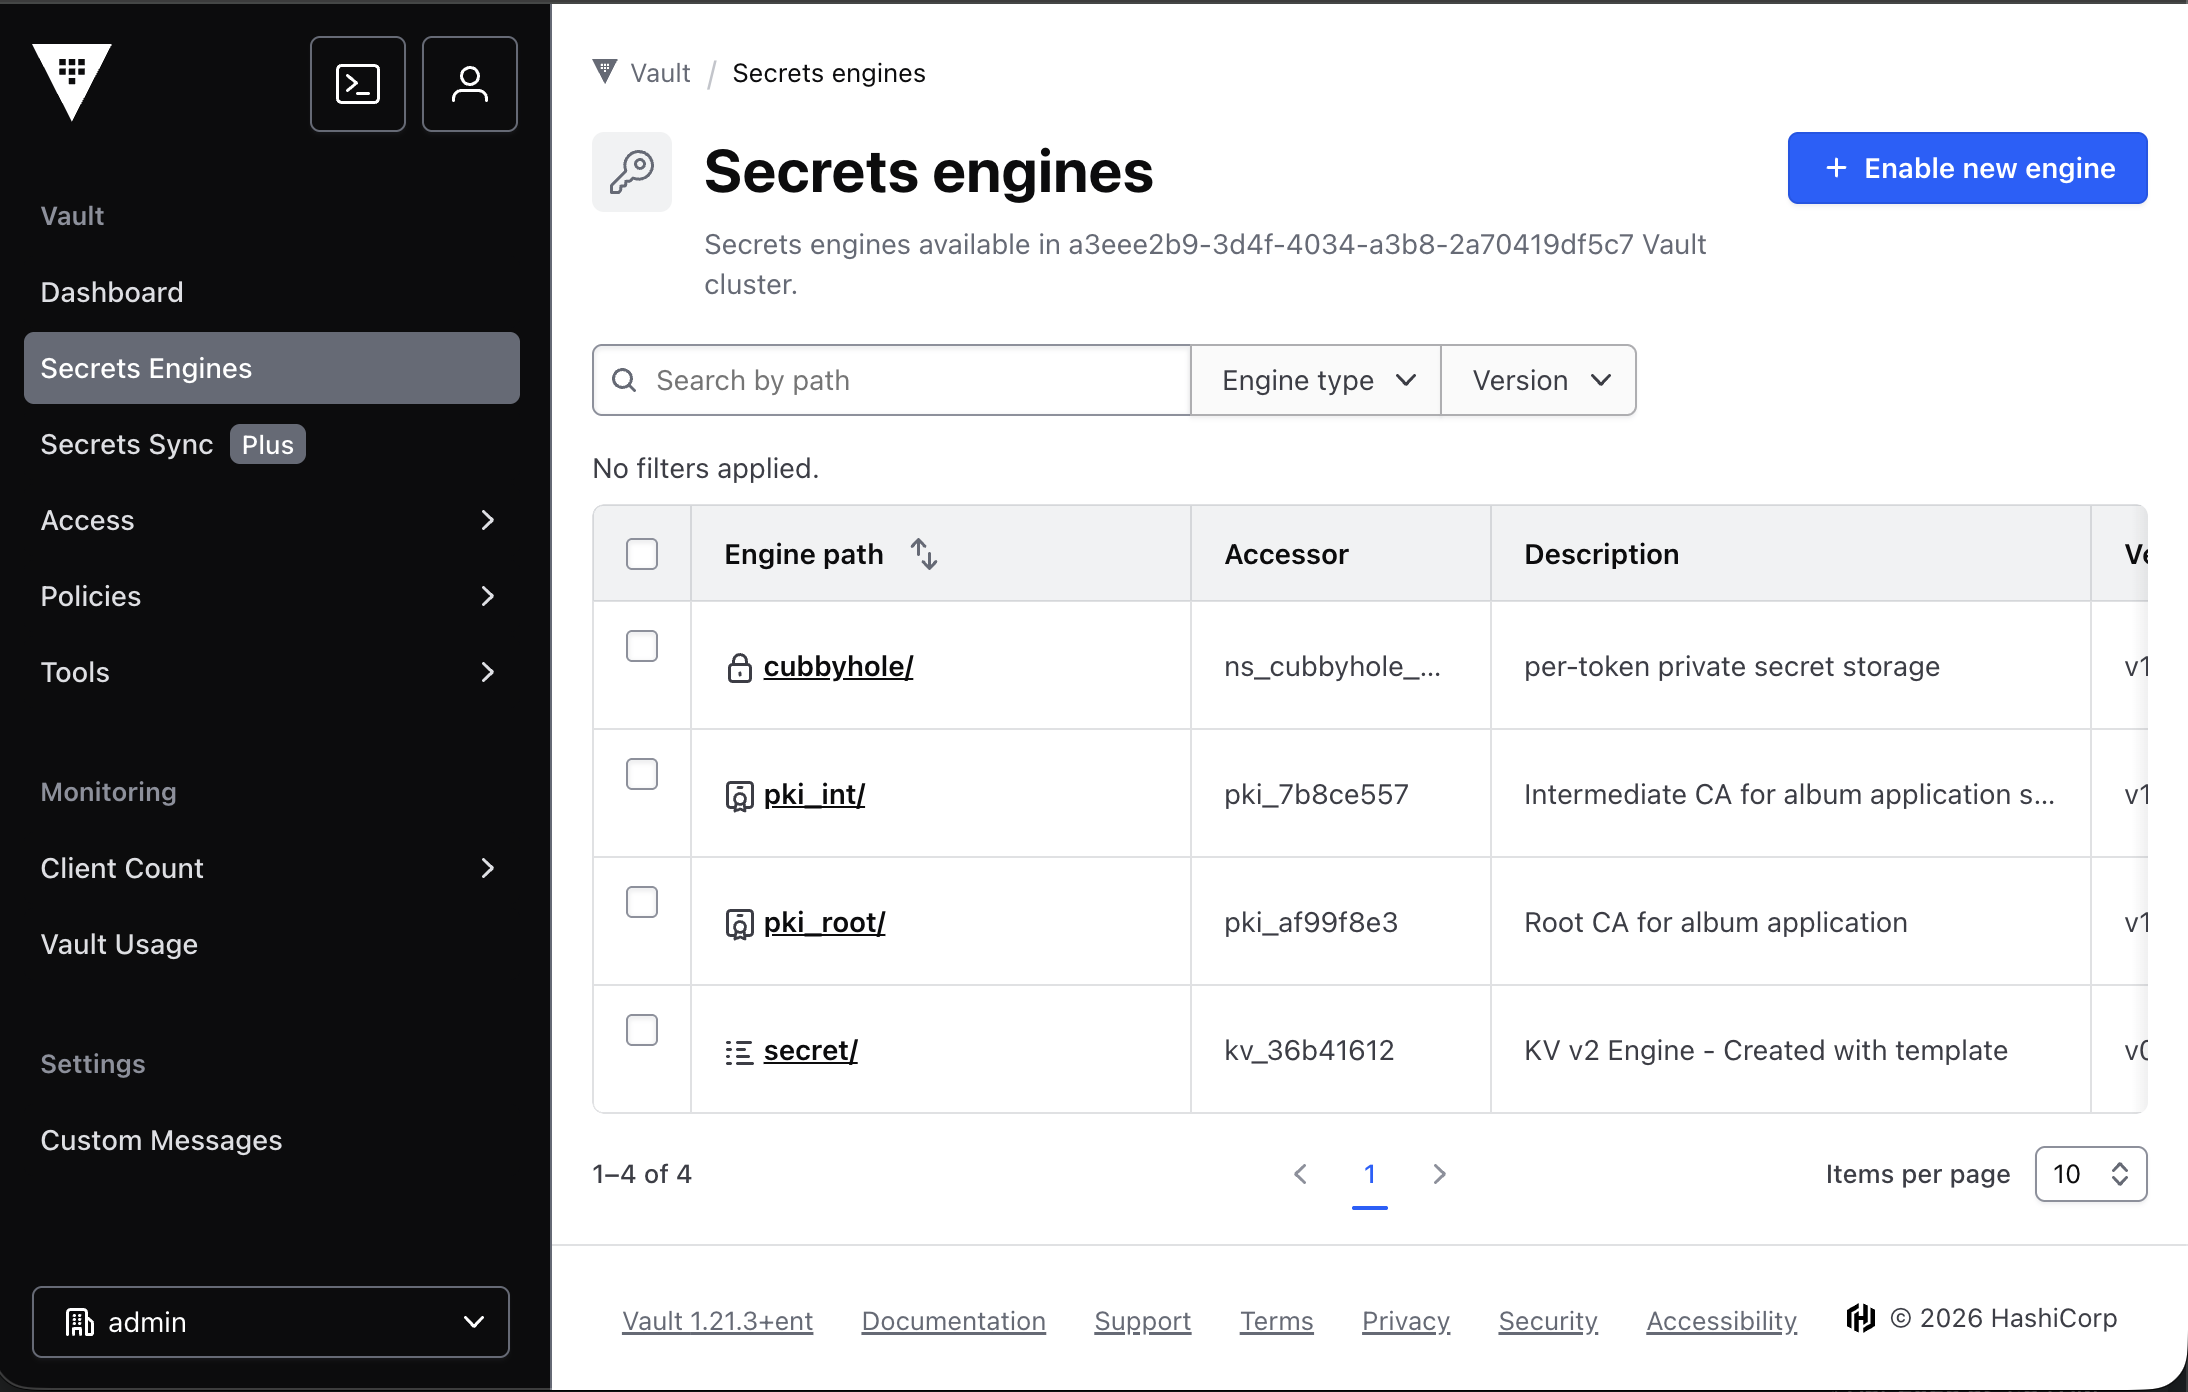
Open the secret/ engine path, then album-app, then auth, and click the Secret tab.
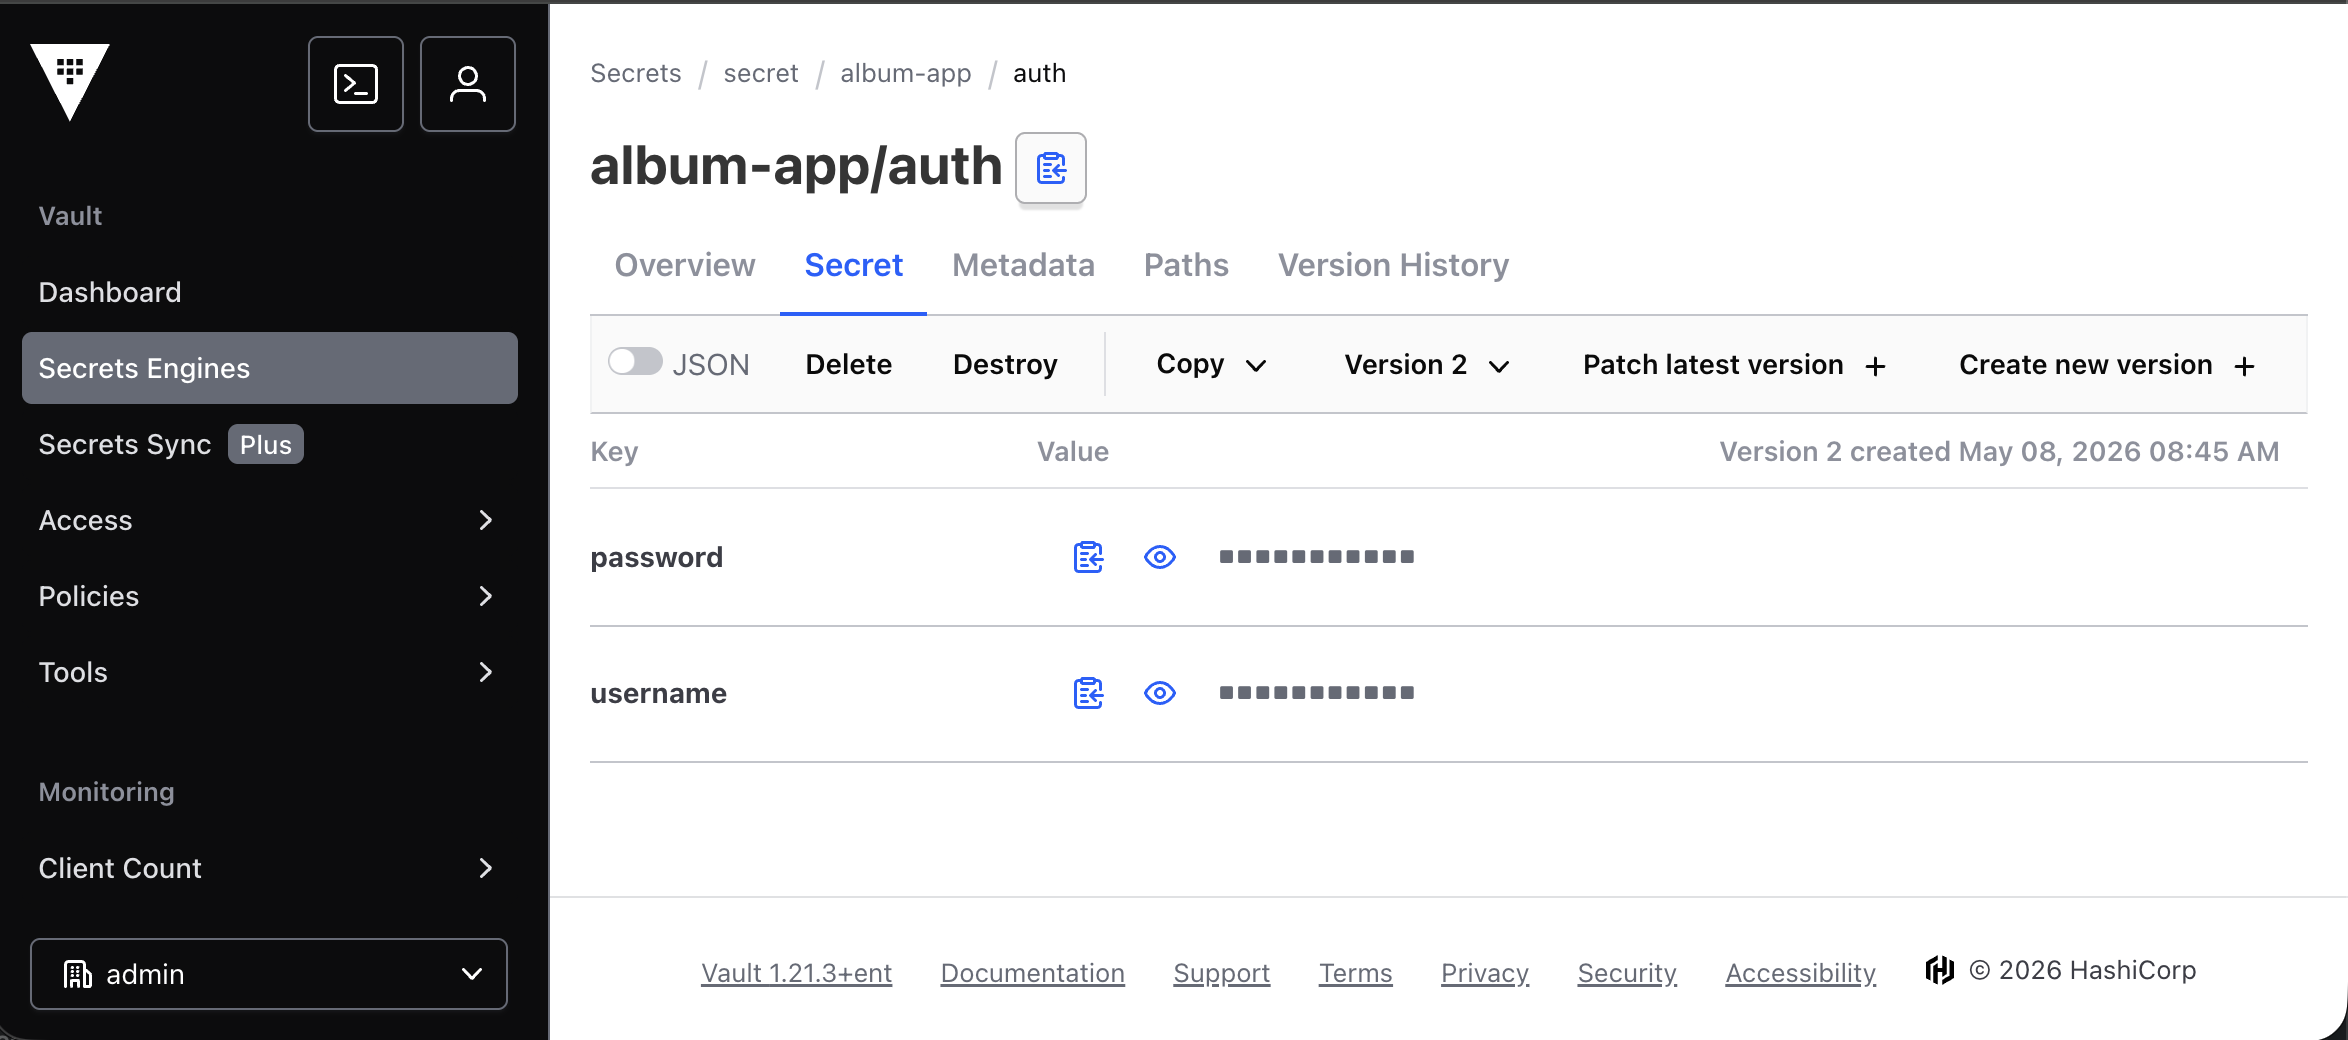
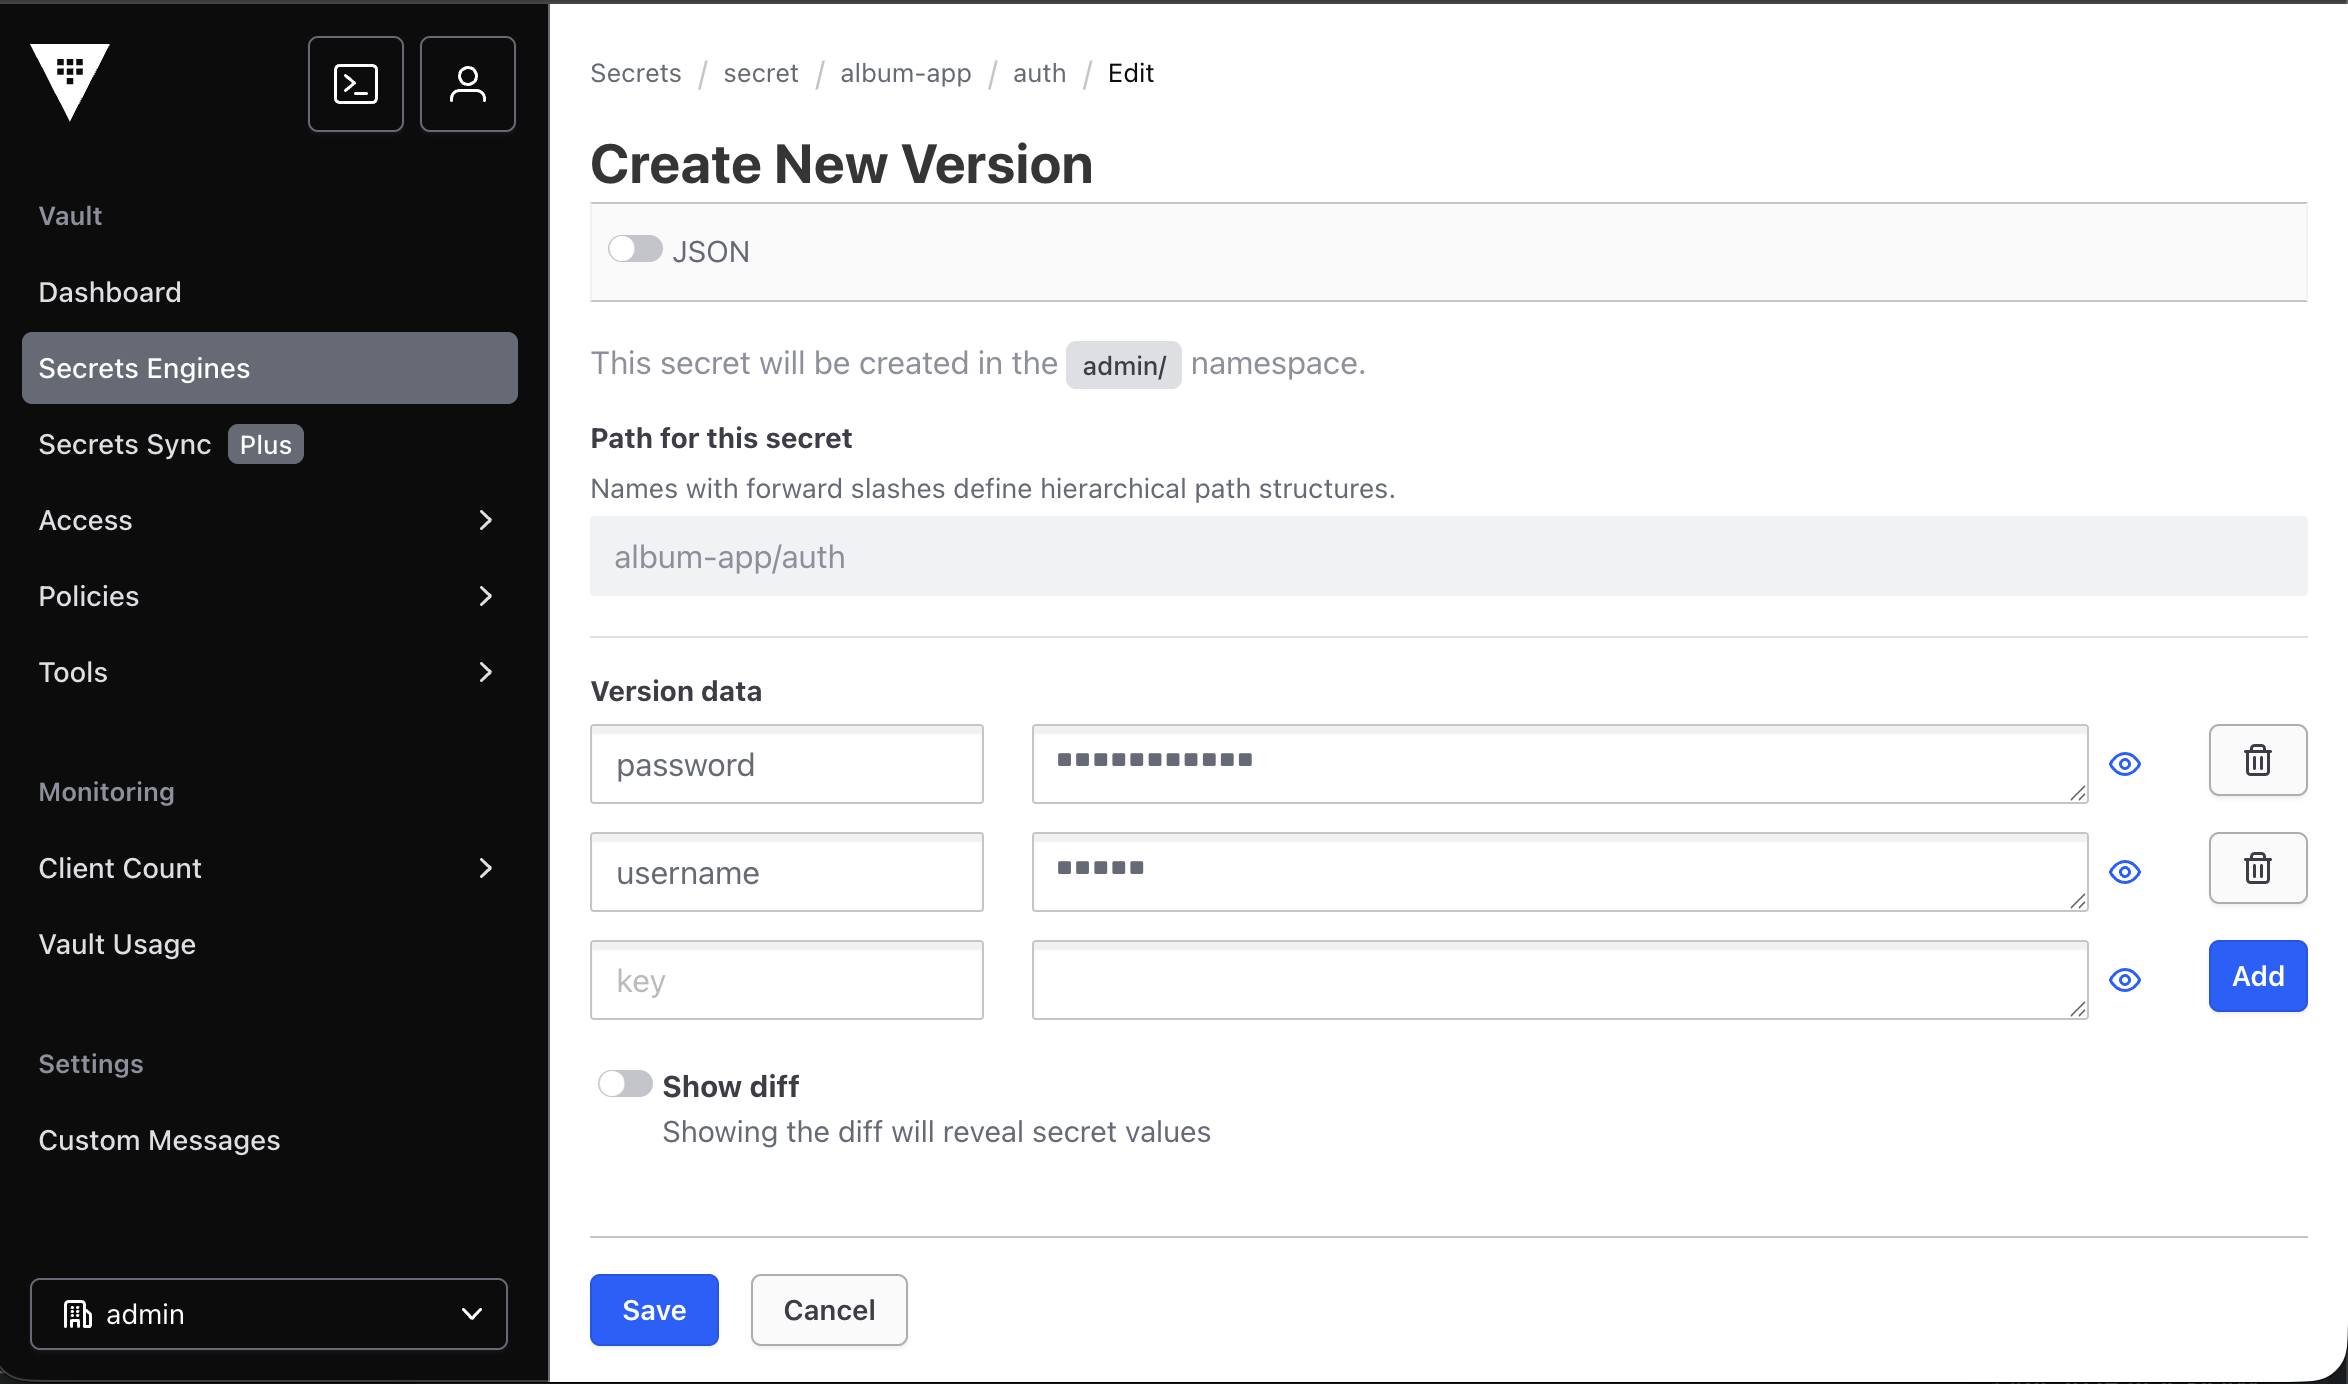
This database credential has been exposed and needs to be changed. Click Create new version, enter new database credential values, and then click Save.
Step 7. Clean up
Once you are done, make sure that you clean up the resources and delete the Vault cluster using the Delete a HCP Vault Dedicated cluster guide.
Summary and next steps
In this tutorial, you learned a spec-driven development approach, where security requirements are defined first and implementation follows. You learned how to secure your codebase by using Vault Radar to identify secret exposures and integrating Vault into IBM Bob (using the Vault MCP Server) to store credentials and manage certificates for your application. You also learned how Bob can refactor the entire application to eliminate all hardcoded secrets, implement HTTPS with Vault-issued certificates, and retrieve all credentials dynamically at runtime.
IBM Bob structured the security remediation following HashiCorp best practices: organizing secrets in logical paths, establishing a complete PKI hierarchy with root and intermediate CAs for TLS certificate issuance, and implementing secure HTTPS communication. Through the Vault MCP server, Bob created the PKI infrastructure, stored all identified secrets, issued certificates, and validated the complete security posture without requiring manual Vault CLI commands.
Using Bob with Vault enables a shift-left security approach to application development: developers can identify vulnerabilities early through Vault Radar scanning, Bob remediates those vulnerabilities by integrating enterprise secrets management during development rather than post-deployment, and developers can focus on business logic while security controls are built in from the start.
The following figure summarizes the tasks that IBM Bob completed.

Next steps
Next, explore how to take this a step further by introducing ContextForge MCP Gateway, through following this tutorial: Enforce secure coding with AI and secret management using IBM Bob, Vault, and MCP Gateway.
Acknowledgments
This tutorial was produced as part of an EMEA initiative sponsored by Ralph Demuth and an IBM Open Innovation Community initiative to develop tutorials and learning content for integrating IBM Bob with other products.
The author Ahmed Azraq deeply appreciates the support of Carmen Raileanu and Sara Asano for the guidance on reviewing and their contributions to this tutorial.