Tutorial
Use IBM Cloud Hyper Protect Crypto Services to encrypt VMware disks
Encrypt disks in an existing IBM Cloud VMware estate using secure key storage and a KMIP instanceIBM Cloud offers integrated VMware solutions. Each virtual machine (VM) you stand up has storage coupled to it, which you may want to encrypt. These VMs may host applications and data that contain sensitive information, so you would need to lock it down.
You can encrypt this storage via highly secure, industry-standard algorithms. But this can lead to a key management concern: Where do you keep the keys, and how do you secure them? You can now configure a tight integration between IBM Cloud Hyper Protect Crypto Services (HPCS) and VMware on IBM Cloud. This tutorial shows you how to set this up to ensure that your most sensitive data is protected.
HPCS allows for secure key generation and storage, and takes advantage of an industry-leading hardware security module (HSM). This is the only public-cloud HSM that offers FIPS 140-2 level 4 data protection, built on IBM LinuxONE. This HSM is highly tamper resistant. Store your keys here, and you can be sure that they're kept safe from hackers -- and even from IBM. No one but you can read them.
IBM Cloud HPCS is a "managed service" with a pay-as-you-go cloud pricing model. It runs on the IBM Hyper Protect platform that leverages Secure Execution for Linux to create confidential computing enclaves. Any service / application that runs on the Hyper Protect platform provides *Technical Assurance" that only the customer has access to the service and no one else.
Customers can also choose to configure and run IBM Hyper Protect Services on an on-premise LinuxONE machine in their own datacenter, to configure and use a FIPS 140-2 Level 4 HSM to generate encryption keys that can service the whole enterprise.
Learning objectives
This tutorial will show you how to integrate IBM Cloud Hyper Protect Crypto Services (HPCS) with VMware solutions in IBM Cloud. You'll learn how to initialize HPCS with a master-key. The master-key can be created from key-parts that can be owned and managed by multiple systems or people in your organisation. With this, taking advantage of envelope encryption, your VMware disks can be encrypted while the keys are stored securely. The integration between HPCS and VMware is provided by a KMIP adapter.
Prerequisites
To complete this tutorial, you'll need:
- An IBM Cloud pay-as-you-go account
- A VMware environment in IBM Cloud
- Access to an HPCS instance in IBM Cloud
- The IBM Cloud CLI, with TKE plug-in
Estimated time
It should take you about about 60 minutes to complete this tutorial.
Components of the solution
To complete this solution, you'll need to follow these three general steps:
- Create keys in HPCS
- Create a Key Management Interoperability Protocol (KMIP) instance, with a mutual authentication handshake between KMIP and your HPCS instance
- Connect your KMIP instance to your VMware environment, again after handshaking for authentication.
Let's start with the HPCS key creation process.
Step 1 Create an HPCS instance and initialize with master-key
Create your HPCS instance by following instructions at Getting started with IBM Cloud Hyper Protect Crypto Service. For this tutorial, initialize the HPCS instance with key-part-files
Viewing the Overview tab of the HPCS instance in IBM Cloud, you should see the crypto-units as Initialized and running:
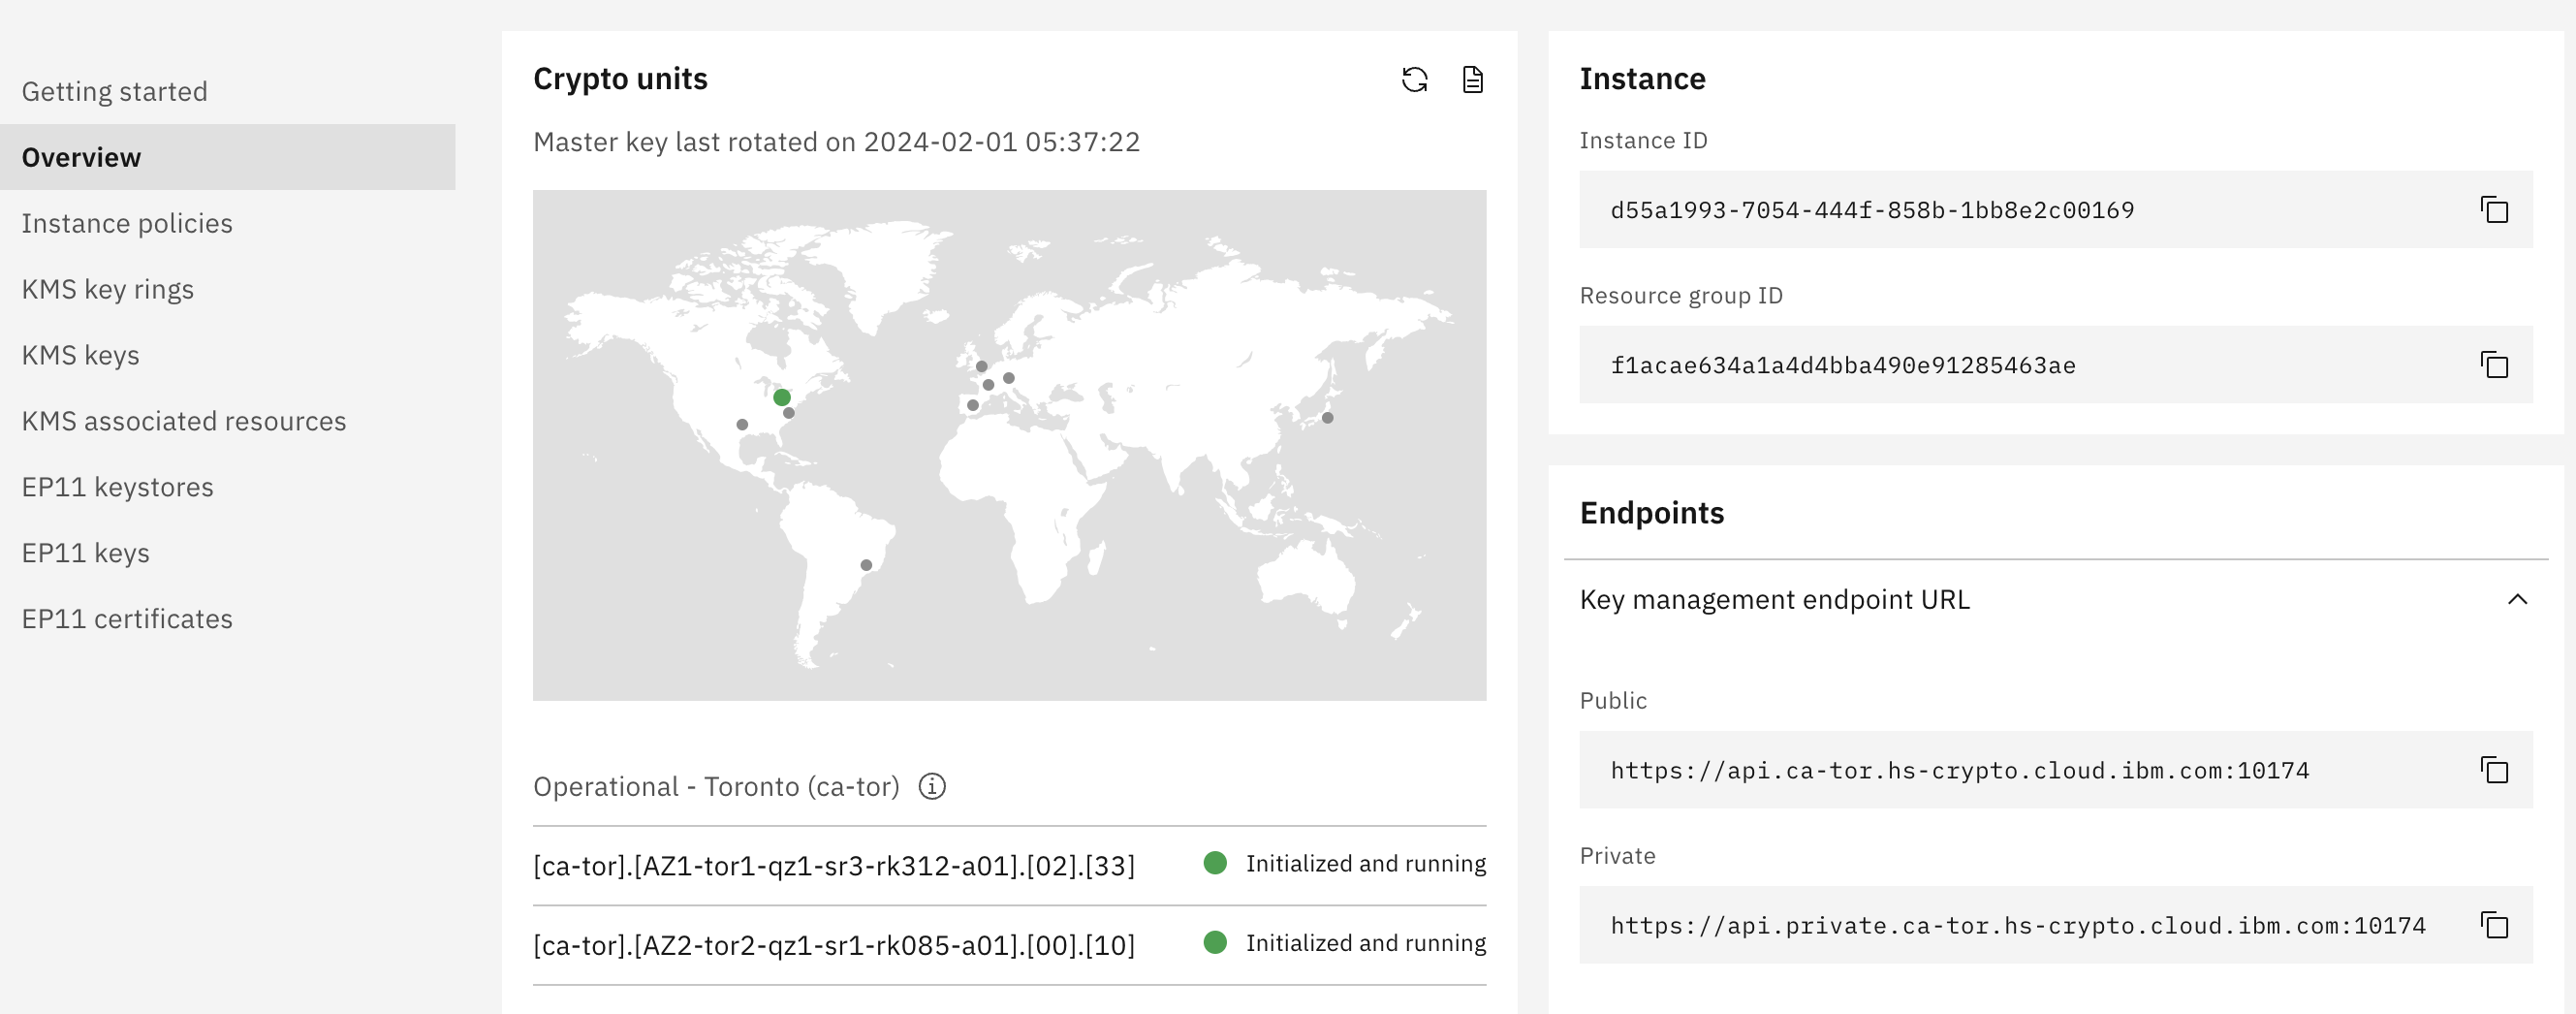
HPCS uses the recommended envelope encryption mechanism of taking a key that's used to encrypt data, the data encryption key (DEK), and encrypting the key itself with a root key. This root key never leaves the confines of HPCS.
To create a root key, go to the KMS Keys tab of your HPCS instance and click the Add key button and name the key appropriately.
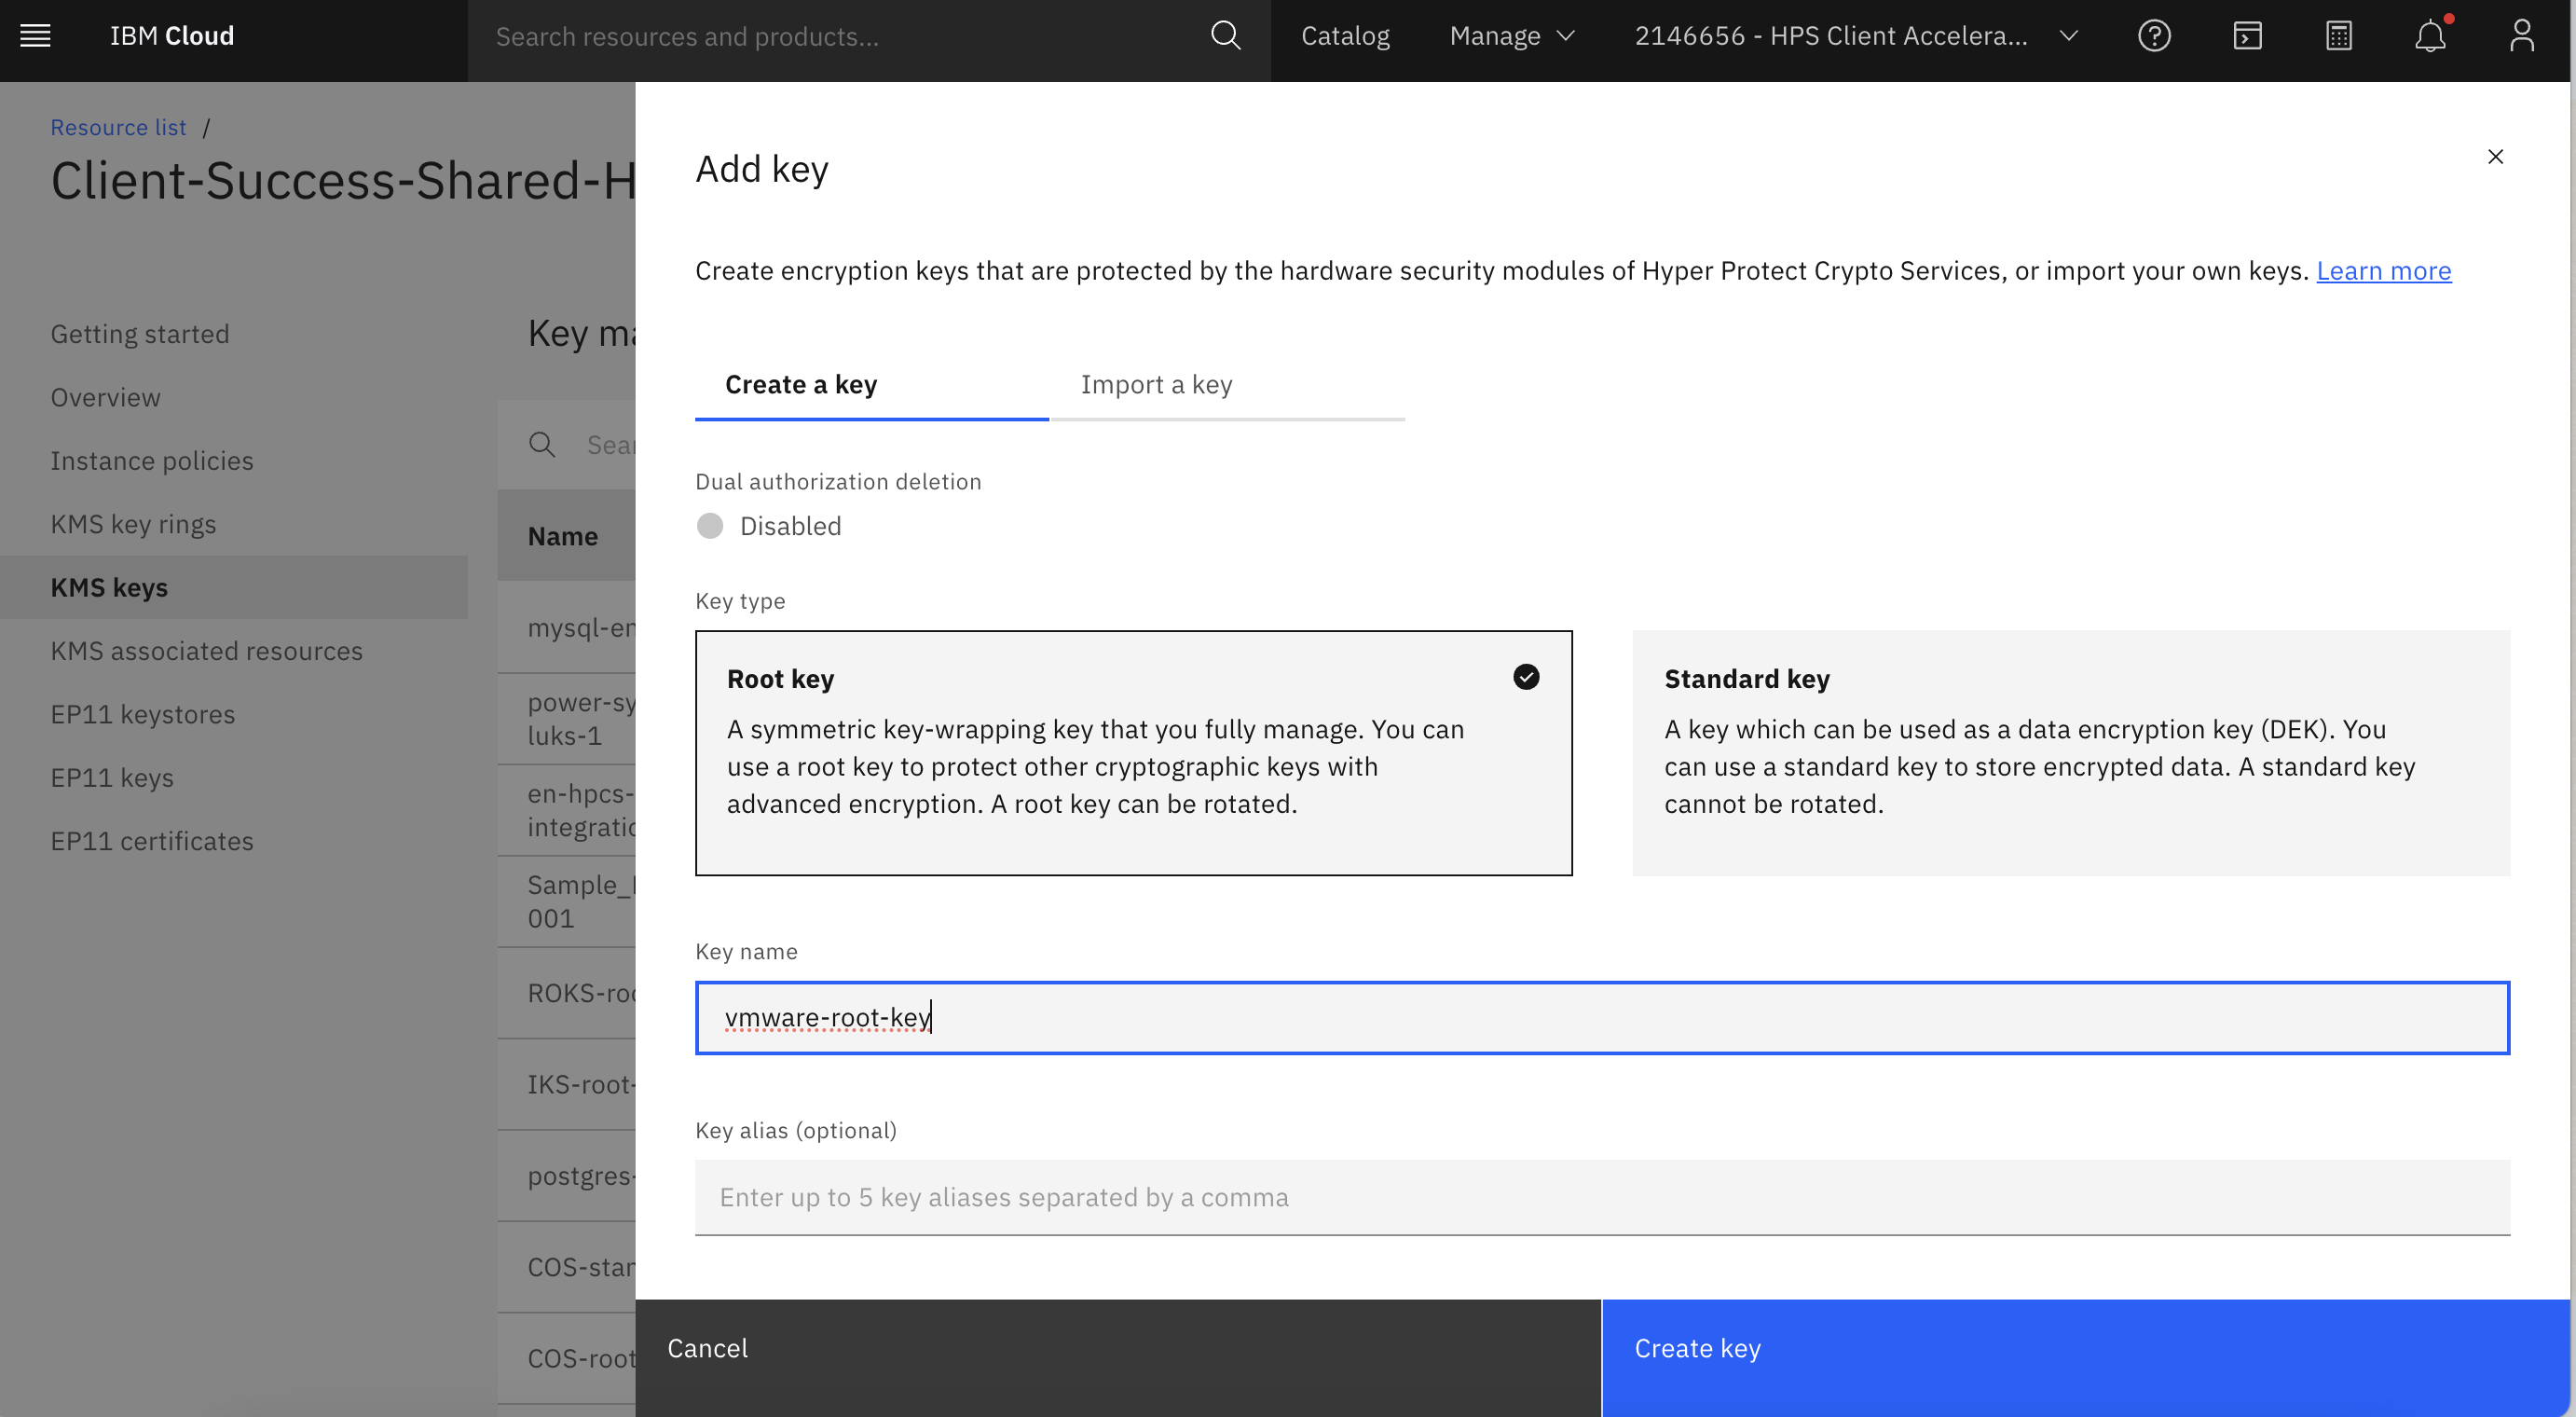
Perform this operation again to create a standard key, called vmware-dek.
The HPCS part of the setup is now complete. Next, you need to install and configure a KMIP adapter in IBM Cloud.
Step 2 Create a KMIP instance in IBM Cloud
Your VMware server has storage attached to it that you'll want to encrypt using the keys stored in the HPCS instance that you've just created. VMware doesn't talk via the same protocols as HPCS, though, so you need to set up an interfacing service, the VMware Key Management Interoperability Protocol (KMIP).
Ensure that you have an IaaS (Classic) account and that your IaaS account has virtual routing and forwarding (VRF) and service endpoints enabled.
Go to the KMIP adapter page on IBM Cloud.
Generate an API key:
ibmcloud iam api-key-create MyHMKey -d "KMIP adapter"And copy the "API key" entry on to the above page.
Retrieve your key manager instance; mine shows
hpvs-vmware.Under the customer root key dropdown, choose the root key created in Step 1 ... here, it's
vmware-root-key.
This will take you to a VMware Solutions page. Under KMIP for VMware on IBM Cloud Instances, you'll see your HPCS instance installing.
That should now be all configured. Finally, you're ready to couple this KMIP instance to your VMware in IBM Cloud installation.
Click the link to your new KMIP adapter. It will confirm the name of your HPCS instance and your customer root key.
Download the KMIP server CA certificate and the KMIP server certificate. Note the endpoints, for example.
 kmip-1.private.us-south.vmware-solutions.cloud.ibm.com:5696
 kmip-2.private.us-south.vmware-solutions.cloud.ibm.com:5696
Step 3 Connect KMIP to VMware in IBM Cloud
Now, you want to couple the KMIP adapter to your VMware vCenter or vSphere instance. First, you need to configure the VPN so you can access the VMware console.
Connect via a MotionPro Plus VPN client. I grabbed the 9.4.0.x branch after following this blog post. Alternatively, a jump server can be used as well.
The VPN client needs to know the endpoint to connect to. On your VMware Solutions Resources page, choose the instance you want to configure your KMIP adapter with.
Note the region where it's located.
Find the corresponding SoftLayer VPN endpoint. For example, for DAL13 it's:
vpn.dal.softlayer.comConnect your VPN to site address
[endpoint]:443with the username and password for your VPN infrastructure account.
Now you should be able to connect to the VMware console on the private network.
Edit the
/etc/hostsor equivalent file on your local system to map the vCenter/PSC IP IP address to the vCenter/PSC FQDN domain. For example:10.208.85.196 vcenter.vcs-scott.example.com 10.208.85.196 vcenter-vcs-scott.vcs-scott.example.comOn your VMware Solutions Resources page, click the button to open the console, or navigate to the domain given in the vCenter/PSC FQDN field.
Launch the client.
At the username and password prompt, from the VMware resources page, find the combination given in the vCenter/PSC ADMIN field. You'll need to click the eye icon to reveal the password; the username is shown before the
/.Click Menu > Global Inventory Lists > vCenter Servers > Configuration > Key Providers > Add.
Choose to create a new cluster and give it a name, along with the server name (name of the KMIP adapter).
Get the hostname and port from your KMIP adapter. If you need to specify proxy details, do so, but I've left it blank.
Click Trust to make vCenter trust KMS.
For the populated key management server entry, click the drop-down icon to see how far the chain of trust has gone. Click Make KMS Trust vCenter. Choose vCenter Certificate. This will generate a root CA certificate for you, which needs to be passed to the KMS. Click Copy.
Back in the KMIP adapter config page, under Client SSL Certificates, click the Add button. Give it a name, then click Add.
Go back to the vSphere Client, and click Done. If you click the refresh symbol in the client, you'll see that trust has now been established between the vSphere environment and the KMIP adapter.
Now you can make use of this integration by creating a new virtual machine with encrypted storage, with its key protected with HPCS.
Create a new VM with encrypted storage
From the vCenter Servers page in the vSphere Client:
- Right-click the data center under the hostname in vSphere client on the left.
- Choose New Virtual Machine..., and Create a new virtual machine.
- Choose Next, and give it a name.
- Choose the defaults until you get to VM Storage Policy, and choose VM Encryption Policy in the dropdown. (We chose Management share for compatible storage; we're going to use a 64-bit Ubuntu Linux image.)
- Click browse under New Network to choose SDDC-DPortGroup-Mgmt (in our case).
- Choose a datastore ISO image to define the VM as, and click the connect box.
Once you've done this, choose the new VM on the left-hand side. Under VM Hardware, it should say that the disk and configuration files are encrypted.
If you click the task in the Recent Tasks pane and choose the VM, one of the log items will be for CreateVM, indicating that it's an encrypt disk operation that uses the KMIP adapter you defined previously. If you go back to the Manage page for the HPCS instance, you'll see the new key in use.
And that's all there is to it. Once the HPCS and KMIP parts of this tutorial have been completed, the actual setup and use of this connection is quite fast, and your keys are now protected by the industry's best hardware security module.
Summary
IBM Cloud Hyper Protect Crypto Services allows for secure key generation and storage, and takes advantage of an industry-leading Hardware Security Module (HSM). This is the only public cloud HSM that offers FIPS 140-2 level 4 data protection, which means that it's highly tamper-resistant. Store your keys here, and you can be sure they're kept safe from hackers, and even from IBM. No one but you can read them.
With the integration between this service and the VMware solutions in IBM Cloud, you can take advantage of this best-of-class technology to encrypt VM disks across your VMware estate. For more information, check out the IBM Cloud Hyper Protect Crypto Services demos.
Acknowledgements
I would like to thank Chris Poole for his contributions to the original tutorial.