Article
Build GitOps-ready Java middleware using WildFly golden images
Use Ansible to automate middleware configuration with CI/CD pipelines and consistent deployments across all environmentsIn our previous article on automating WildFly deployments with Ansible, we explored how to use Ansible to configure and deploy WildFly on traditional infrastructure—virtual machines, bare metal servers, and existing environments. That approach works great for managing running servers where configuration happens at deployment time. But what if you're building container images for Kubernetes? You need everything pre-configured and ready to go. That's where golden images come in.
The challenge with building production-ready container images for middleware like WildFly is complex. You need to bake in JDBC drivers, datasources, JVM tuning, security settings, and clustering, all before deployment. The traditional approach using Dockerfiles filled with bash scripts becomes an unmaintainable mess. You can't test without building the entire image. The configuration isn't reusable across VMs and containers. It's not idempotent. Debugging bash scripts inside container builds is a nightmare.
This article shows you how to extend the Ansible automation approach to build immutable, pre-configured golden images for container deployments. By using the same Ansible playbooks that configure running servers, you can now bake that configuration directly into container images. You get clean YAML configuration. You get instant local testing without building containers. You get the same automation working across your entire infrastructure—VMs, bare metal, and containers.
Once you have golden images, you can scale up to a full GitOps workflow. GitHub Actions provides automated CI/CD pipelines that build, test, and publish images on every configuration change. Kubernetes deployments scale effortlessly from 3 pods to 100. The same image you tested locally in Docker runs identically in production Kubernetes, eliminating "it worked in staging" surprises.
The Dockerfile problem: A concrete example
When you start building WildFly container images, the obvious tool is a Dockerfile. You start writing RUN commands with bash scripts to download WildFly, install JDBC drivers, and configure datasources by manipulating XML. Before you know it, you've got something like this messy Dockerfile example:
RUN microdnf install -y java-17-openjdk-headless wget unzip && \
microdnf clean all && \
# Download and install WildFly
cd /opt && \
wget https://github.com/wildfly/wildfly/releases/download/39.0.1.Final/wildfly-39.0.1.Final.tar.gz && \
tar -xzf wildfly-39.0.1.Final.tar.gz && \
mv wildfly-39.0.1.Final wildfly && \
rm wildfly-39.0.1.Final.tar.gz && \
# Create wildfly user and group
groupadd -r wildfly && \
useradd -r -g wildfly -d /opt/wildfly -s /sbin/nologin wildfly && \
chown -R wildfly:wildfly /opt/wildfly && \
# Download PostgreSQL JDBC driver
mkdir -p /opt/wildfly/modules/org/postgresql/main && \
cd /opt/wildfly/modules/org/postgresql/main && \
wget https://jdbc.postgresql.org/download/postgresql-42.7.1.jar && \
# Create module.xml for PostgreSQL driver (XML in bash = pain!)
printf '%s\n' \
'<?xml version="1.0" encoding="UTF-8"?>' \
'<module xmlns="urn:jboss:module:1.9" name="org.postgresql">' \
' <resources>' \
'  <resource-root path="postgresql-42.7.1.jar"/>' \
' </resources>' \
' <dependencies>' \
'  <module name="javax.api"/>' \
'  <module name="javax.transaction.api"/>' \
' </dependencies>' \
'</module>' \
> module.xml
And that's just for one JDBC driver. Multiply that by datasource configuration, JVM tuning, security settings, and clustering, and the Dockerfile becomes an unmaintainable mess. The real problems run deeper than messy code: you can't test without building the entire image (that typo in the XML? You won't find out until 10 minutes into the build), it's not reusable (this only works in containers, not VMs), it's not idempotent (run it twice and get duplicate entries or failures), and debugging bash scripts inside container builds is a nightmare.
The Ansible golden image approach
The key insight here is that we can use Ansible to configure WildFly and then commit that fully configured state directly into a container image. This approach keeps the Dockerfile incredibly simple. It just needs to install dependencies and run the Ansible playbook, while all the complex, testable, and reusable configuration logic lives safely within Ansible.
In practice, the workflow flows naturally: you start with a base UBI image, install Java and Ansible, and run your playbook to configure WildFly. Once the setup is complete, you simply commit this state into a golden image, push it to your container registry, and seamlessly deploy it to your cluster using Minikube.
Your Dockerfile becomes clean and minimal:
FROM registry.access.redhat.com/ubi9/ubi-minimal:latest

# Install Java and Ansible
RUN microdnf install -y java-17-openjdk-headless python3 python3-pip && \
pip3 install ansible-core

# Copy and run Ansible configuration
COPY ansible/ /tmp/ansible/
RUN ansible-galaxy collection install -r /tmp/ansible/requirements.yml && \
ansible-playbook -i /tmp/ansible/inventory /tmp/ansible/configure.yml
And your actual configuration lives in a readable Ansible playbook:
---
- name: "{{ install_name }} installation and configuration"
  hosts: "{{ hosts_group_name | default('all') }}"
  remote_user: root
  vars:
    wildfly_install_workdir: '/opt'
    install_name: "{{ override_install_name | default('wildfly') }}"
    wildfly_user: "{{ install_name }}"
    wildfly_home: "{{ wildfly_install_workdir }}/{{ install_name }}/{{ wildfly_version }}"
    app:
      name: 'test-app.war'
      url: 'https://raw.githubusercontent.com/ansible-middleware/wildfly/main/molecule/files/test-app.war'
    ansible_distribution: 'RedHat'
  collections:
    - middleware_automation.wildfly
  roles:
    - middleware_automation.wildfly.wildfly_install
  tasks:
    - name: Install JDBC drivers
      when: jdbc_drivers is defined and jdbc_drivers | length > 0
      ansible.builtin.include_role:
        name: middleware_automation.wildfly.wildfly_driver
      vars:
        wildfly_driver_module_name: "{{ item.name }}"
        wildfly_driver_version: "{{ item.version }}"
        wildfly_driver_jar_filename: "{{ item.jar_file }}"
        wildfly_driver_jar_url: "{{ item.url }}"
      loop: "{{ jdbc_drivers }}"
      loop_control:
        label: "{{ item.name }}"

    - name: Apply JVM tuning configuration
      when: wildfly_java_opts is defined and wildfly_java_opts | length > 0
      ansible.builtin.lineinfile:
        path: "{{ wildfly_home }}/bin/standalone.conf"
        regexp: "^JAVA_OPTS="
        line: 'JAVA_OPTS="{{ wildfly_java_opts | join(" ") }}"'
        backup: true

    - name: "Download application {{ app.name }}"
      ansible.builtin.get_url:
        url: "{{ app.url }}"
        dest: "{{ wildfly_home }}/standalone/deployments/{{ app.name }}"
        owner: "{{ wildfly_user }}"
        group: "{{ wildfly_user }}"
        mode: '0644'
All your configuration variables live in one place group_vars/all.yml:
---
wildfly_version: '39.0.1.Final'
wildfly_java_opts:
  - '-Xms512m'
  - '-Xmx2048m'
jdbc_drivers:
  - name: org.postgresql
    version: '42.7.1'
    jar_file: postgresql-42.7.1.jar
    url: https://jdbc.postgresql.org/download/postgresql-42.7.1.jar
Here's the interesting part: Let's say your application needs MySQL instead of PostgreSQL. Replace the jdbc_drivers variable details with MySQL and you'll be good to go.
jdbc_drivers:
  - name: com.mysql
    version: '8.0.33'
    jar_file: mysql-connector-j-8.0.33.jar
    url: https://jdbc.postgresql.org/download/postgresql-42.7.1.jar
That's it. The same approach works for Oracle, SQL Server, or any database — just change the JDBC driver in your Ansible configuration, rebuild, and deploy. No complex Dockerfile changes needed.
Deploy applications in WildFly golden images
The golden image includes a pre-deployed sample application to demonstrate end-to-end deployment. The Ansible playbook downloads a WAR file and places it in WildFly's auto-deployment directory during the image build:
tasks:
  - name: "Download application {{ app.name }}"
    ansible.builtin.get_url:
      url: "https://raw.githubusercontent.com/ansible-middleware/wildfly/main/molecule/files/test-app.war"
      dest: "{{ wildfly_home }}/standalone/deployments/{{ app.name }}"
      owner: "{{ wildfly_user }}"
      group: "{{ wildfly_user }}"
      mode: '0644'
When the container starts, WildFly automatically deploys the application. You can verify it's running:
# Check WildFly is up
curl http://localhost:8080

# Check the application is deployed
curl http://localhost:8080/test-app
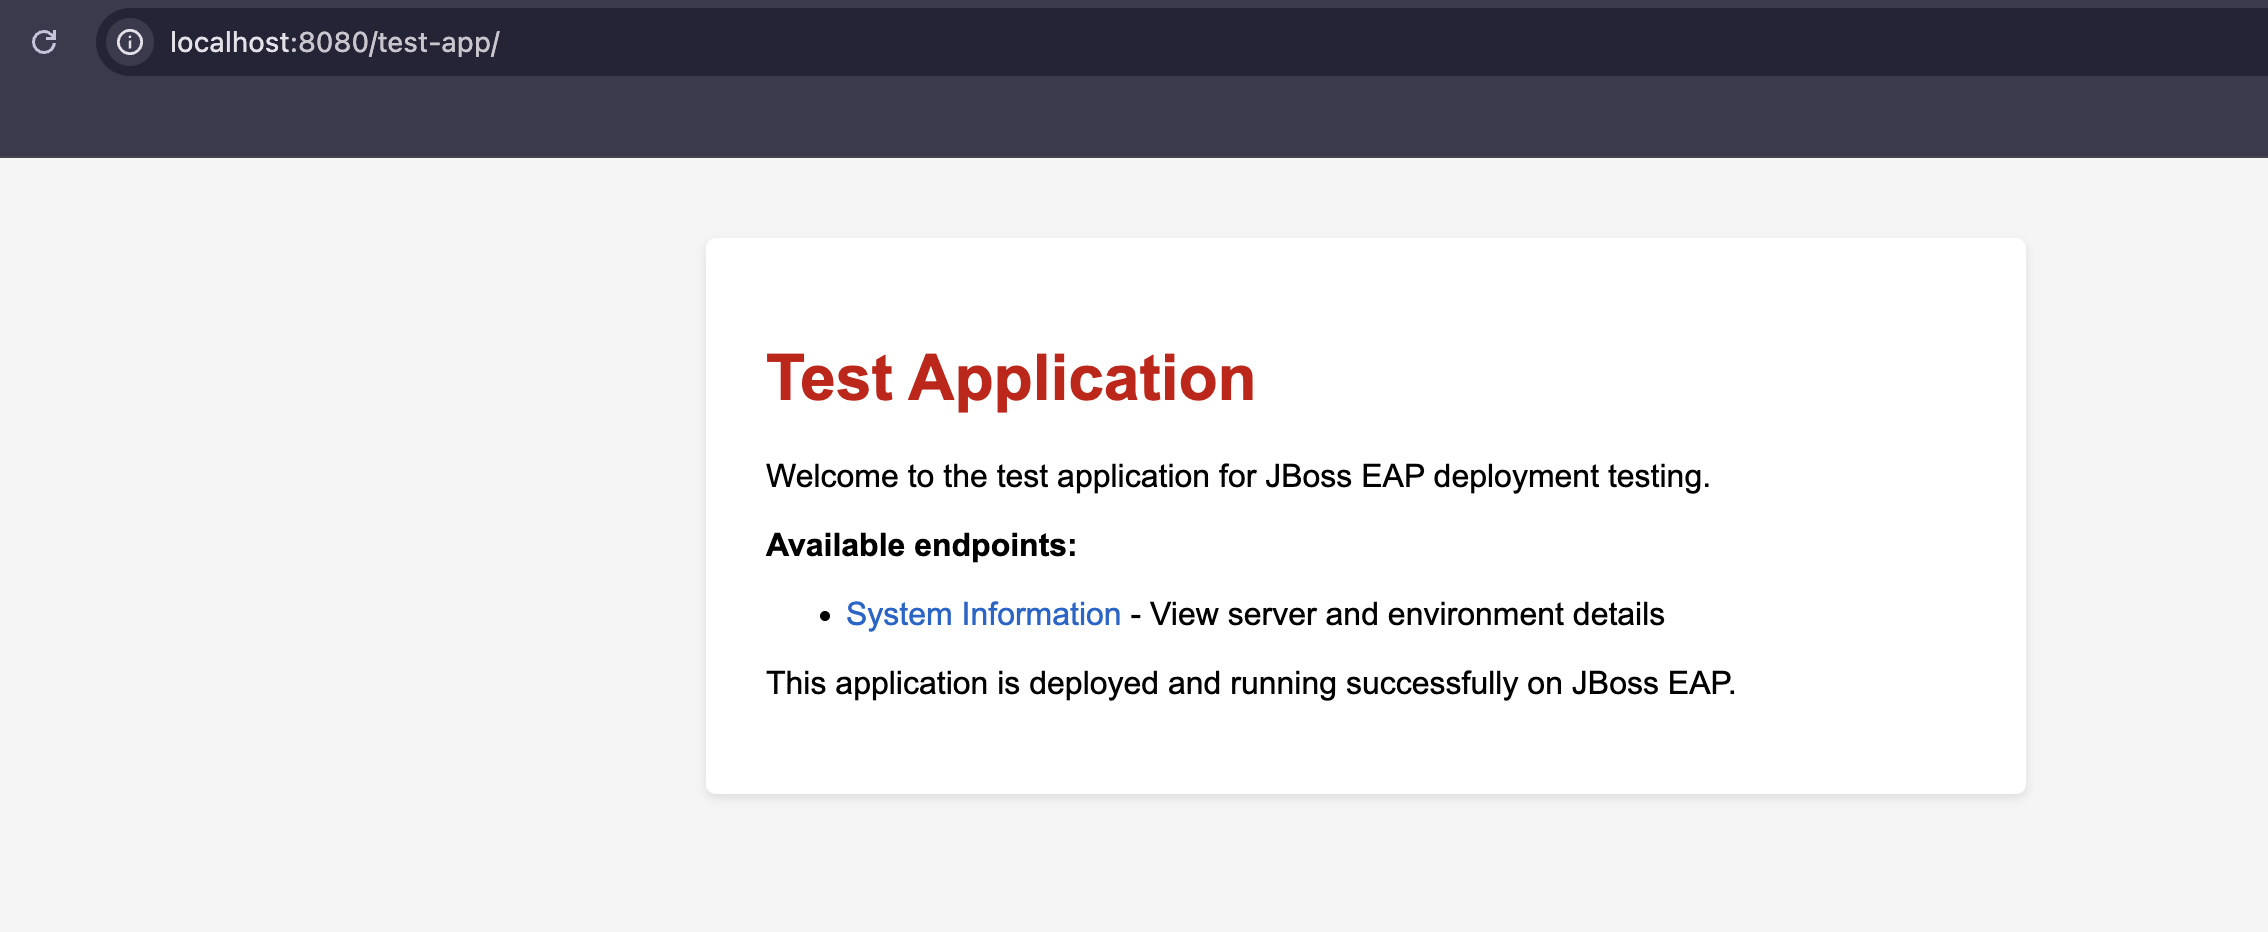
This approach works for container images because we're baking the application into the immutable image. For runtime deployments, you'd use WildFly's CLI or the wildfly_app_deploy role with a running server.
Test Ansible configurations before building containers
Here's where this approach really shines. Because your configuration is Ansible, you can test it on your local machine without building any containers:
# Install the Ansible collection
ansible-galaxy collection install -r ansible/requirements.yml

# Test what would change (dry run)
ansible-playbook -i ansible/inventory ansible/configure.yml --check

# See the exact changes that would be made
ansible-playbook -i ansible/inventory ansible/configure.yml --diff --check
Made a typo in your configuration? You'll find out in seconds, not after a 10-minute container build. Want to see exactly what files would change? The --diff flag shows you. This turns configuration from a frustrating trial-and-error process into an interactive, fast feedback loop.
Building the golden image
Once your Ansible playbook is working, building the actual container image is straightforward:
docker build -t wildfly-golden:latest .
The build process:
- Starts with a minimal Red Hat UBI base image
- Installs Java and Ansible
- Copies your Ansible files
- Runs the playbook to configure WildFly
- Cleans up temporary files
- Creates the golden image
When you run this image, WildFly is already configured and ready to go. No startup scripts, no configuration on first boot — just start it and it works:
docker run -d -p 8080:8080 -p 9990:9990 \
-e DB_HOST=postgres \
-e DB_NAME=mydb \
-e DB_USER=admin \
-e DB_PASSWORD=secret \
wildfly-golden:latest
Notice how secrets are passed as environment variables at runtime, not baked into the image. The golden image contains the structure and configuration, but sensitive data is injected when you deploy.
Scaling up to make it GitOps ready
Ready to take your deployment to the next level? Now that the Ansible and Docker components are in place, you can shift toward a true GitOps model. I've outlined two distinct approaches: using GitHub Actions for CI/CD and Kubernetes for robust, scalable production environments.
Approach 1: Automating everything with GitHub Actions
Building images manually on your laptop is fine for development, but in production you need automated builds that test every change before it goes live. This is where CI/CD pipelines come in, and with the Ansible approach, they're remarkably straightforward to set up.
The GitHub Actions workflow does four critical things:
Builds the image automatically whenever you push changes to the Ansible configuration, Dockerfile, or the workflow itself. No more "it worked on my machine" every build happens in a clean environment.
Tests the image before publishing it. This is crucial. The workflow actually starts a container from the newly-built image and verifies:
- WildFly starts successfully
- The HTTP endpoint responds (port 8080)
- The management interface is accessible (port 9990)
- The wildfly user exists
- Java is properly installed
- WildFly binaries are in the expected location
If any of these checks fail, the workflow stops. No broken images make it to the registry.
Publishes to multiple registries — both GitHub Container Registry (GHCR) and Docker Hub. Why both? GHCR is great for GitHub integration and private repos, while Docker Hub is widely accessible and familiar to most teams. The workflow pushes to both with version tags and a
latesttag:# The workflow automatically generates version tags like: # 20260514-bd1946c (date + git commit) # latest (always points to the most recent build)Creates a build summary showing exactly what was built and where it was published. When you open the GitHub Actions run, you see:
## Published Images

### GitHub Container Registry
- ghcr.io/your-username/wildfly-golden:20260514-bd1946c
- ghcr.io/your-username/wildfly-golden:latest

### Docker Hub
- docker.io/your-username/wildfly-golden:20260514-bd1946c
- docker.io/your-username/wildfly-golden:latest
You can see my performed published images, GitHub Container Registry and Docker Hub.
Here's what a typical GitHub Actions workflow run looks like:
on:
  push:
    branches: [main, develop]
    paths:
      - 'ansible/**'
      - 'Dockerfile'
      - '.github/workflows/build-golden-image.yml'
This means the build only triggers when you actually change something that affects the image. Changed your README? No build. Changed the Ansible configuration? Build triggered.
The beauty of this setup is that you configure it once, and then every change to your WildFly configuration goes through the same automated build-test-publish pipeline. You push a commit that increases the database connection pool size, and within minutes you have a tested, published image ready to deploy.
Approach 2: Deploying to Kubernetes with Minikube
Now comes the payoff, deploying your golden image to Kubernetes. But before you push to a production cluster, you want to test locally. This is where Minikube comes in it gives you a real Kubernetes cluster running on your laptop.
Why test on Kubernetes locally? Because containers running in Docker and containers running in Kubernetes are not the same thing. Kubernetes adds:
- Pod networking and service discovery
- Health checks (liveness, readiness, startup probes)
- Resource limits and requests
- Secret injection via environment variables
- Rolling updates and rollbacks
- Horizontal scaling
You want to verify all of this works before you deploy to production. But before that you need to setup MiniKube.
Loading your image into Minikube
Minikube runs its own Docker daemon, separate from your laptop's Docker. So you need to load your image into Minikube:
# Load the image you built locally
minikube image load wildfly-golden:demo

# Verify it's there
minikube image ls | grep wildfly
Creating secrets for database configuration
Remember, we don't bake secrets into images. Kubernetes has a proper secret management system:
kubectl create secret generic wildfly-db-secret \
--from-literal=host=postgres \
--from-literal=database=mydb \
--from-literal=username=wildfly \
--from-literal=password=supersecret
Deploying to Kubernetes
To deploy your application, you need to apply two manifests: the Deployment creates and manages your pods, while the Service exposes them with a stable network endpoint. The deployment manifest tells Kubernetes to launch 3 replicas using your golden image, inject database credentials from secrets, allocate resources (512Mi-2Gi memory, 0.5-2 CPU cores), and configure health probes to automatically restart unhealthy pods. The service creates a ClusterIP that load-balances traffic across all healthy pods on ports 8080 (HTTP) and 9990 (management).
kubectl apply -f kubernetes/deployment.yml
kubectl apply -f kubernetes/service.yml
The deployment file looks like below:
apiVersion: apps/v1
kind: Deployment
metadata:
  name: wildfly-golden
  labels:
    app: wildfly
    tier: application
spec:
  replicas: 3
  selector:
    matchLabels:
      app: wildfly
  template:
    metadata:
      labels:
        app: wildfly
        tier: application
    spec:
      containers:
        - name: wildfly
          image: wildfly-golden:demo
          imagePullPolicy: Never
          ports:
            - containerPort: 8080
              name: http
              protocol: TCP
            - containerPort: 9990
              name: management
              protocol: TCP
          env:
            # Database configuration (injected at runtime)
            - name: DB_HOST
              valueFrom:
                secretKeyRef:
                  name: wildfly-db-secret
                  key: host
            - name: DB_NAME
              valueFrom:
                secretKeyRef:
                  name: wildfly-db-secret
                  key: database
            - name: DB_USER
              valueFrom:
                secretKeyRef:
                  name: wildfly-db-secret
                  key: username
            - name: DB_PASSWORD
              valueFrom:
                secretKeyRef:
                  name: wildfly-db-secret
                  key: password
          # JVM tuning (optional overrides)
          - name: JAVA_OPTS
            value: "-Xms512m -Xmx2048m -XX:MetaspaceSize=256m -XX:MaxMetaspaceSize=512m"
          resources:
            requests:
              memory: "512Mi"
              cpu: "500m"
            limits:
              memory: "2Gi"
              cpu: "2000m"
          livenessProbe:
            httpGet:
              path: /
              port: 8080
            initialDelaySeconds: 60
            periodSeconds: 10
            timeoutSeconds: 5
            failureThreshold: 3
          readinessProbe:
            httpGet:
              path: /
              port: 8080
            initialDelaySeconds: 30
            periodSeconds: 5
Notice several important things here:
This configuration ensures high availability through triple-redundancy replicas and robust resource governance via enforced CPU and memory limits. Security is prioritized by injecting sensitive database credentials through Kubernetes Secrets rather than hardcoding them. Finally, the setup uses health probes for automated self-healing and an optimized image pull policy tailored for local Minikube development, ensuring a stable and efficient deployment lifecycle.
Once the deployment is done, watch pods come up:
kubectl get pods -l app=wildfly -w
# NAME READY STATUS RESTARTS AGE
# wildfly-golden-7d9f8fcc4d-2ksl8m 1/1 Running 0 30s
# wildfly-golden-7d9f8fcc4d-9hjgp 1/1 Running 0 30s
# wildfly-golden-7d9f8fcc4d-xm2nf 1/1 Running 0 30s
All three pods start in about 30 seconds because WildFly is already configured in the golden image. No startup scripts downloading drivers or configuring datasources everything is ready to go.
Accessing your application
# Option 1: Use Minikube's service command
minikube service wildfly --url
# http://192.168.49.2:30090

# Option 2: Port-forward for local access
kubectl port-forward svc/wildfly 8080:8080
curl http://localhost:8080

# Access the management console
kubectl port-forward svc/wildfly 9990:9990
open http://localhost:9990/console
# Login: admin / admin
You can see WildFly is running fine on localhost:

Viewing in the Kubernetes dashboard
Minikube includes a web dashboard that shows everything visually:
minikube dashboard
This opens a browser showing:
- All three WildFly pods running (green checkmarks)
- Pod logs (click any pod to see WildFly startup logs)
- Resource usage (CPU, memory per pod)
- Service endpoints
- ConfigMaps and Secrets

The dashboard provides a visual overview of all deployed resources:

The dashboard also shows you the secrets as well:

Scaling is trivial
Want to handle more load? Just scale up:
kubectl scale deployment wildfly-golden --replicas=5
# deployment.apps/wildfly-golden scaled

kubectl get pods -l app=wildfly
# Now you have 5 pods running
Kubernetes automatically distributes traffic across all pods. No configuration changes needed. The same golden image that worked with 3 replicas works with 5, or 10, or 100.
Deploy consistent WildFly images across environments
This is the real power of golden images. The exact same image you tested locally in Docker, then tested in Minikube, now deploys to production Kubernetes clusters. No "staging works but production doesn't" surprises. The image is immutable and pre-tested.
Production benefits of golden image deployments
This approach has delivered real benefits in production environments:
Faster development cycles: Instead of waiting 10 minutes for a container build to fail, you get feedback in seconds with Ansible's check mode.
Consistent configuration everywhere: The same Ansible playbook works on development VMs, staging environments, and production containers. One source of truth, multiple deployment targets.
Easier onboarding: New team members can read YAML configuration much more easily than parsing bash scripts embedded in Dockerfiles.
Better CI/CD: Your build pipeline becomes more reliable because you can validate configuration before building images. Failed builds happen at the validation stage, not after pushing bad images to production.
Audit trail: Every configuration change goes through version control as readable YAML, not obscure bash one-liners. You can see exactly what changed and why.
Zero-downtime deployments: With Kubernetes health checks and the golden image approach, rolling updates happen smoothly. New pods start fully configured while old ones continue serving traffic.
Disaster recovery: Need to rebuild from scratch? Pull the image from the registry and deploy. No complex configuration steps, no hunting for the right startup scripts.
Adopt Ansible-based golden images for your infrastructure
If you're building container images for application servers, databases, or any complex middleware, consider whether your Dockerfile bash scripts are making your life harder than necessary. The Ansible approach isn't just about cleaner code. It's about faster feedback loops, better testability, configuration that works across your entire infrastructure, and production deployments you can trust.
Start small. Take one messy Dockerfile and try converting the configuration to Ansible. Test it locally. See how much faster you can iterate. Set up the GitHub Actions workflow and watch automated builds just work. Deploy to Minikube and see your application scale effortlessly. Then decide if it's worth adopting more broadly.
The goal isn't to use Ansible everywhere just for the sake of it. The goal is to make configuration manageable, testable, and reusable. If Ansible helps you achieve that, great. If another tool works better for your needs, use that instead. What matters is that you're not stuck maintaining 300 lines of bash scripts in Dockerfiles when there are better options available.
Summary
Building golden images with Ansible transforms complex WildFly deployments from fragile bash scripts in Dockerfiles into maintainable, testable infrastructure as code. By using Ansible playbooks to configure middleware before committing it to an immutable container image, you gain faster development cycles through immediate local testing, consistent configuration across VMs and containers from a single source of truth, and more reliable CI/CD pipelines that validate configurations before building images. The approach scales naturally from local Docker development through Minikube testing to production Kubernetes deployments, with the same golden image running everywhere. When paired with GitHub Actions for automated builds and Kubernetes for orchestration, this method delivers zero-downtime deployments, simplified disaster recovery, and a complete audit trail of all configuration changes.
Next steps
Check out the demo repository to see the complete implementation and explore the Ansible Middleware Collections for production-ready roles and modules.
Acknowledgements
Thanks to the Ansible Middleware community for developing and maintaining the WildFly collection that makes this approach possible.
If you want to know more, please connect with us via email, visit the Ansible Middleware website, or explore Ansible Middleware projects on GitHub.