Tutorial
Accelerate Java development with IBM Bob and Liberty Tools
Use AI assistance and Liberty Tools to build, test, and debug cloud-native Java apps without leaving your IDEIBM Bob and Liberty Tools together let you develop, test, and debug cloud-native Java applications on Open Liberty entirely within one IDE and with no manual server restarts and no context switching.
Modern development workflows are evolving. Traditionally, developers followed a core iterative cycle known as the inner development loop, which required significant manual effort. Rebuilding applications, restarting servers, and debugging issues slowed development and broke the developer's flow.
With the rise of agentic AI, developers are supported by intelligent tools that reduce this friction. By integrating AI capabilities into your workflow, you can reduce repetitive manual work, accelerate development cycles, and receive real-time coding assistance.
To fully realize these benefits, use IBM Bob and Liberty Tools. IBM Bob acts as a central, intelligent workspace that keeps you focused, and Liberty Tools is a powerful plugin for managing Liberty applications:
- IBM Bob is an AI-powered development environment designed to provide context-aware support and integrated tooling within a single IDE. Rather than constantly switching between different windows and terminals, IBM Bob keeps everything you need in one place.
- Liberty Tools is a plugin available across many IDEs including IntelliJ IDEA, Visual Studio Code, Eclipse IDE, and now also available across OpenVSX-compatible IDEs, including IBM Bob. The Liberty Tools plugin introduces capabilities that allow you to seamlessly develop, test, debug, and manage Liberty applications.
Together, IBM Bob and Liberty Tools make cloud-native Java development easier, faster, and more productive, allowing you to remain entirely within your inner development loop without interruption.
In this tutorial, you use a simple Liberty-based Java application that you can use to run through the stages of the inner development loop to showcase a real workflow. Specifically, you learn how to:
- Set up and run a Liberty application using Liberty Tools.
- Use Liberty dev mode to make and instantly preview code changes without restarting the server.
- Use IBM Bob’s AI assistance to generate a new REST endpoint and integration tests.
- Run those tests directly from the Liberty Tools panel.
- Attach the debugger to inspect live variable values.
You will complete all of these tasks without leaving your IDE.
Prerequisites
- Java 17.
- IBM Bob. Sign up for the IBM Bob free trial.
- Liberty Tools. After you install Bob, install Liberty Tools from the OpenVSX marketplace from the Extensions in Bob. Liberty Tools are added to your workspace.
Steps
Step 1. Clone the Open Liberty sample repo in IBM Bob
To see how you can benefit from using both IBM Bob and Liberty Tools, you will walk through a real-world developer workflow using the Getting started with Open Liberty guide repo.
- Open IBM Bob.
- Open your terminal in IBM Bob.
Clone the sample repo using this command:
git clone https://github.com/OpenLiberty/guide-getting-started.gitChange directories to the
guide-getting-started/finishdirectory, which is where you will make updates to the sample application.
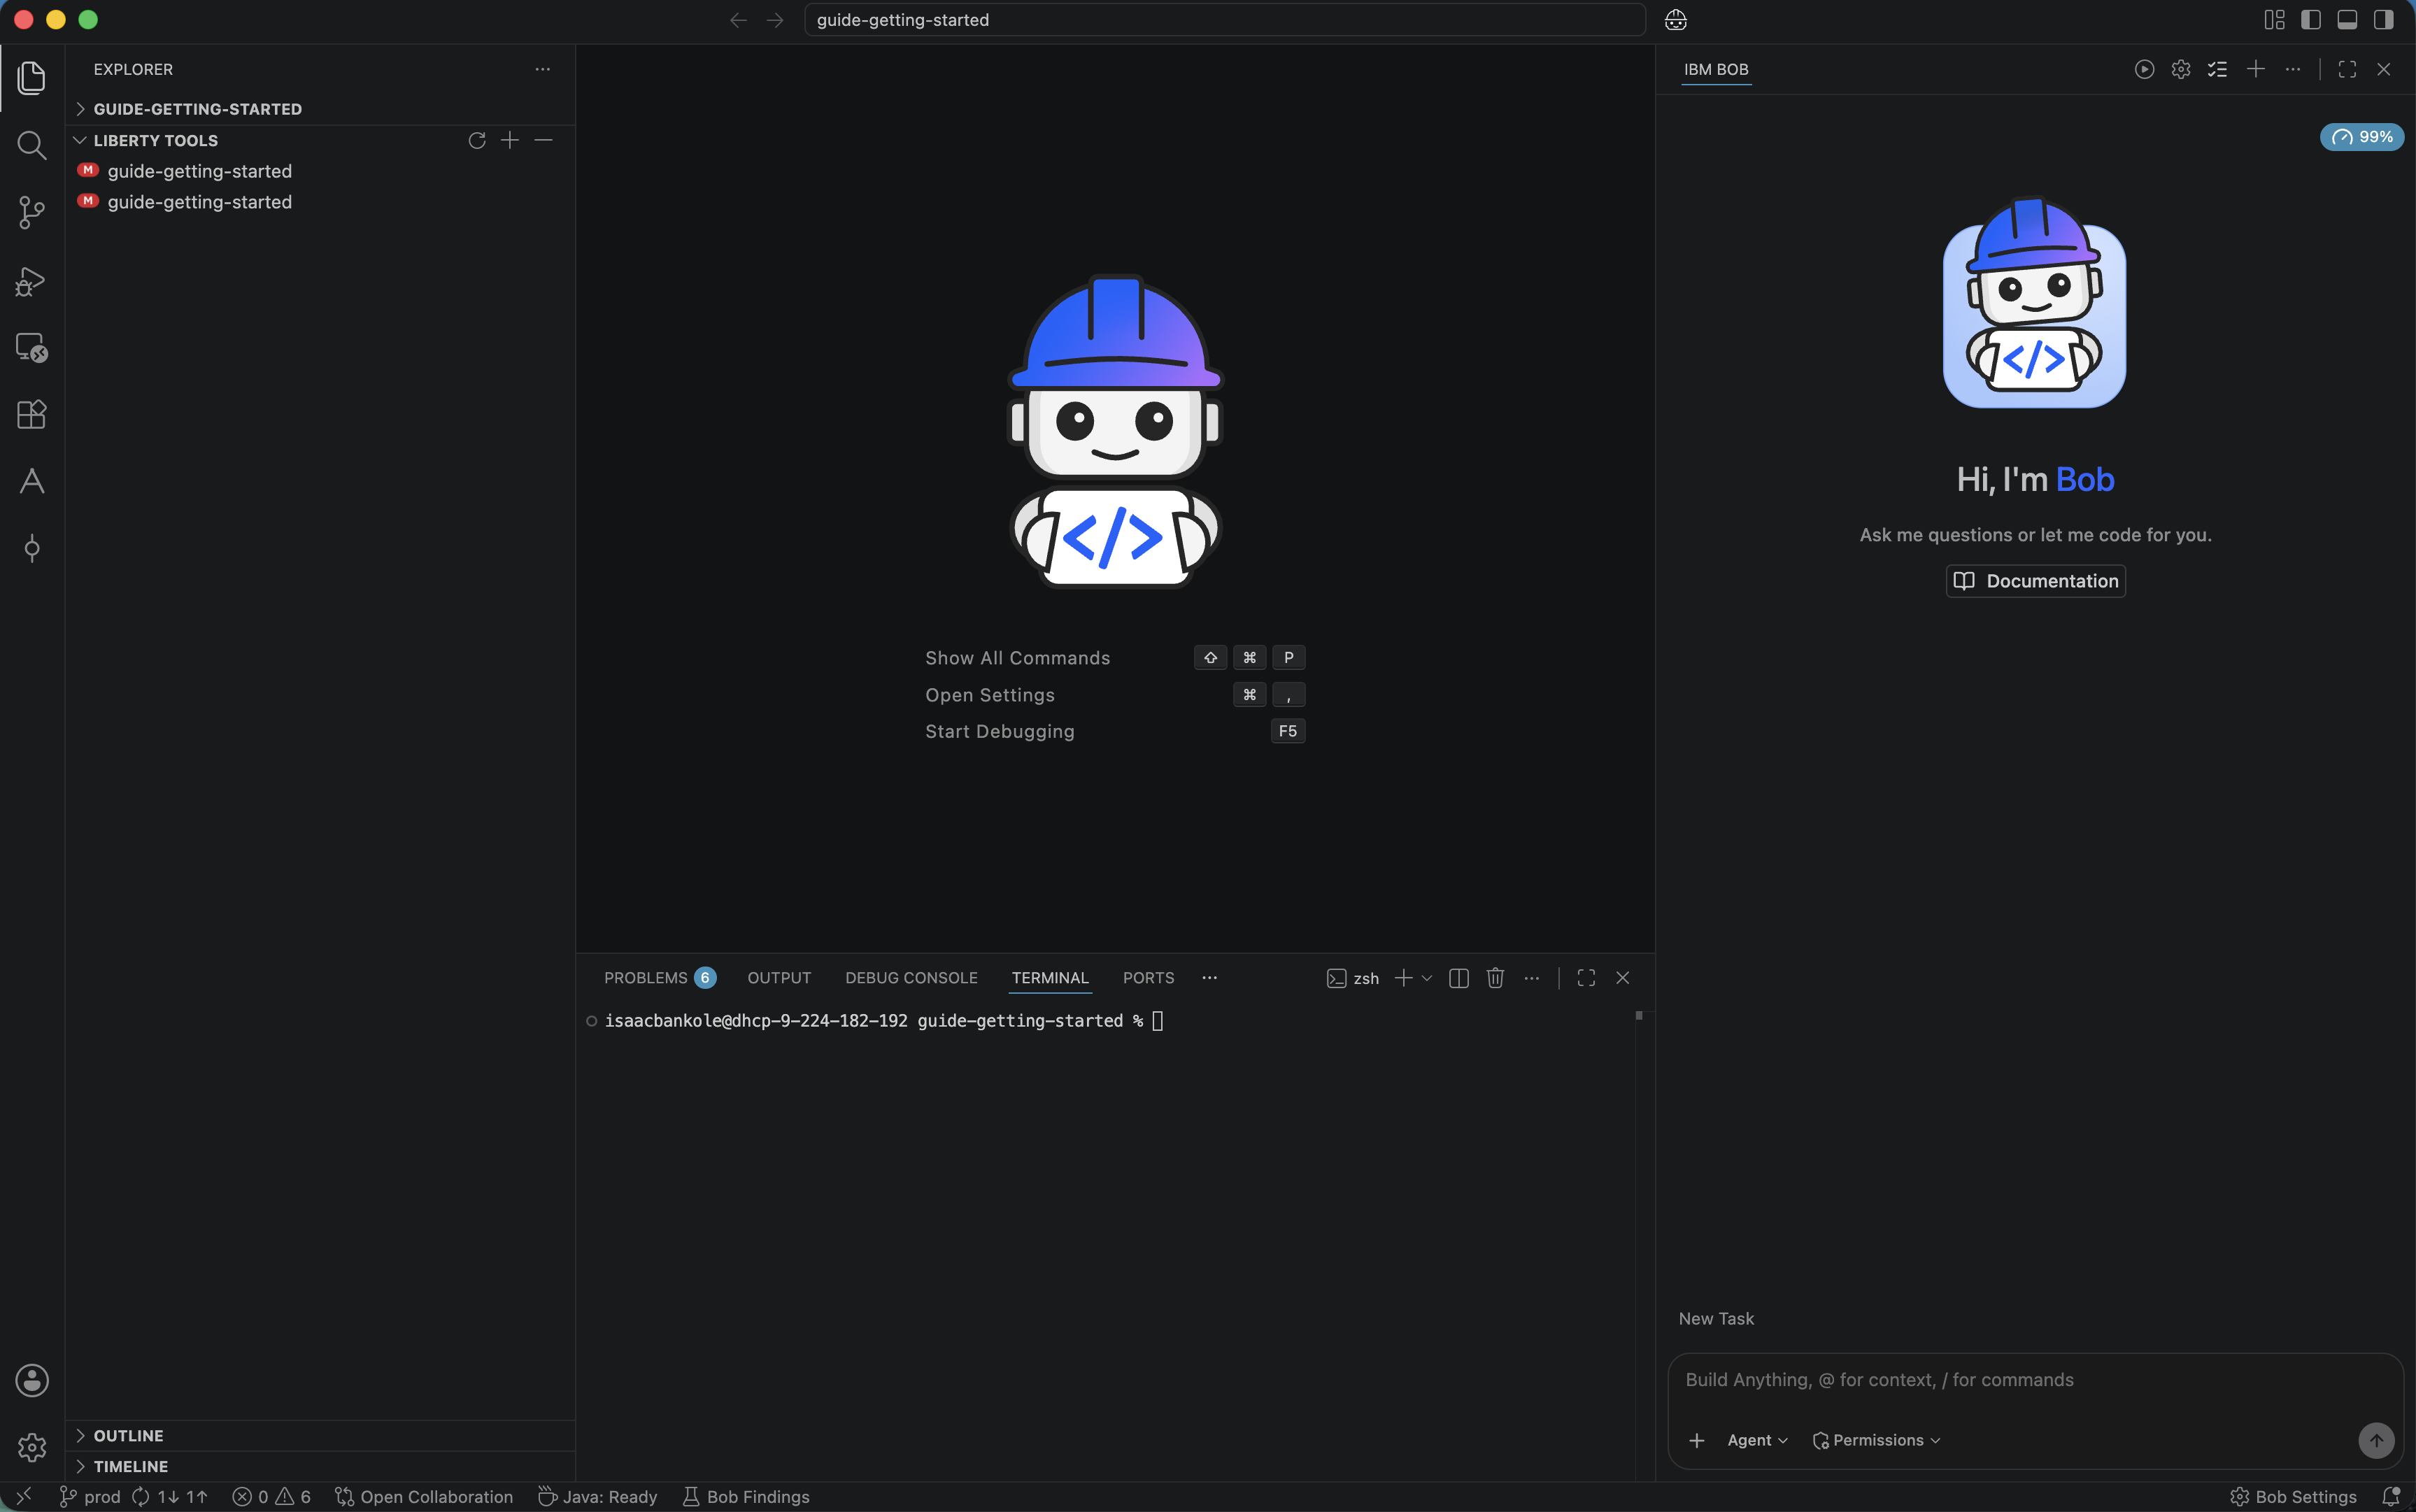
Once Liberty Tools is installed, any Liberty projects in your workspace are automatically detected and added to a new UI element called Liberty Tools. You’ll see this new UI element in the Explorer view below your application’s repository tree. From here, you can start and stop applications, run tests, and attach debuggers with simple mouse clicks instead of memorizing complex command-line instructions.
Step 2. Add a REST endpoint using Liberty dev mode and IBM Bob
Before you start writing code or further developing the sample application, you should start Liberty dev mode. Then, update the application by creating a new endpoint, which is a common task when building cloud-native APIs.
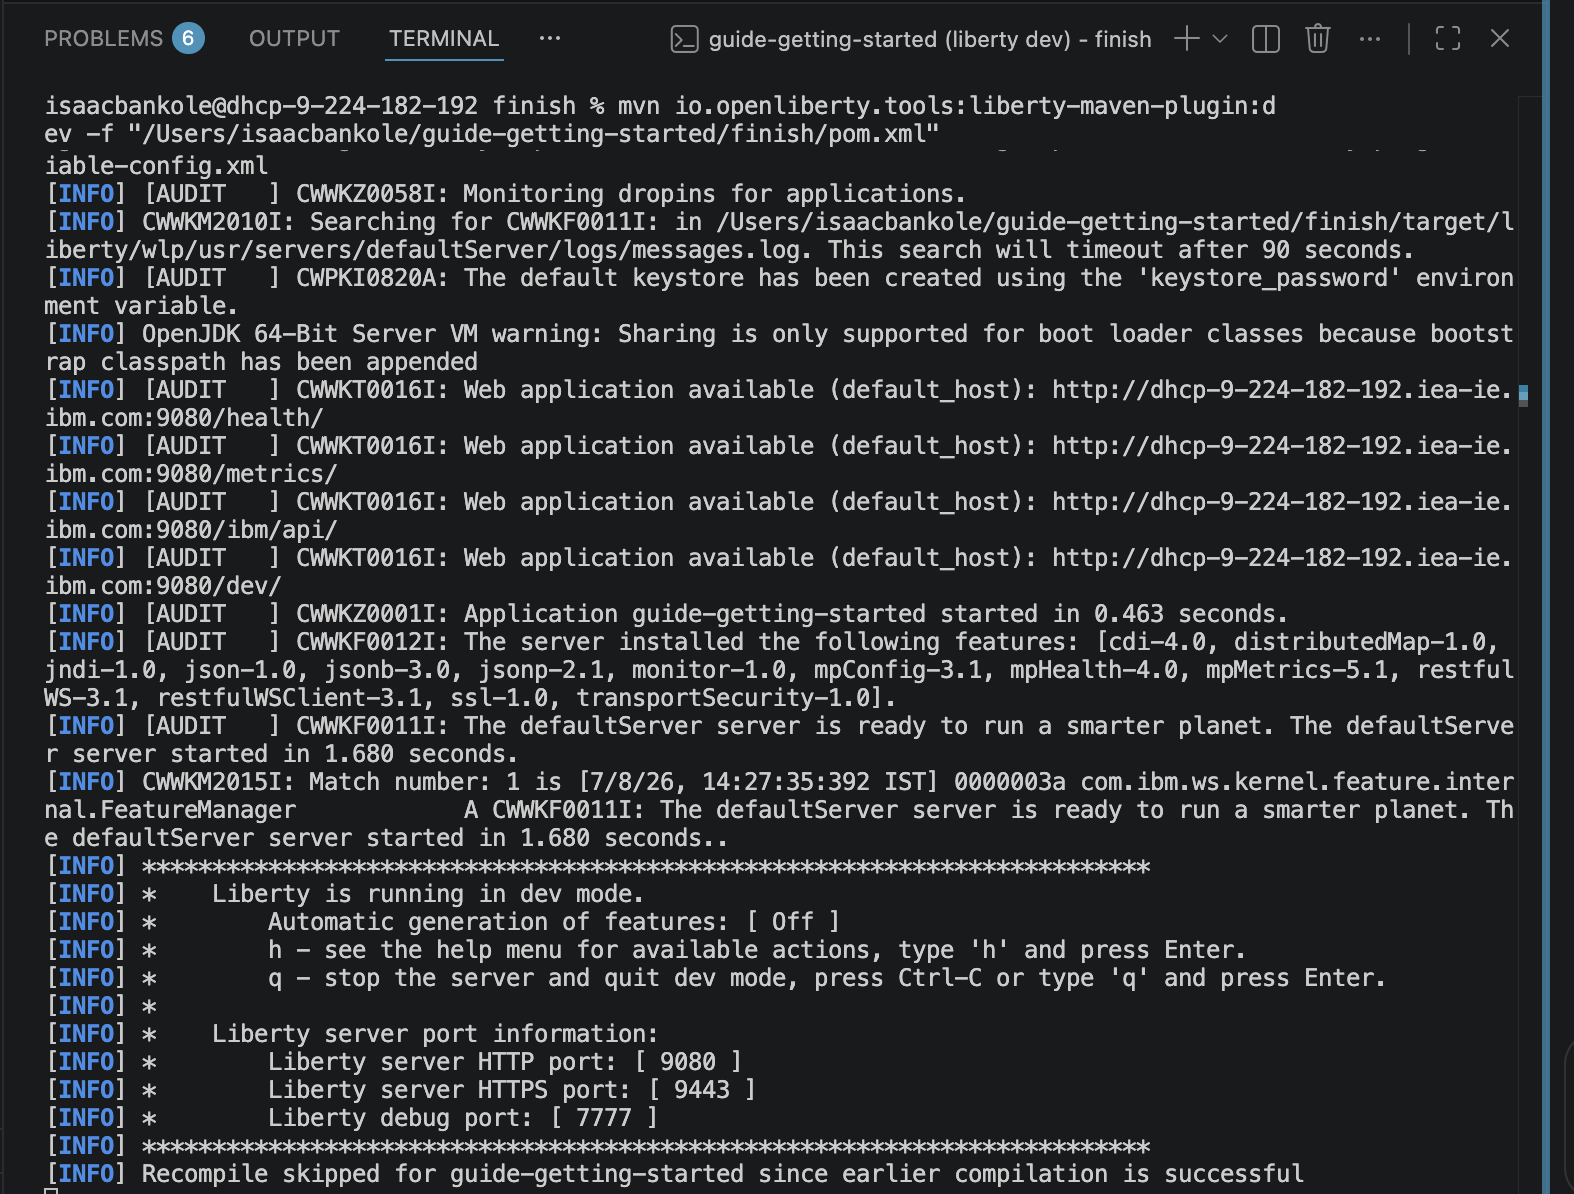
In IBM Bob, in the Explorer, in Liberty Tools, select and right-click the first
guide-getting-startedproject, and then click Start. The application is started in Liberty dev mode.Dev mode automatically detects file saves, recompiles your code, and redeploys the application instantly, eliminating manual rebuilds and keeping you in flow. To learn more about Liberty dev mode, see the article, “Why cloud-native Java developers love Liberty.”
To create a new Java class for this application, use the IDE repository tree navigation to access:
.../finish/src/main/java/io/openliberty/sample/system.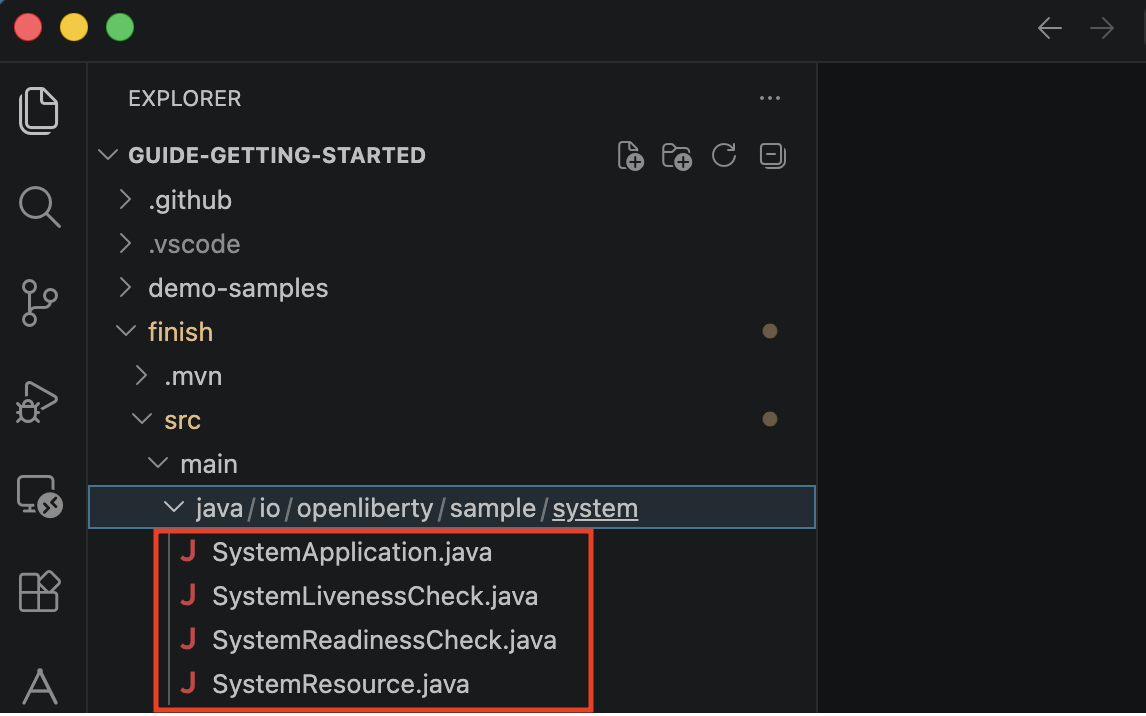
Create the new class
HelloResource.javain this directory. Click the New file icon by the repository name at the top of the Explorer pane.In the
HelloResource.javaclass file, begin typing the following code. As you type, IBM Bob provides AI-powered autocomplete suggestions and real-time validation. Simultaneously, Liberty Tools offers configuration help and coding assistance that is specific to the Liberty runtime, Jakarta EE, and MicroProfile APIs. As you type the class body, IBM Bob surfaces inline autocomplete suggestions based on the context of your file, such as completing import statements, filling in annotation attributes, and suggesting method signatures. Liberty Tools simultaneously validates your JAX-RS annotations and MicroProfile configuration, and can propose Liberty-specific quick fixes. Accept a suggestion by pressing Tab, or ignore it and keep typing.package io.openliberty.sample.system; import jakarta.enterprise.context.RequestScoped; import jakarta.ws.rs.GET; import jakarta.ws.rs.Path; import jakarta.ws.rs.Produces; import jakarta.ws.rs.core.MediaType; @Path("/hello") public class HelloResource { @GET @Produces(MediaType.TEXT_PLAIN) public String hello() { return "Hello, Liberty!"; } }Save this file. Liberty dev mode detects these changes and automatically recompiles the updated source code in the background.
Step 3. Generate and run integration tests with IBM Bob
Testing is a critical phase of the inner dev loop. The sample application already has some simple tests set up to test the functionality of the application, but now that you added a new class, it's important to add new tests to confirm that it works as expected. IBM Bob can actively assist you in writing these new tests, making it easier than ever to stay on top of test coverage for your applications.
In the Bob chat panel, paste this prompt into the box and press Enter:
Generate an integration test class called HelloEndpointIT in start/src/test/java/it/io/openliberty/sample/. It should test all three endpoints in HelloResource.java: GET /system/hello returns "Hello, Liberty!", GET /system/hello/{name} returns "Hello, {name}!", and GET /system/hello/debug returns HTTP 200 with JSON keys sum, average, and total_iterations. Follow the same pattern as PropertiesEndpointIT.java — use JAX-RS Client, read http.port and context.root from system properties, and close the client after each test.Bob generates the complete test file and writes it directly into your project.
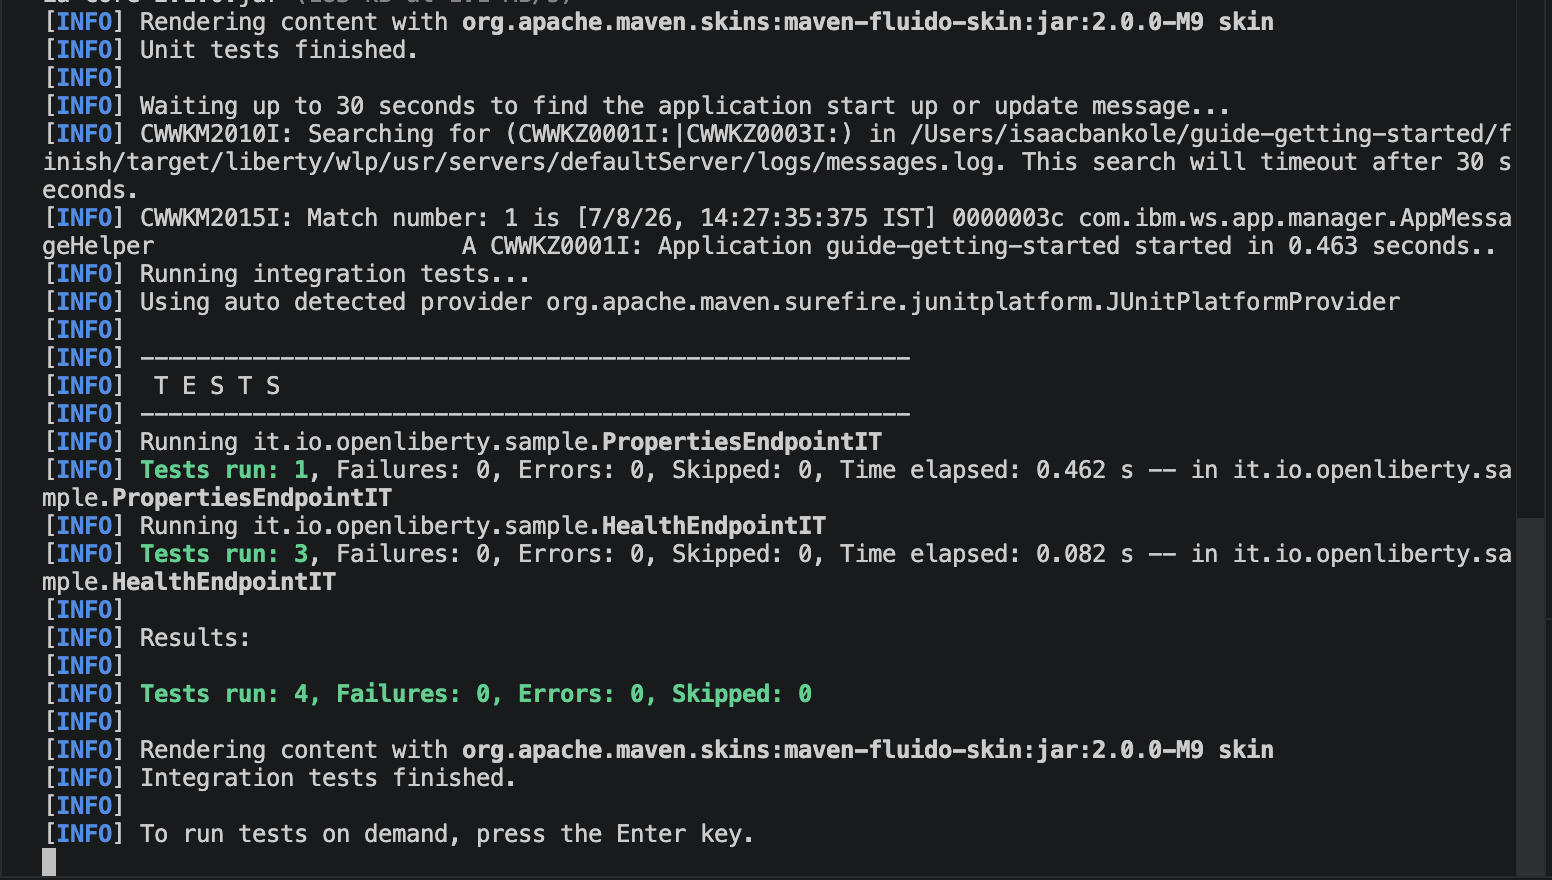
In the terminal running the Liberty application in dev mode, press Enter. Liberty dev mode executes these tests.
Verify that your new endpoint works by opening a web browser and navigating to
http://localhost:9080/system/hello.You should immediately see the expected response:
"Hello, Liberty!"
Step 4. Attach the debugger and inspect live variables
When issues arise, you need a way to inspect your code without a complicated setup. Liberty Tools makes debugging straightforward.
In IBM Bob, in Liberty Tools in the Explorer, select and right-click the
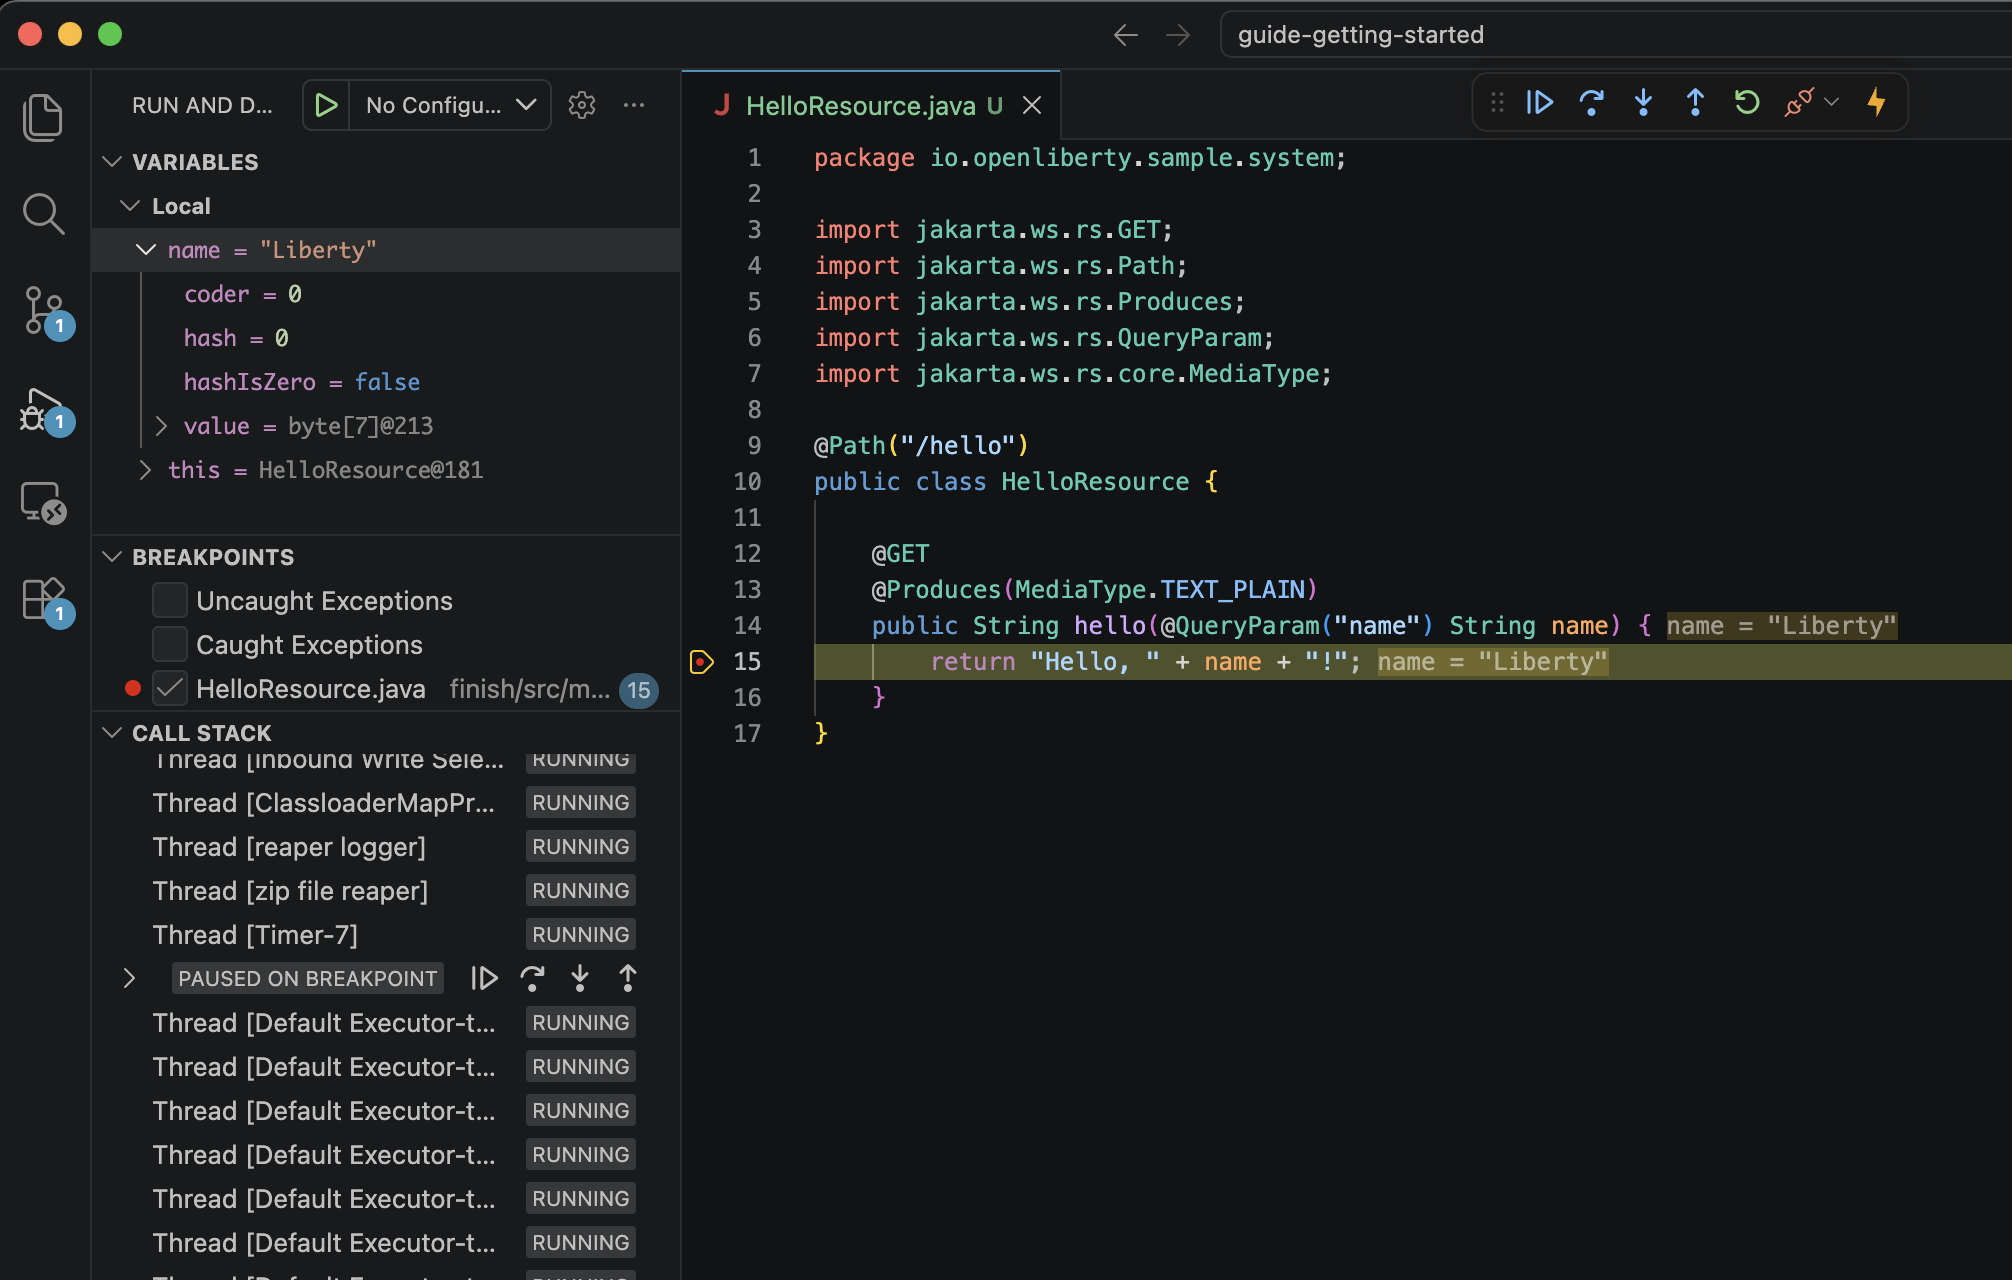
guide-getting-startedproject, and then click Attach debugger.Set a breakpoint by clicking the gutter next to a line in the
HelloResource.javaclass file. A red dot appears confirming the breakpoint is armed.Trigger the endpoint to hit the breakpoint and inspect live variable values in the debug panel.
This action instantly connects your IDE to the running server. The UI transitions to the debugging view, where you can set breakpoints, step through execution line by line, and inspect variables. When a breakpoint is hit, you can see the populated values of your variables and stack frames in real time, giving you full visibility into your application's state during execution.
Summary and next steps
Developing cloud-native Java applications does not have to be a frustrating or fragmented process. By using IBM Bob and Liberty Tools together, you can efficiently develop, build, test, debug, and manage your applications within a single, intelligent IDE.
Combining AI-powered assistance with the ease of use of Liberty Tools and the rapid iteration capabilities of Liberty dev mode allows you to accelerate development cycles, reduce repetitive manual effort, and improve your overall productivity.
To further enhance your Java development workflow, consider exploring complementary modernization tools. IBM Application Modernization Accelerator (AMA) and AMA Dev Tools provide contextual support for migrating legacy applications to Liberty. For a broader overview, see Java application modernization tools: A complete guide.