Tutorial
Automated installation of IBM AIX using customized CDs
Use customized .data files for automated installation using 311 interrupt mode in BOS menus and by modifying AIX product mediaThe installation of IBM AIX requires a lot of user input, (such as selection of the installation language, type of installation, disk, and edition, and so on) and this becomes a tedious task for system administrators especially when there are many servers in which these tasks need to be performed.
To automate the installation of AIX with predefined user input, AIX installers have been created with a 311 interrupt mode, programmed to look for a custom CD with data files that can be used for installation of AIX.
The other way is to modify the bosinst.data file in the AIX product media itself with the required parameters to achieve automated installation.
This tutorial explains how to perform automated installation of AIX using the 311 interrupt mode and by modifying the AIX product media itself.
Using 311 Interrupt mode
To use the 311 interrupt mode, you first need to create a CD with the .data files. Use an AIX system to perform the tasks mentioned in this section.
Creating a custom CD with .data files
To create a CD, first you need to create a folder to store the data files.
# mkdir cust_cd
# cd cust_cd
Then, perform the following tasks to create a custom CD.
Preparing a bosinst.data file
The values in the bosinst.data file are used for AIX installation (non-prompted AIX installation). You must install the Base Operating System (BOS) before you can access and modify the default bosinst.data file. After installing, you can find it at /var/adm/ras/bosinst.data
Now we are ready to edit the bosinst.data file or we can copy an existing bosinst.data to this folder.
# ls -lrt
total 16
-rw-r--r--    1 root     system         6501 Nov 29 04:22 bosinst.data
#
While preparing your bosinst.data file make sure that you set the following values as required.
Refer to IBM Documentation for the description of each variable.
PROMPT = no
EXISTING_SYSTEM_OVERWRITE = yes
INSTALL_METHOD = migrate
To skip the dialog and at the same time, accept the software license agreements and maintenance agreements, you need to set the given values for the following variables:
RUN_STARTUP = no
ACCEPT_LICENSES = yes
ACCEPT_SWMA = yes
You can use the target_disk_data stanza to specify the required disk for installation.
target_disk_data:
    LOCATION =
    SIZE_MB =
    HDISKNAME = hdisk0
If you have your root volume group (rootvg) installed in multiple disks, then specify multiple target_disk_data stanzas to identify each disk.
Preparing the firstboot.script file
The firstboot.script file can be used to define our startup tasks to run after installation.
The installer has the ability to search for a firstboot.script file in the custom CD and copy it to the RAM file system. The installer will run this script after the installation is complete.
We can use this firstboot.script file to make the installer run any firstboot kind of tasks. Let us use this to set up the network configuration for our system.
Make sure that you have permissions to run the firstboot.script file.
Refer to the following sample firstboot.script file as below:
# cat firstboot.script
echo "Executing firstboot script"

mktcpip -h idevp8-lp19.aus.stglabs.ibm.com -a 9.3.78.63 -m 255.255.255.0 -i en0 -n 9.3.1.200 -d aus.stglabs.ibm.com -g 9.3.78.1 -s -C 0 -A no

echo "exiting firstboot script”
Preparing a signature file
Now for the installer to look for the bosinst.data file and the firstboot.script file, we should create a file named signature with the word data in it, like, as shown below:
# echo data > signature
# cat signature
data
#
Now that we have prepared all the required files in our folder, use the following command to create an ISO image of the folder, cust_cd.
# mkrr_fs 1 /cust_cd.iso /cust_cd
Running mkisofs ...

mkrr_fs was successful.
#
Write this cust_cd.iso file to a CD-ROM in your system using the VML on Virtual I/O Server (VIOS).
Refer to the IBM Support page for instructions to use VML.
Using 311 Interrupt in BOS menus
Perform the following steps to create a CD using the 311 Interrupt mode:
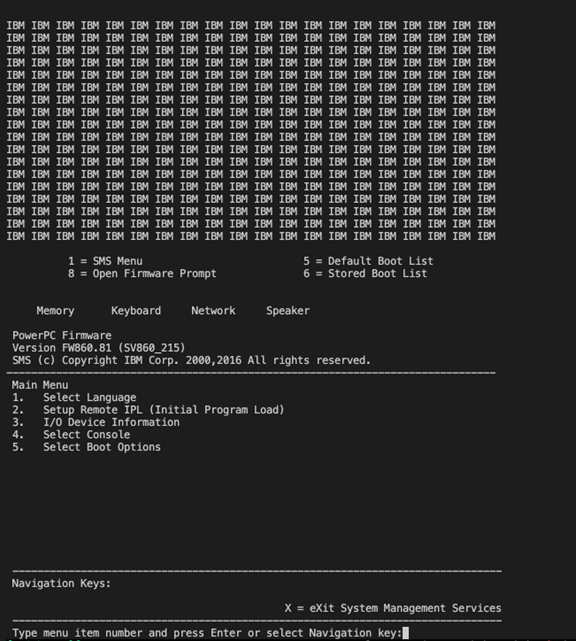
Restart your system and enter the System Management Services (SMS) menu by pressing 1.
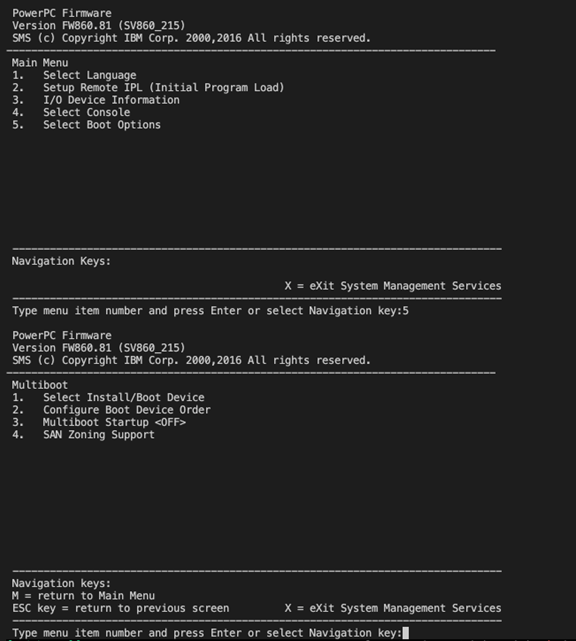
Enter 5 to select boot options.
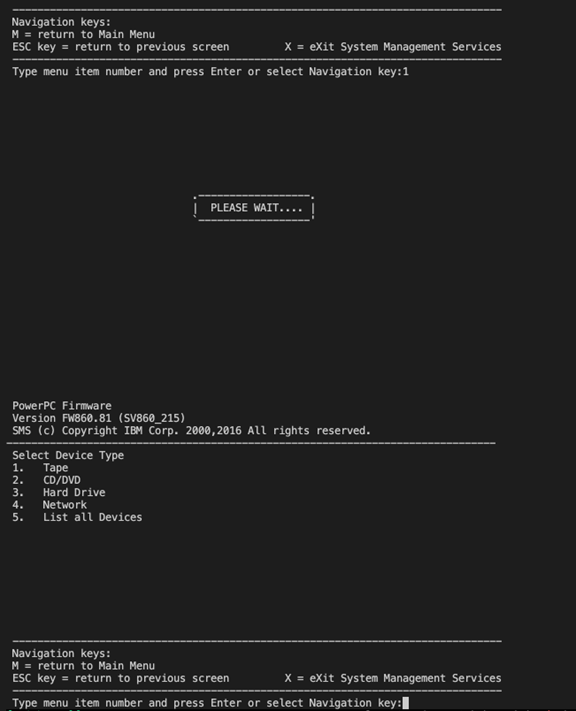
Enter 1 to select install/boot device.
Enter 5 to list all the devices.
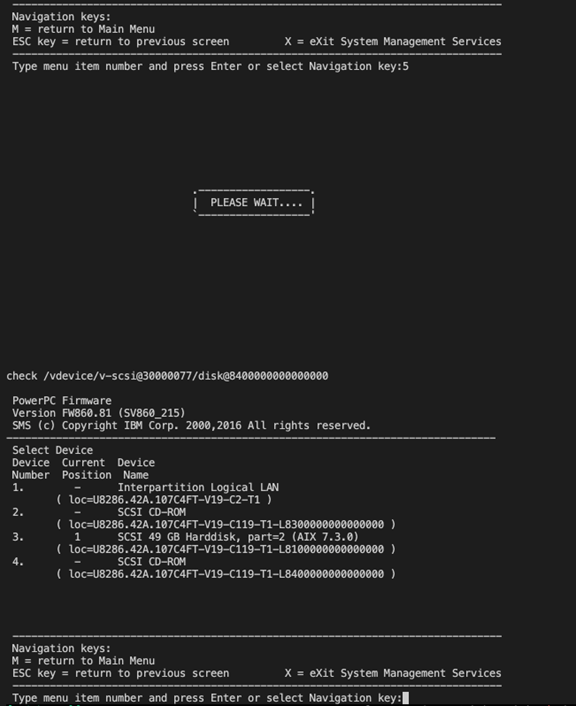
In the above list, CD-ROM listed as device number 2 is where I have mounted the AIX product DVD using VML on VIOS, and CD-ROM listed as device number 4 is where I have mounted the custom CD with data files. You should be able to identify your devices based on the logical unit number (LUN) from VIOS.
Select device 2.
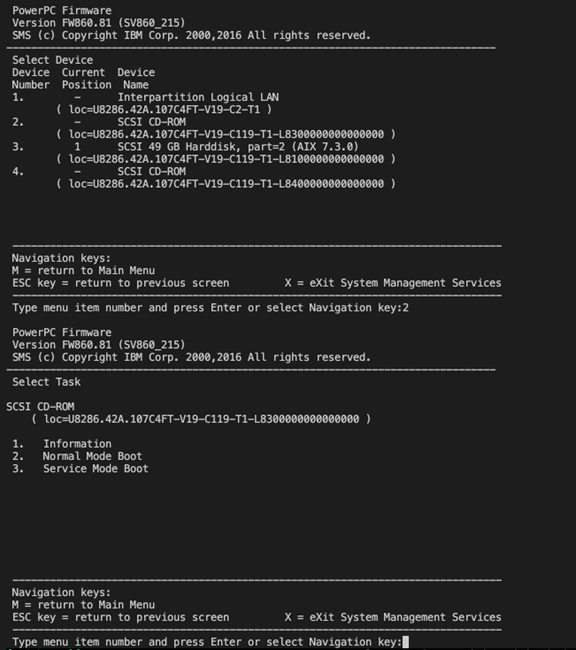
Enter 2 for normal mode boot.
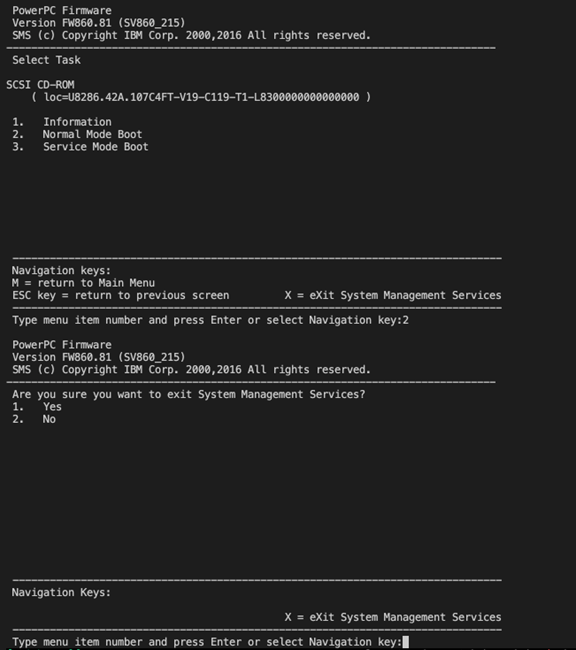
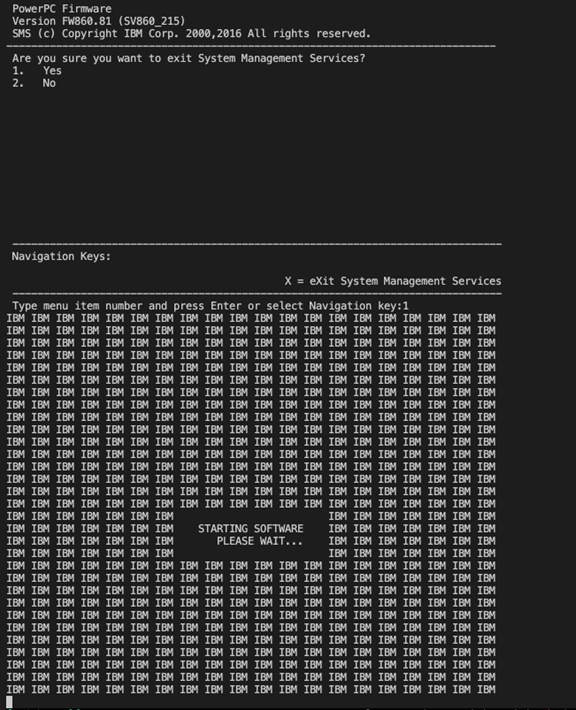
Enter 1 to exit the SMS menu.
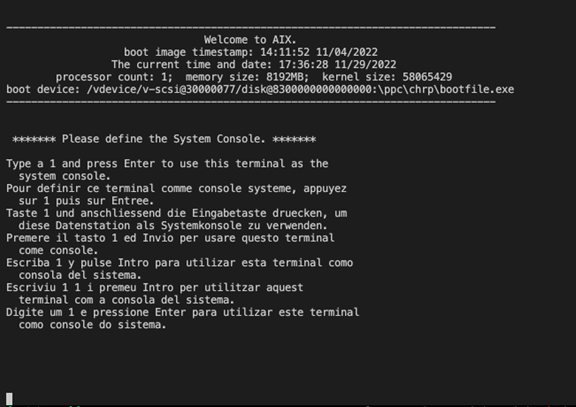
Now press 1 and then Enter to continue using this as the terminal.
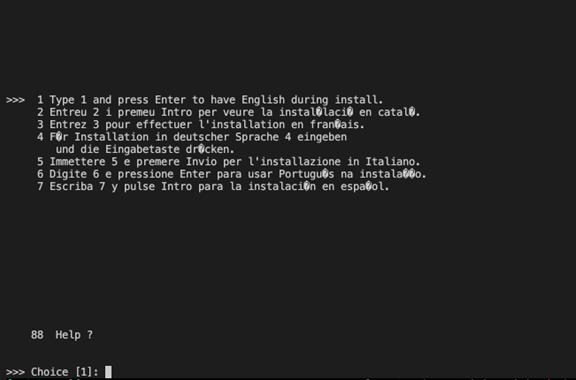
Press Enter to continue with English as the language during installation.
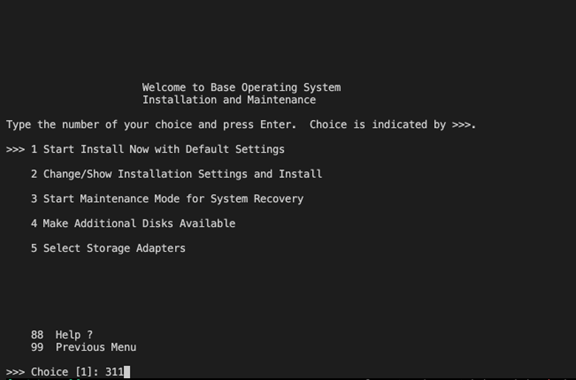
In the BOS menu, type 311 and press Enter.
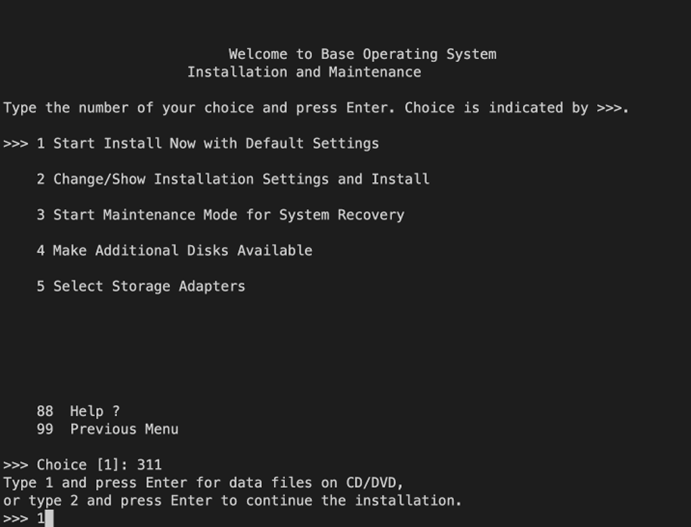
The installer will provide a prompt as shown below to check if you want to look for data files in the CD or DVD or to continue with the installation. Type 1 and then press Enter.
Now, the installer would look for data files in the available CD ROM devices and copy them to the RAM file system. Because, we had set prompt to no, the installer would not ask for any further options.
The
firstboot.scriptwill be run by the installer at the end of the installation process. After the installation is complete a login prompt appears.The installation will continue if the data files are found by the installer. Because, we had set prompt to no, the installer would not ask for any further options.
After the installation is complete a login prompt appears.
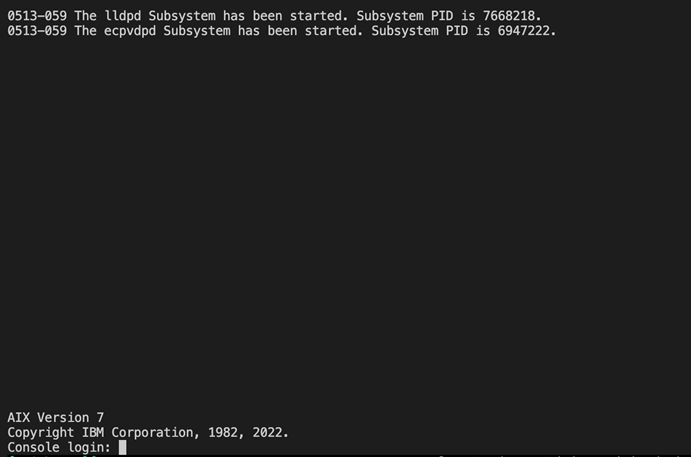
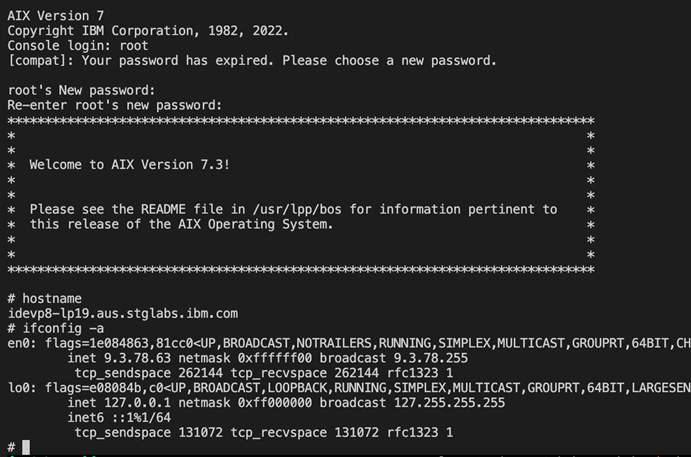
Log in as a root user and set a new password for root. Then, you can see that the IP of the system is assigned as per our firstboot.script file.
Modifying AIX product media
Make sure that the ulimit value for files is set to unlimited.
#
# ulimit -f unlimited
# ulimit -a
time(seconds)        unlimited
file(blocks)         unlimited
data(kbytes)         131072
stack(kbytes)        32768
memory(kbytes)       32768
coredump(blocks)     2097151
nofiles(descriptors) 2000
threads(per process) unlimited
processes(per user)  128
#
Run the following command to copy the contents of your CD-ROM with the AIX product media as an ISO image to your system.
#
# dd if=/dev/cd0 of=/my.iso
8104896+0 records in
8104896+0 records out
#
Now, use the loopmount command to mount your ISO image at a required mount point.
# loopmount -i /my.iso -o "-V cdrfs -o ro" -m /mnt
#
The loopmount command creates a read-only copy of the contents of the DVD, because it is in the CD-ROM File System (CDRFS) format. Now, create a folder /new_iso in a large file system to copy all the contents from the ISO image (/mnt).
(The -h option is to preserve symlinks only)
# mkdir /new_iso
# cp -hR /mnt/* /new_iso
#
Run the following commands to create the hard links.
# cd /new_iso/usr/sys/inst.images
# rm *
# rm .toc
# cd /new_iso/usr/sys/inst.images
# ls /new_iso/installp/ppc | while read f ; do ln /new_iso/installp/ppc/$f $f ; done
#
Now we have duplicated the CD into a read/write file system.
Edit the bosinst.template file at /new_iso/usr/lpp/bosinst in the same way we did in the Preparing a bosinst.data file section.
Now, create a firstboot.script file at /new_iso same as we did in the section Preparing the firstboot.script section.
Create an ISO image with the contents of /new_iso using the following command.
# mkrr_fs 1 /new.iso /new_iso
Running mkisofs ...

mkrr_fs was successful.
# ls -lrt /new.iso
-rw-r--r--    1 root     system   4143587328 Nov 30 01:02 /new.iso
#
Now you can use VML on VIOS and install AIX using this ISO image. Follow the instruction as mentioned in the 311 Interrupt in BOS menus section. Note that except when exiting the SMS menu, you won’t be given any prompt for questions. The installation will proceed as per the bosinst.data parameters.
After the installation is complete, a login prompt appears.
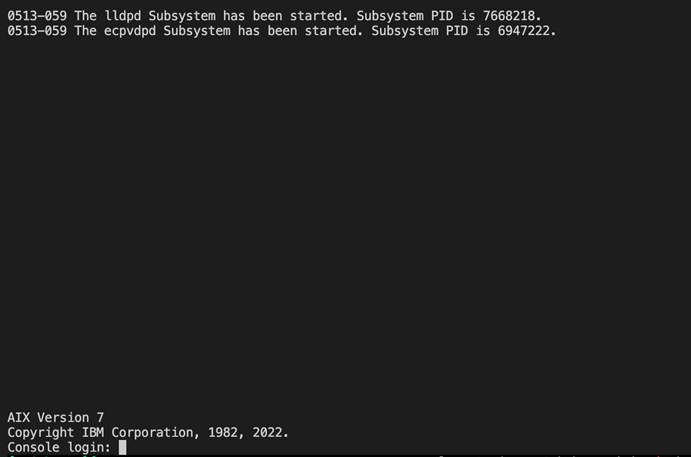
Log in as root user and set a new password for root. Then, you can check if the IP of the system is assigned as per our firstboot.script file.

Summary
This tutorial explained how automating the installation of AIX with custom settings can be achieved using the 311 interrupt mode of AIX installer and how the firstboot script can be used to set up the initial configurations.
About the author
Saikrishna Akkela is a developer in the AIX Image Management team.
You can reach Sai at akkela.saikrishna@ibm.com