Tutorial
Deploy a guest virtual machine on a bare metal system
Text-based and GUI-based installation of guest VMsArchive date: 2023-10-17
This content is no longer being updated or maintained. The content is provided “as is.” Given the rapid evolution of technology, some content, steps, or illustrations may have changed.Introduction
Bare metal servers are powerful systems that provide users with sole access to the entire server. A pure bare metal server is a single server that is offered without a hypervisor. Bare metal servers can be acquired in a preconfigured or a custom-configured form to exact specifications. Refer to bare metal systems for more information.
This tutorial explains how to install guests, that is, VMs on an IBM® Power Systems™ bare metal server. The operating system installed on the bare metal system is the host system, whereas the virtual machine we are trying to install as per the instructions in this tutorial is the guest system. You can install guest VMs using both text-based and graphical user interface (GUI) based methods. This tutorial explains both.
Prerequisites
You need to make sure that the following prerequisites are fulfilled before installing a guest VM on a bare metal system:
Make sure that the bare metal system is already installed with Red Hat Enterprise Linux (RHEL), SUSE Linux Enterprise Server (SLES), or Ubuntu operating system as the host operating system.
Perform these additional steps on the bare metal system on which you will deploy the guest VM. In this example, RHEL is installed on the bare metal system as the host operating system and RHEL will also be installed as the guest operating system.
Install all necessary packages and RPMs for RHEL by setting up a repository to perform yum update.
Run the following commands to install the mandatory packages to set up guests on your host operating system.
   yum install qemu-*
   yum install virt-*
   yum install libvirt-daemon
   yum install libvirt-daemon-driver-*
Start the libvirt service using the following command:
service libvirtd start
Verify if the setup is done properly using the following command:
virsh list -all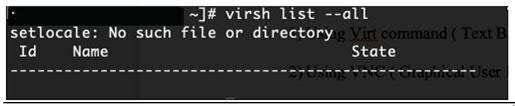
The output of the command with the ID, name, and state shows that the setup is done properly. In this example, the virsh list is blank because no guests are installed yet on our host operating system.
After performing these steps, the host operating system is now ready for you to deploy the required operating system (RHEL, SLES, or Ubuntu) on the guest virtual machines.
Estimated time
In an ideal scenario (if everything runs smoothly), it takes around 45 minutes to 1 hr to install all the packages, RPMs and the guest virtual machine.
Steps
Installing a guest VM on a bare metal system
There are two ways to install a guest VM on a bare metal system:
Using the
virtcommand (text-based installation)Using XML file (GUI-based installation)
Text-based installation of guest (using virt command)
Perform the following steps for text-based installation of a guest operating system using the virt command:
Copy the OS image (ISO) file to path /var/lib/libvirt/images/ of your system.
Create a directory named data (in var/lib/libvirt/images/) to place a virtual hard disk where we will mount the OS.
mkdir dataRun the following command to create a virtual image disk of size 30 GB from the path /var/lib/libvirt/images/data/.
qemu-img create -f qcow2 vm-name.qcow2 30GFor example:
qemu-img create -f qcow2 Myvm1.qcow2 30GName of the VM: Myvm1 (guest name can be anything)
The following output is displayed.


Install the OS using the
virt-installcommand and specify the ISO path as well as qcow image path. Navigate to the data folder, var/lib/libvirt/images/data, and then run thevirt-installcommand.virt-install --name Myvm1 --ram 2048 --disk path=/var/lib/libvirt/images/data/Myvm1.qcow2,size=8 --vcpus 4 --os-type linux --os-variant generic --network bridge=virbr0 --graphics none --console pty,target_type=serial --cdrom /var/lib/libvirt/images/isoimage.isoisoimage.iso is the ISO image of the operation system you want to install as guest.

During the installation process, provide the necessary input.
Refer to the following link for text-based installation:
Proceed with the remaining steps to complete the installation process.
If your installer prompts, log in to the guest operating system (that is, the VM)
If required, press Ctrl+] to exit from the guest operating system.
To verify if the guest is installed successfully run the following command:
virsh list -all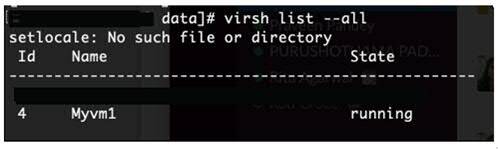
Status running indicates that the guest Myvm1 is installed successfully and is running.
Again, if required, log in to the guest system using the following command:
virsh console <VM number or VM name>For example:
virsh console 4Or,virsh console Myvm1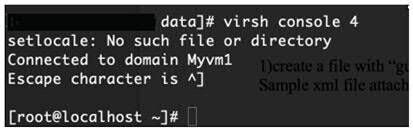
GUI-based installation of guest (using an XML file)
This section explains the step-by-step method for installing the guest VM using the GUI-based method.
Perform the following steps to install a guest VM on a host:
Create a file (guestname.xml) at the path /var/lib/libvirt/images/data/
Refer to the sample XML file in the Appendix.
For example: Myvm2.xml

Create a qcow image at the path /var/lib/libvirt/images/data/
qemu-img create -f qcow2 guestname.qcow2 30GFor example:
qemu-img create -f qcow2 Myvm2.qcow2 30G
Define the XML file created in step 1 using the following command:
virsh define guestname.xmlFor example:
virsh define Myvm2.xml
Start the guest system using the
virsh startcommand:virsh start guestnameFor example:
virsh start Myvm2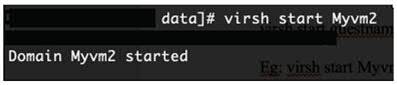
Enable Virtual Network Computing (VNC) to view the GUI console.
VNC is a graphical desktop sharing system that uses the RFB (remote framebuffer) protocol to remotely control another computer.
virsh vncdisplay guestnameFor example:
virsh vncdisplay Myvm2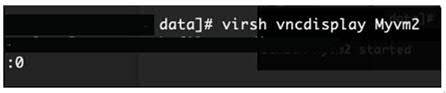
Enable the TCP port 5900 to connect to VNC (a platform independent desktop sharing and remote control application).
sudo iptables -I INPUT 1 -p tcp --dport 5900 -j ACCEPTRun the ifconfig command to check the IP of the system to connect to VNC:
#ifconfigProvide the host IP and port number in the VNC viewer as mentioned in following example and start installation:
For example: 9.24.135.222:0
Note: If VNC is not connecting to 9.24.135.222:0, disable the system firewall using the following command and try to reconnect to VNC:
service firewalld stop
After completing the installation, log in to your guest system.
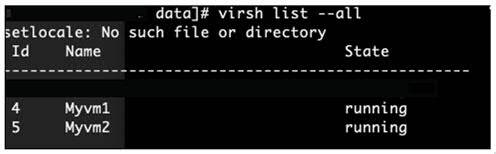
The following screen capture shows that the two VMs are present in the host operating system.
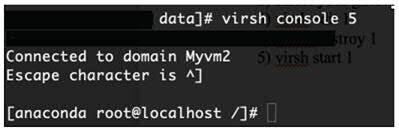
Connect with the latest guest system installed by using the GUI method.
Refer to Table 1 to identify the virsh commands to start, edit, or stop your guest system.
Table 1. Description of virsh commands
| virsh command | Example | Description |
|---|---|---|
virsh List |
virsh list -all |
Lists all the guest VMs present in your system |
virsh console |
virsh console <guest name/guest number> |
Selects the guest VM |
virsh start |
virsh start <guest name/guest number> |
Starts the guest VM |
virsh edit |
virsh edit <guest name/guest number> |
Edits the guest VM |
virsh destroy |
virsh destroy <guest name/guest number> |
Stops the guest VM |
Summary
By using the steps outlined in this tutorial, you can easily install a guest VM on a bare metal system, which is considered quite complicated when compared to using a hypervisor.
Sample XML file
In the sample XML file shown in this section, you can just change the guest name, qcow image path, and the ISO path and use it to install a guest on a bare metal system.
Before copying the ISO image, make sure that your image is copied completely, otherwise you will not be able to proceed with the steps smoothly.
Sample XML file
   <domain type='kvm'>
     <name>Myvm2</name>
     <uuid></uuid>
     <memory unit='KiB'>4194304</memory>
     <currentMemory unit='KiB'>4194304</currentMemory>
     <vcpu placement='static'>10</vcpu>
     <resource>
     <partition>/machine</partition>
     </resource>
     <os>
     <type arch='ppc64le' machine='pseries-rhel7.5.0'>hvm</type>
     <boot dev='cdrom'/>
     </os>
     <features>
     <acpi/>
     <apic/>
     </features>
     <cpu>
     <topology sockets='2' cores='5' threads='1'/>
     </cpu>
     <clock offset='utc'/>
     <on_poweroff>destroy</on_poweroff>
     <on_reboot>restart</on_reboot>
     <on_crash>restart</on_crash>
     <devices>
     <emulator>/usr/libexec/qemu-kvm</emulator>
     <disk type='file' device='disk'>
     <driver name='qemu' type='qcow2' cache='none'/>
     <source file='/var/lib/libvirt/images/data/Myvm2.qcow2'/>
     <target dev='vda' bus='virtio'/>
     <address type='pci' domain='0x0000' bus='0x00' slot='0x03' function='0x0'/>
     </disk>
     <disk type='file' device='cdrom'>
     <driver name='qemu' type='raw'/>
     <source file='/var/lib/libvirt/images/OS.iso'/>
     <target dev='sda' bus='scsi'/>
     <readonly/>
     <address type='drive' controller='0' bus='0' target='0' unit='0'/>
     </disk>
     <controller type='usb' index='0'>
     <address type='pci' domain='0x0000' bus='0x00' slot='0x02' function='0x0'/>
     </controller>
     <controller type='pci' index='0' model='pci-root'/>
     <controller type='scsi' index='0'>
     <address type='spapr-vio' reg='0x2000'/>
     </controller>
     <interface type='bridge'>
     <mac address='52:54:c0:08:70:95'/>
     <source bridge='virbr0'/>
     <model type='virtio'/>
     <address type='pci' domain='0x0000' bus='0x00' slot='0x01' function='0x0'/>
     </interface>
     <serial type='pty'>
     <target port='0'/>
     <address type='spapr-vio' reg='0x30000000'/>
     </serial>
     <console type='pty'>
     <target type='serial' port='0'/>
     <address type='spapr-vio' reg='0x30000000'/>
     </console>
     <input type='keyboard' bus='usb'/>
     <input type='mouse' bus='usb'/>
     <graphics type='vnc' port='5900' autoport='yes' listen='0.0.0.0'>
     <listen type='address' address='0.0.0.0'/>
     </graphics>
     <video>
      <model type='vga' vram='16384' heads='1'/>
      <address type='pci' domain='0x0000' bus='0x00' slot='0x04' function='0x0'/>
     </video>
      <memballoon model='virtio'>
      <address type='pci' domain='0x0000' bus='0x00' slot='0x05' function='0x0'/>
      </memballoon><panic model='pseries'/>
      </devices>
      <seclabel type='dynamic' model='selinux' relabel='yes'/>
</domain>