Tutorial
Write and run serverless MQ applications in Azure
Deploy a serverless MQ application to Microsoft Azure CloudIn this tutorial, you create HTTP triggered Azure functions inside an Azure function app. When you invoke an HTTP trigger endpoint, a function is invoked which in turn interacts with an instance of IBM MQ.
Azure Functions are a serverless feature of Microsoft Azure Cloud. You can create serverless applications from their templates or deploy your own.
Serverless applications are cloud-native and reside on the cloud. The cloud provider takes care of server configuration, deployment, and monitoring.
With serverless applications, you are only charged for the resources you use. Serverless applications execute only when they are triggered. Typically, you are not charged when there are zero instances of your application running.
Serverless MQ application architecture
Every time one of the Azure function endpoints is triggered, one of the functions is invoked. The function connects to IBM MQ on Azure and sends or processes messages. The MQ REST API is used to connect to MQ.
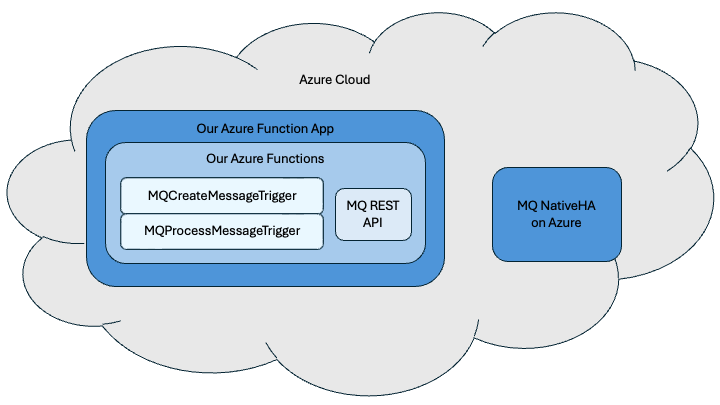
The following sections describe the application components in more detail.
Our application will be deployed on Azure Cloud and communicate with an instance of MQ that is also deployed on Azure Cloud. You will send messages to the queue manager on Azure using the Azure function MQCreateMessageTrigger. You will get messages off the queue manager using the Azure function MQProcessMessageTrigger.
The queue manager and queue to post messages to or get messages from the queue are provided as HTTP input parameters to each of the functions.
The MQ Rest API contains different methods to get (delete) and post messages.
The Azure Function has three core files:
src/index.jscontains the general application level code.src/functions/MQCreateMessageTrigger.jscontains the HTTP triggered function that puts messages onto a queue manager on each invocation.src/functions/MQProcessMessageTrigger.jscontains the HTTP triggered function that gets (deletes) messages from a queue manager on each invocation.
Prerequisites
- VSCode and the Azure Functions extension, which will make the testing and deployment of our serverless application easier.
- Azure Functions Core Tools, which is installed the first time you run your functions locally.
- Node.js (We tested with v24 in this tutorial.)
- An Azure account.
- MQ on Azure.
- MQ in a container.
- Go — required to build the Message Observer.
Steps
Step 1. Clone the Git repository
Make sure you are in a directory where you want to clone the project, and then clone the mq-dev-patterns repository by running this command:
git clone https://github.com/ibm-messaging/mq-dev-patterns.git
After cloning the repo, change directories to the directory where our serverless application is:
cd serverless/azure-functions-rest-http-trigger
Step 2. Test your application locally against MQ in a container
For this step you will need a MQ queue manager running in a container on your development machine.
Open the azure-functions-rest-http-trigger folder in VSCode.
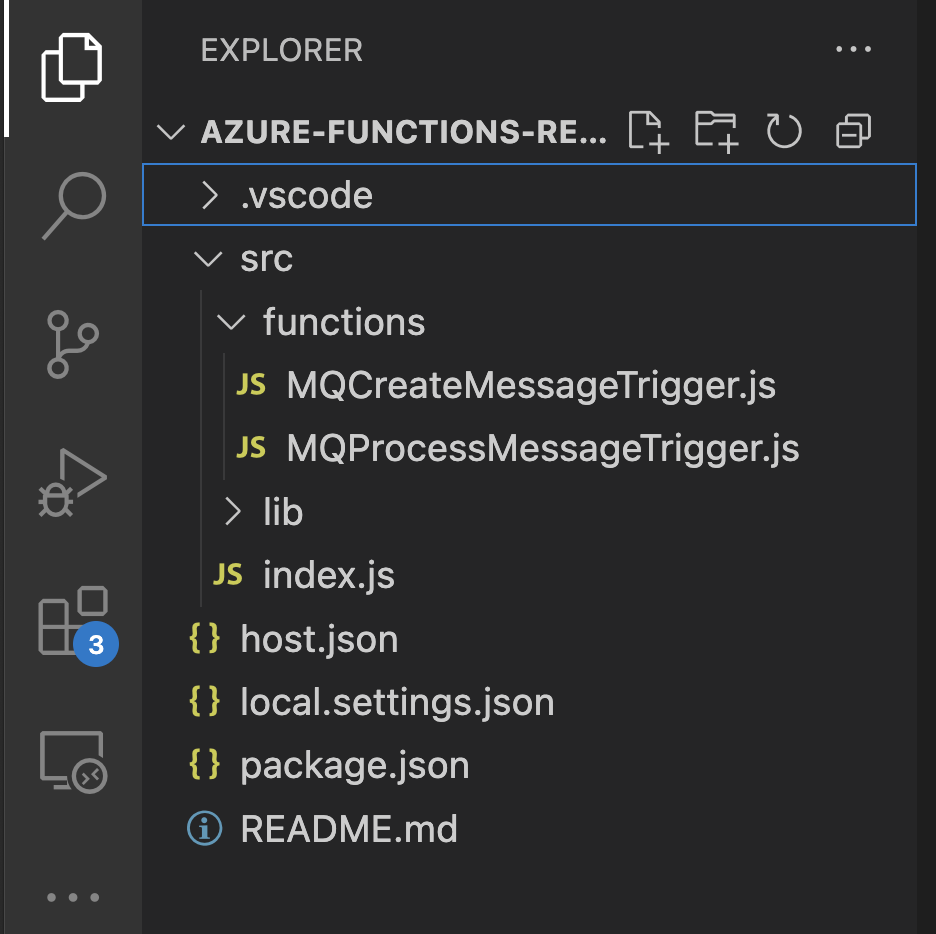
To test our functions locally, you will use the debugger on VSCode. Before running the debugger, you need to configure MQ locally and initialize the Azure functions.
Local MQ configuration
We provide queue manager configuration as environment variables that will allow the functions to communicate with MQ. These environment variables for MQ will be in the local.settings.json file in the Values section.
Set these variables for the MQ server, using values that point at the queue manager running on your development machine.
    "QM_NAME:0": "QM1",
    "MQ_HOST:0": "localhost",
    "MQ_PORT:0" : 9443,
    "MQ_APPUSER:0": "app",
    "MQ_PASSWORD:0": "passw0rd",
    "DEBUG": "mq*:*",
    "ALLOW_SELF_SIGNED": "true",
    "MAX_MESSAGES": 4
Select the Azure plugin in VSCode.

Initialize local project
Open up the local project, inside the local workspace. The first time you open the local project, you will see an instruction asking you to initialize the local project for use with VSCode.
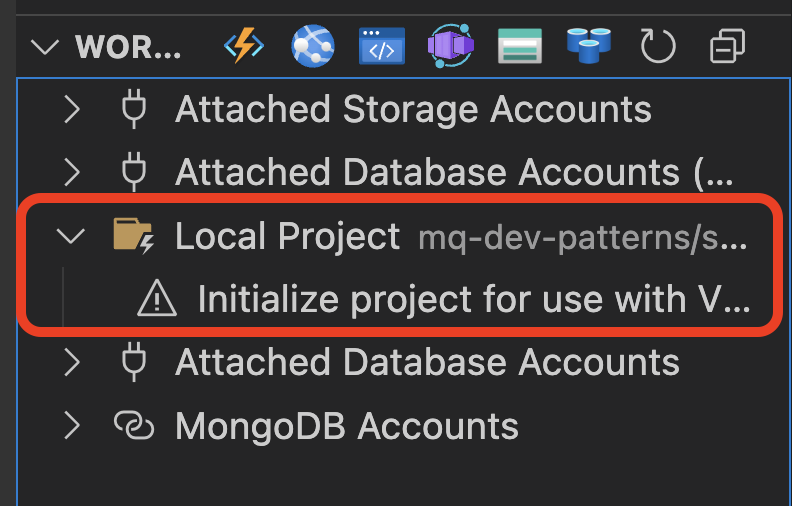
Click the warning message which will initialize the Azure Function project locally on your VSCode.
You will see a notification when it is done initializing the project. Refresh the Local Workspace.

You will see something like this:

Run the debugger
Run the debugger by clicking Run > Start Debugging from the top menu bar.
If you see a warning message like this:
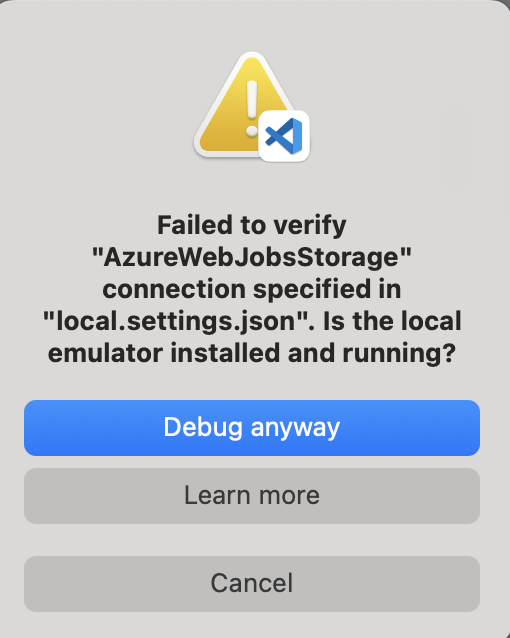
Then, select Debug anyway.
The first time you run the debugger, you may be prompted with the notification below:
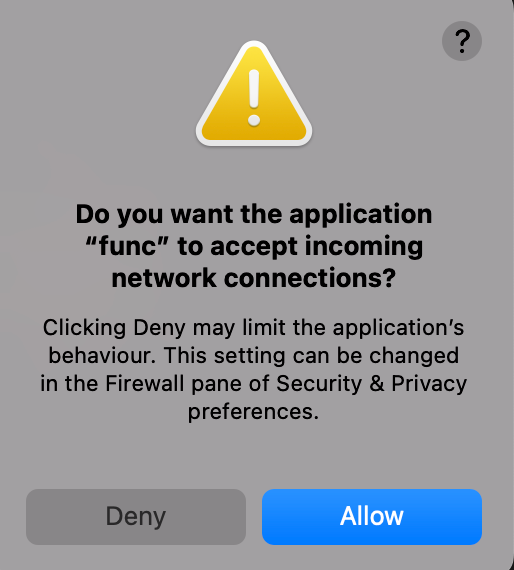
Click Allow.
Look at the built-in terminal on VSCode. You should see an output similar to this:
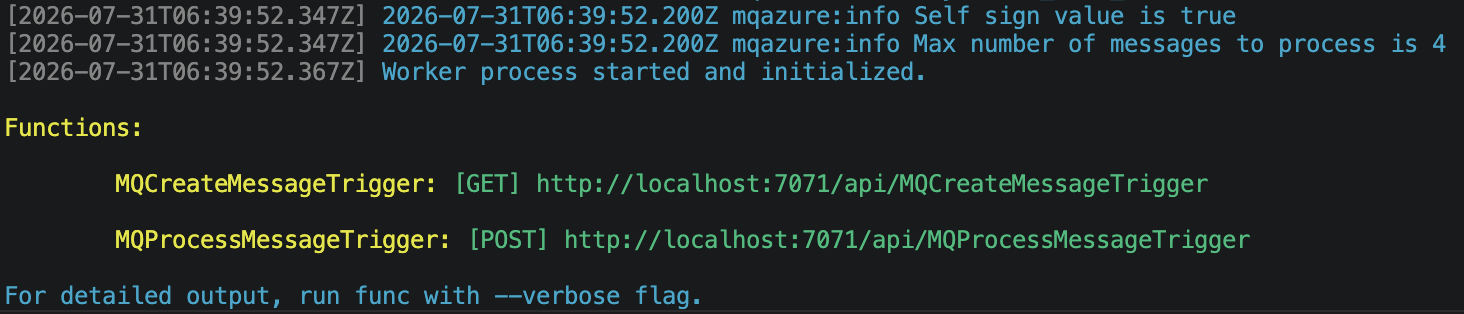
Copy the link next to MQCreateMessageTrigger and paste it in your web browser.
You will see a 400 error on your web page.
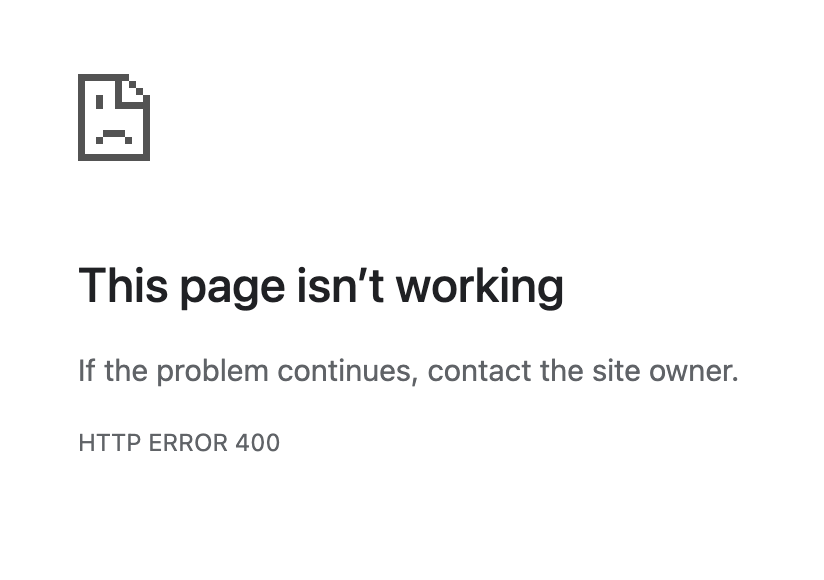
The logs in VSCode will show why.

The call was missing the parameters QMGR and QUEUE.
Add parameters to refer to the queue manager running locally on your development machine. For example:
http://localhost:7071/api/MQCreateMessageTrigger?QMGR=QM1&QUEUE=DEV.QUEUE.1
This time the browser will show "Request Accepted."
Check the MQ console
Navigate to the MQ console by opening a browser and going to https://localhost:9443.
Log in, Select Manage, and check the queue you sent messages to.
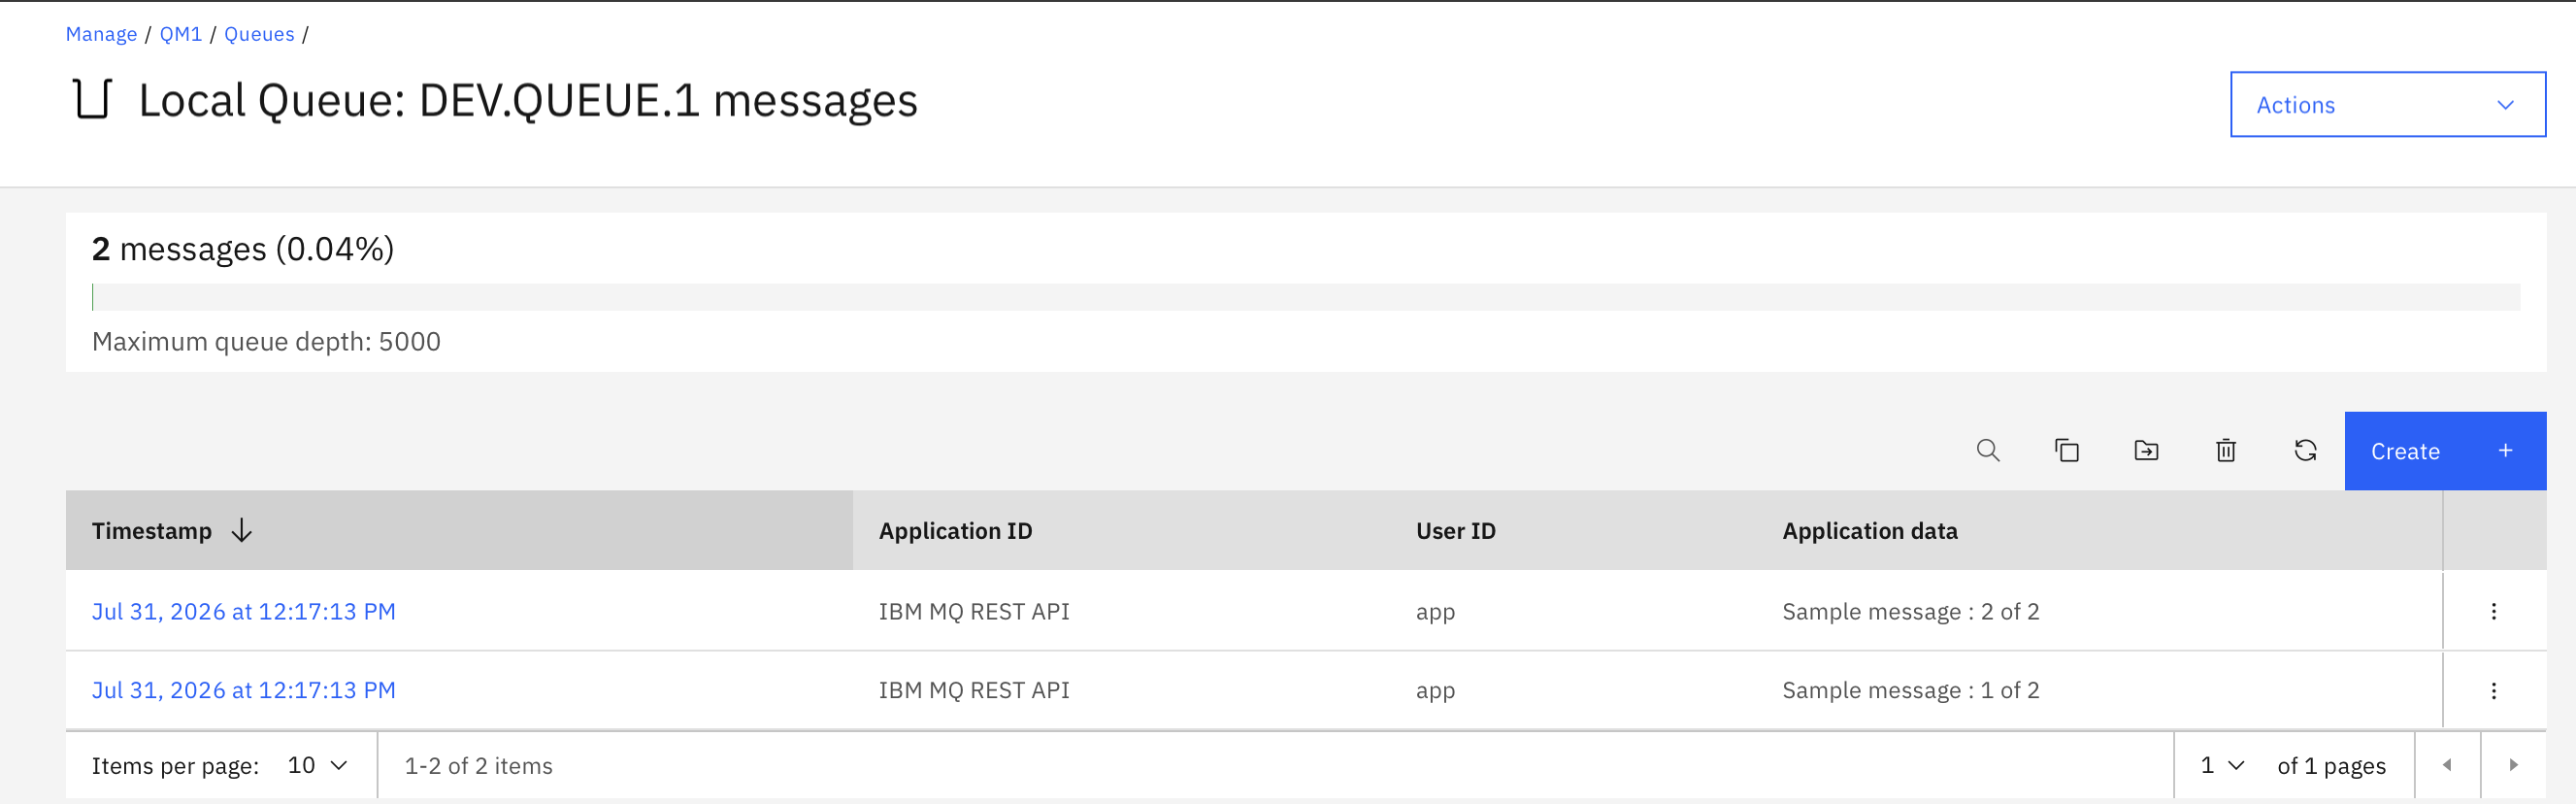
Congratulations! You have successfully tested your CreateMessage Azure function with all components running locally.
Step 3. Test the ProcessMessage Azure function locally
In this step we test the MQProcessMessageTrigger Azure function. We will use the Message Observer as used in the Write and run serverless IBM MQ application in IBM Cloud tutorial.
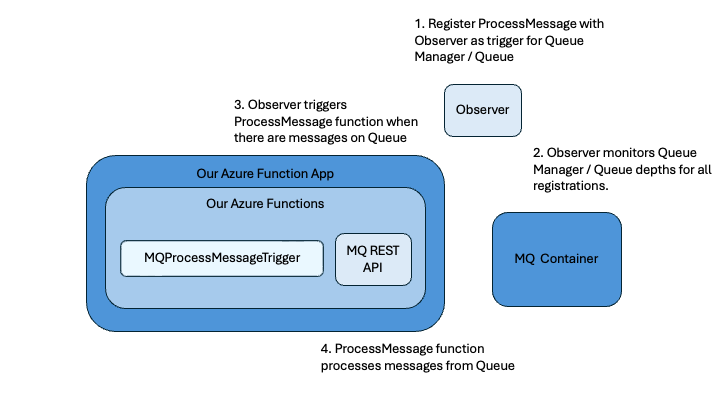
Architecture of the observer-initiated Azure trigger
The trigger for this function is compatible with the Message Observer, which will allow you to use it to monitor queue depth, and trigger the Azure ProcessMessage function.
Clone the Observer Git repository
Make sure you are in a directory where you want to clone the project, and then clone the mq-code-engine-observer repository by running this command:
git clone https://github.com/ibm-messaging/mq-code-engine-observer
After cloning the repo, change directories to the directory where our observer code is:
cd mq-code-engine-observer/observer
make
Configure and start the observer
Open the observer folder in up a new VSCode instance. Create a new file env-azure.json and add the following queue manager configuration.
{
    "MQ_ENDPOINTS" : [
        {
            "QMGR" : "QM1",
            "MQ_REST_HOST" : "https://localhost",
            "MQ_REST_PORT" : "9443",
            "ADMIN_USER" : "admin",
            "ADMIN_PASSWORD" : "passw0rd"
        }
    ]
}
In a terminal run the following command to start the observer.
NOTIFY_INTERVAL=1 ALLOW_SELF_SIGNED=1 EnvFile=./env-azure.json ./observer
This will start the observer in a mode where it monitors queue depths for registered endpoints every minute.
Register the ProcessMessage Azure function with the observer
In a terminal run the following command.
curl -d "QMGR=QM1&QUEUE=DEV.QUEUE.1&NOTIFY=http://localhost:7071/api/MQProcessMessageTrigger" -X POST -H "application/x-www-form-urlencoded" http://localhost:8080/register
Within a minute you should see that the ProcessMessage trigger has been invoked and some of the messages have been removed from the queue.
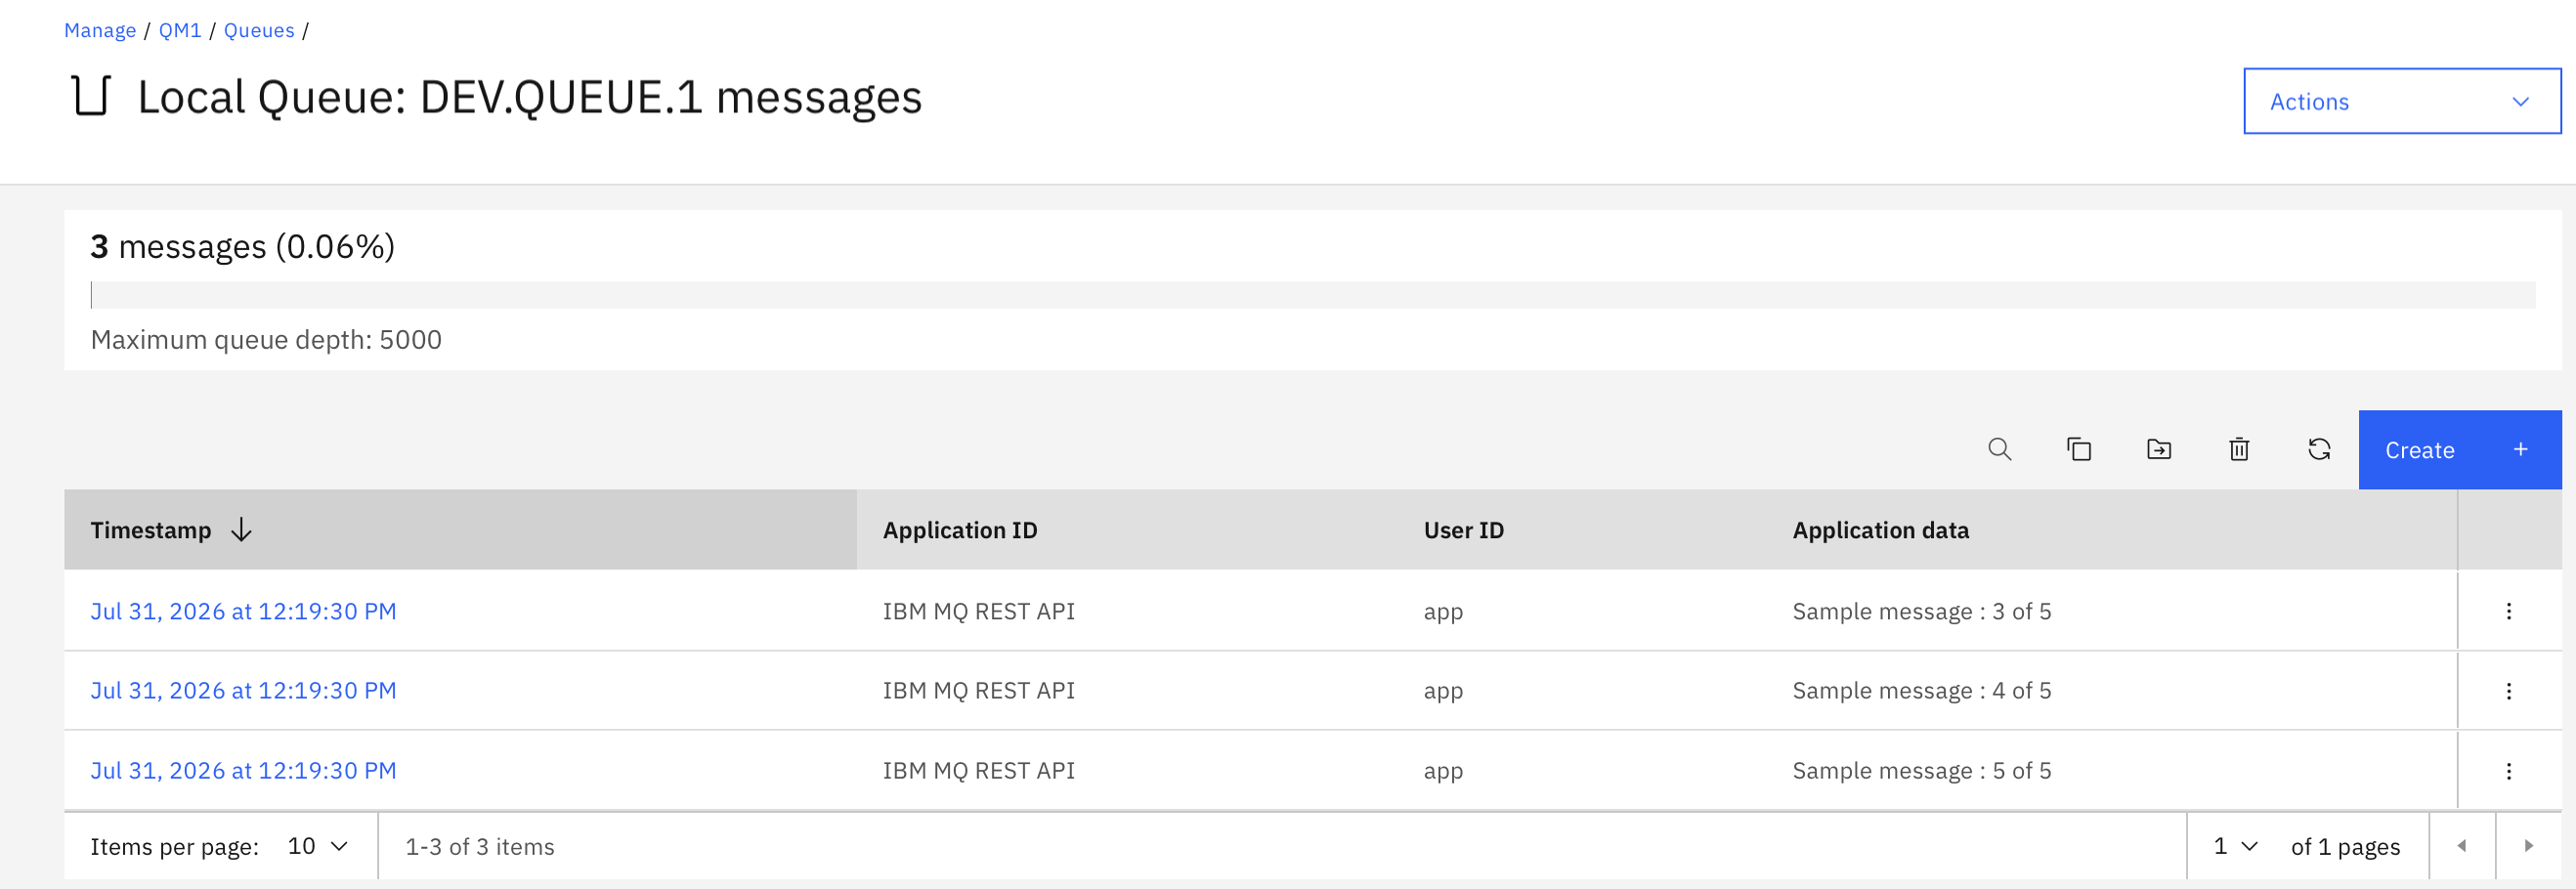
Congratulations! You have successfully triggered your ProcessMessage Azure function from the Message Observer. Azure functions remain dormant until invoked. The Observer can monitor queue depths and trigger your Azure functions when there are messages to process.
Before proceeding to the next step, stop the Observer and stop the VSCode debugger.

Step 4. Test against MQ NativeHA instance running in Azure
You will now test the Observer triggered Azure function against a NativeHA instance of MQ running in Azure
Architecture of the observer with IBM MQ hosted in Azure

Deploy MQ to Azure
If you don't already have a queue manager running in Azure, deploy one by following the MQ on Azure tutorial.
You should have Queue Manager admin credentials, app credentials and a load balancer IP address that you will now use to configure the Azure functions and Observer.
Configuring our Azure Function
Edit the file local.settings.json and add the queue manager configuration to slot 1.
    "QM_NAME:1": "secureapphelm",
    "MQ_HOST:1": "< loadbalancer ip for mq goes here >",
    "MQ_PORT:1" : 9443,
    "MQ_APPUSER:1": "app",
    "MQ_PASSWORD:1": "< mq app password goes here >",
So that the file looks something like this:
{
  "IsEncrypted": false,
  "Values": {
    "AzureWebJobsStorage": "UseDevelopmentStorage=true",
    "FUNCTIONS_WORKER_RUNTIME": "node",
    "QM_NAME:0": "QM1",
    "MQ_HOST:0": "localhost",
    "MQ_PORT:0" : 9443,
    "MQ_APPUSER:0": "app",
    "MQ_PASSWORD:0": "passw0rd",
    "QM_NAME:1": "secureapphelm",
    "MQ_HOST:1": "< loadbalancer ip for mq goes here >",
    "MQ_PORT:1" : 9443,
    "MQ_APPUSER:1": "app",
    "MQ_PASSWORD:1": "< mq app password goes here >",
    "DEBUG": "mq*:*",
    "ALLOW_SELF_SIGNED": "true",
    "MAX_MESSAGES": 4
  }
}
Configuring the Observer
Edit the Observer file env-azure.json and add the queue manager configuration:
        {
            "QMGR" : "secureapphelm",
            "MQ_REST_HOST" : "https://< loadbalancer ip for mq goes here >",
            "MQ_REST_PORT" : "9443",
            "ADMIN_USER" : "admin",
            "ADMIN_PASSWORD" : "< mq app password goes here >"
        },
The file should look like this:
{
    "MQ_ENDPOINTS" : [
        {
            "QMGR" : "secureapphelm",
            "MQ_REST_HOST" : "https://< loadbalancer ip for mq goes here >",
            "MQ_REST_PORT" : "9443",
            "ADMIN_USER" : "admin",
            "ADMIN_PASSWORD" : "< mq app password goes here >"
        },
        {
            "QMGR" : "QM1",
            "MQ_REST_HOST" : "https://localhost",
            "MQ_REST_PORT" : "9443",
            "ADMIN_USER" : "admin",
            "ADMIN_PASSWORD" : "passw0rd"

        }
    ]
}
Start the Azure functions
In your VSCode session run the debugger by clicking Run > Start Debugging from the top menu bar.
From a browser trigger the CreateMessage function by entering the following url
http://localhost:7071/api/MQCreateMessageTrigger?QMGR=secureapphelm&QUEUE=DEV.QUEUE.1
You should see the response Request Accepted.
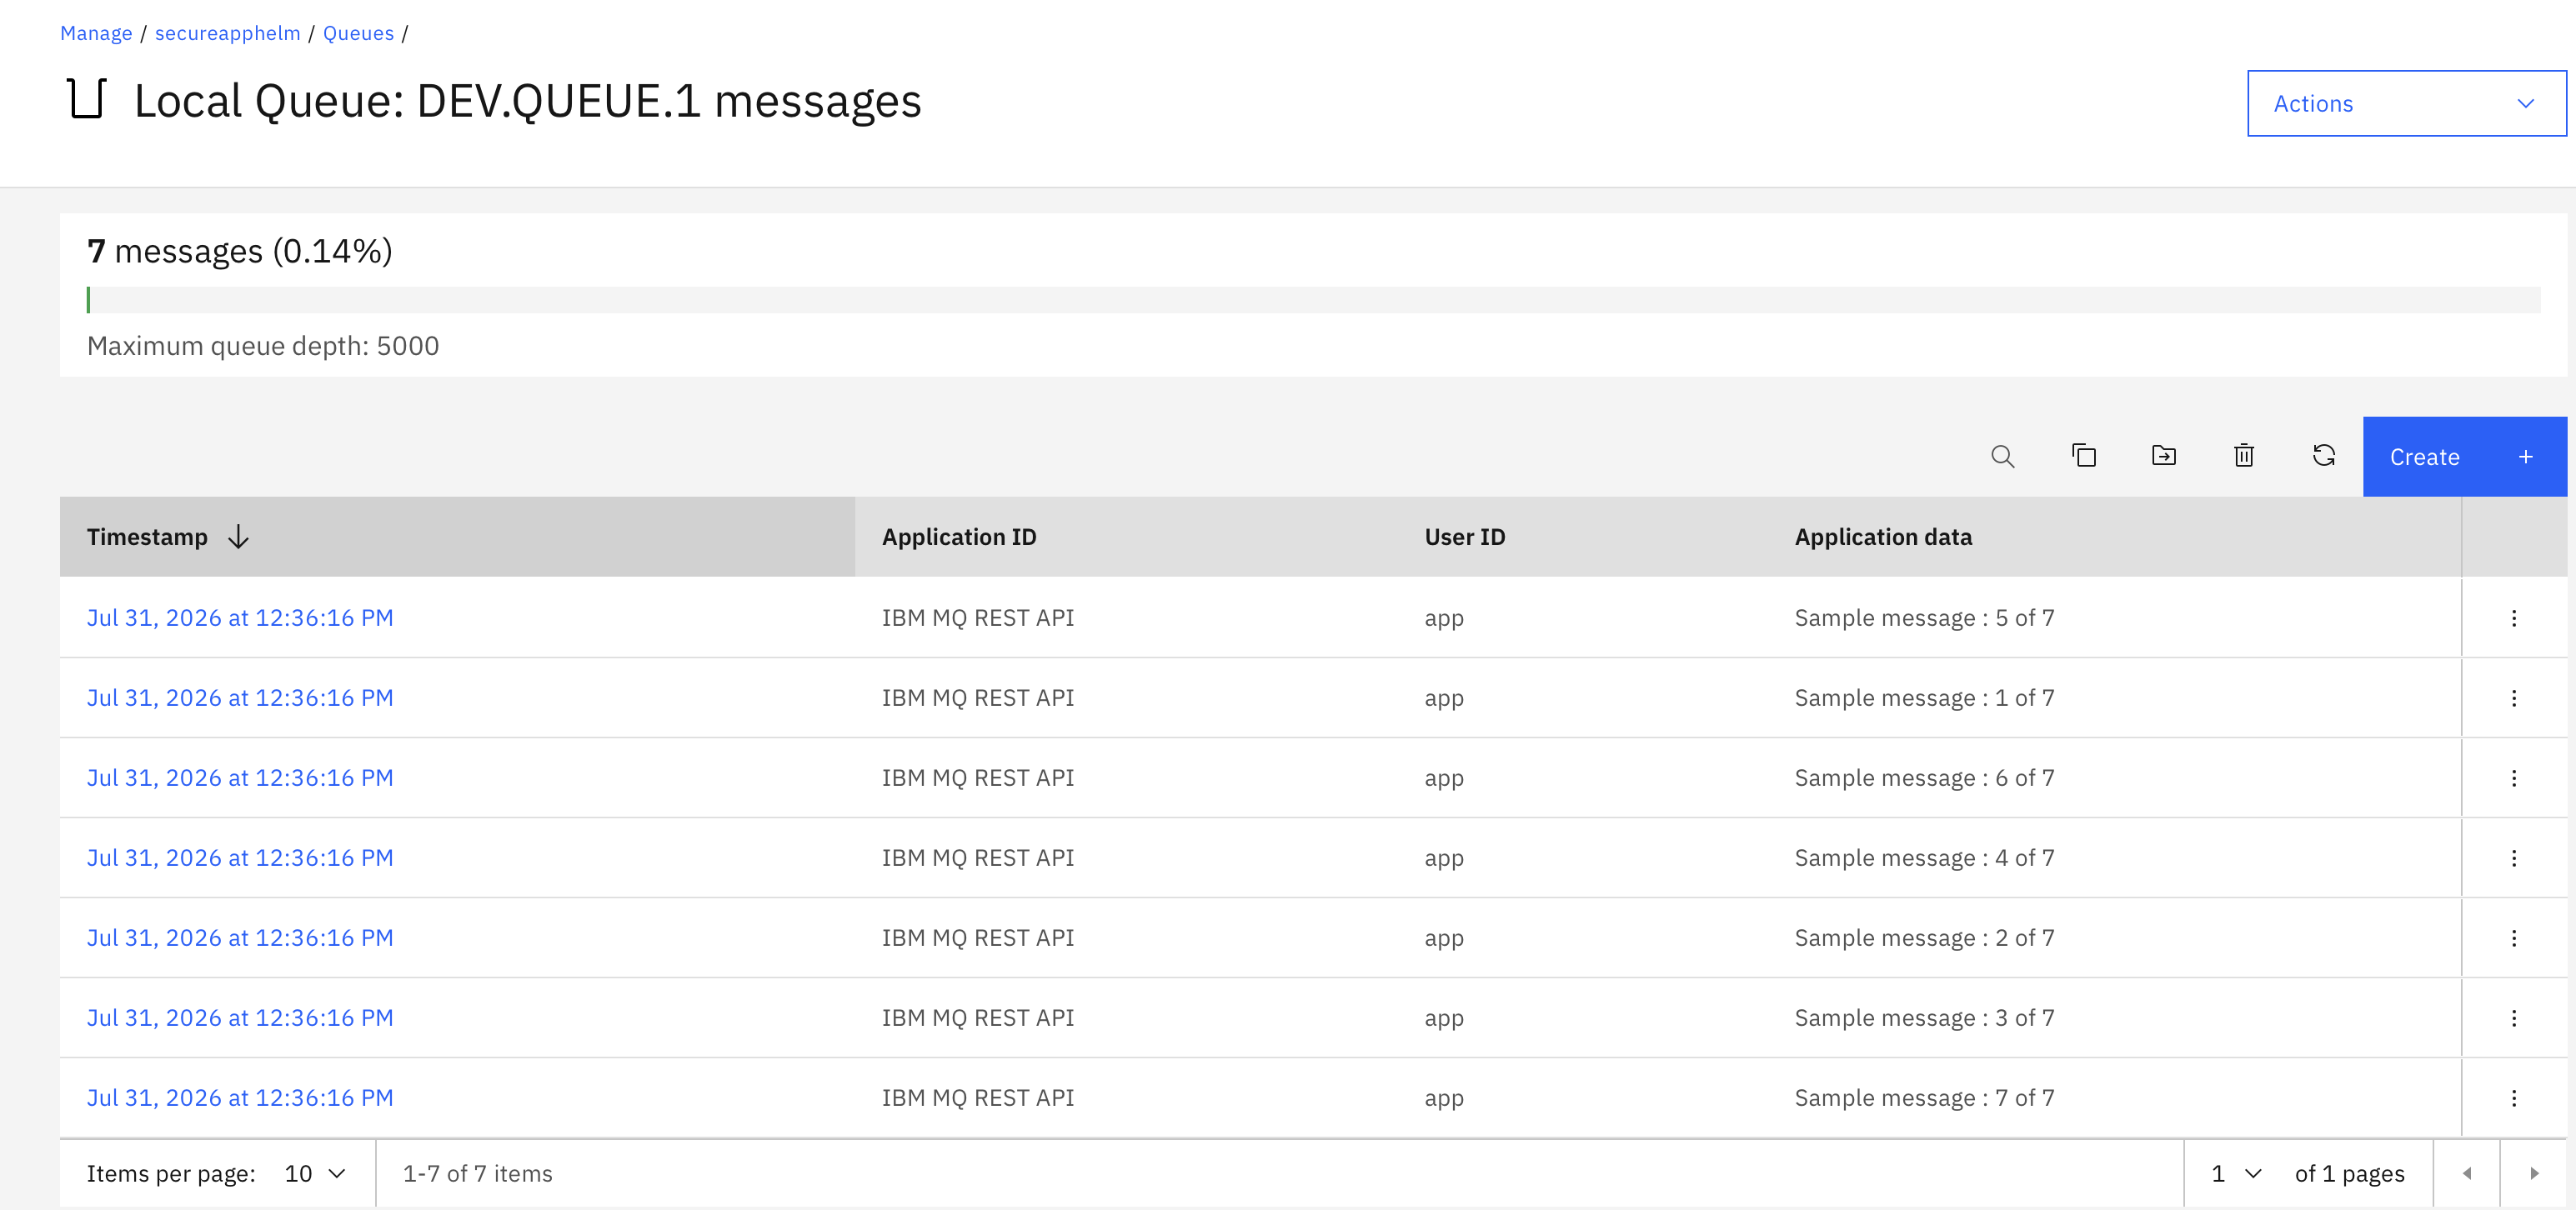
On the MQ console for the queue manager running in Azure, you should see new messages on the queue.
Start the observer
In your observer terminal run the following command to start the observer:
NOTIFY_INTERVAL=1 ALLOW_SELF_SIGNED=1 EnvFile=./env-azure.json ./observer
In another terminal, run the following command to register the ProcessMessage trigger to be notified when there are messages in the DEV.QUEUE.1 queue on the Azure hosted queue manager:
curl -d "QMGR=secureapphelm&QUEUE=DEV.QUEUE.1&NOTIFY=http://localhost:7071/api/MQProcessMessageTrigger" -X POST -H "application/x-www-form-urlencoded" http://localhost:8080/register
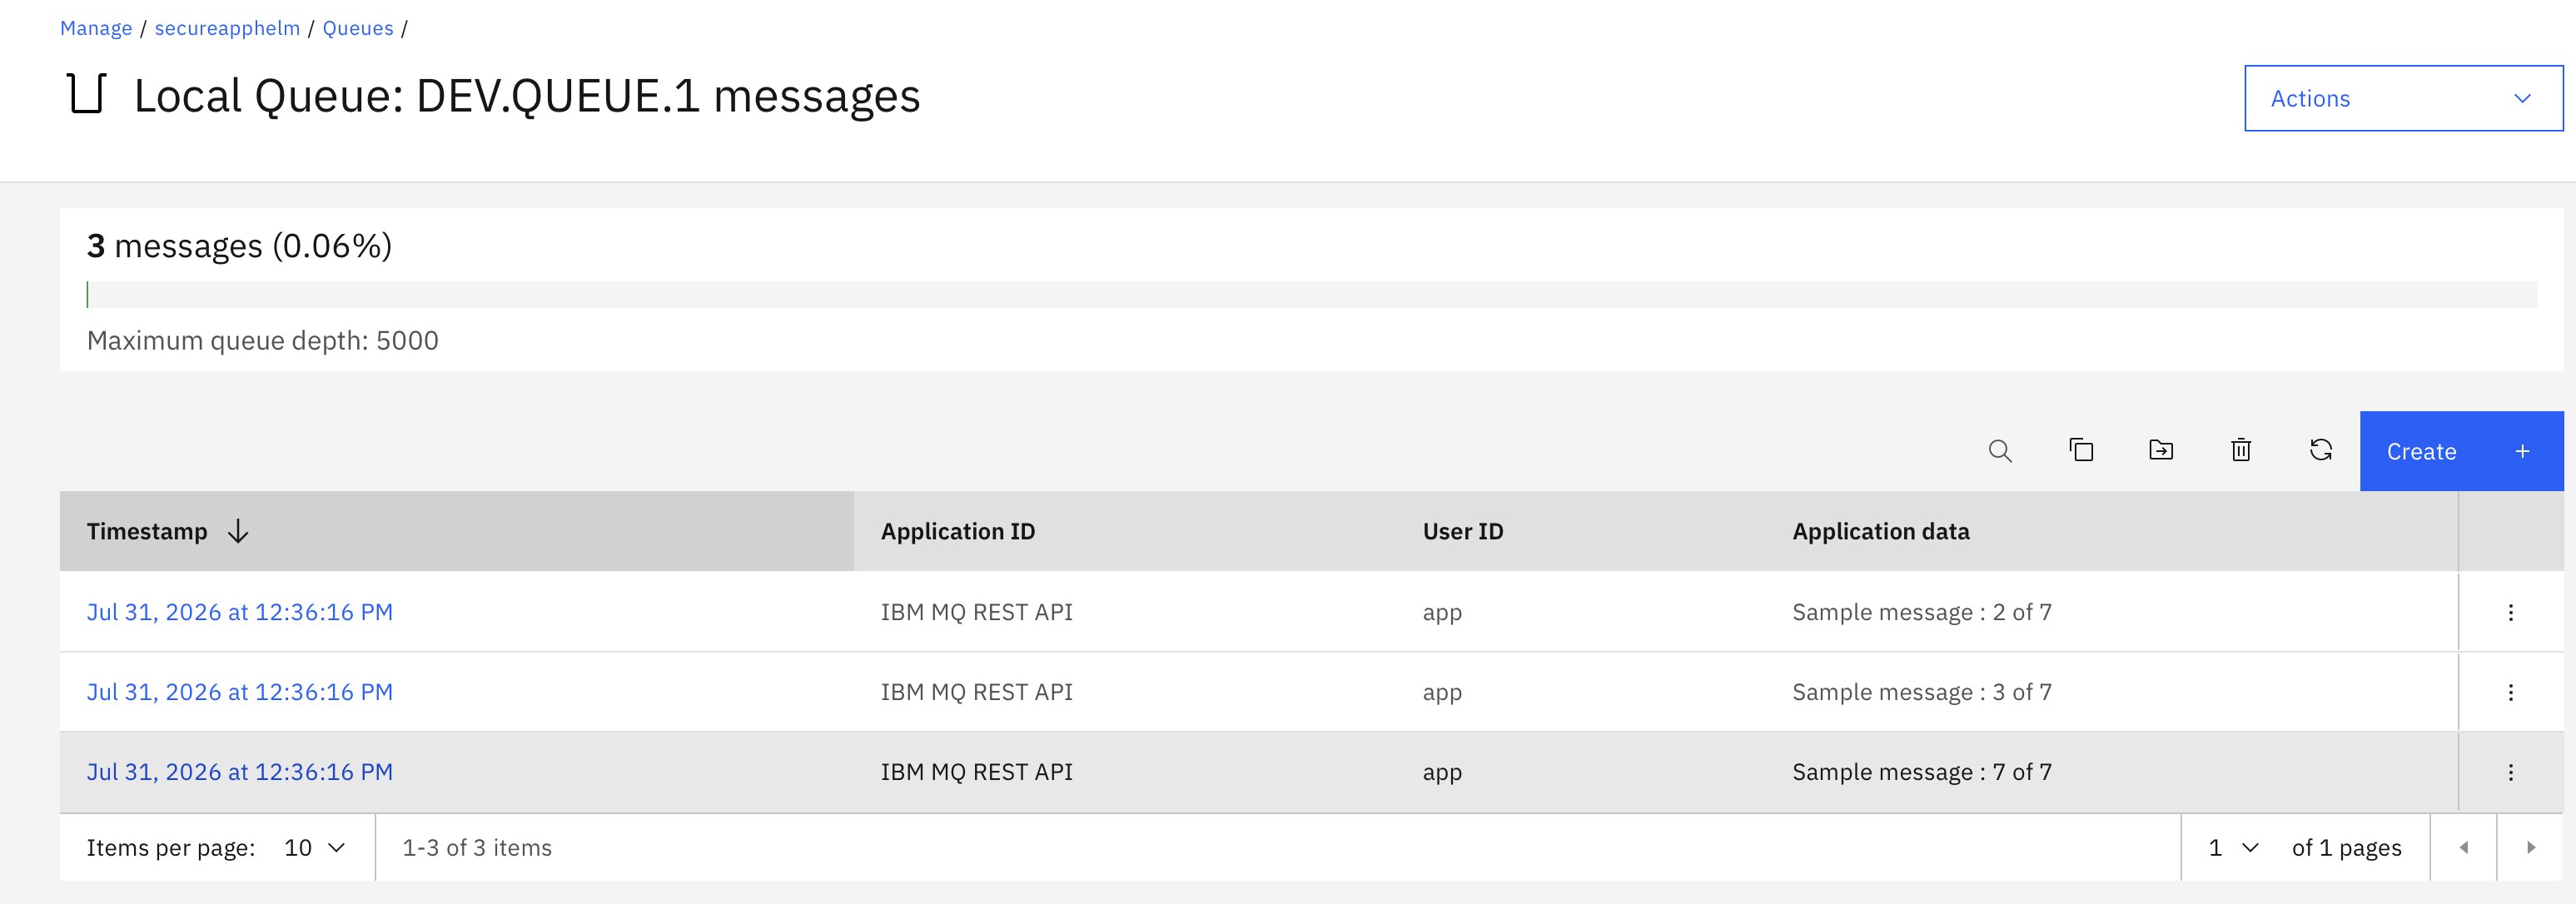
Every minute you should see a portion of the messages processed off the queue.
Before proceeding to the next step, stop the Observer and stop the VSCode debugger.
Congratulations! You have successfully configured a locally running Observer and locally running Azure functions to put and get messages to/from a queue manager running in Azure.
Step 5. Deploy the Azure functions to Azure
You will now deploy the Azure functions to Azure, and use the Observer to trigger them.
Architecture of the observer with Azure Functions deployed to Azure
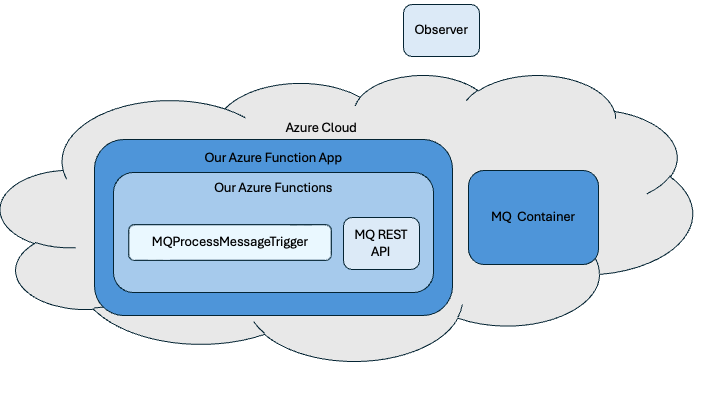
Create a Function app
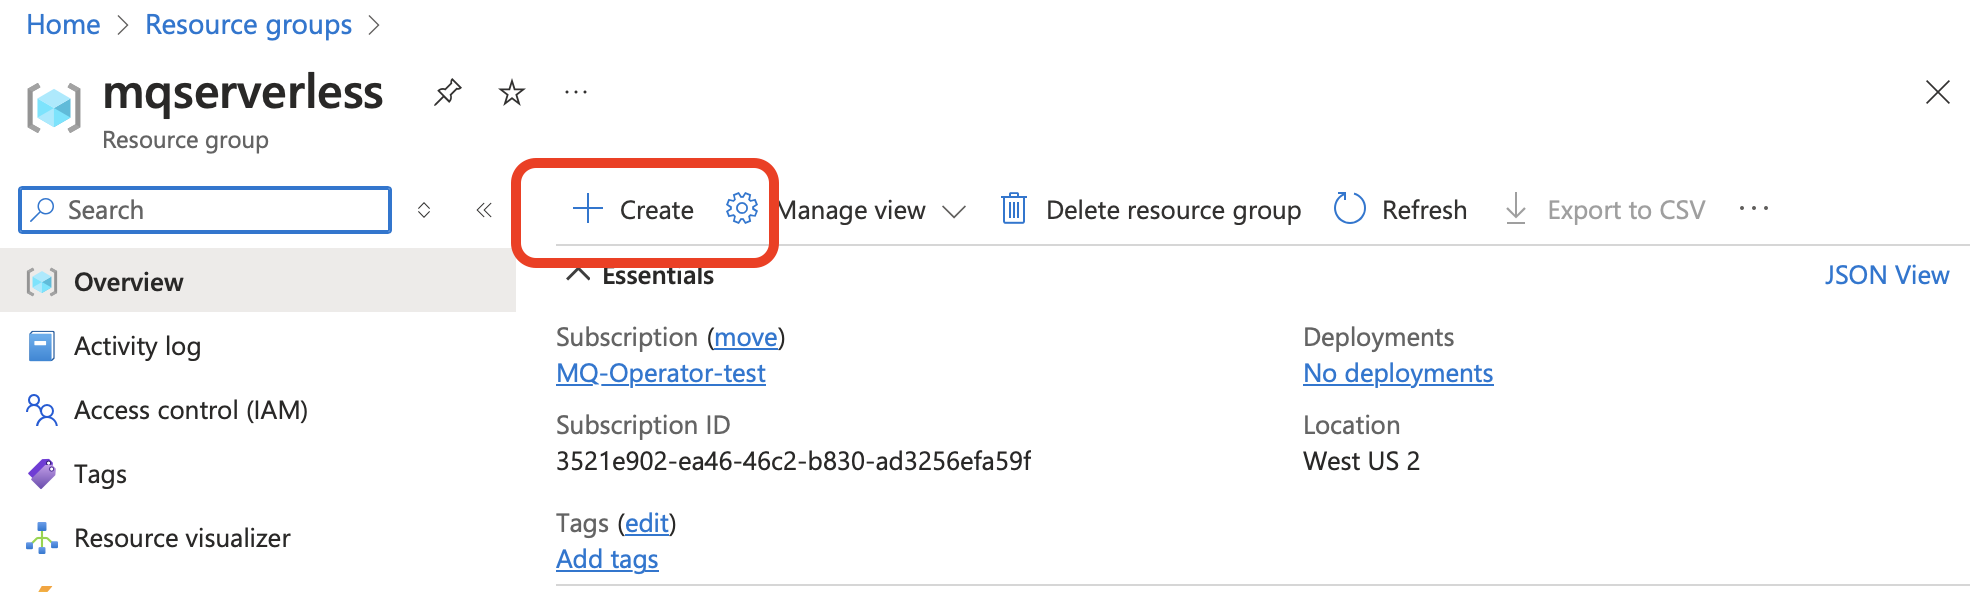
On the Azure Portal create a new Resource Group for your Azure Function application.

Select your new resource group, and click on create.
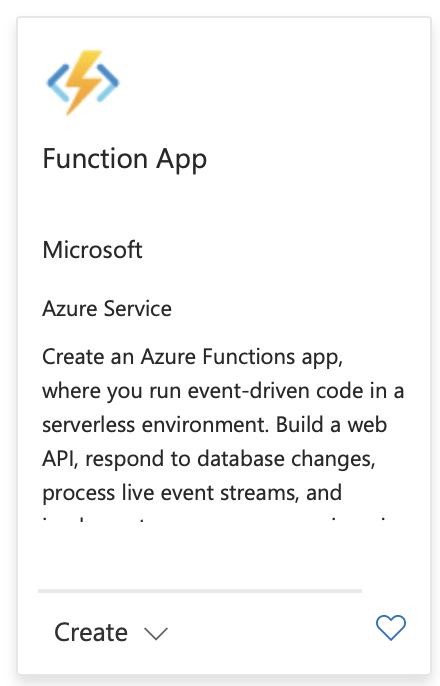
In the market place, search for "function app".

Select Function app.
Create the Function app, selecting "Consumption" as the hosting plan.

Select Node.js as the runtime stack.

You can use the default values for all settings as you scroll through the Function app create wizard.
Click Create and wait for your Function App to deploy. The deployment should take around 3 minutes.
Sign in to Azure in VSCode
Go to the Azure extension in VSCode. Under the Remote workspace, select Sign in to Azure.
You will be redirected to a browser login page. Log in with your Azure account. After you see a success message, return to VSCode.
If you are still not logged in, try using the Refresh button for your browser. If that also doesn’t work, try restarting VSCode. Subscription accounts may require Multi-factor Authentication (MFA). You will have to navigate to the Azure Portal and manually log in. If you can’t see your account on VSCode after you have manually logged in, restart VSCode.
Use VSCode to deploy your Functions to the Function app on Azure
In VSCode select workspaces, and select the function app icon. Select the Deploy to Azure option.
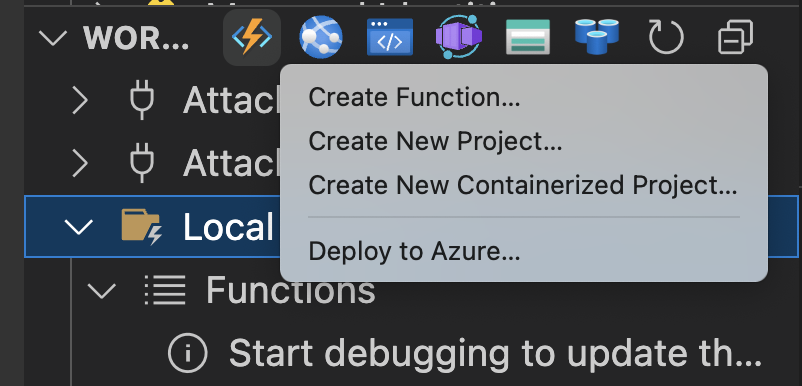
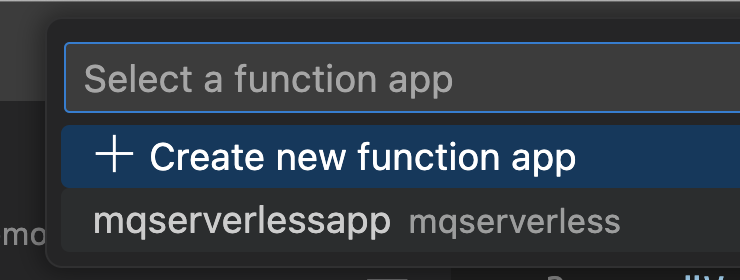
Select your previously created function app.
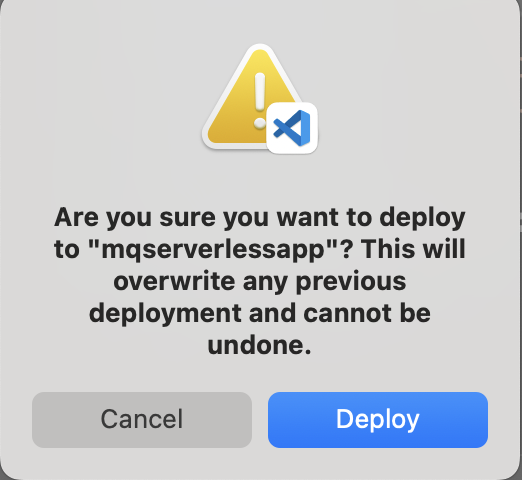
Click on "Deploy" in the warning box.
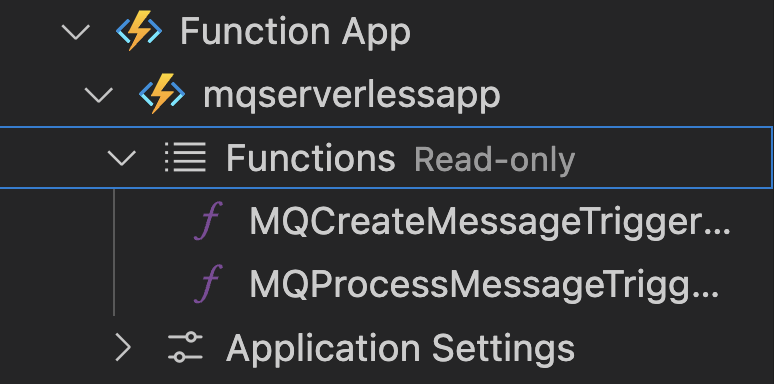
The functions should show up in your remote resources list.
Configure the function app
On the Azure portal, go to the Environment variables settings page for your function app.
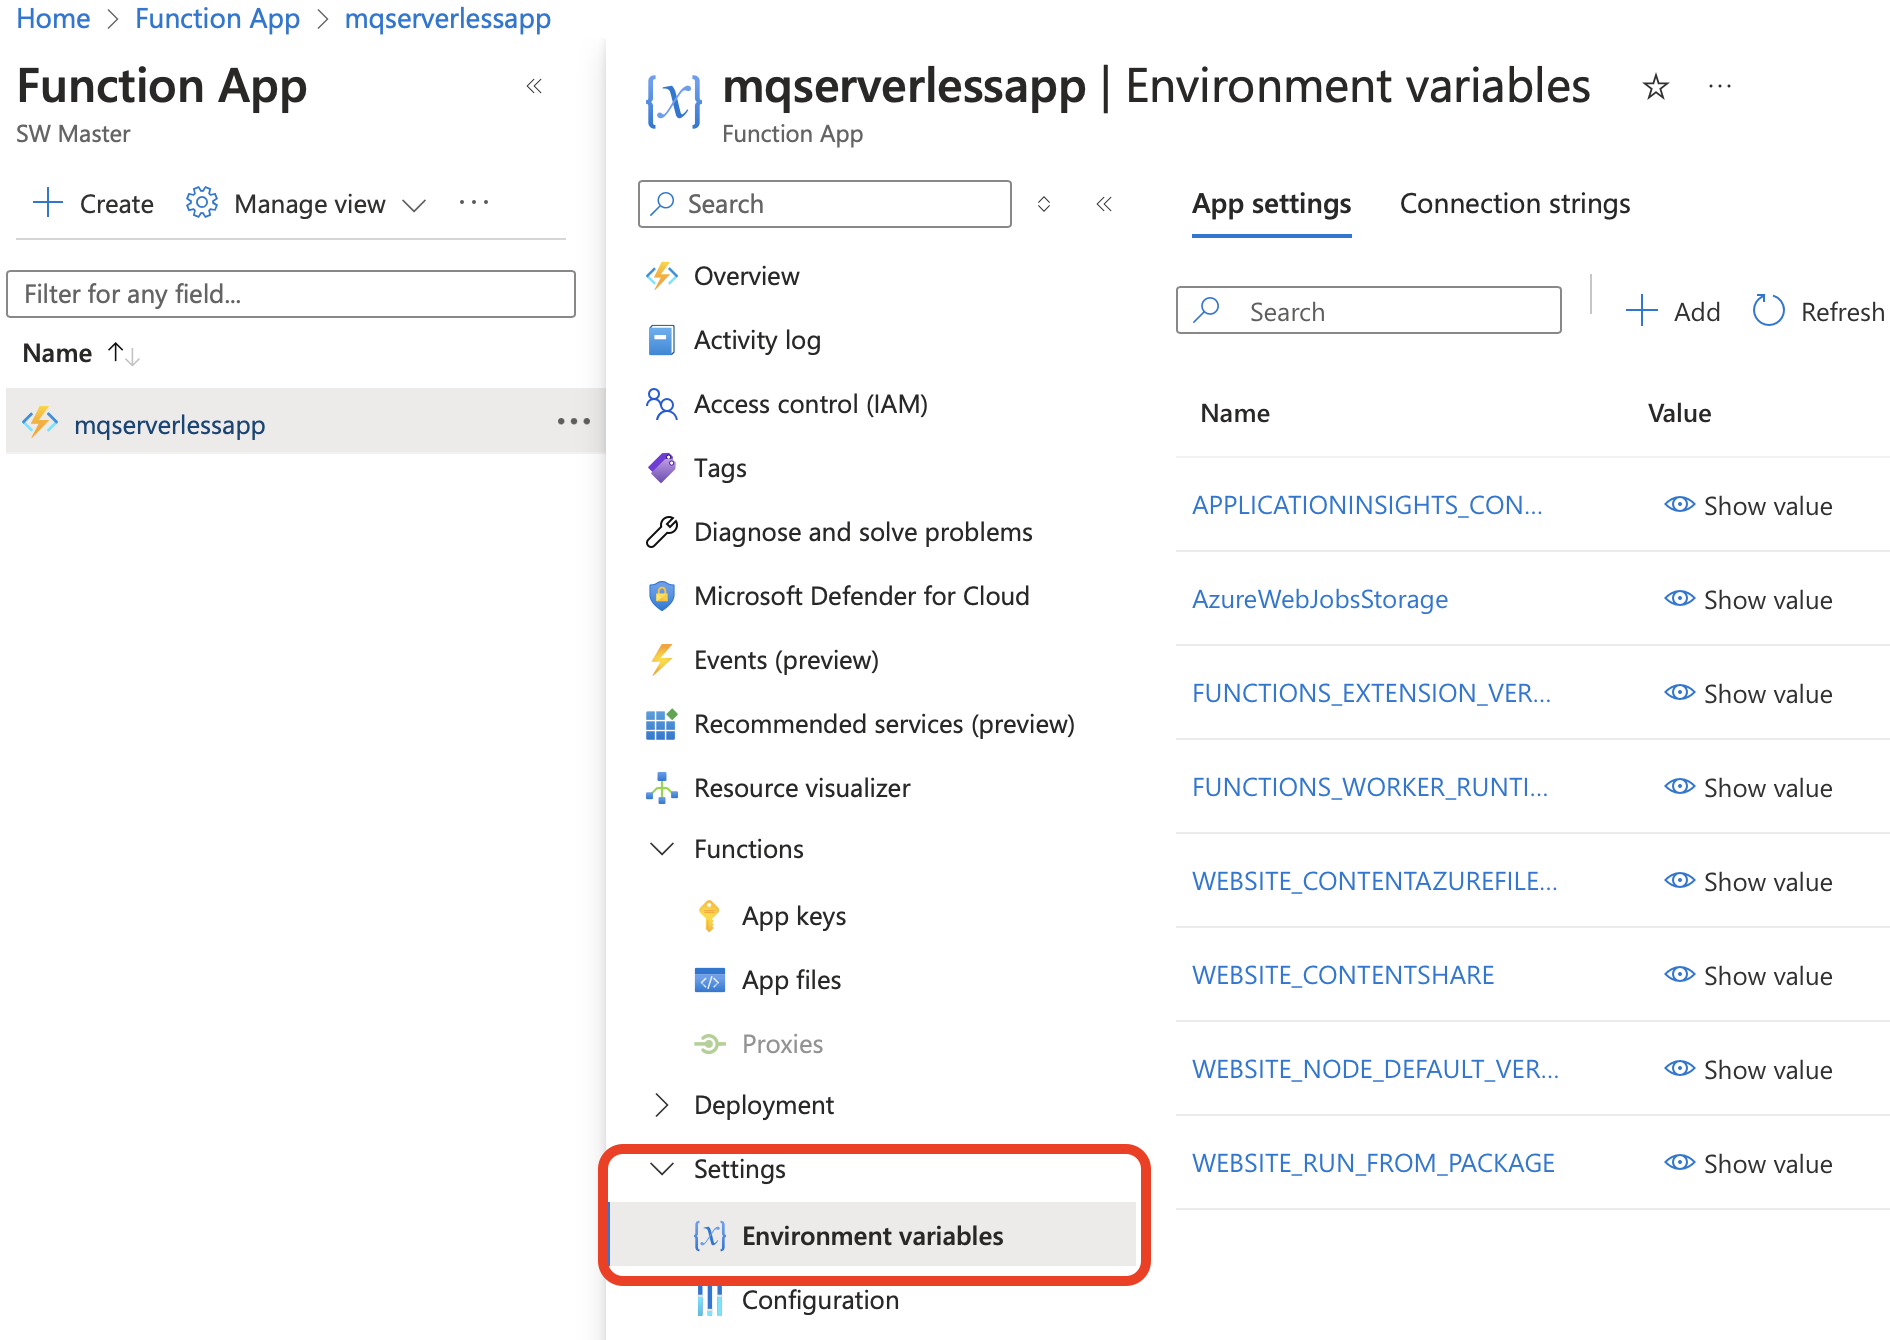
Add settings for the following key / value pairs.
    "QM_NAME:0": "secureapphelm",
    "MQ_HOST:0": " your load balancer ip",
    "MQ_PORT:0" : 9443,
    "MQ_APPUSER:0": "app",
    "MQ_PASSWORD:0": "< your mq app password>",
    "DEBUG": "mq*:*",
    "ALLOW_SELF_SIGNED": true,
    "MAX_MESSAGES": 4
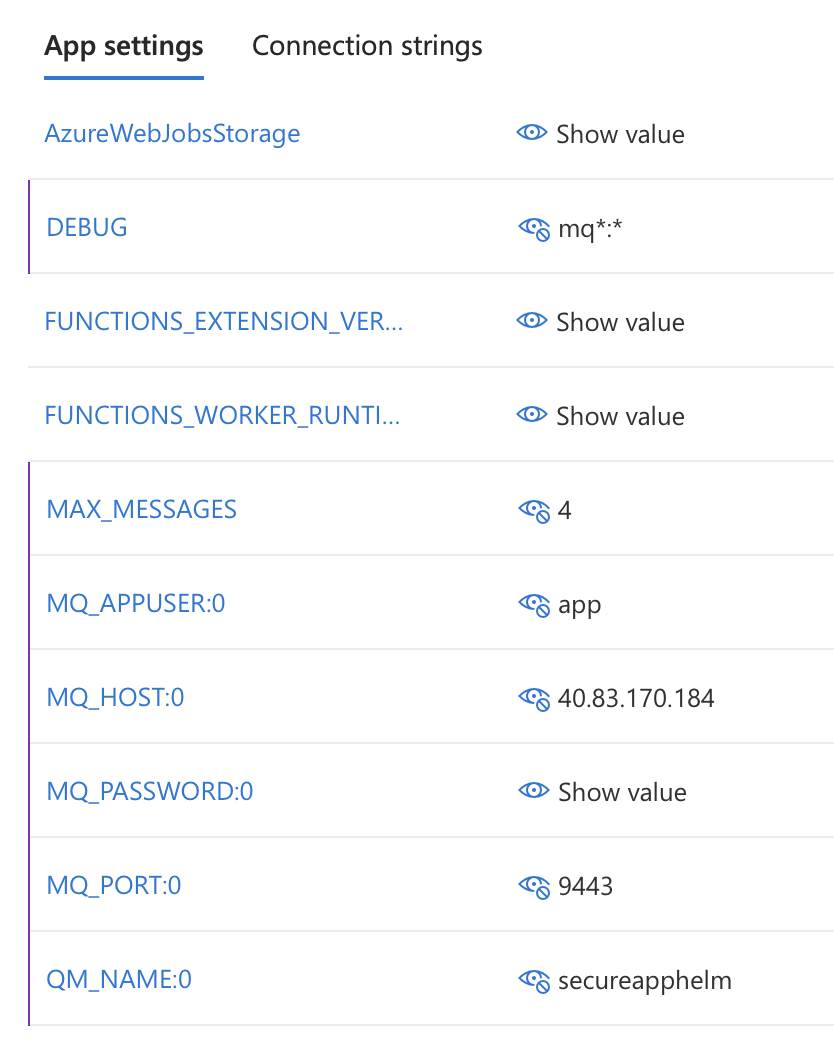
Click Apply and Confirm to save your updates. Your functions will be automatically restarted.
Get the Azure function URLs
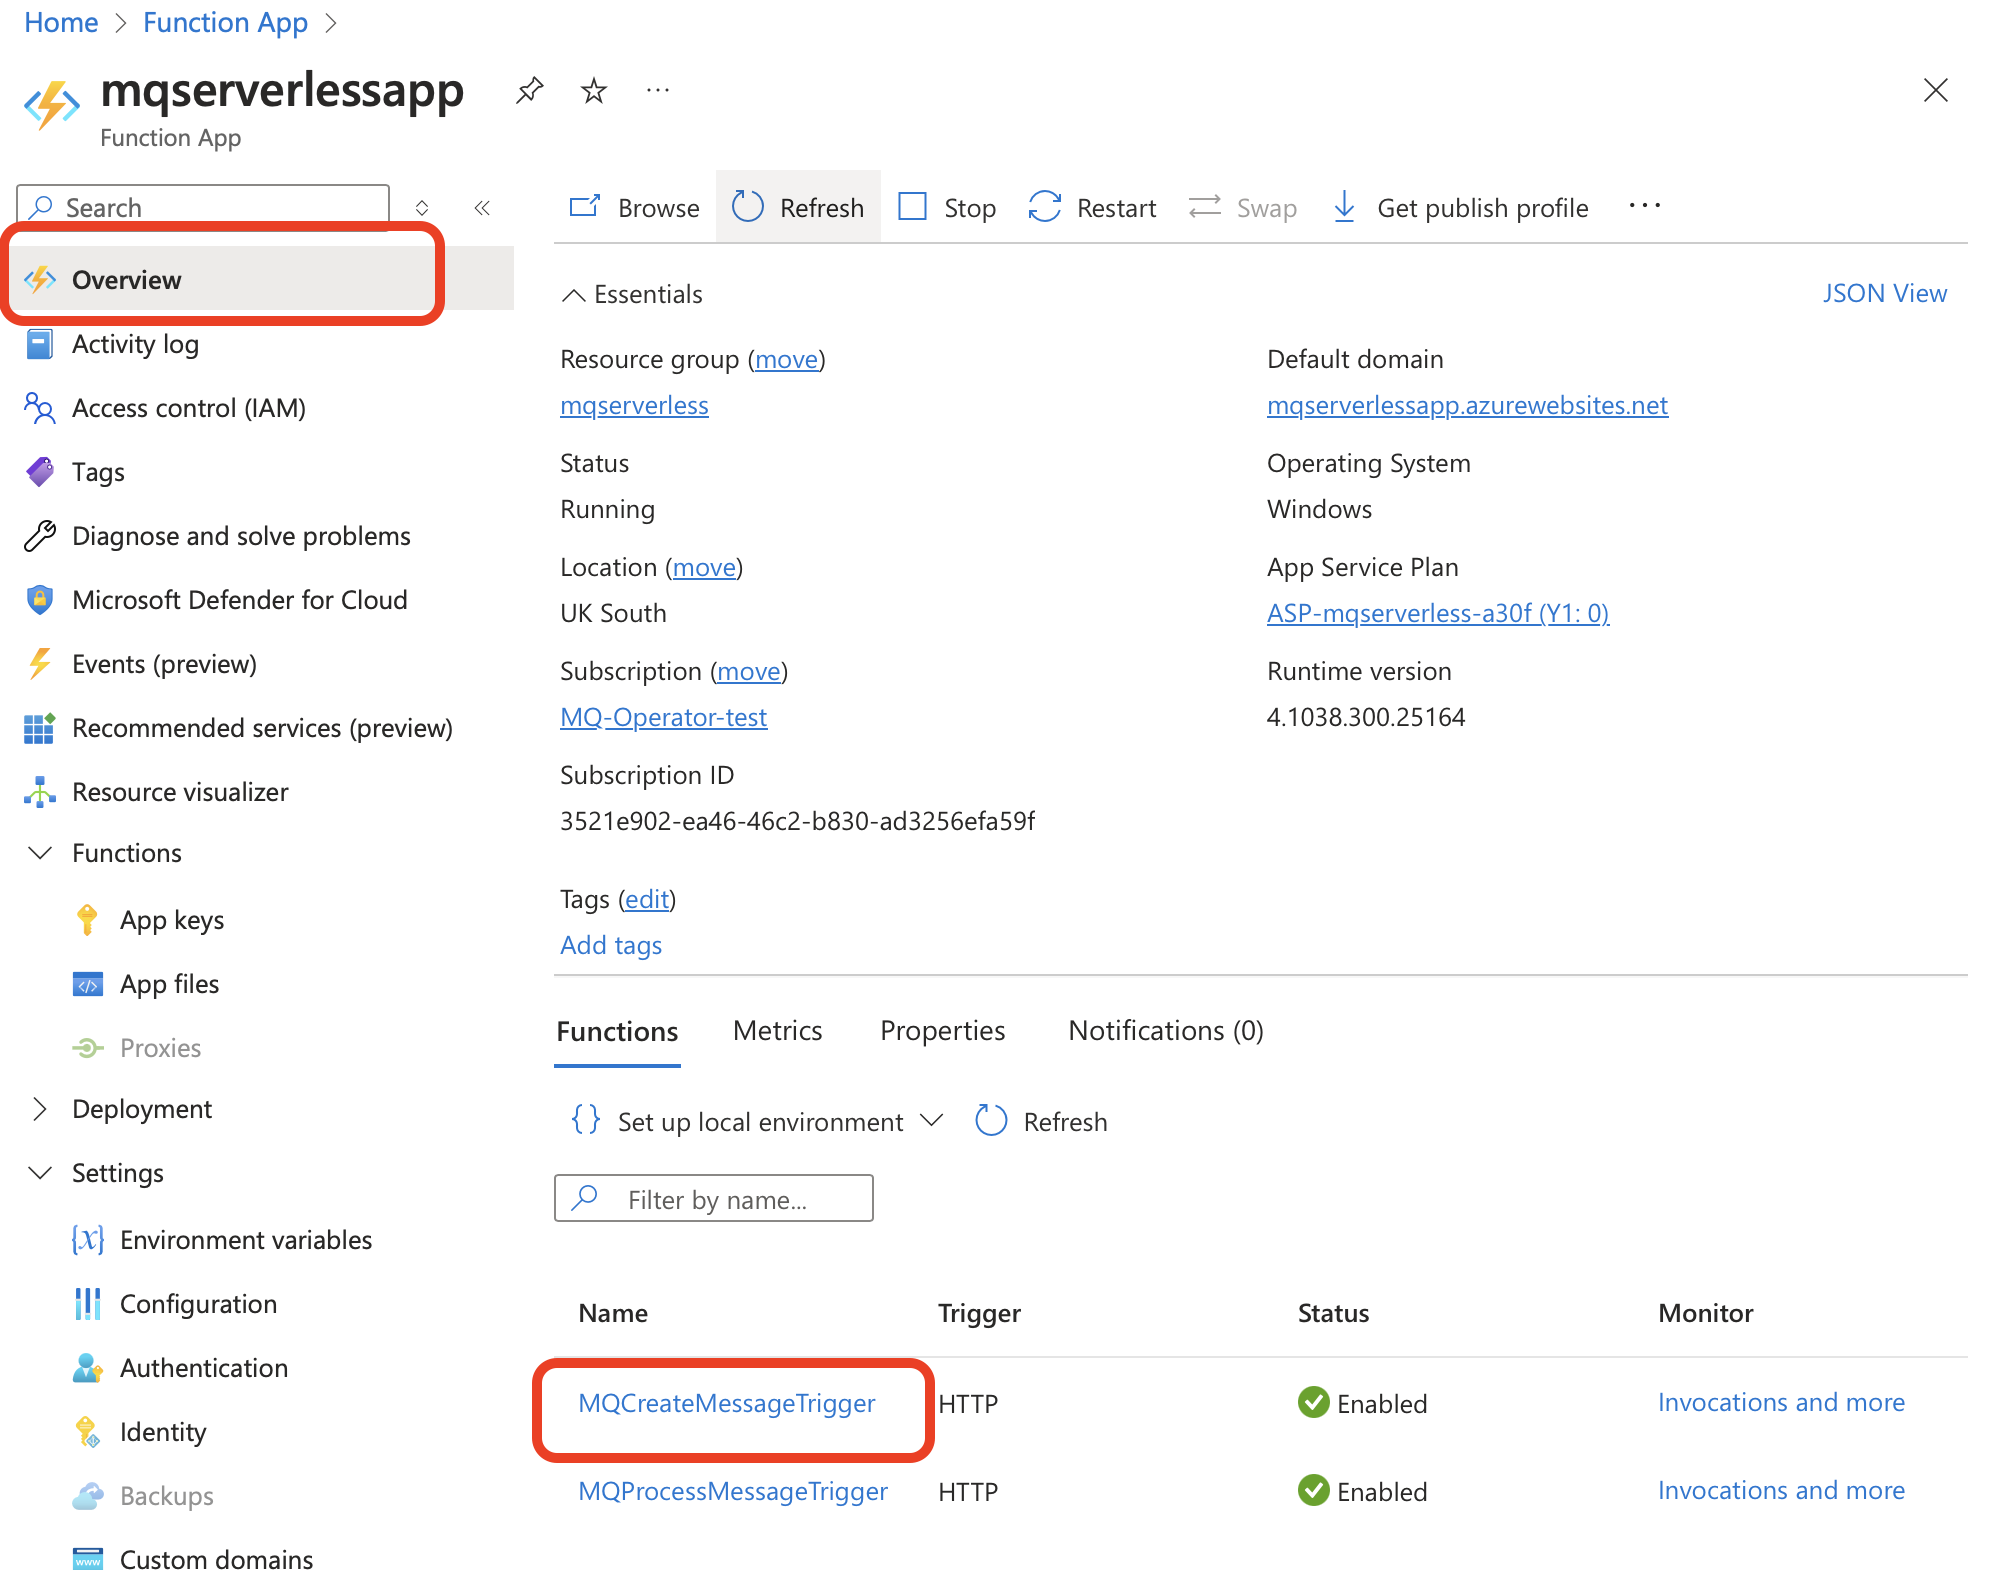
Go to the overview page for your function app and select the CreateMessage function.
Click Get Function URL, and make a note of the URL.
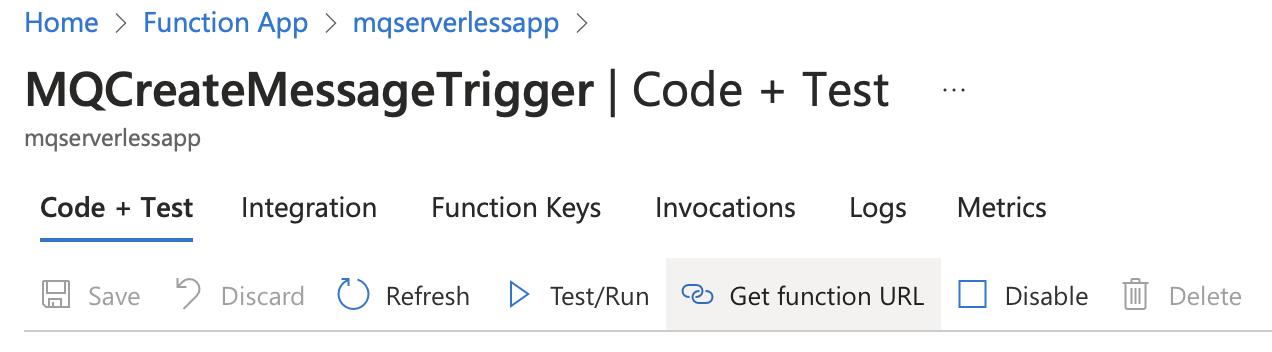
Do the same for the ProcessMessage function.
In our test the CreateMessage URL was https://mqserverlessapp.azurewebsites.net/api/MQCreateMessageTrigger and the ProcessMessage URL was https://mqserverlessapp.azurewebsites.net/api/MQProcessMessageTrigger.
The function app name needs to be unique across Azure, and you might not be able to use mqserverlessapp.
Test the CreateMessage Function
Using the CreateMessage URL paste the following into a browser.
https://mqserverlessapp.azurewebsites.net/api/MQCreateMessageTrigger?QMGR=secureapphelm&QUEUE=DEV.QUEUE.1
You should get a "Request Accepted" response, and new messages on your MQ hosted queue manager.
Test the ProcessMessage Function
The Observer should already be configured for your Azure hosted queue manager.
In the Observer terminal start the observer by running the command.
NOTIFY_INTERVAL=1 ALLOW_SELF_SIGNED=1 EnvFile=./env-azure.json ./observer
In a separate terminal register the Azure hosted ProcessMessage function to receive Observer notifications by running the command.
curl -d "QMGR=secureapphelm&QUEUE=DEV.QUEUE.1&NOTIFY=https://mqserverlessapp.azurewebsites.net/api/MQProcessMessageTrigger" -X POST -H "application/x-www-form-urlencoded" http://localhost:8080/register
Remember to use your specific ProcessMessage function URL.
Every minute you should see 4 messages removed from the queue, until the queue is drained.
Congratulations! You now have an MQ serverless application consisting of two functions running in Azure.
Step 6. Cleanup
To avoid unnecessary cost you should shut down all Azure services once you are done with them.
Stop the Observer.
On the Azure Portal stop your Function app.
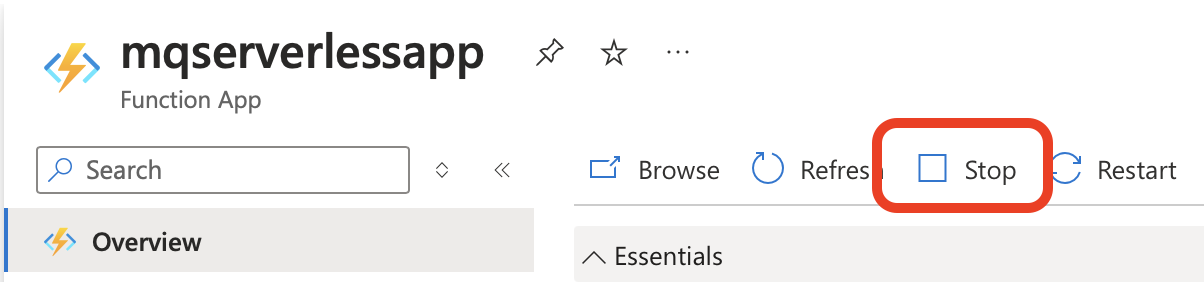
Delete the function app.

Delete the resource group.

Delete the queue manager by following the cleanup steps in the MQ on Azure tutorial
Summary and next steps
In this tutorial, you learned how serverless frameworks control the triggering of application endpoints so that applications do not need to run constantly monitoring for incoming requests. This approach reduces costs because applications only consume resources when needed.
You also explored Azure Functions, the serverless solution for Microsoft Azure, which frees developers from maintaining an infrastructure for their applications. You created the resources needed on Azure to host a serverless application.
You deployed the application to Azure, configured Azure functions, and tested them both locally and in Azure.
You connected the function application to an Azure deployed MQ instance both locally and remotely. You set up your VSCode environment with the Microsoft Azure extensions to simplify development and unit testing. You provided connection variables in different ways depending on the test environment, and used the MQ console to verify that messages were processed successfully.
Now that you have completed this tutorial, you can create your own MQ serverless application and deploy it on Microsoft Azure.